ESP OPEL CROSSLAND X 2018 Infotainment system
[x] Cancel search | Manufacturer: OPEL, Model Year: 2018, Model line: CROSSLAND X, Model: OPEL CROSSLAND X 2018Pages: 127, PDF Size: 2.63 MB
Page 27 of 127
External devices27Connecting/disconnecting a device
Connect one of the devices
mentioned above to the USB port. If
required, use the appropriate
connection cable. The music function
starts automatically.
Note
If a non-readable USB device is
connected, a corresponding error
message appears and the
Infotainment system automatically
switches to the previous function.
To disconnect the USB device, select
another function and then remove the USB storage device.Caution
Avoid disconnecting the device
during playback. This may
damage the device or the
Infotainment system.
Bluetooth audio streaming
Streaming allows you to listen to
music from your smartphone.
For a detailed description on how to
establish a Bluetooth connection
3 45.
If audio playback does not start
automatically, it may be necessary to
start the playback on the smartphone.
First adjust the volume on your
smartphone (to a high level). Then
adjust the volume of Infotainment
system.
File formats
The audio equipment supports
different file formats.
Playing audio
Activating the music function
Connecting the USB or Bluetooth
device 3 26.
If device already connected, but
playback of stored music files not
active:
Press AUDIO , select SOURCES and
then select the respective source.
Playback of the audio tracks starts
automatically.
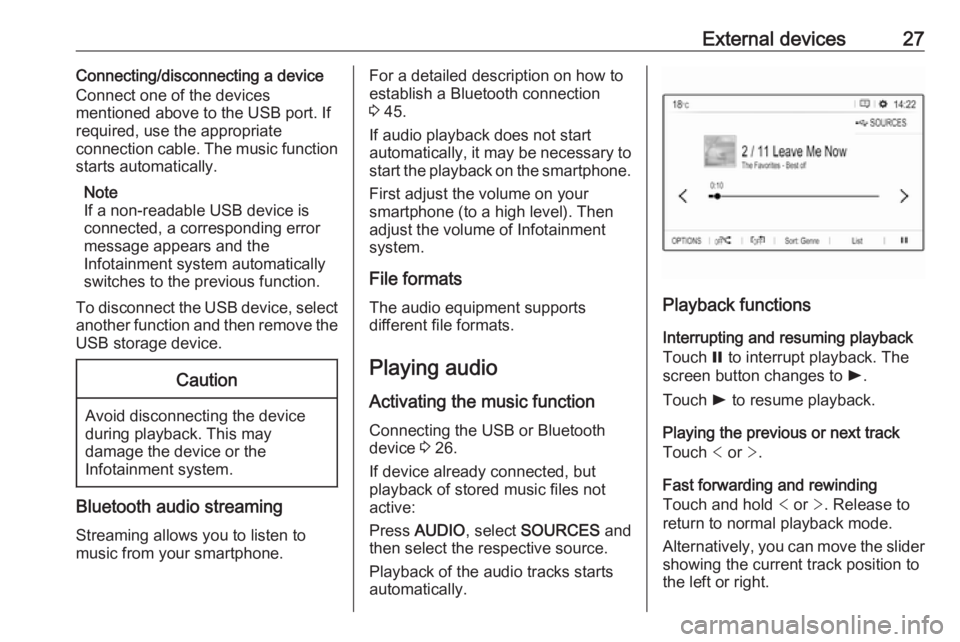
Playback functions
Interrupting and resuming playback
Touch = to interrupt playback. The
screen button changes to l.
Touch l to resume playback.
Playing the previous or next track
Touch < or >.
Fast forwarding and rewinding
Touch and hold < or >. Release to
return to normal playback mode.
Alternatively, you can move the slider showing the current track position to
the left or right.
Page 28 of 127
28External devicesPlaying tracks randomly
Touch button repeatedly to toggle
between the available random
modes.
” : play tracks of currently selected
list (album, artist, etc.) in random
order.
æ : play all tracks stored on
connected device in random order.
Ý : play tracks of currently selected
list (album, artist, etc.) in normal
playback mode.
Repeating tracks
Touch button repeatedly to switch
repeat mode on or off.
– : repeat tracks of currently selected
list (album, artist, etc.).
Þ : play tracks of currently selected
list (album, artist, etc.) in normal
playback mode.
Browse music functions
(only available for devices connected via USB)You can have your music files sorted
according to different criteria. Two
options are available for browsing the
music files stored on the connected
USB device.
Browsing via main menu
If you want to change the currently
active USB source, select
SOURCES and then select the
desired source. The respective main
menu is displayed.
Select the button showing the
currently selected sorting criteria, e.g. Sort: Album or Sort: Artist , and then
select the desired new sorting criteria.
A sorting process is performed.
Select List and then select the desired
track.
Playback of the selected track is
started.
Browsing via device menu
Select OPTIONS and then select
Music files .
If you want to change the currently
active USB source, select Other.Select the desired sorting criteria, e.g.
Albums or Artists , and then select the
desired track.
Playback of the selected track is started.
Displaying pictures You can view pictures stored on a
USB device.
Activating the picture viewer Connecting the USB device 3 26.
If device already connected, but
picture viewer not active:
Press AUDIO , select OPTIONS and
then select Managing photos .
Select the desired picture.
A slide show of all stored picture files
starts automatically.
Page 30 of 127
30NavigationNavigationGeneral information.....................30
Usage .......................................... 31
Destination input ..........................34
Guidance ..................................... 38General information
The navigation system will reliably guide you to your destination.
The current traffic situation is taken
into account in the route calculation.
For this purpose, the Infotainment
system receives traffic
announcements in the current
reception area via RDS-TMC.
The navigation system cannot,
however, take into account traffic
incidents, traffic regulations changed
at short notice and hazards or
problems that arise suddenly (e.g.
road works).Caution
The usage of the navigation
system does not release the driver
from the responsibility for a
correct, vigilant attitude in road
traffic. The relevant traffic
regulations must always be
followed. If a navigation instruction contradicts traffic regulations, the
traffic regulations always apply.
Functioning of the navigation
system
The position and movement of the
vehicle are detected by the navigation
system using sensors. The travelled
distance is determined by the
vehicle’s speedometer signal, turning
movements on bends by a sensor.
The position is determined by the GPS (Global Positioning System)
satellites.
By comparing the sensor signals with the digital maps, it is possible to
determine the position with an
accuracy of approx. 10 metres.
The system will also work with poor
GPS reception. However, the
accuracy of the determination of the
position will be reduced.
After the entry of the destination
address or point of interest (nearest
petrol station, hotel, etc.), the route is calculated from the current location to
the destination selected.
Route guidance is provided by voice
output and an arrow, as well as with
the aid of a multi-colour map display.
Page 33 of 127
Navigation33Touch the traffic jam icon to show
traffic events on the map. Touch Ï to
show a list with information on these
traffic events.
If you want to display a different map
section:
Touch õ to show the area around the
current location.
Touch ö to show the entire route.
Touch ÷ to show the area around the
destination.
To return to the default navigation
view, touch Ù.
Autozoom functionIf the autozoom function is activated
( AUTO is displayed below the map
view), the zoom level changes
automatically when approaching a
turning manoeuvre during active
route guidance. This way, you always get a good overview of the respective
manoeuvre.
If the autozoom function is
deactivated, the selected zoom level
remains the same during the whole
route guidance process.
To activate or deactivate the function: Select MENU, select Settings and
then select the Aspect tab.
Activate or deactivate Automatic
zoom setting .
Map manipulation
Moving visible map section
Place your finger anywhere on the
screen and move it in the desired
direction.
The map moves accordingly,
displaying a new section. A new
button bar is shown.
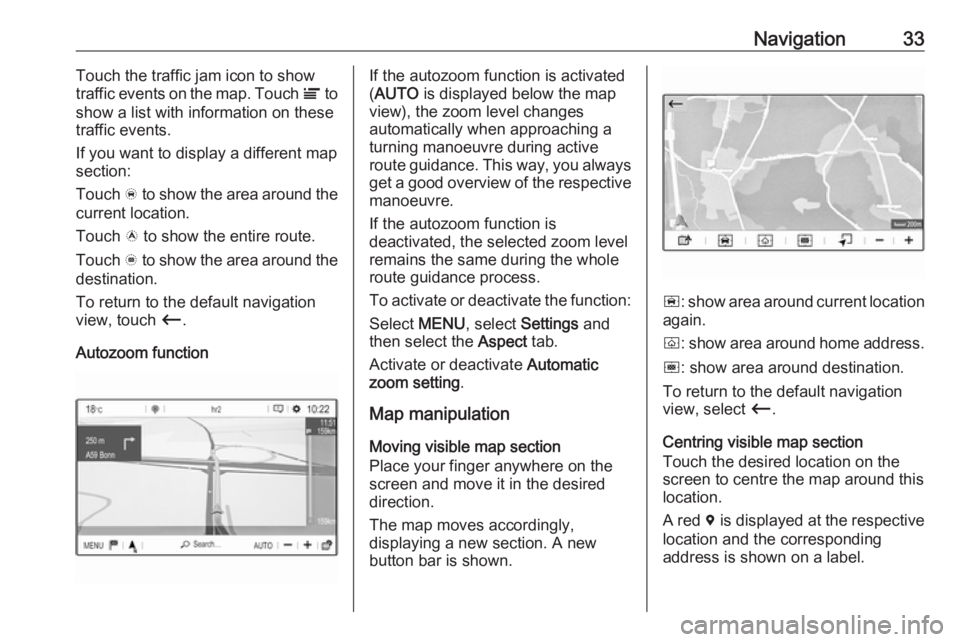
ñ : show area around current location
again.
ò : show area around home address.
ó : show area around destination.
To return to the default navigation
view, select Ù.
Centring visible map section
Touch the desired location on the
screen to centre the map around this
location.
A red d is displayed at the respective
location and the corresponding
address is shown on a label.
Page 34 of 127
34NavigationManual zooming
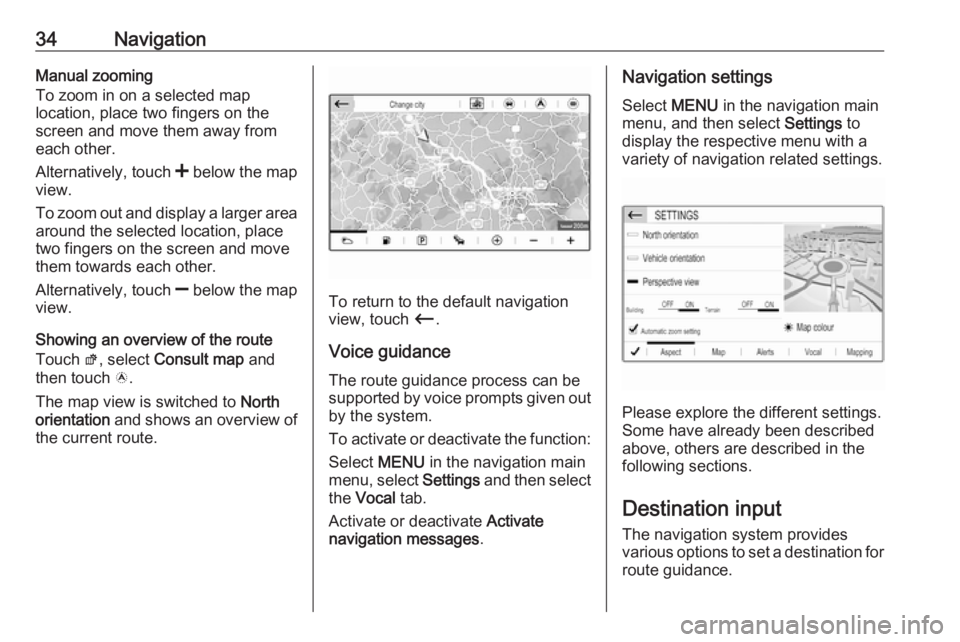
To zoom in on a selected map
location, place two fingers on the
screen and move them away from
each other.
Alternatively, touch < below the map
view.
To zoom out and display a larger area around the selected location, place
two fingers on the screen and move
them towards each other.
Alternatively, touch ] below the map
view.
Showing an overview of the route
Touch ø, select Consult map and
then touch ö.
The map view is switched to North
orientation and shows an overview of
the current route.
To return to the default navigation
view, touch Ù.
Voice guidance
The route guidance process can be
supported by voice prompts given out by the system.
To activate or deactivate the function:
Select MENU in the navigation main
menu, select Settings and then select
the Vocal tab.
Activate or deactivate Activate
navigation messages .
Navigation settings
Select MENU in the navigation main
menu, and then select Settings to
display the respective menu with a variety of navigation related settings.
Please explore the different settings.
Some have already been described
above, others are described in the
following sections.
Destination input The navigation system provides
various options to set a destination for
route guidance.
Page 35 of 127
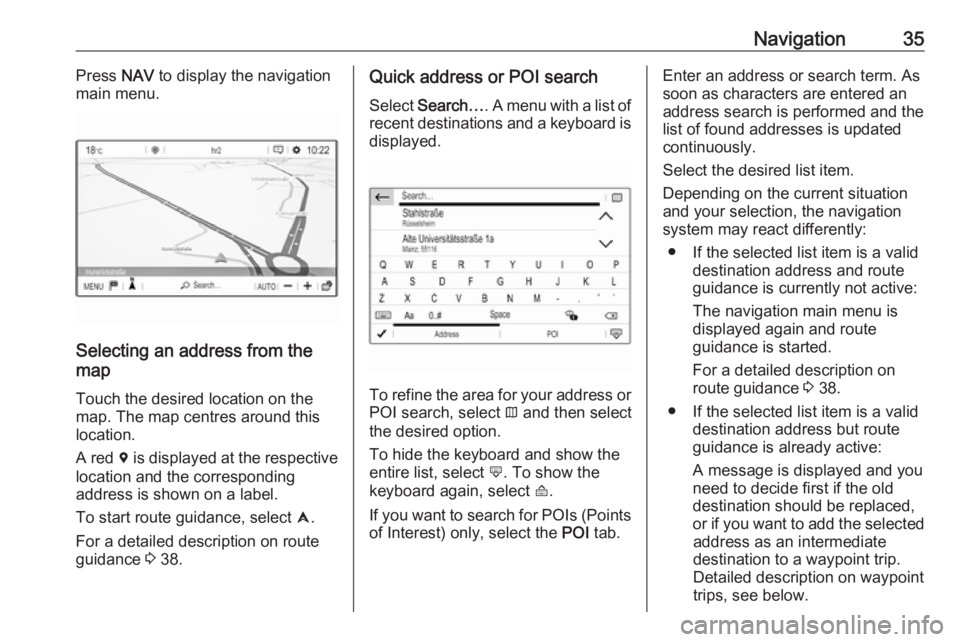
Navigation35Press NAV to display the navigation
main menu.
Selecting an address from the
map
Touch the desired location on themap. The map centres around this
location.
A red d is displayed at the respective
location and the corresponding
address is shown on a label.
To start route guidance, select û.
For a detailed description on route
guidance 3 38.
Quick address or POI search
Select Search… . A menu with a list of
recent destinations and a keyboard is
displayed.
To refine the area for your address or
POI search, select × and then select
the desired option.
To hide the keyboard and show the
entire list, select ù. To show the
keyboard again, select ú.
If you want to search for POIs (Points of Interest) only, select the POI tab.
Enter an address or search term. As
soon as characters are entered an
address search is performed and the
list of found addresses is updated
continuously.
Select the desired list item.
Depending on the current situation
and your selection, the navigation
system may react differently:
● If the selected list item is a valid destination address and route
guidance is currently not active:
The navigation main menu is
displayed again and route
guidance is started.
For a detailed description on route guidance 3 38.
● If the selected list item is a valid destination address but route
guidance is already active:
A message is displayed and you
need to decide first if the old
destination should be replaced,
or if you want to add the selected
address as an intermediate
destination to a waypoint trip.
Detailed description on waypoint
trips, see below.
Page 36 of 127
36NavigationSelect the desired option.
● If the navigation system needs more detailed information for
route calculation:
Enter a further search term to refine your search.
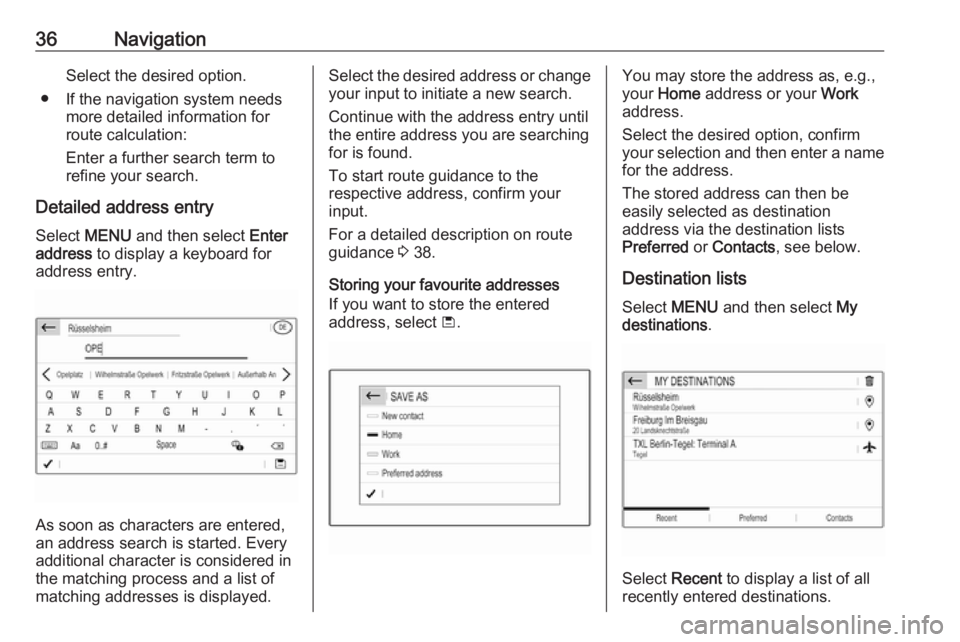
Detailed address entry Select MENU and then select Enter
address to display a keyboard for
address entry.
As soon as characters are entered,
an address search is started. Every additional character is considered inthe matching process and a list of
matching addresses is displayed.
Select the desired address or change
your input to initiate a new search.
Continue with the address entry until
the entire address you are searching for is found.
To start route guidance to the
respective address, confirm your
input.
For a detailed description on route
guidance 3 38.
Storing your favourite addresses
If you want to store the entered
address, select ü.You may store the address as, e.g.,
your Home address or your Work
address.
Select the desired option, confirm
your selection and then enter a name for the address.
The stored address can then be
easily selected as destination
address via the destination lists
Preferred or Contacts , see below.
Destination lists
Select MENU and then select My
destinations .
Select Recent to display a list of all
recently entered destinations.
Page 37 of 127
Navigation37Select Preferred to display all
destinations which were stored
before as home address, work
address or preferred address.
Select Contacts to display a list with
contact names and all related
addresses stored before as personal
contacts.
To start route guidance to the
respective address, select a list entry.
For a detailed description on route
guidance 3 38.
Points of interest
A point of interest (POI) is a specific
location that might be of general
interest, e.g. a petrol station, a
parking area or a restaurant.
The data stored within the navigation
system contains a great number of
predefined POIs, which are indicated
on the map (if activated, 3 31).
Selecting a POI from the map
Touch the desired POI icon on the
map. The map centres around this
location.
Touch the icon again.A red d is displayed at the respective
location and the corresponding
address is shown on a label.
To start route guidance, select û.
For a detailed description on route
guidance 3 38.
Showing a list of POIs around a location
Touch the desired location on the map. The map centres around this
location.
A red d is displayed at the respective
location and the corresponding
address is shown on a label.
Touch and hold d.
A list of POIs around the location is
displayed.
Select the desired POI to start route
guidance.
For a detailed description on route
guidance 3 38.
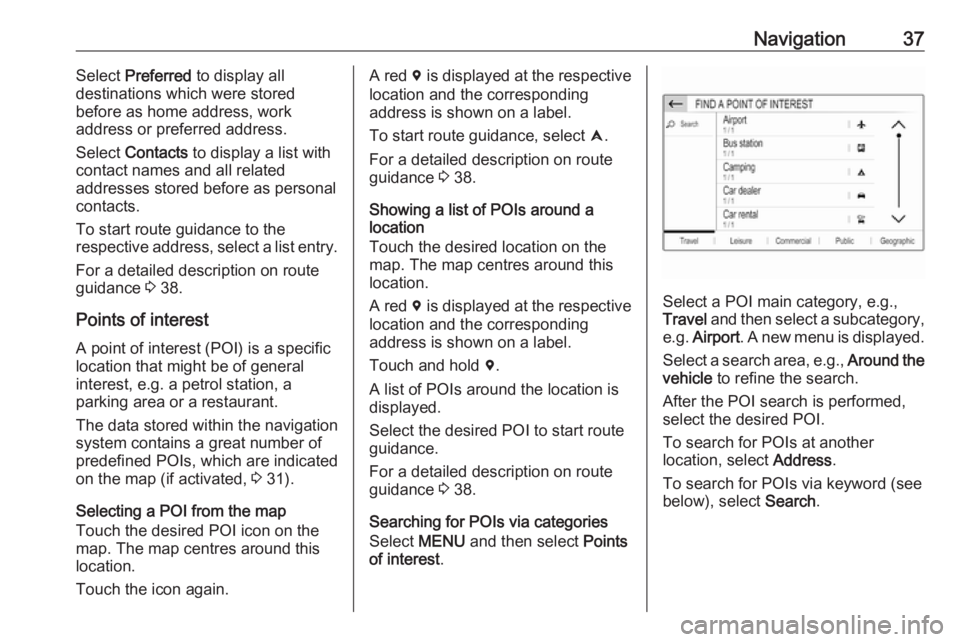
Searching for POIs via categories
Select MENU and then select Points
of interest .
Select a POI main category, e.g.,
Travel and then select a subcategory,
e.g. Airport . A new menu is displayed.
Select a search area, e.g., Around the
vehicle to refine the search.
After the POI search is performed,
select the desired POI.
To search for POIs at another
location, select Address.
To search for POIs via keyword (see below), select Search.
Page 39 of 127
Navigation39
Note
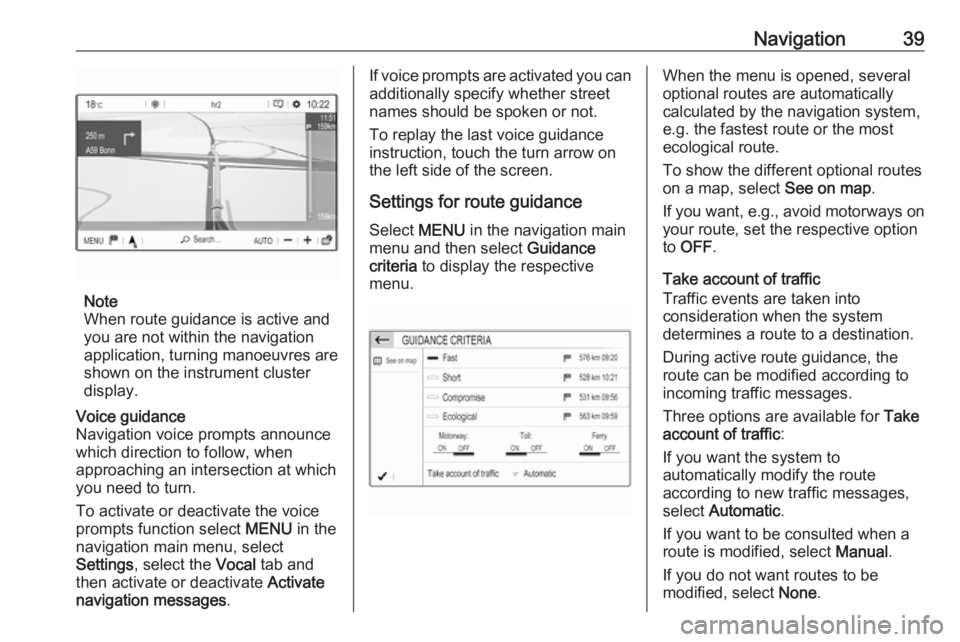
When route guidance is active and
you are not within the navigation
application, turning manoeuvres are shown on the instrument clusterdisplay.
Voice guidance
Navigation voice prompts announce
which direction to follow, when
approaching an intersection at which
you need to turn.
To activate or deactivate the voice
prompts function select MENU in the
navigation main menu, select
Settings , select the Vocal tab and
then activate or deactivate Activate
navigation messages .If voice prompts are activated you can
additionally specify whether street
names should be spoken or not.
To replay the last voice guidance
instruction, touch the turn arrow on
the left side of the screen.
Settings for route guidance
Select MENU in the navigation main
menu and then select Guidance
criteria to display the respective
menu.When the menu is opened, several
optional routes are automatically
calculated by the navigation system,
e.g. the fastest route or the most
ecological route.
To show the different optional routes
on a map, select See on map.
If you want, e.g., avoid motorways on
your route, set the respective option
to OFF .
Take account of traffic
Traffic events are taken into
consideration when the system
determines a route to a destination.
During active route guidance, the
route can be modified according to
incoming traffic messages.
Three options are available for Take
account of traffic :
If you want the system to
automatically modify the route
according to new traffic messages,
select Automatic .
If you want to be consulted when a
route is modified, select Manual.
If you do not want routes to be
modified, select None.
Page 40 of 127
40NavigationStarting, cancelling, resuming
route guidance
To start route guidance, enter or
select a destination address 3 34.
Depending on the situation, route
guidance may start automatically, or
you may have to follow some
instructions on the screen.
To cancel route guidance, select
MENU in the navigation main menu
and then select STOP NAVIGATION .
To resume a cancelled route
guidance, select MENU in the
navigation main menu and then
select RESUME GUIDANCE .
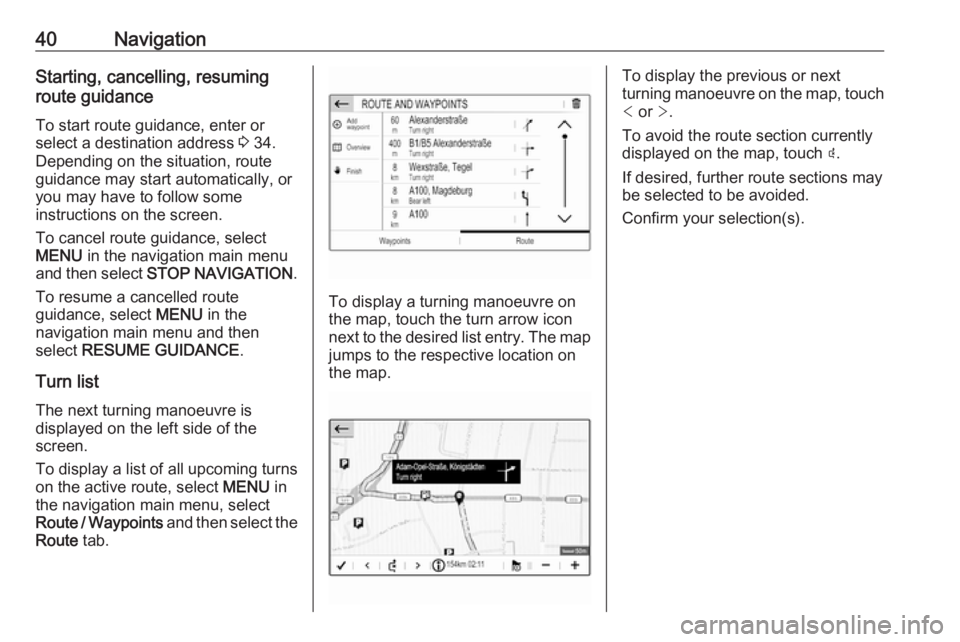
Turn list The next turning manoeuvre is
displayed on the left side of the
screen.
To display a list of all upcoming turns on the active route, select MENU in
the navigation main menu, select
Route / Waypoints and then select the
Route tab.
To display a turning manoeuvre on
the map, touch the turn arrow icon
next to the desired list entry. The map
jumps to the respective location on
the map.
To display the previous or next
turning manoeuvre on the map, touch < or >.
To avoid the route section currently
displayed on the map, touch þ.
If desired, further route sections may
be selected to be avoided.
Confirm your selection(s).