ECU OPEL CROSSLAND X 2018 Manual user
[x] Cancel search | Manufacturer: OPEL, Model Year: 2018, Model line: CROSSLAND X, Model: OPEL CROSSLAND X 2018Pages: 257, PDF Size: 7.81 MB
Page 75 of 257

Storage73● Secure loose objects in the loadcompartment to prevent from
sliding.
● When transporting objects in the load compartment, the backrestsof the rear seats must not be
angled forward.
● Do not allow the load to protrude above the upper edge of the
backrests.
● Do not place any objects on the load compartment cover or the
instrument panel, and do not
cover the sensor on top of the instrument panel.
● The load must not obstruct the operation of the pedals, parking
brake and gear selector, or
hinder the freedom of movement of the driver. Do not place any
unsecured objects in the interior.
● Do not drive with an open load compartment.9Warning
Always make sure that the load in
the vehicle is securely stowed.
Otherwise objects can be thrown
around inside the vehicle and
cause personal injury or damage
to the load or car.
● The payload is the difference between the permitted gross
vehicle weight (see identification
plate 3 228) and the EC kerb
weight.
To calculate the payload, enter
the data for your vehicle in the
weights table at the front of this
manual.
The EC kerb weight includes
weights for the driver (68 kg),
luggage (7 kg) and all fluids (fuel
tank 90% full).
Optional equipment and
accessories increase the kerb
weight.
● Driving with a roof load increases
the sensitivity of the vehicle to
cross-winds and has a
detrimental effect on vehicle
handling due to the vehicle's
higher centre of gravity.
Distribute the load evenly and secure it properly with retaining
straps. Adjust the tyre pressure
and vehicle speed according to
the load conditions. Check and
retighten the straps frequently.
Do not drive faster than
120 km/h.
The permissible roof load is
60 kg. The roof load is the
combined weight of the roof rack and the load.
Page 91 of 257

Instruments and controls89Caution
If engine coolant temperature is
too high, stop vehicle, switch off
engine. Danger to engine. Check
coolant level.
Engine oil level monitor
The state of the engine oil level is
displayed in the Driver Information
Centre for a few seconds following
the service information after switching
on the ignition.
A proper state of oil level is indicated
by the message Oil level correct.
If oil level is low, I flashes and Oil
level incorrect is indicated,
accompanied by the H indicator.
Confirm oil level by using the oil
dipstick and top up engine oil
respectively. Engine oil 3 188.
A fault of measurment is indicated by
the message Oil level measurment
invalid . Check oil level manually by
using the dipstick.
Service display
The service system informs when to
change the engine oil and filter or a
vehicle service is required. Based on
driving conditions, the interval at
which an engine oil and filter change
is required can vary considerably.
Service information 3 224
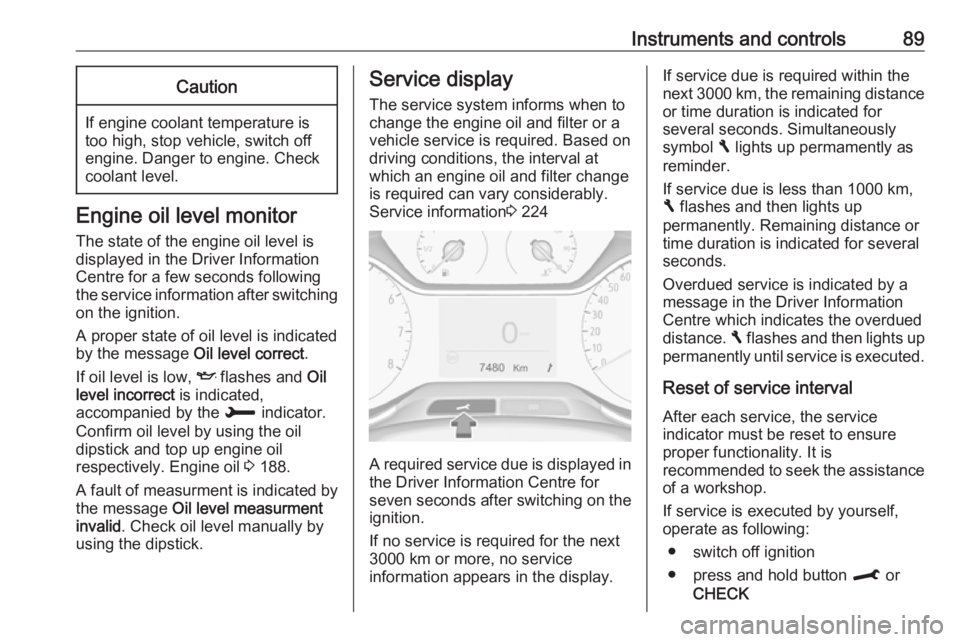
A required service due is displayed in
the Driver Information Centre forseven seconds after switching on the
ignition.
If no service is required for the next
3000 km or more, no service
information appears in the display.
If service due is required within the
next 3000 km, the remaining distance or time duration is indicated for
several seconds. Simultaneously
symbol F lights up permamently as
reminder.
If service due is less than 1000 km,
F flashes and then lights up
permanently. Remaining distance or
time duration is indicated for several
seconds.
Overdued service is indicated by a
message in the Driver Information
Centre which indicates the overdued
distance. F flashes and then lights up
permanently until service is executed.
Reset of service interval After each service, the service
indicator must be reset to ensure
proper functionality. It is
recommended to seek the assistance
of a workshop.
If service is executed by yourself,
operate as following:
● switch off ignition
● press and hold button M or
CHECK
Page 112 of 257

110Instruments and controlsThe deactivation is indicated by the
status light flashing red and green for a short period of time and each time
the vehicle is started.
Note
If the transmission of the vehicle
location is deactivated, some
services are no longer available.
Note
The vehicle location always remains
accessible to OnStar in the case of
an emergency.
Find the privacy policy in your
account.
Software updates
OnStar may remotely carry out software updates without further
notice or consent. These updates are
to enhance or maintain safety and
security or the operation of the
vehicle.
These updates may concern privacy
issues. Find the privacy policy in your account.
Page 148 of 257

146Driving and operatingEngine braking
To utilise the engine braking effect, select a lower gear in good time when driving downhill, see manual mode.
Rocking the vehicle Rocking the vehicle is only
permissible if the vehicle is stuck in
sand, mud or snow. Move the selector
lever between D and R in a repeat
pattern. Do not race the engine and
avoid sudden acceleration.
Parking
Apply the parking brake and engage P .Manual mode
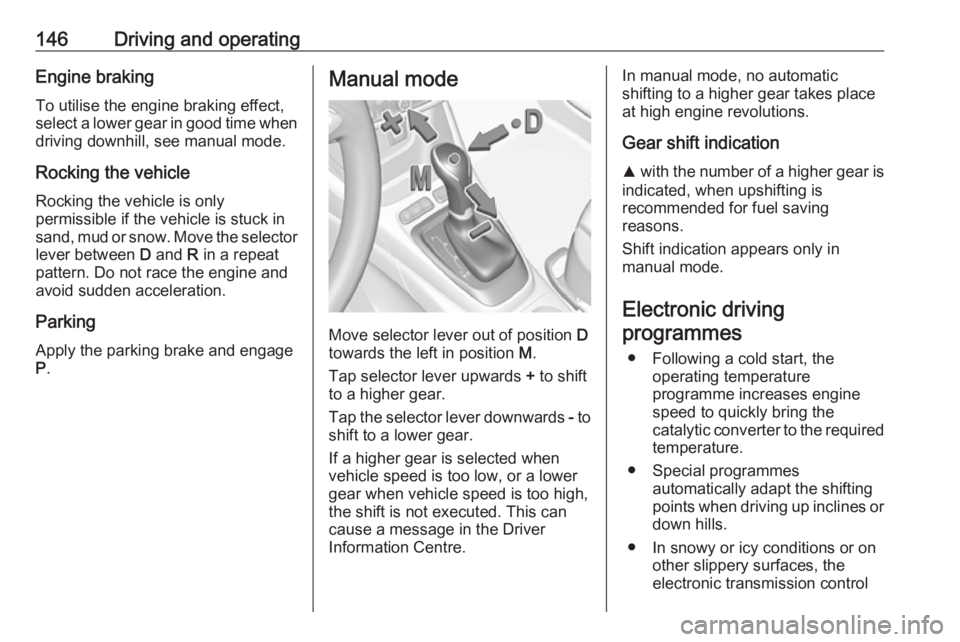
Move selector lever out of position D
towards the left in position M.
Tap selector lever upwards + to shift
to a higher gear.
Tap the selector lever downwards - to
shift to a lower gear.
If a higher gear is selected when
vehicle speed is too low, or a lower
gear when vehicle speed is too high,
the shift is not executed. This can
cause a message in the Driver
Information Centre.
In manual mode, no automatic
shifting to a higher gear takes place
at high engine revolutions.
Gear shift indication
R with the number of a higher gear is
indicated, when upshifting is
recommended for fuel saving
reasons.
Shift indication appears only in
manual mode.
Electronic driving programmes
● Following a cold start, the operating temperature
programme increases engine
speed to quickly bring the
catalytic converter to the required
temperature.
● Special programmes automatically adapt the shifting
points when driving up inclines or
down hills.
● In snowy or icy conditions or on other slippery surfaces, the
electronic transmission control
Page 184 of 257

182Driving and operatingThe permissible gross train weight
must not be exceeded. This weight is
specified on the identification plate
3 228.
Vertical coupling load The vertical coupling load is the load
exerted by the trailer on the coupling
ball. It can be varied by changing the
weight distribution when loading the
trailer.
The maximum permissible vertical
coupling load of 60 kg is specified on
the towing equipment identification
plate and in the vehicle documents.
Always aim for the maximum load,
especially in the case of heavy
trailers. The vertical coupling load
should never fall below 25 kg.Rear axle load
When the trailer is coupled and the
towing vehicle fully loaded, the
permissible rear axle load (see
identification plate or vehicle
documents) may be exceeded by 60 kg , the gross vehicle weight rating
must not be exceeded. If the
permissible rear axle load is
exceeded, a maximum speed of
100 km/h applies.
Towing equipmentCaution
When operating without a trailer,
remove the coupling ball bar.
Stowage of coupling ball bar
The bag with the coupling ball bar is
stowed on the rear floor cover in the
load compartment.
Place the strap through the rear right
lashing eye, wrap around twice and
tighten the strap to secure the bag.
Fitting the coupling ball bar
Page 186 of 257

184Driving and operatingEye for break-away stopping cable
Attach breakaway stopping cable to
eye.
Check that the coupling ball bar is correctly installed
● Green marking on rotary knob must point towards green
marking on coupling ball bar.
● There must be no gap between the rotary handle and the
coupling ball bar.
● The coupling ball bar must be firmly engaged in the opening.
● The coupling ball bar must be locked and the key removed.
9Warning
Towing a trailer is permitted only
when a coupling ball bar is fitted correctly. If the coupling ball bardoes not engage correctly, seekthe assistance of a workshop.
Dismounting the coupling ball bar
Open the protective flap and turn the
key to position c to unlock the
coupling ball bar.
Pull out rotary handle and turn
clockwise as far as it will go. Pull out coupling ball bar downwards.
Insert sealing plug in opening.
Swivel the connecting socket
upwards.
Stow the coupling ball bar in the bag
and secure by fixing the strap through the rear right lashing eye. Wrap
around twice and tighten the strap to
secure the bag.
Page 198 of 257

196Vehicle careLight assembly in the body
Detaching the light assembly
1. Unscrew the two screws that secure the light assembly.
2. Remove the light assembly bypulling it straight back.
3. Remove the three screws thatsecure the bulb carrier.
4. Version without LED
Remove the bulb by pulling and
replace.
Tail light/Brake light 1
Turn-signal light 2
Version with LED
Only turn signal light bulb can be
replaced.
Remove the bulb socket from the light assembly by turning it
anticlockwise.
Page 199 of 257

Vehicle care197
Remove the turn signal light bulb
from the socket by pulling it
straight out.
Replace bulb.
Attaching the light assembly 1. Attach the bulb carrier to the light assembly and secure with the
three screws.2. Attach the light assembly to the vehicle body as shown in the
illustration and secure with the
two screws.
Light assembly in the tailgate
Detaching the light assembly
1. Release the cover in the tailgate and remove it.
Page 200 of 257

198Vehicle care2. Unscrew the plastic securing nutby hand.
3. Carefully withdraw the lightassembly from the recesses and
remove.
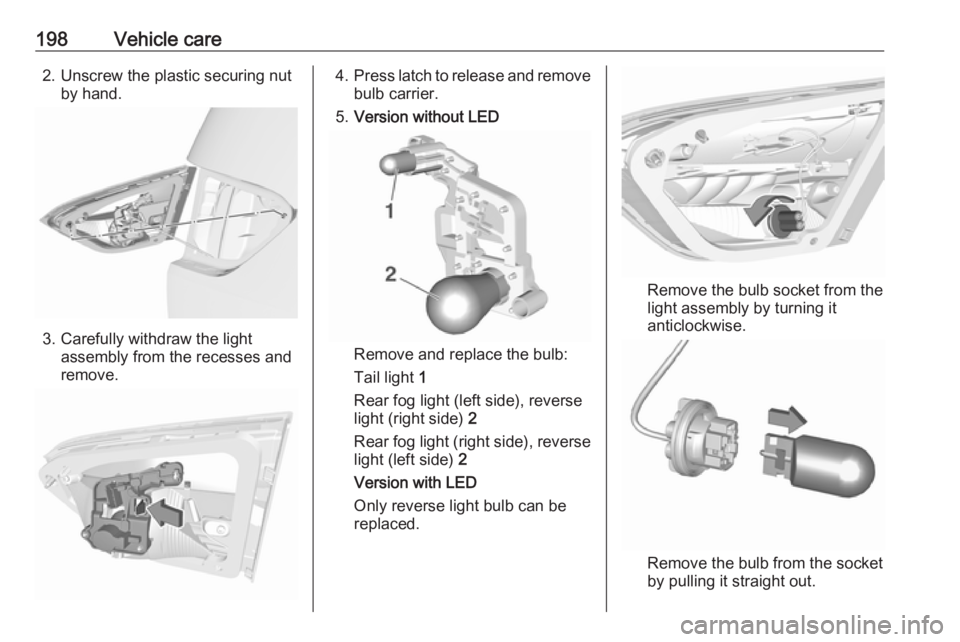
4. Press latch to release and remove
bulb carrier.
5. Version without LED
Remove and replace the bulb:
Tail light 1
Rear fog light (left side), reverse
light (right side) 2
Rear fog light (right side), reverse
light (left side) 2
Version with LED
Only reverse light bulb can be
replaced.
Remove the bulb socket from the
light assembly by turning it
anticlockwise.
Remove the bulb from the socket by pulling it straight out.
Page 201 of 257

Vehicle care199Replace bulb.
Attaching the light assembly 1. Attach bulb carrier to the light assembly.
2. Attach the light assembly to thetailgate.
3. Secure the light assembly with the
plastic securing nut.
4. Attach the cover to the tailgate.
Side turn signal lights
To replace bulb, remove lamp
housing:
1. Slide lamp to its left side and remove with its right end.
2. Turn bulb holder anticlockwiseand remove from housing.
3. Pull bulb from bulb holder and replace it.