parking brake OPEL CROSSLAND X 2019.75 Manual user
[x] Cancel search | Manufacturer: OPEL, Model Year: 2019.75, Model line: CROSSLAND X, Model: OPEL CROSSLAND X 2019.75Pages: 253, PDF Size: 7.76 MB
Page 131 of 253
Driving and operating129●Lock the vehicle with e on the
radio remote control.
Or with electronic key system
press marking on front door
handles 3 22.
● Activate the anti-theft alarm system 3 31.
● The engine cooling fans may run
after the engine has been
switched off 3 176.Caution
After running at high engine
speeds or with high engine loads,
operate the engine briefly at a low load or run in neutral for
approx. 30 seconds before
switching off, in order to protect
the turbocharger.
Caution
Under extreme cold temperatures,
idle engine for maximum
5 minutes otherwise the engine
might be damaged.
Note
In the event of an accident with
airbag deployment, the engine is
switched off automatically if the
vehicle comes to a standstill within a certain time.
In countries with extreme low
temperatures it may be necessary to park the vehicle without applied
parking brake. Make sure to park the
vehicle on a level surface.
Keys, locks 3 20.
Laying-up the vehicle for a long
period of time 3 175.Engine exhaust9 Danger
Engine exhaust gases contain
poisonous carbon monoxide,
which is colourless and odourless and could be fatal if inhaled.
If exhaust gases enter the interior
of the vehicle, open the windows.
Have the cause of the fault
rectified by a workshop.
Avoid driving with an open load
compartment, otherwise exhaust
gases could enter the vehicle.
Exhaust filter
Automatic cleaning process
The exhaust filter system filters soot particles out of the exhaust gases.
The start of saturation of the exhaust
filter is indicated by the temporary
illumination of % or C ,
accompanied by a message in the
Driver Information Centre.
Page 136 of 253
134Driving and operatingM and the number of the selected
gear indicates manual mode.
R indicates reverse gear.
N indicates neutral position.
P indicates park position.
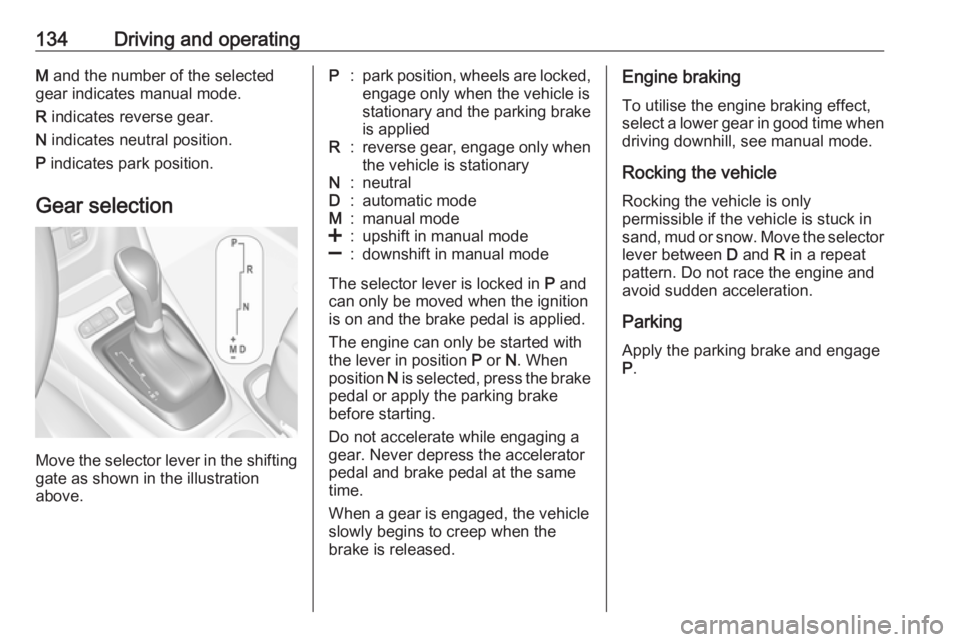
Gear selection
Move the selector lever in the shifting
gate as shown in the illustration
above.
P:park position, wheels are locked, engage only when the vehicle is
stationary and the parking brake is appliedR:reverse gear, engage only when
the vehicle is stationaryN:neutralD:automatic modeM:manual mode<:upshift in manual mode]:downshift in manual mode
The selector lever is locked in P and
can only be moved when the ignition
is on and the brake pedal is applied.
The engine can only be started with
the lever in position P or N. When
position N is selected, press the brake
pedal or apply the parking brake
before starting.
Do not accelerate while engaging a
gear. Never depress the accelerator
pedal and brake pedal at the same
time.
When a gear is engaged, the vehicle
slowly begins to creep when the
brake is released.
Engine braking
To utilise the engine braking effect,
select a lower gear in good time when driving downhill, see manual mode.
Rocking the vehicle Rocking the vehicle is only
permissible if the vehicle is stuck in
sand, mud or snow. Move the selector
lever between D and R in a repeat
pattern. Do not race the engine and
avoid sudden acceleration.
Parking
Apply the parking brake and engage
P .
Page 138 of 253
136Driving and operatingIf the vehicle battery is discharged,
start the vehicle using jump leads
3 207.
If the vehicle battery is not the cause
of the fault, release the selector lever.
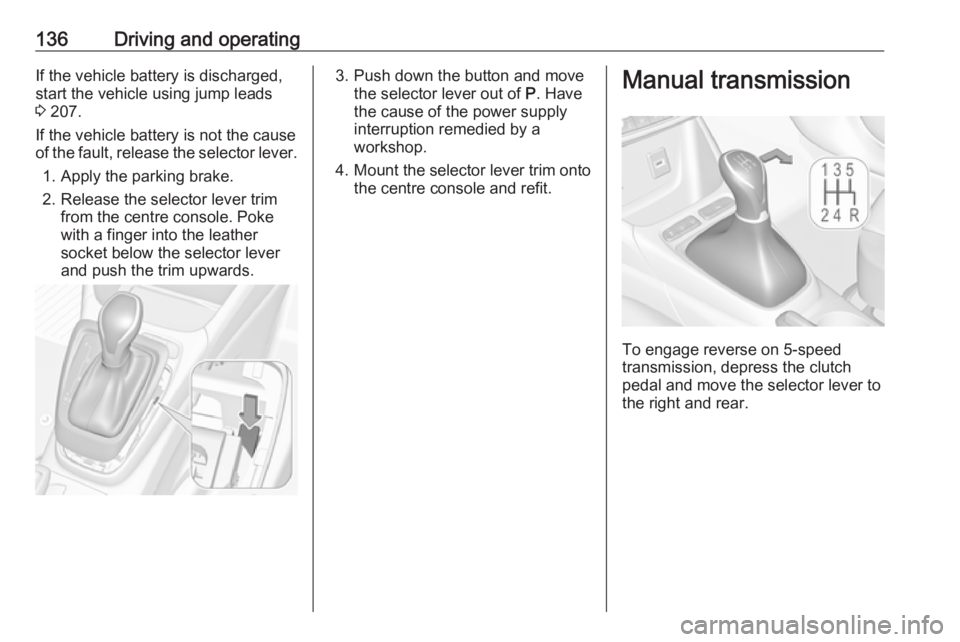
1. Apply the parking brake.
2. Release the selector lever trim from the centre console. Pokewith a finger into the leather
socket below the selector lever
and push the trim upwards.3. Push down the button and move the selector lever out of P. Have
the cause of the power supply
interruption remedied by a
workshop.
4. Mount the selector lever trim onto
the centre console and refit.Manual transmission
To engage reverse on 5-speed
transmission, depress the clutch
pedal and move the selector lever to
the right and rear.
Page 140 of 253
138Driving and operatingABS starts to regulate brake pressureas soon as a wheel shows a tendency to lock. The vehicle remains
steerable, even during hard braking.
ABS control is made apparent
through a pulse in the brake pedal
and the noise of the regulation
process.
For optimum braking, keep the brake
pedal fully depressed throughout the
braking process, despite the fact that
the pedal is pulsating. Do not reduce
the pressure on the pedal.
When braking in an emergency, the
hazard warning flashers are switched
on automatically depending on the
force of deceleration. They are
switched off automatically the first
time you accelerate.
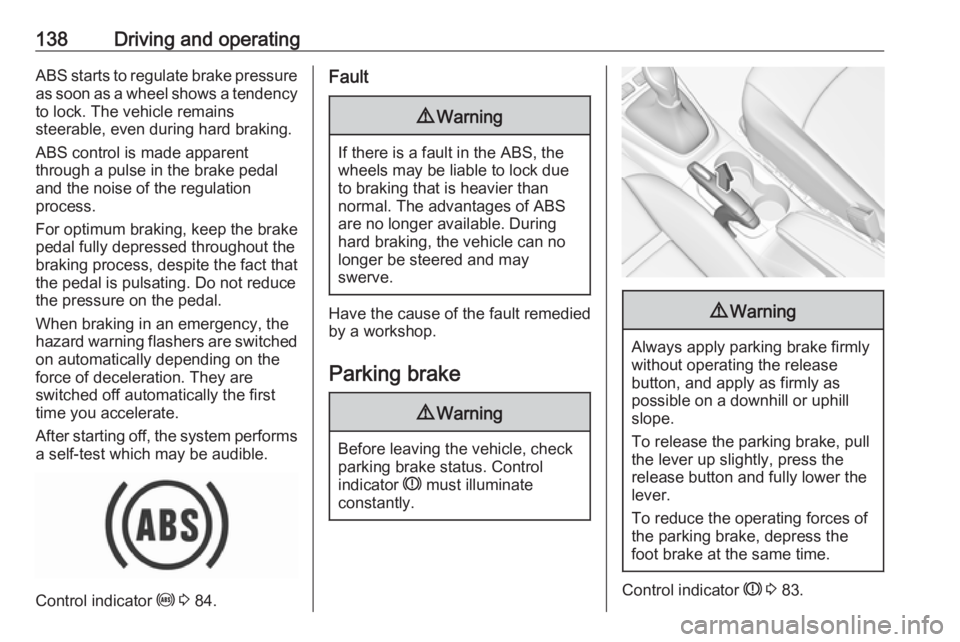
After starting off, the system performs a self-test which may be audible.
Control indicator u 3 84.
Fault9 Warning
If there is a fault in the ABS, the
wheels may be liable to lock due
to braking that is heavier than
normal. The advantages of ABS are no longer available. During
hard braking, the vehicle can no longer be steered and may
swerve.
Have the cause of the fault remedied
by a workshop.
Parking brake
9 Warning
Before leaving the vehicle, check
parking brake status. Control
indicator R must illuminate
constantly.
9 Warning
Always apply parking brake firmly
without operating the release
button, and apply as firmly as
possible on a downhill or uphill
slope.
To release the parking brake, pull
the lever up slightly, press the
release button and fully lower the
lever.
To reduce the operating forces of
the parking brake, depress the
foot brake at the same time.
Control indicator R 3 83.
Page 151 of 253
Driving and operating149System limitationsIn some cases, the active emergencybraking system may provide an
automatic braking in situations that
seem to be unnecessary, for instance
in parking garages, due to traffic signs in a curve or due to vehicles in
another lane. This is normal
operation, the vehicle does not need
service. Firmly apply the accelerator
pedal to override the automatic
braking if the situation and the
surroundings permit.
In the following cases, active
emergency braking performance is limited:
● driving on winding or hilly roads
● detecting all vehicles, especially vehicles with a trailer, tractors,
muddy vehicles, etc.
● detecting a vehicle when weather
limits visibility, such as in fog,
rain, or snow
● driving in the dark
● windscreen damaged or stickeredComplete attention is always required
while driving, and you should be
ready to take action and apply the
brakes and / or steer the vehicle to
avoid crashes.
We recommend to deactivate the
system in the vehicle personalisation
in the following cases:
● when towing a trailer or caravan
● when carrying long objects on roof bars or a roof rack
● when the vehicle is being towed with the engine running
● when a spare wheel is fitted that is smaller than the other wheels
● before using an automatic car wash with the engine running
● before placing the vehicle on a rolling road in a workshop
● if the windscreen has been damaged close to the camera
● if the front bumper has been damaged
● if the brake lamps are not working
Active emergency braking can be
deactivated in the personalisation
menu 3 95. If deactivated, milluminates in the instrument cluster
and a warning message is displayed
in the Driver Information Centre.
Fault
In case the system requires a service, a message is displayed in the Driver
Information Centre.
If the system does not work as it
should do, vehicle messages are
displayed in the Driver Information
Centre.
Vehicle messages 3 94.
Front pedestrian protection Front pedestrian protection may helpto avoid or reduce the harm causedby front-end crashes with pedestrians when driving forward.
The system uses the front camera in
the windscreen to detect a pedestrian
directly ahead in your path.
Front pedestrian protection can
detect and alert to pedestrians in a
forward gear at speeds between
5 km/h and 60 km/h.
Page 152 of 253
150Driving and operatingDuring driving in the dark, system
performance is limited.9 Danger
Front pedestrian braking does not
provide an alert or automatically
brake the vehicle, unless it detects
a pedestrian.
The system may not detect
pedestrians, including children,
when the pedestrian is not directly
ahead, not fully visible, not
standing upright, or when part of a
group.
Front pedestrian protection includes:
● detecting front pedestrian ahead● front pedestrian alert
Front pedestrian protection is
activated together with forward
collision alert.
Forward collision alert 3 145.
Detecting front pedestrian ahead
A pedestrian ahead up to a distance
of approx. 40 m is indicated by a
symbol in the instrument cluster.
Front pedestrian alert
When approaching a detected
pedestrian too quickly, a warning
message is displayed in the Driver
Information Centre. A warning chime
is provided.
Cruise control or Adaptive cruise
control may be disengaged when the
front pedestrian alert occurs.
System limitations
In the following cases, front
pedestrian protection may not detect
a pedestrian ahead or sensor
performance is limited:
● vehicle speed is out of range from
5 km/h to 60 km/h in forward gear
● the distance to an pedestrian ahead is more than 40 m
● driving on winding or hilly roads
● driving in the dark
● weather limits visibility, such as fog, rain, or snow● the sensor in the windscreen isblocked by snow, ice, slush, mud,
dirt etc.
● the windscreen is damaged or affected by foreign objects, e.g.
stickers
Parking assist General information
The system is switched off
automatically when attaching a trailer
or bike carrier to the trailer hitch.9 Warning
The driver bears full responsibility
for the parking manoeuvre.
Always check the surrounding
area when driving backwards or
forwards while using parking
assist system.
The parking assist makes parking easier by measuring the distance
between the vehicle and obstacles. It
informs and warns the driver by giving acoustic signals and display
indication.
Page 177 of 253
Vehicle care175emissions and other emissions of the
vehicle and cause the vehicle to no
longer conform to the operating
permit, impacting the validity of your
vehicle registration.Caution
When transporting the vehicle on
a train or on a recovery vehicle, the
mud flaps might be damaged.
Vehicle storage
Storage for a long period of time
If the vehicle is to be stored for several months:
● Wash and wax the vehicle.
● Have the wax in the engine compartment and underbody
checked.
● Clean and preserve the rubber seals.
● Fill up fuel tank completely.
● Change the engine oil.
● Drain the washer fluid reservoir.
● Check the coolant antifreeze and
corrosion protection.
● Adjust tyre pressure to the value specified for full load.
● Park the vehicle in a dry, well ventilated place. Prevent the
vehicle from rolling.
● Engage first or reverse gear or set selector lever to P.
● Do not apply the parking brake.
● Open the bonnet, close all doors and lock the vehicle.
● Disconnect the clamp from the negative terminal of the vehicle
battery. Note that all systems are
not functional, e.g. central locking system.
Anti-theft alarm system 3 31.
Putting back into operation
When the vehicle is to be put back into
operation:
● Connect the clamp to the negative terminal of the vehicle
battery. Initialize the power
windows 3 36.
● Check tyre pressure.● Fill up the washer fluid reservoir.
● Check the engine oil level.
● Check the coolant level.
● Fit the number plate if necessary.
End-of-life vehicle recovery
Information on end-of-life vehicle
recovery centres and the recycling of
end-of-life vehicles is available on our website, where legally required. Only
entrust this work to an authorised
recycling centre.
Page 195 of 253
Vehicle care193No.Circuit7Heated steering wheel8Rear wiper9–10Central locking system11Central locking system12Instrument cluster13Climate control system, USB14OnStar15Instrument cluster, climate
control system16Brake, starter, retained power
off17Instrument cluster18Advanced parking assist19Top column module, trailer
control module20–21Anti-theft alarm system, start
buttonNo.Circuit22Rain sensor, front camera23Door module24Advanced parking assist,
camera, Infotainment25Airbag26Top column module27Anti-theft alarm system28–29Infotainment30–31Infotainment32Power outlet front33–34Heated exterior mirrors, door
moduleNo.Circuit35Instrument cluster, light switch,
advanced parking assist, trans‐
mission control module36Courtesy lights, sun visor lights,
glovebox light
Fuse box on the right side of the
instrument panel
In left-hand drive vehicles, the fuse
box is located behind a cover in the
glovebox. Open the glovebox and
remove the cover. Remove the
bracket.
Page 199 of 253
Vehicle care197The pressure increases by nearly
10 kPa for a 10 °C temperature
increase. This must be considered
when warm tyres are checked.
Tyre deflation detectionsystem
The tyre deflation detection system
continually checks the rotation speed
of all four wheels and warns on low
tyre pressure condition once vehicle
is driving. This is achieved by
comparing tyre rolling circumference
with reference values and further
signals.
If a tyre loses pressure the control
indicator w illuminates and a warning
message is displayed in the Driver
Information Centre.
In this case reduce speed, avoid
sharp cornering and strong braking.
Stop at next safe opportunity and
check tyre pressure.
Control indicator w 3 85.
After adjusting tyre pressure initialise
system to extinguish the control
indicator and restart system.Caution
Deflation detection system warns
just about low tyre pressure
condition and does not replace
regular tyre maintenance by the
driver.
In case of a system malfunction a
message is displayed in the Driver
Information Centre. Set correct tyre
pressure and reinitialise system. If the
failure continues to be displayed,
contact a workshop. The system is
inoperable when ABS or ESC has a
malfunction or a temporary spare
wheel is used.
In case of a system malfunction a
message is displayed in the Driver
Information Centre. Set correct tyre
pressure and reinitialise system. If the
failure continues to be displayed,
contact a workshop. The system is
inoperable when ABS or ESC has a
malfunction.
Once the road tyre has been refitted,
check the tyre pressure with cold
tyres and initialise the system.
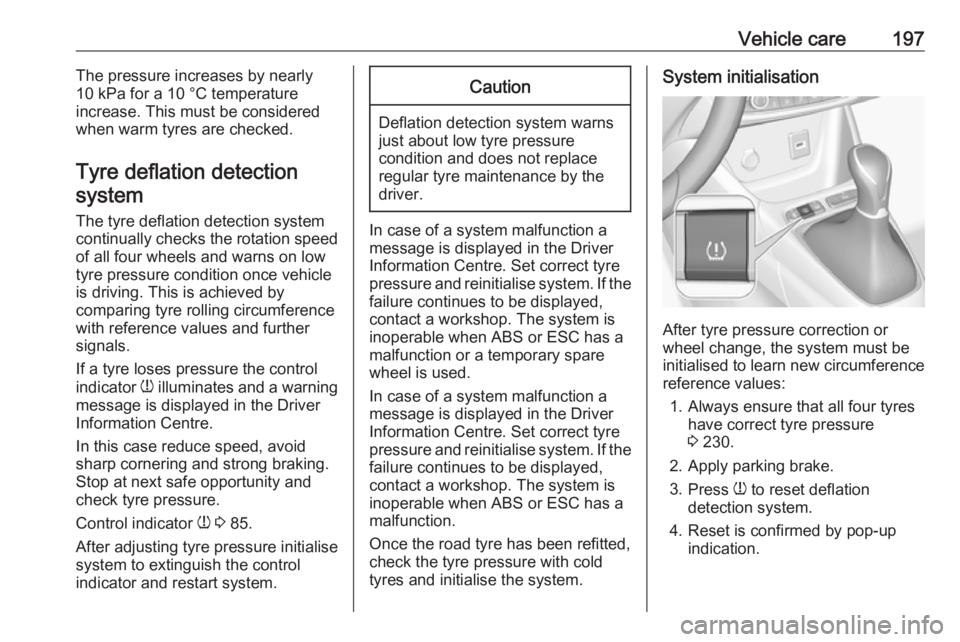
System initialisation
After tyre pressure correction or
wheel change, the system must be
initialised to learn new circumference reference values:
1. Always ensure that all four tyres have correct tyre pressure3 230.
2. Apply parking brake. 3. Press w to reset deflation
detection system.
4. Reset is confirmed by pop-up indication.
Page 201 of 253
Vehicle care199Wheel covers must not impair brake
cooling.9 Warning
Use of unsuitable tyres or wheel
covers could lead to sudden
pressure loss and thereby
accidents.
Vehicles with steel wheels: When
using locking wheel nuts, do not
attach wheel covers.
Tyre chains
Tyre chains are only permitted on the
front wheels.
Always use fine mesh chains that add no more than 10 mm to the tyre tread
and the inboard sides (including chain lock).9 Warning
Damage may lead to tyre blowout.
Tyre chains are only permitted on
tyres of size 195/65 R15 91 and
195/60 R16 89
Temporary spare wheel
The use of tyre chains is not permitted on the temporary spare wheel.
Tyre repair kit
Minor damage to the tyre tread can be
repaired with the tyre repair kit.
Do not remove foreign bodies from
the tyres.
Tyre damage exceeding 4 mm or that
is at tyre's sidewall cannot be repaired with the tyre repair kit.
9 Warning
Do not drive faster than 80 km/h.
Do not use for a lengthy period.
Steering and handling may be
affected.
If you have a flat tyre:
Apply the parking brake and engage
first gear, reverse gear or P.
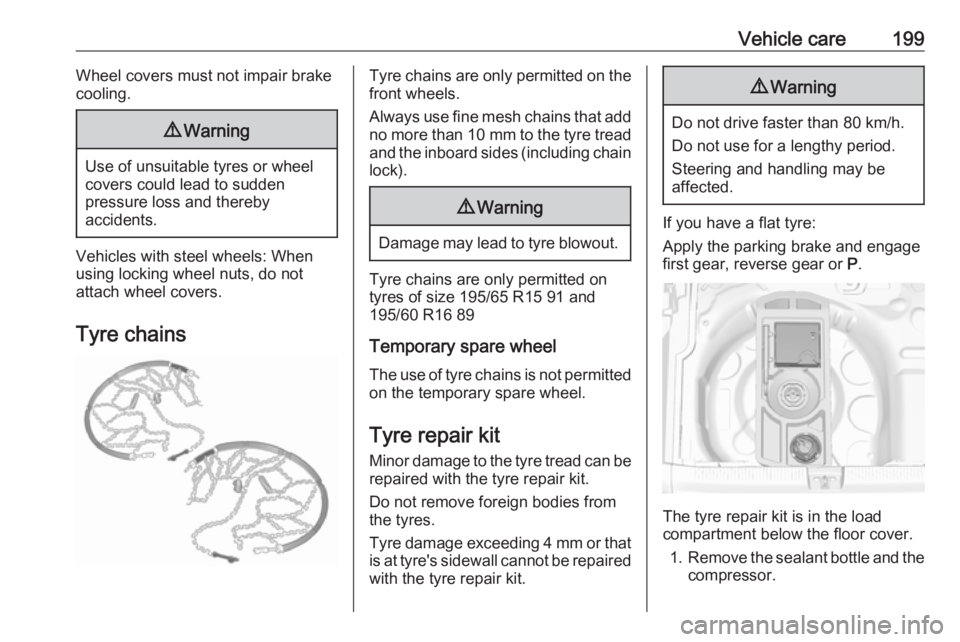
The tyre repair kit is in the load
compartment below the floor cover.
1. Remove the sealant bottle and the
compressor.