Tank OPEL INSIGNIA 2014 Owner's Manual
[x] Cancel search | Manufacturer: OPEL, Model Year: 2014, Model line: INSIGNIA, Model: OPEL INSIGNIA 2014Pages: 321, PDF Size: 8.95 MB
Page 83 of 321
Storage819Warning
Always make sure that the load in
the vehicle is securely stowed.
Otherwise objects can be thrown
around inside the vehicle and
cause personal injury or damage
to the load or car.
■ The payload is the difference between the permitted gross
vehicle weight (see identification
plate 3 264) and the EC kerb
weight.
To calculate the payload, enter the
data for your vehicle in the Weights
table at the front of this manual.
The EC kerb weight includes
weights for the driver (68 kg),
luggage (7 kg) and all fluids (tank
90 % full).
Optional equipment and
accessories increase the kerb
weight.
■ Driving with a roof load increases the sensitivity of the vehicle to
cross-winds and has a detrimental
effect on vehicle handling due to
the vehicle's higher centre of
gravity. Distribute the load evenly
and secure it properly with retaining
straps. Adjust the tyre pressure and vehicle speed according to the load
conditions. Check and retighten the straps frequently.
Do not drive faster than 120 km/h.
The permissible roof load is
100 kg. The roof load is the
combined weight of the roof rack
and the load.
Page 99 of 321
Instruments and controls97
Midlevel and Uplevel instrument
cluster
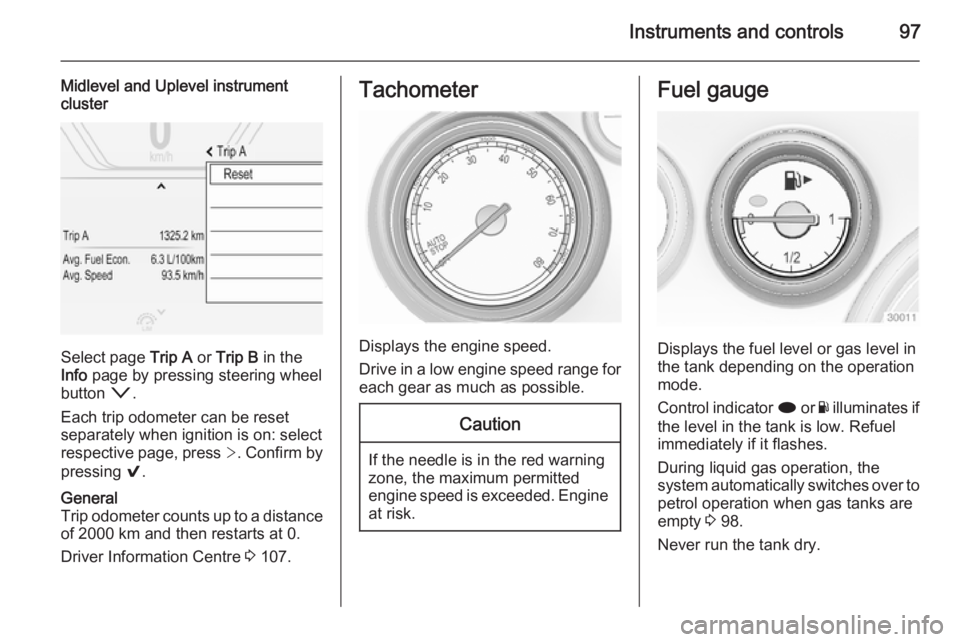
Select page Trip A or Trip B in the
Info page by pressing steering wheel
button o.
Each trip odometer can be reset
separately when ignition is on: select
respective page, press >. Confirm by
pressing 9.
General
Trip odometer counts up to a distance
of 2000 km and then restarts at 0.
Driver Information Centre 3 107.Tachometer
Displays the engine speed.
Drive in a low engine speed range for each gear as much as possible.
Caution
If the needle is in the red warning
zone, the maximum permitted
engine speed is exceeded. Engine at risk.
Fuel gauge
Displays the fuel level or gas level in
the tank depending on the operation
mode.
Control indicator i or Y illuminates if
the level in the tank is low. Refuel
immediately if it flashes.
During liquid gas operation, the
system automatically switches over to
petrol operation when gas tanks are
empty 3 98.
Never run the tank dry.
Page 100 of 321
98Instruments and controls
Because of the fuel remaining in the
tank, the top-up quantity may be less
than the specified tank capacity.
Fuel selector
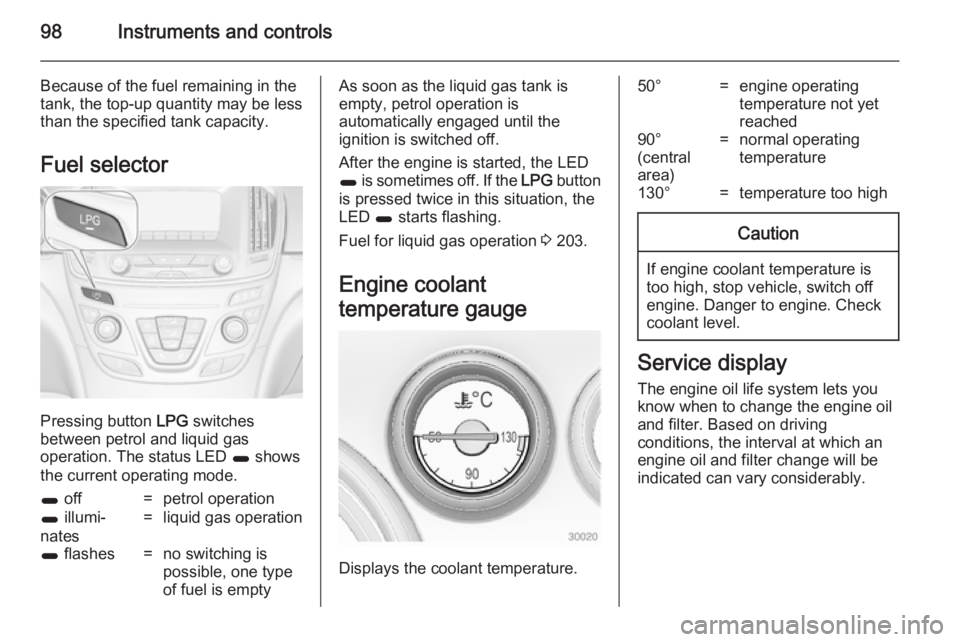
Pressing button LPG switches
between petrol and liquid gas
operation. The status LED 1 shows
the current operating mode.
1 off=petrol operation1 illumi‐
nates=liquid gas operation1 flashes=no switching is
possible, one type
of fuel is emptyAs soon as the liquid gas tank is
empty, petrol operation is
automatically engaged until the
ignition is switched off.
After the engine is started, the LED
1 is sometimes off. If the LPG button
is pressed twice in this situation, the
LED 1 starts flashing.
Fuel for liquid gas operation 3 203.
Engine coolant
temperature gauge
Displays the coolant temperature.
50°=engine operating
temperature not yet
reached90°
(central
area)=normal operating
temperature130°=temperature too highCaution
If engine coolant temperature is
too high, stop vehicle, switch off
engine. Danger to engine. Check
coolant level.
Service display
The engine oil life system lets you
know when to change the engine oil
and filter. Based on driving
conditions, the interval at which an
engine oil and filter change will be
indicated can vary considerably.
Page 107 of 321
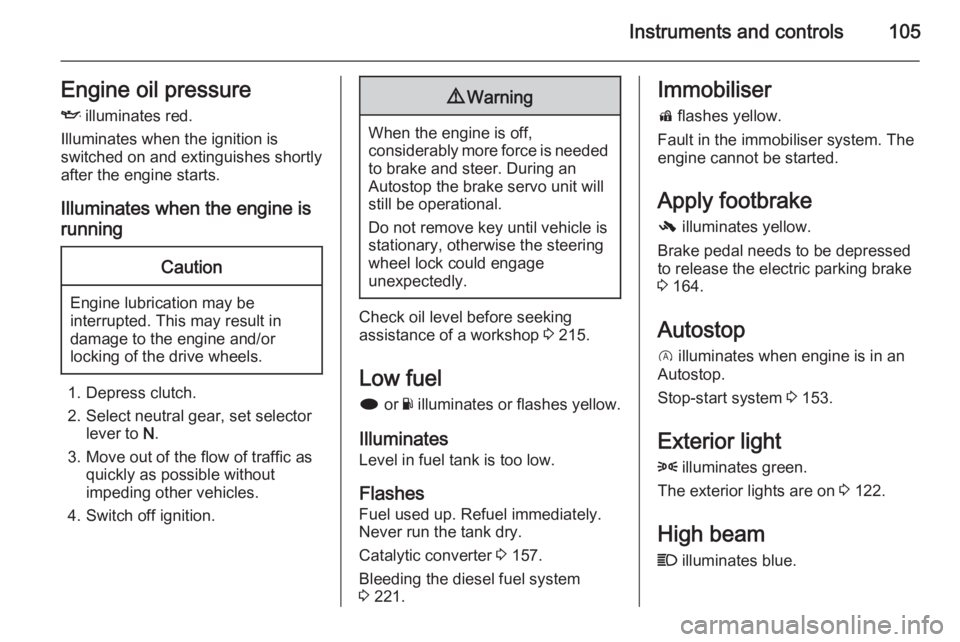
Instruments and controls105Engine oil pressureI illuminates red.
Illuminates when the ignition is
switched on and extinguishes shortly
after the engine starts.
Illuminates when the engine is runningCaution
Engine lubrication may be
interrupted. This may result in
damage to the engine and/or
locking of the drive wheels.
1. Depress clutch.
2. Select neutral gear, set selector lever to N.
3. Move out of the flow of traffic as quickly as possible without
impeding other vehicles.
4. Switch off ignition.
9 Warning
When the engine is off,
considerably more force is needed
to brake and steer. During an
Autostop the brake servo unit will still be operational.
Do not remove key until vehicle is stationary, otherwise the steeringwheel lock could engage
unexpectedly.
Check oil level before seeking
assistance of a workshop 3 215.
Low fuel
i or Y illuminates or flashes yellow.
Illuminates Level in fuel tank is too low.
Flashes
Fuel used up. Refuel immediately.
Never run the tank dry.
Catalytic converter 3 157.
Bleeding the diesel fuel system
3 221.
Immobiliser
d flashes yellow.
Fault in the immobiliser system. The
engine cannot be started.
Apply footbrake
- illuminates yellow.
Brake pedal needs to be depressed
to release the electric parking brake
3 164.
Autostop
D illuminates when engine is in an
Autostop.
Stop-start system 3 153.
Exterior light 8 illuminates green.
The exterior lights are on 3 122.
High beam
C illuminates blue.
Page 112 of 321
110Instruments and controls
On Baselevel display, the pages
"Remaining Oil Life ", "Tyre
Pressure", "Traffic Sign Assistant"
and "Following distance indication" are displayed in the Settings Menu
X . Select by pressing Menu
button.
On Baselevel display, the pages "Top consumers", "Economy trend" and
"Eco index" are displayed in the Eco
Menu s . Select by pressing
Menu button.
Trip odometer 1/A and 2/B
Trip odometer displays the current
distance since a certain reset.
Trip odometer counts up to a distance
of 2000 km then restarts at 0.
To reset on Baselevel display, press
the SET/CLR button for a few
seconds, on Midlevel and Uplevel
display, press > and confirm with 9.
The information of trip odometer page
1/A and 2/B can be reset separately
for odometer, average consumption
and average speed while the
respective display is active.Average consumption
Display of average consumption. The measurement can be reset at any
time and starts with a default value.
To reset on Baselevel display, press
the SET/CLR button for a few
seconds, on Midlevel and Uplevel
display, press > and confirm with 9.
On vehicles with LPG engines, average consumption is indicated for
the currently selected mode, LPG or Gasoline.
Average speed
Display of average speed. The
measurement can be reset at any
time.
To reset on Baselevel display, press
the SET/CLR button for a few
seconds, on Midlevel and Uplevel
display, press > and confirm with 9.
Digital speed Digital display of the instantaneous
speed.Fuel range
Range is calculated from current fuel
tank content and current
consumption. The display shows
average values.
After refuelling, the range is updated
automatically after a brief delay.
When the fuel level in the tank is low,
a message appears on the display
and the control indicator i or Y in the
fuel gauge illuminates.
When the tank has to be refuelled
immediately, a warning message
appears and remains on the display.
Additionally the control indicator i
or Y in the fuel gauge flashes 3 105.
Fuel range LPG version
Display of approximate fuel range
available with the remaining fuel in
each respective fuel tank of gasoline
and LPG fuel, along with a total range
of both fuel types together. Switch
between the modes by pressing SET/
CLR button or 9 button.
Page 159 of 321
Driving and operating157
The control indicator % extinguishes
as soon as the self-cleaning
operation is complete.
Catalytic converter
The catalytic converter reduces the
amount of harmful substances in the
exhaust gases.Caution
Fuel grades other than those listed on pages 3 202, 3 269 could
damage the catalytic converter or
electronic components.
Unburnt petrol will overheat and
damage the catalytic converter.
Therefore avoid excessive use of the starter, running the fuel tank
dry and starting the engine by
pushing or towing.
In the event of misfiring, uneven
engine running, a reduction in engine performance or other unusual
problems, have the cause of the fault
rectified by a workshop as soon as
possible. In an emergency, driving
can be continued for a short period,
keeping vehicle speed and engine
speed low.Automatic transmission
The automatic transmission permits
automatic gearshifting (automatic
mode) or manual gearshifting
(manual mode).
Manual shifting is possible in manual mode by tapping the selector lever or
pulling the steering wheel paddles
3 159.
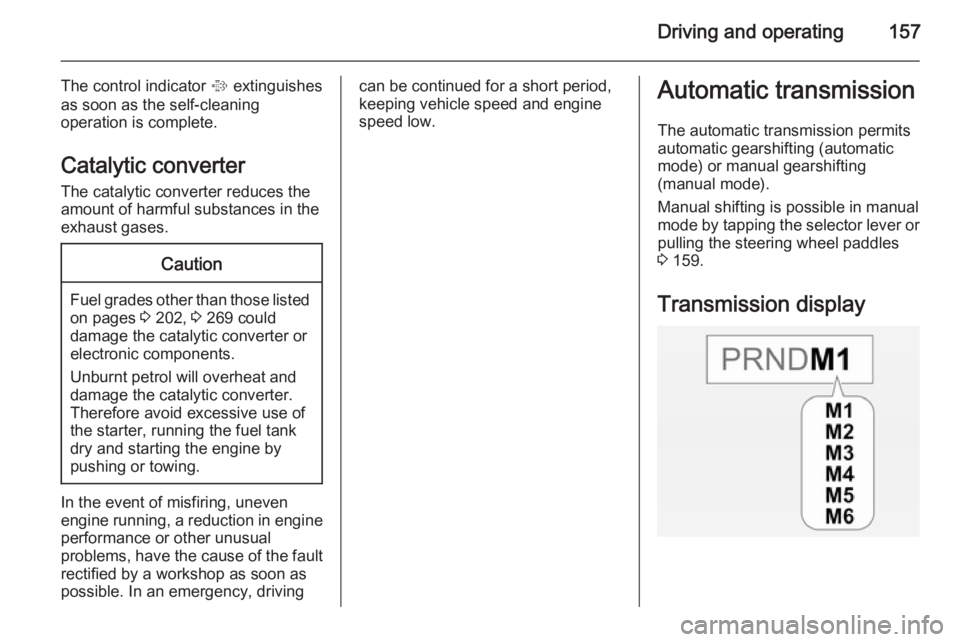
Transmission display
Page 206 of 321
204Driving and operating
Press the LPG button to switch
between petrol and liquid gas
operation as soon as the required
parameters (coolant temperature,
gas temperature and minimum
engine speed) have been reached.
The requirements are usually fulfilled
after around 60 seconds (depending
on exterior temperature) and the first
firm press on the accelerator. The
LED status shows the current
operating mode.1 off=petrol operation1 illumi‐
nates=liquid gas operation1 flashes=no switching is
possible, one type
of fuel is empty
As soon as the liquid gas tank is
empty, petrol operation is
automatically engaged until the
ignition is switched off.
Every six months, run the petrol tank
down until control indicator i or Y
illuminates, then refuel. This helps
maintain fuel quality and system
function for petrol operation.
Fill the tank completely at regular
intervals to prevent corrosion in the
tank.
Faults and remedies
If gas mode is not possible, check the following:
■ Is there enough liquid gas present?
■ Is there enough petrol present for starting?
Due to extreme temperatures in
combination with the gas
composition, it may take slightly
longer before the system switches
from petrol to gas mode.
In extreme situations, the system may
also switch back to petrol mode if the
minimum requirements are not
fulfilled.
Seek the assistance of a workshop in the event of all other faults.Caution
Repairs and adjustments may onlybe made by trained specialists in
order to maintain the safety and
warranty on the LPG system.
Liquid gas is given a particular odour
(odorised) so that any leaks can be
detected easily.
9 Warning
If you smell gas in the vehicle or in
the immediate vicinity, switch to petrol mode immediately. No
smoking. No naked flames or
ignition sources.
If the gas odour persists, do not start
the engine. If possible, close the
manual shut-off valve on the
multivalve. The multivalve is located
on the liquid gas tank in the load
compartment, underneath the rear
floor cover.
Page 208 of 321
206Driving and operating
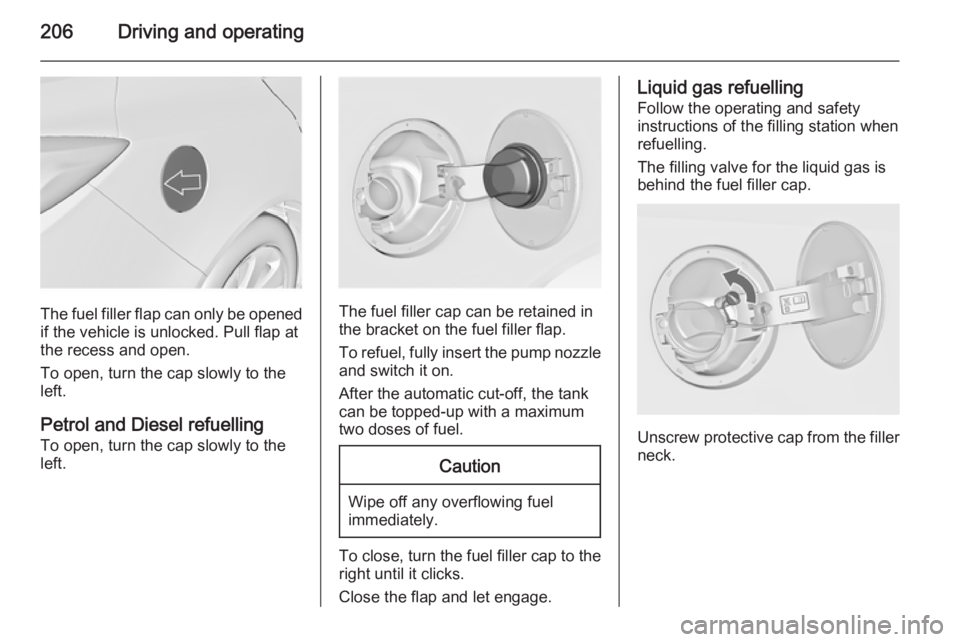
The fuel filler flap can only be opened
if the vehicle is unlocked. Pull flap at
the recess and open.
To open, turn the cap slowly to the
left.
Petrol and Diesel refuelling To open, turn the cap slowly to the
left.The fuel filler cap can be retained in
the bracket on the fuel filler flap.
To refuel, fully insert the pump nozzle
and switch it on.
After the automatic cut-off, the tank
can be topped-up with a maximum
two doses of fuel.
Caution
Wipe off any overflowing fuel
immediately.
To close, turn the fuel filler cap to the right until it clicks.
Close the flap and let engage.
Liquid gas refuelling
Follow the operating and safety
instructions of the filling station when
refuelling.
The filling valve for the liquid gas is
behind the fuel filler cap.
Unscrew protective cap from the filler
neck.
Page 209 of 321
Driving and operating207
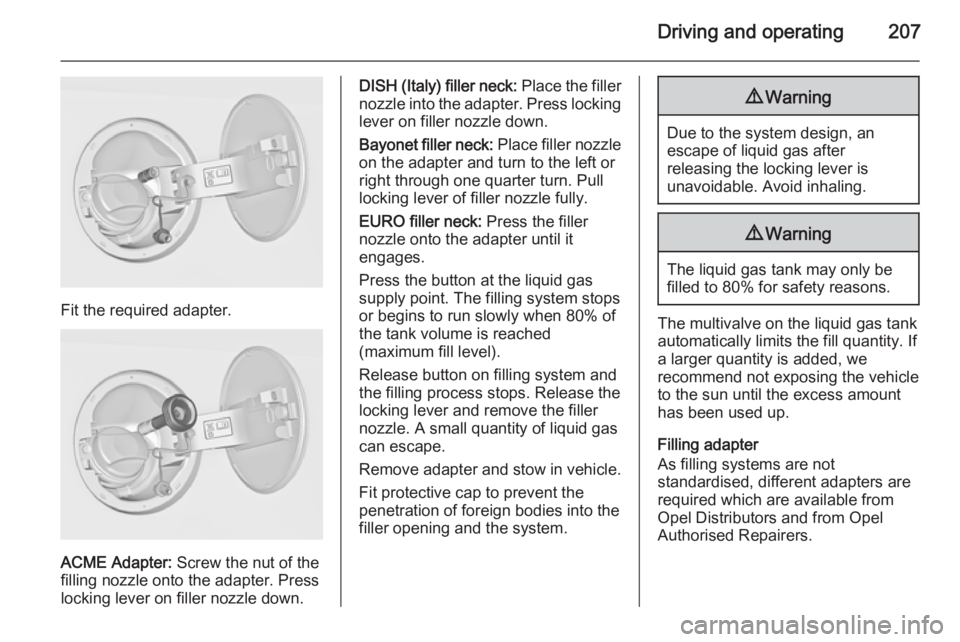
Fit the required adapter.
ACME Adapter: Screw the nut of the
filling nozzle onto the adapter. Press
locking lever on filler nozzle down.
DISH (Italy) filler neck: Place the filler
nozzle into the adapter. Press locking lever on filler nozzle down.
Bayonet filler neck: Place filler nozzle
on the adapter and turn to the left or
right through one quarter turn. Pull
locking lever of filler nozzle fully.
EURO filler neck: Press the filler
nozzle onto the adapter until it
engages.
Press the button at the liquid gas supply point. The filling system stops
or begins to run slowly when 80% of
the tank volume is reached
(maximum fill level).
Release button on filling system and
the filling process stops. Release the
locking lever and remove the filler
nozzle. A small quantity of liquid gas
can escape.
Remove adapter and stow in vehicle.
Fit protective cap to prevent the
penetration of foreign bodies into the
filler opening and the system.9 Warning
Due to the system design, an
escape of liquid gas after
releasing the locking lever is
unavoidable. Avoid inhaling.
9 Warning
The liquid gas tank may only be
filled to 80% for safety reasons.
The multivalve on the liquid gas tank
automatically limits the fill quantity. If
a larger quantity is added, we
recommend not exposing the vehicle
to the sun until the excess amount
has been used up.
Filling adapter
As filling systems are not
standardised, different adapters are
required which are available from
Opel Distributors and from Opel
Authorised Repairers.
Page 215 of 321
Vehicle care213Vehicle careGeneral Information...................213
Vehicle checks ........................... 214
Bulb replacement .......................222
Electrical system ........................232
Vehicle tools .............................. 239
Wheels and tyres .......................240
Jump starting ............................. 252
Towing ....................................... 254
Appearance care .......................257General Information
Accessories and vehicle
modifications
We recommend to use genuine parts and accessories and factory
approved parts specific for your
vehicle type. We cannot assess or
guarantee reliability of other products
- even if they have a regulatory or
otherwise granted approval.
Do not make any modifications to the
electrical system, e.g. changes of
electronic control units (chip tuning).Caution
When transporting the vehicle on
a train or on a recovery vehicle, the
mud flaps might be damaged.
Vehicle storage
Storage for a long period of time
If the vehicle is to be stored for several months:
■ Wash and wax the vehicle.
■ Have the wax in the engine compartment and underbody
checked.
■ Clean and preserve rubber seals.
■ Fill up fuel tank completely.
■ Change engine oil.
■ Drain washer fluid reservoir.
■ Check coolant antifreeze and corrosion protection.
■ Adjust tyre pressure to the value specified for full load.
■ Park vehicle in dry, well ventilated place. Engage first or reverse gear
or set selector lever to P. Prevent
the vehicle from rolling.
■ Do not apply parking brake.