display OPEL INSIGNIA 2017 Manual user
[x] Cancel search | Manufacturer: OPEL, Model Year: 2017, Model line: INSIGNIA, Model: OPEL INSIGNIA 2017Pages: 327, PDF Size: 9.3 MB
Page 212 of 327

210Driving and operating
Traffic signs, which will be detected,
are:
Limit- and no passing signs
● speed limit
● no passing
● end of speed limit
● end of no passingRoad signs
Beginning and end of:
● city regions (country specific)
● motorways
● A-roads
● play streetsAdd on signs ● additional hints to traffic signs
● restriction of trailer towing
● tractor constraints
● wet warning● ice warning
● direction arrows
Speed limit signs and no passing
signs are displayed in the Driver
Information Centre until the next
speed limit sign or end of speed limit is detected or up to a defined sign
timeout.
Indication of multiple signs on the
display is possible.
An exclamation mark in a frame
indicates that there is an additional
sign detected which cannot be clearly
identified by the system.
The system operates without loss of
performance up to a speed of
200 km/h depending on the lighting
conditions. At night the system is
active up to a speed of 160 km/h.
Display indication Information about the currently valid
traffic signs is available on the
designated traffic sign assistant page in the Driver Information Centre.
Additionally, the currently valid speed
limit is displayed permanently in the
lower line of the Driver Information
Centre. In case a speed limit with add on sign is available, a + symbol is
displayed in this area.
Page 213 of 327

Driving and operating211
On Baselevel display, select Settings
X by pressing MENU and select
traffic sign assistant page with the adjuster wheel on the turn signal lever
3 111.
On Midlevel and Uplevel display
select Info menu with the right
steering wheel buttons and press P
to select traffic sign assistant page
3 111.
When another page on the Driver
Information Centre menu was
selected and then traffic sign
assistant page is chosen again, the
last recognised traffic sign will be
displayed.
Alert function The alert function can be activated or
deactivated in the setting menu of the
traffic sign assistant page.Once activated and when the traffic
sign detection page is currently not
displayed, newly detected speed limit
and no passing signs are displayed
as popup alerts in the Driver
Information Centre.
The alert function can be activated or
deactivated in the setting menu of the
traffic sign assistant page by pressing SET/CLR on the turn signal lever or
9 on the steering wheel.
Page 214 of 327

212Driving and operating
Illustration shows baselevel Driver
Information Centre.
Illustration shows midlevel or uplevel
Driver Information Centre.
When the setting page is displayed,
select Alerts ON on uplevel display or
set alerts J on midlevel display to
activate alert function.
Deactivate by selecting Alerts Off or
alerts I.
Setting remains active up to the next
change.
Pop-up alert is displayed for approx. eight seconds in the Driver
Information Centre.
System reset
The content of the traffic sign display
can be cleared in the setting menu of the traffic sign assistant page by
selecting Reset and confirm by
pressing SET/CLR on the turn signal
lever or 9 on right steering wheel
control.
Alternatively, SET/CLR or 9 can be
pressed for three seconds to clear the
content of the page.
Upon successful reset, a chime will
sound and the following symbol is indicated until the next traffic sign is
detected.
In some cases, traffic sign assistant is
cleared up automatically by the
system.
Clearing of traffic signs
There are different scenarios that
lead to clearing the currently
displayed traffic signs. After clearing,
the “Default Sign” is displayed in the
Driver Information Centre.
Reasons for signs being cleared: ● A predefined distance was driven
or time has elapsed (differs for
each sign type)
● Vehicle drives through a turn
● The speed becomes slower than 52 km/h (city entry detection)
Page 215 of 327

Driving and operating213Fault
The traffic sign assistant system may
not operate correctly if:
● The area of the windscreen, where the front camera is
located, is not clean or affected
by foreign items, e.g. stickers.
● Traffic signs are completely or partially covered or difficult to
discern.
● There are adverse environmental
conditions, e.g. heavy rain, snow,
direct sunlight or shadows.
● Traffic signs are incorrectly mounted or damaged.
● Traffic signs do not comply with the Vienna Convention on traffic
signs (Wiener Übereinkommen
über Straßenverkehrszeichen).Caution
The system is intended to help the driver within a defined speed
range to recognise certain traffic
signs. Do not ignore traffic signs
which are not displayed by the
system.
The system does not recognise
any other than the conventional
traffic signs that might give or end
a speed limit.
Do not let this special feature
tempt you into taking risks when
driving.
Always adapt speed to the road
conditions.
The driver assistance systems do not relieve the driver from full
responsibility for vehicle
operation.
Lane departure warning
The lane departure warning system
observes the lane markings between
which the vehicle is driving, via a front camera. The system detects lane
changes and warns the driver in the
event of an unintended lane change
by visual and acoustic signals.
Criteria for the detection of an
unintended lane change are:
● No operation of turn signals.
● No brake pedal operation.
● No active accelerator operation or speeding-up.
● No active steering.
If the driver is active, no warning will
be issued.
Activation
The lane departure warning system isactivated by pressing ). The
illuminated LED in the button
indicates that the system is switched
Page 218 of 327

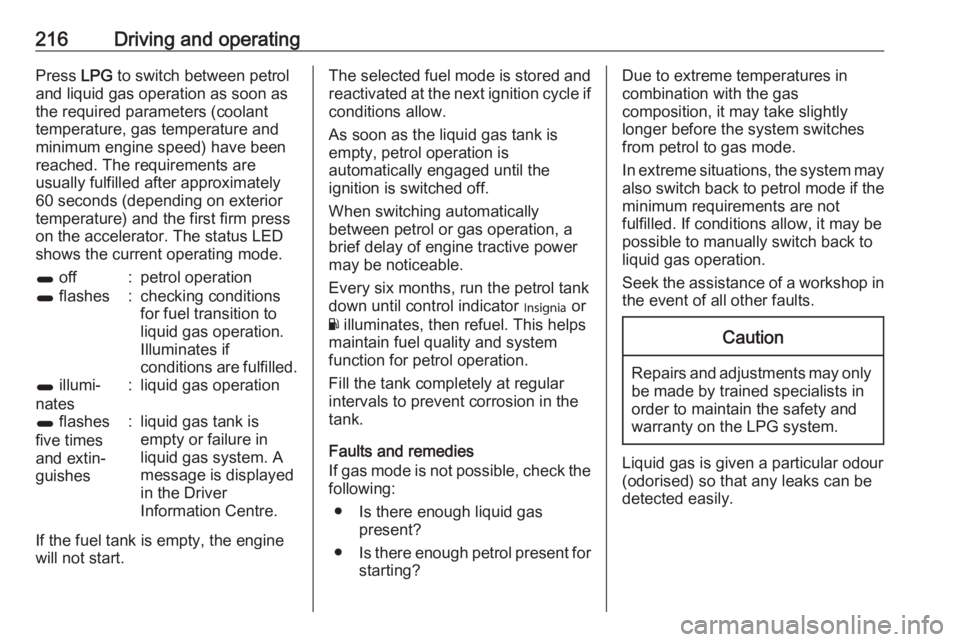
216Driving and operatingPress LPG to switch between petrol
and liquid gas operation as soon as
the required parameters (coolant
temperature, gas temperature and
minimum engine speed) have been
reached. The requirements are
usually fulfilled after approximately
60 seconds (depending on exterior
temperature) and the first firm press
on the accelerator. The status LED
shows the current operating mode.1 off:petrol operation1 flashes:checking conditions
for fuel transition to
liquid gas operation.
Illuminates if
conditions are fulfilled.1 illumi‐
nates:liquid gas operation1 flashes
five times
and extin‐
guishes:liquid gas tank is
empty or failure in
liquid gas system. A
message is displayed
in the Driver
Information Centre.
If the fuel tank is empty, the engine
will not start.
The selected fuel mode is stored and
reactivated at the next ignition cycle if conditions allow.
As soon as the liquid gas tank is
empty, petrol operation is
automatically engaged until the
ignition is switched off.
When switching automatically
between petrol or gas operation, a
brief delay of engine tractive power
may be noticeable.
Every six months, run the petrol tank
down until control indicator I or
Y illuminates, then refuel. This helps
maintain fuel quality and system
function for petrol operation.
Fill the tank completely at regular intervals to prevent corrosion in the
tank.
Faults and remedies
If gas mode is not possible, check the
following:
● Is there enough liquid gas present?
● Is there enough petrol present for
starting?Due to extreme temperatures in
combination with the gas
composition, it may take slightly
longer before the system switches
from petrol to gas mode.
In extreme situations, the system may also switch back to petrol mode if the
minimum requirements are not
fulfilled. If conditions allow, it may be
possible to manually switch back to
liquid gas operation.
Seek the assistance of a workshop in
the event of all other faults.Caution
Repairs and adjustments may only be made by trained specialists in
order to maintain the safety and
warranty on the LPG system.
Liquid gas is given a particular odour
(odorised) so that any leaks can be
detected easily.
Page 223 of 327

Driving and operating221
Bayonet adapter: Netherlands,
Norway, Spain, United Kingdom
EURO adapter: Spain
DISH adapter: Austria, Bosnia-
Herzegovina, Bulgaria, Croatia,
Czech Republic, Denmark, Estonia,
France, Greece, Hungary, Italy,
Latvia, Lithuania, Macedonia,
Poland, Portugal, Romania, Serbia,
Slovakia, Slovenia, Sweden,
Switzerland, Turkey, Ukraine
Fuel filler cap
Only use genuine fuel filler caps.
Diesel-engined and Ethanol-engined
vehicles have special fuel filler caps.
Fuel consumption - CO 2-
Emissions
The fuel consumption (combined) of the model Opel Insignia is within arange of 10.9 to 3.8 l/100 km.
Depending on country, the fuel
consumption is displayed in km/l. In
this case the fuel consumption
(combined) of the model Opel
Insignia is within a range of 9.2 to
26.3 km/l.
The CO 2 emission (combined) is
within a range of 252 to 99 g/km.
For the values specific for your
vehicle, refer to the EEC Certificate of Conformity provided with your vehicle
or other national registration
documents.
General information
The official fuel consumption and
specific CO 2 emission figures quoted
relate to the EU base model with standard equipment.
Page 253 of 327

Vehicle care251No.Circuit1Infotainment system/Info
display/Anti-theft alarm system2Body control unit3Body control unit4Infotainment system/Info
display5Infotainment system/Info
display/High beam assist6Cigarette lighter7Power outlet8Body control unit9Body control unit10Body control unit11Interior fan12–13–14Diagnostic connector15AirbagNo.Circuit16Central locking system/Tailgate17Air conditioning system18Transportation fuse19Memory20–21Instrument22Ignition/Central locking system/
Electronic key system23Body control unit24Body control unit25Steering wheel control26Power outlet load compartment
Power seats, No's. 12 and 13, have
an overload protection. The circuit will
be closed again after cooling down.
Load compartment fuse box
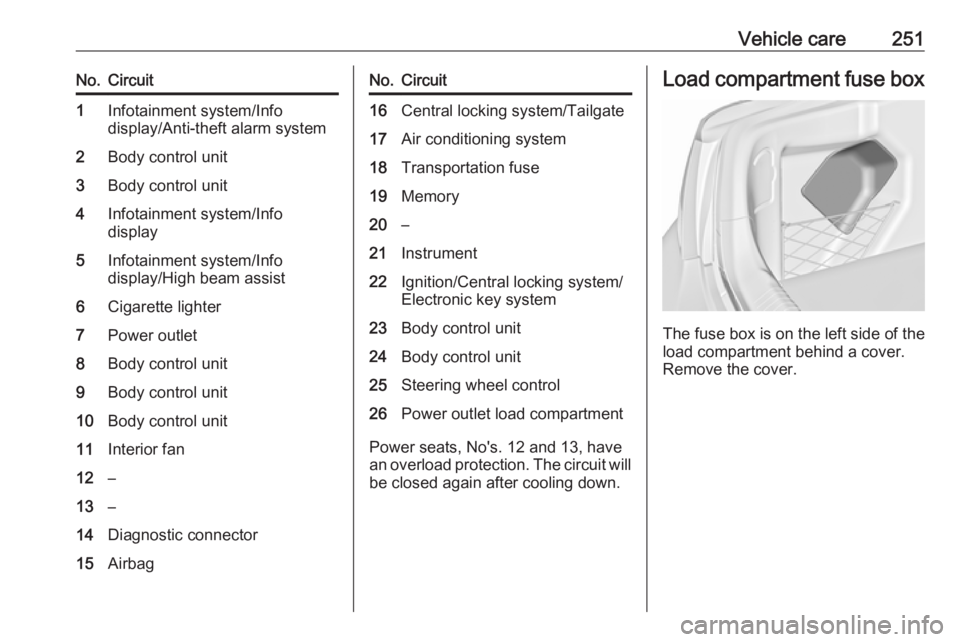
The fuse box is on the left side of the
load compartment behind a cover.
Remove the cover.
Page 257 of 327

Vehicle care255The tyre pressure information label
on the left door frame indicates the
original equipment tyres and the
correspondent tyre pressures.
The tyre pressure data refers to cold
tyres. It applies to summer and winter
tyres.
Always inflate the spare tyre to the
pressure specified for full load.
The ECO tyre pressure serves to
achieve the smallest amount of fuel
consumption possible.
Incorrect tyre pressures will impair
safety, vehicle handling, comfort and fuel economy and will increase tyre
wear.
Tyre pressures differ depending on
various options. For the correct tyre
pressure value, follow the procedure
below:
1. Identify drive axle and body style.
2. Identify the engine identifier code.
Engine data 3 284.
3. Identify the respective tyre.
The tyre pressure tables show all possible tyre combinations 3 295.For the tyres approved for your
vehicle, refer to the EEC Certificate of
Conformity provided with your vehicle or other national registration
documents.
The driver is responsible for correct
adjustment of tyre pressure.9 Warning
If the pressure is too low, this can
result in considerable tyre warm-
up and internal damage, leading to tread separation and even to tyre
blow-out at high speeds.
9 Warning
For specific tyres the
recommended tyre pressure as
shown in the tyre pressure table may exceed the maximum tyre
pressure as indicated on the tyre.
Never exceed the maximum tyre
pressure as indicated on the tyre.
If the tyre pressure shall be reduced
or increased on a vehicle with tyre
pressure monitoring system, switch
off ignition. After adjusting tyre
pressure switch on ignition and select
the according setting on the page
Tyre load in the Driver Information
Centre, 3 111.
Temperature dependency The tyre pressure depends on the
temperature of the tyre. During
driving, tyre temperature and
pressure increase. Tyre pressure
values provided on the tyre
information label and tyre pressure
chart are valid for cold tyres, which means at 20 °C.
The pressure increases by nearly
10 kPa for a 10 °C temperature
increase. This must be considered
when warm tyres are checked.
The tyre pressure value displayed in
the Driver Information Centre shows
the real tyre pressure. A cooled down tyre will show a decreased value,which does not indicate an air leak.
Page 258 of 327

256Vehicle careTyre pressure monitoring
system
The tyre pressure monitoring system
checks the pressure of all four wheels once a minute when vehicle speed
exceeds a certain limit.Caution
Tyre pressure monitoring system
warns just about low tyre pressure condition and does not replace
regular tyre maintenance by the
driver.
All wheels must be equipped with
pressure sensors and the tyres must
have the prescribed pressure.
Note
In countries where the tyre pressure monitoring system is legally
required, the use of wheels without
pressure sensors will invalidate the
vehicle type approval.
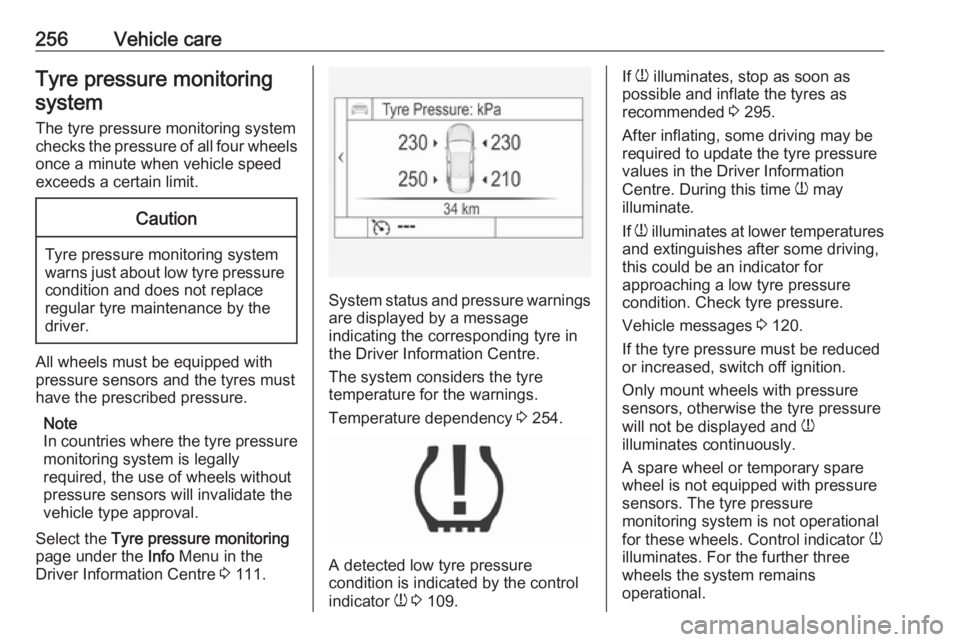
Select the Tyre pressure monitoring
page under the Info Menu in the
Driver Information Centre 3 111.
System status and pressure warnings
are displayed by a message
indicating the corresponding tyre in
the Driver Information Centre.
The system considers the tyre
temperature for the warnings.
Temperature dependency 3 254.
A detected low tyre pressure
condition is indicated by the control
indicator w 3 109.
If
w illuminates, stop as soon as
possible and inflate the tyres as
recommended 3 295.
After inflating, some driving may be
required to update the tyre pressure
values in the Driver Information
Centre. During this time w may
illuminate.
If w illuminates at lower temperatures
and extinguishes after some driving,
this could be an indicator for
approaching a low tyre pressure condition. Check tyre pressure.
Vehicle messages 3 120.
If the tyre pressure must be reduced or increased, switch off ignition.
Only mount wheels with pressure
sensors, otherwise the tyre pressure
will not be displayed and w
illuminates continuously.
A spare wheel or temporary spare
wheel is not equipped with pressure
sensors. The tyre pressure
monitoring system is not operational
for these wheels. Control indicator w
illuminates. For the further three
wheels the system remains
operational.
Page 259 of 327

Vehicle care257The use of commercially available
liquid tyre repair kits can impair the
function of the system. Factory-
approved repair kits can be used.
Operating electronic devices or being
close to facilities using similar wave
frequencies could disrupt the tyre
pressure monitoring system.
Each time the tyres are replaced tyre
pressure monitoring system sensors
must be dismounted and serviced.
For the screwed sensor replace valve core and sealing ring, for clipped
sensor replace complete valve stem.
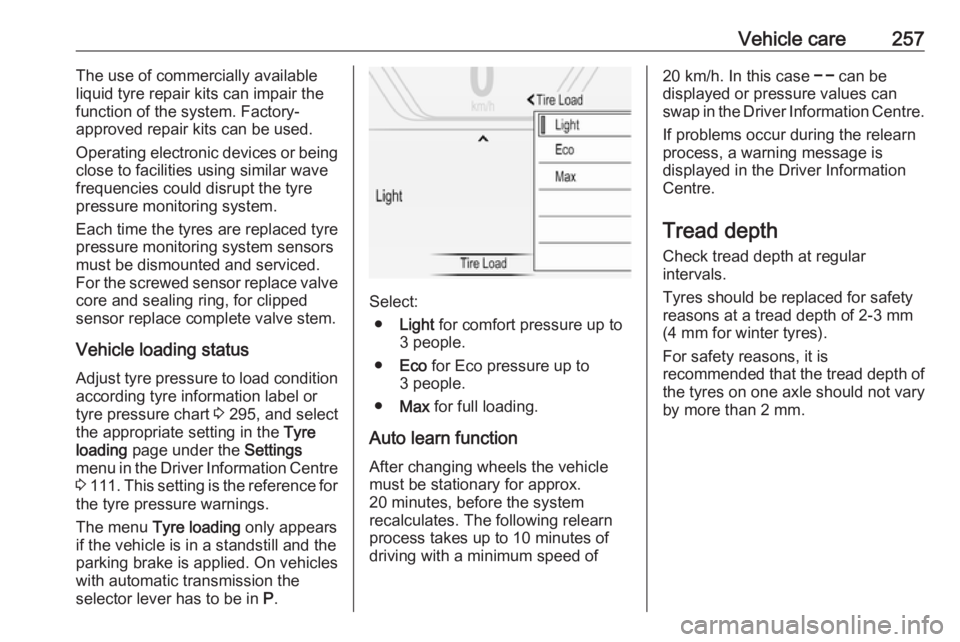
Vehicle loading status Adjust tyre pressure to load condition
according tyre information label or
tyre pressure chart 3 295, and select
the appropriate setting in the Tyre
loading page under the Settings
menu in the Driver Information Centre 3 111 . This setting is the reference for
the tyre pressure warnings.
The menu Tyre loading only appears
if the vehicle is in a standstill and the parking brake is applied. On vehicles
with automatic transmission the
selector lever has to be in P.
Select:
● Light for comfort pressure up to
3 people.
● Eco for Eco pressure up to
3 people.
● Max for full loading.
Auto learn function
After changing wheels the vehicle
must be stationary for approx.
20 minutes, before the system
recalculates. The following relearn
process takes up to 10 minutes of
driving with a minimum speed of
20 km/h. In this case $ can be
displayed or pressure values can
swap in the Driver Information Centre.
If problems occur during the relearn
process, a warning message is
displayed in the Driver Information
Centre.
Tread depthCheck tread depth at regular
intervals.
Tyres should be replaced for safety
reasons at a tread depth of 2-3 mm
(4 mm for winter tyres).
For safety reasons, it is
recommended that the tread depth of
the tyres on one axle should not vary
by more than 2 mm.