wheel OPEL INSIGNIA 2017 Manual user
[x] Cancel search | Manufacturer: OPEL, Model Year: 2017, Model line: INSIGNIA, Model: OPEL INSIGNIA 2017Pages: 327, PDF Size: 9.3 MB
Page 114 of 327
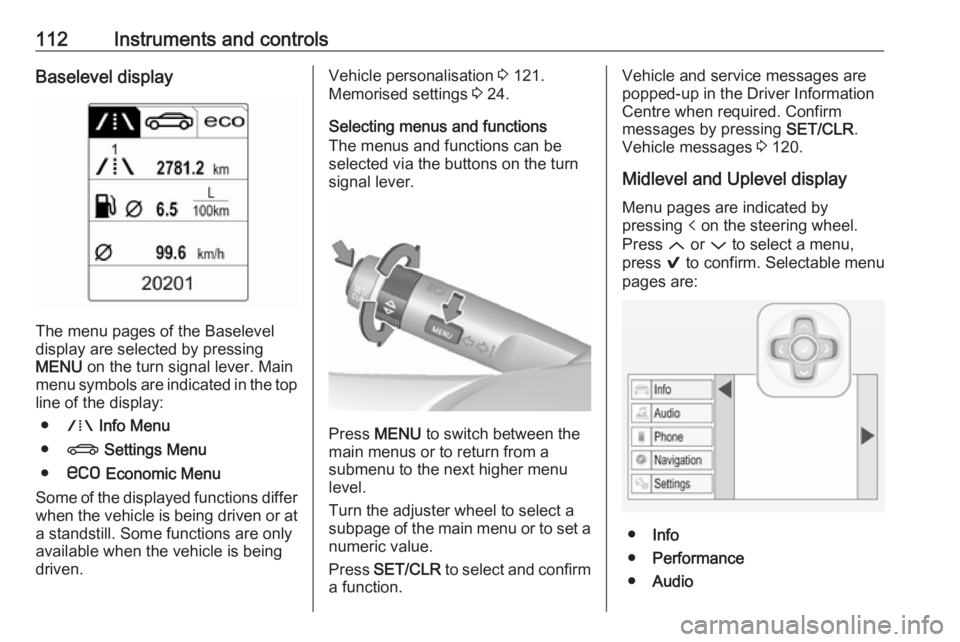
112Instruments and controlsBaselevel display
The menu pages of the Baselevel
display are selected by pressing
MENU on the turn signal lever. Main
menu symbols are indicated in the top line of the display:
● W Info Menu
● X Settings Menu
● s Economic Menu
Some of the displayed functions differ
when the vehicle is being driven or at
a standstill. Some functions are only
available when the vehicle is being
driven.
Vehicle personalisation 3 121.
Memorised settings 3 24.
Selecting menus and functions
The menus and functions can be
selected via the buttons on the turn
signal lever.
Press MENU to switch between the
main menus or to return from a
submenu to the next higher menu
level.
Turn the adjuster wheel to select a
subpage of the main menu or to set a
numeric value.
Press SET/CLR to select and confirm
a function.
Vehicle and service messages are
popped-up in the Driver Information
Centre when required. Confirm
messages by pressing SET/CLR.
Vehicle messages 3 120.
Midlevel and Uplevel display Menu pages are indicated by
pressing p on the steering wheel.
Press Q or P to select a menu,
press 9 to confirm. Selectable menu
pages are:
● Info
● Performance
● Audio
Page 115 of 327
Instruments and controls113●Phone
● Navigation
● Settings
Some of the displayed functions differ
when the vehicle is being driven or at
a standstill. Some functions are only
available when the vehicle is being
driven.
Uplevel instrument cluster can be
displayed as Sport mode or Tour
mode. See below: Settings Menu,
Display Themes.
Vehicle personalisation 3 121.
Memorised settings 3 24.
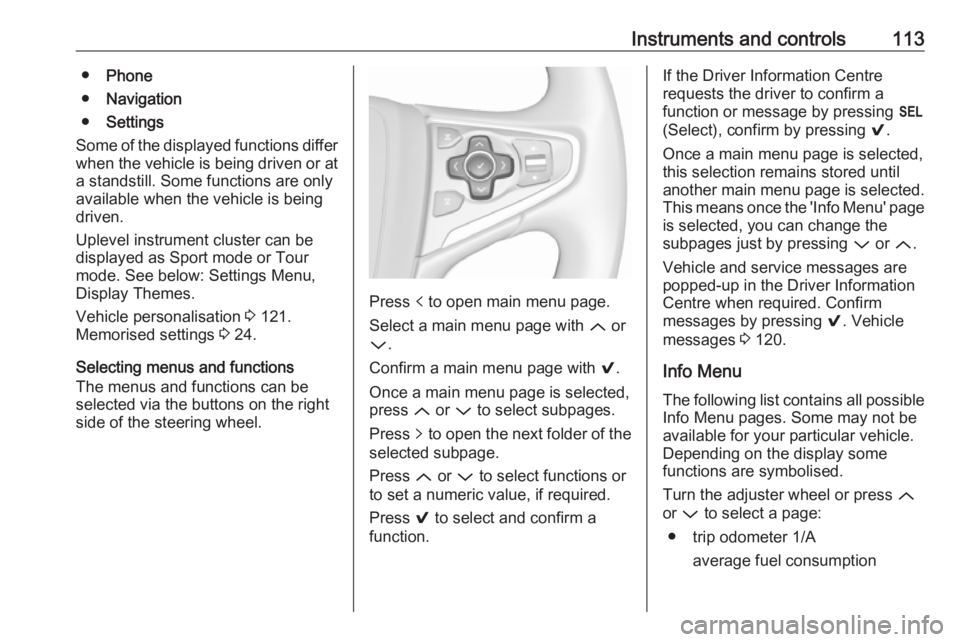
Selecting menus and functions
The menus and functions can be
selected via the buttons on the right
side of the steering wheel.
Press p to open main menu page.
Select a main menu page with Q or
P .
Confirm a main menu page with 9.
Once a main menu page is selected, press Q or P to select subpages.
Press q to open the next folder of the
selected subpage.
Press Q or P to select functions or
to set a numeric value, if required.
Press 9 to select and confirm a
function.
If the Driver Information Centre
requests the driver to confirm a
function or message by pressing H
(Select), confirm by pressing 9.
Once a main menu page is selected,
this selection remains stored until
another main menu page is selected.
This means once the 'Info Menu' page
is selected, you can change the
subpages just by pressing P or Q.
Vehicle and service messages are
popped-up in the Driver Information
Centre when required. Confirm
messages by pressing 9. Vehicle
messages 3 120.
Info Menu The following list contains all possible
Info Menu pages. Some may not be
available for your particular vehicle.
Depending on the display some
functions are symbolised.
Turn the adjuster wheel or press Q
or P to select a page:
● trip odometer 1/A average fuel consumption
Page 117 of 327
Instruments and controls115When the fuel level in the tank is low,
a message appears on the display
and control indicator i or Y in the
fuel gauge illuminates.
When the tank must be refuelled
immediately, a warning message
appears and remains on the display.
Additionally, control indicator i or
Y in the fuel gauge flashes 3 109.
Fuel range LPG version
Display of approximate fuel range
available with the remaining fuel in
each respective fuel tank of Petrol
and LPG fuel, along with a total range
of both fuel types together. Switch
between the modes by pressing
SET/CLR or 9.
Gasoline fuel level/LPG fuel level
Displays the fuel level for the fuel type not currently being used, e.g. in petrol
mode the fuel level for LPG is
displayed. A dedicated Driver
Information Centre cluster gauge
shows the fuel level for the fuel
currently being used.Instantaneous fuel consumption
Display of the instantaneous
consumption.
On vehicles with LPG engines,
instantaneous consumption is
indicated for the currently selected
mode, LPG or Petrol.
Remaining oil life
Indicates an estimate of the oil's
useful life. The number in % means the remaining of current oil life 3 102.
Tire pressure
Checks tyre pressure of all wheels
during driving 3 256.
Timer
To start and stop press 9. To reset,
press > and confirm Reset.
Traffic sign assistant
Displays the detected traffic signs for
the current route section 3 209.Following distance
Displays the distance in seconds to a preceding moving vehicle 3 195. If
Adaptive cruise control is active this
page shows the following distance
setting instead.
Battery voltage
Displays the vehicle battery voltage.
Top consumers
List of top comfort consumers
currently switched on is displayed in
descending order. Fuel saving
potential is indicated.
During sporadic driving conditions,
the engine will activate the heated
rear window automatically to increase the engine load. In this event, the
heated rear window is indicated as
one of the top consumers, without
activation by the driver.
Economy trend
Displays the average consumption
development over a distance of
50 km. Filled segments display the
consumption in 5 km steps and shows
the effect of topography or driving
behaviour on fuel consumption.
Page 119 of 327
Instruments and controls117Phone Menu
Phone menu enables managing and
performing of phone calls, scrolling
through contacts or operating
handsfree phoning.
See Infotainment manual.
Navigation Menu
Navigation menu enables route
guidance.
See Infotainment manual.
Settings Menu
The following list contains all possible Settings Menu pages. Some may not
be available for your particular
vehicle. Depending on the display
some functions are symbolised.
Turn the adjuster wheel or press Q
or P to select a page and follow the
instructions given in the submenus:
● units
● display themes
● info pages
● speed warning● tyre loading
● software information
Units
Press > while units page is displayed.
Select imperial or metric units by
pressing 9.
Display themes
Press > while display themes is
displayed. Select Sport or Touring mode by pressing 9. Sport mode
includes more vehicle information,
Tour mode includes more media information.
This setting is only available with
Uplevel display.
Info pages
Press > while Info pages is displayed.
A list of all items in the Info Menu is
displayed. Select the functions to be
displayed in the Info page by pressing
9 . Selected pages have a 9 in a
checkbox. Non viewable functions
have a blank checkbox. See Info
Menu above.Speed warning
The speed warning display allows
you to set a speed that you do not
want to exceed.
To set the speed warning, press >
while the page is displayed. Press
Q or P to adjust the value. Press
9 to set the speed. Once the speed
is set, this feature can be turned off by
pressing 9 while viewing this page. If
the selected speed limit is exceeded,
a pop-up warning is displayed with a
chime.
Tyre loading
The tyre pressure category according
to the actual tyre inflation pressure
can be selected 3 256.
Software information
Displays the open source software
information.
Valet mode
Some functions of the Driver
Information Centre and the Colour- Info-Display can be limited for some
drivers.
Page 122 of 327
120Instruments and controlsVehicle messagesMessages are indicated in the Driver
Information Centre, in some cases
together with a warning and signal
buzzer.
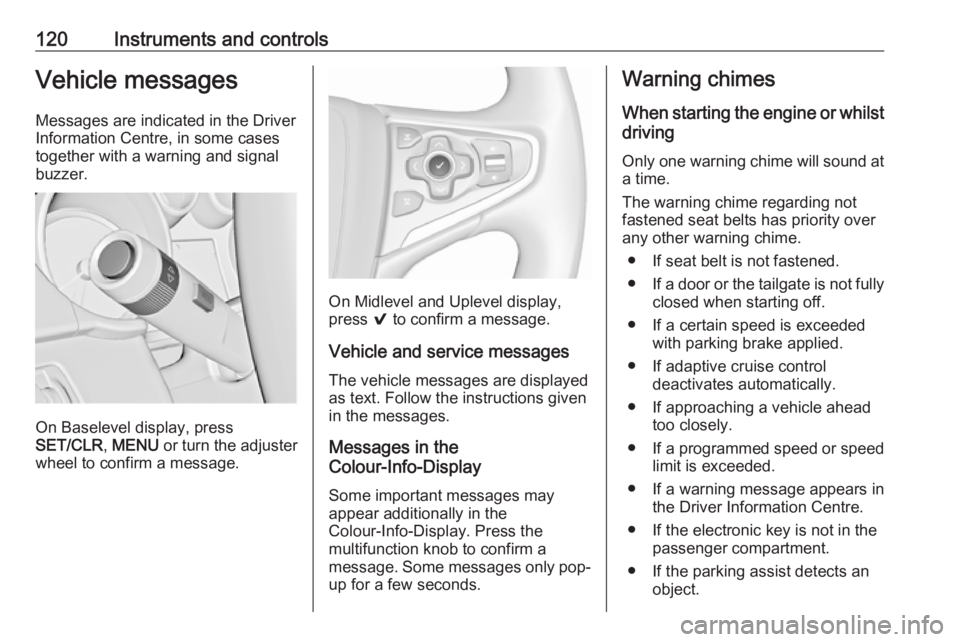
On Baselevel display, press
SET/CLR , MENU or turn the adjuster
wheel to confirm a message.
On Midlevel and Uplevel display,
press 9 to confirm a message.
Vehicle and service messages The vehicle messages are displayed
as text. Follow the instructions given
in the messages.
Messages in the
Colour-Info-Display
Some important messages may
appear additionally in the
Colour-Info-Display. Press the
multifunction knob to confirm a
message. Some messages only pop- up for a few seconds.
Warning chimes
When starting the engine or whilst driving
Only one warning chime will sound at
a time.
The warning chime regarding not
fastened seat belts has priority over
any other warning chime.
● If seat belt is not fastened.
● If a door or the tailgate is not fully
closed when starting off.
● If a certain speed is exceeded with parking brake applied.
● If adaptive cruise control deactivates automatically.
● If approaching a vehicle ahead too closely.
● If a programmed speed or speed
limit is exceeded.
● If a warning message appears in the Driver Information Centre.
● If the electronic key is not in the passenger compartment.
● If the parking assist detects an object.
Page 124 of 327
122Instruments and controls
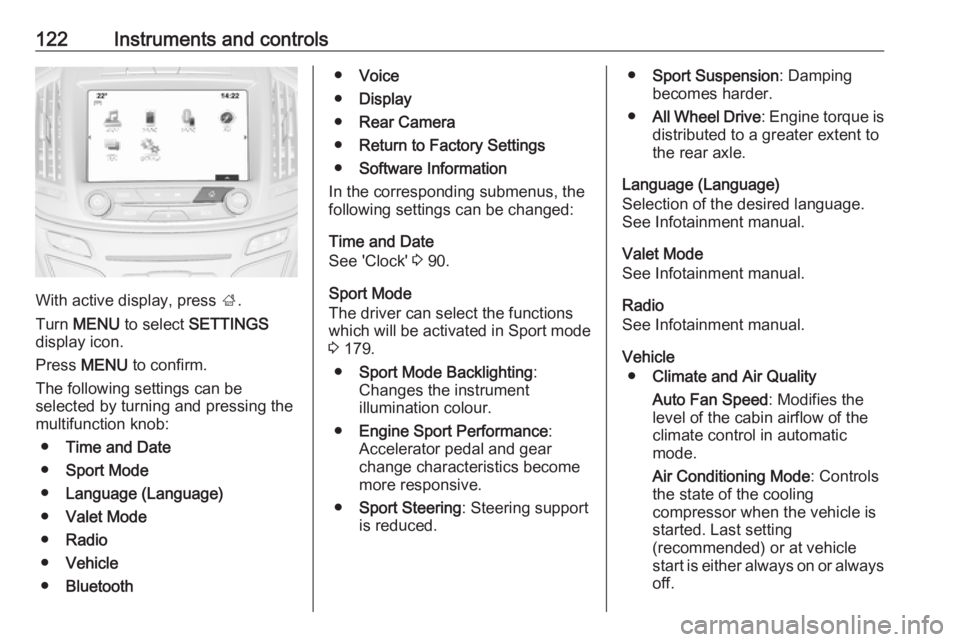
With active display, press ;.
Turn MENU to select SETTINGS
display icon.
Press MENU to confirm.
The following settings can be
selected by turning and pressing the
multifunction knob:
● Time and Date
● Sport Mode
● Language (Language)
● Valet Mode
● Radio
● Vehicle
● Bluetooth
●Voice
● Display
● Rear Camera
● Return to Factory Settings
● Software Information
In the corresponding submenus, the
following settings can be changed:
Time and Date
See 'Clock' 3 90.
Sport Mode
The driver can select the functions
which will be activated in Sport mode
3 179.
● Sport Mode Backlighting :
Changes the instrument
illumination colour.
● Engine Sport Performance :
Accelerator pedal and gear
change characteristics become
more responsive.
● Sport Steering : Steering support
is reduced.● Sport Suspension : Damping
becomes harder.
● All Wheel Drive : Engine torque is
distributed to a greater extent to the rear axle.
Language (Language)
Selection of the desired language.
See Infotainment manual.
Valet Mode
See Infotainment manual.
Radio
See Infotainment manual.
Vehicle ● Climate and Air Quality
Auto Fan Speed : Modifies the
level of the cabin airflow of the
climate control in automatic
mode.
Air Conditioning Mode : Controls
the state of the cooling
compressor when the vehicle is
started. Last setting
(recommended) or at vehicle
start is either always on or always
off.
Page 134 of 327
132LightingHeadlight range adjustment
Manual headlight range
adjustment
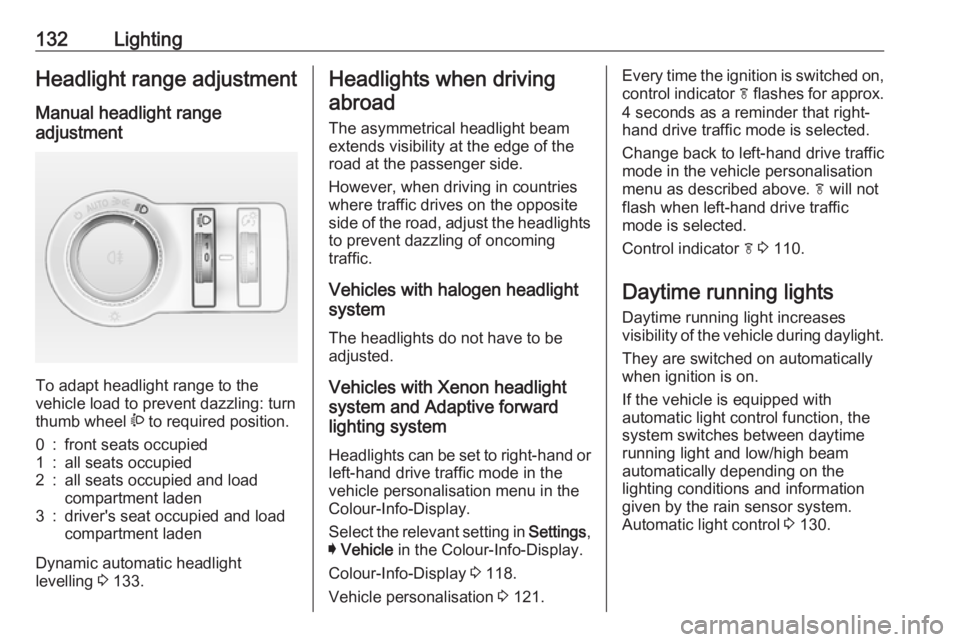
To adapt headlight range to the
vehicle load to prevent dazzling: turn
thumb wheel ? to required position.
0:front seats occupied1:all seats occupied2:all seats occupied and load
compartment laden3:driver's seat occupied and load
compartment laden
Dynamic automatic headlight
levelling 3 133.
Headlights when driving
abroad
The asymmetrical headlight beam
extends visibility at the edge of the
road at the passenger side.
However, when driving in countries
where traffic drives on the opposite
side of the road, adjust the headlights to prevent dazzling of oncoming
traffic.
Vehicles with halogen headlight
system
The headlights do not have to be adjusted.
Vehicles with Xenon headlight
system and Adaptive forward
lighting system
Headlights can be set to right-hand or left-hand drive traffic mode in the
vehicle personalisation menu in the
Colour-Info-Display.
Select the relevant setting in Settings,
I Vehicle in the Colour-Info-Display.
Colour-Info-Display 3 118.
Vehicle personalisation 3 121.Every time the ignition is switched on,
control indicator f flashes for approx.
4 seconds as a reminder that right- hand drive traffic mode is selected.
Change back to left-hand drive traffic
mode in the vehicle personalisation
menu as described above. f will not
flash when left-hand drive traffic
mode is selected.
Control indicator f 3 110.
Daytime running lights Daytime running light increases
visibility of the vehicle during daylight.
They are switched on automatically
when ignition is on.
If the vehicle is equipped with
automatic light control function, the
system switches between daytime running light and low/high beam
automatically depending on the
lighting conditions and information
given by the rain sensor system.
Automatic light control 3 130.
Page 135 of 327
Lighting133Adaptive forward lighting
The Adaptive forward lighting
functions are only available with Bi-
Xenon headlights. Light range, light
distribution and intensity of light are
variably triggered depending on the
light conditions, weather and road
type.
Some functions of the Adaptive
forward lighting can be deactivated or
activated in the vehicle
personalisation menu. Select the
relevant setting in Settings, I Vehicle
in the Info-Display. Vehicle
personalisation 3 121.
With the light switch in position
AUTO all lighting functions are
available.
The following functions are available
also with light switch in position 9:
● dynamic curve lighting ● corner lighting
● reversing function
● dynamic automatic headlight levellingPlaystreet lighting
Activated automatically at low speed
up to approx. 30 km/h. The light beam
is turned at an angle of 8° to the roadside.
Town lighting
Activated automatically at a speed
range between approx. 40 and
55 km/h and when street lights are
detected by the light sensor. The light
range is reduced by an extended light distribution.
Country lighting
Activated automatically at a speed
range between approx. 55 and
115 km/h. The beam of light and the
brightness is different between the left and the right side.
Motorway lighting Activated automatically at a speed
above approx. 115 km/h and minimal steering movements. It switches on
after a delay or immediately when the
vehicle is powerfully accelerated. The light beam is longer and brighter.Adverse weather lighting
Activated automatically up to a speed of approx. 70 km/h, when the rain
sensor recognizes condensation or
the wiper operates continuously. The
range, distribution and light intensity
is regulated variably depending on visibility.
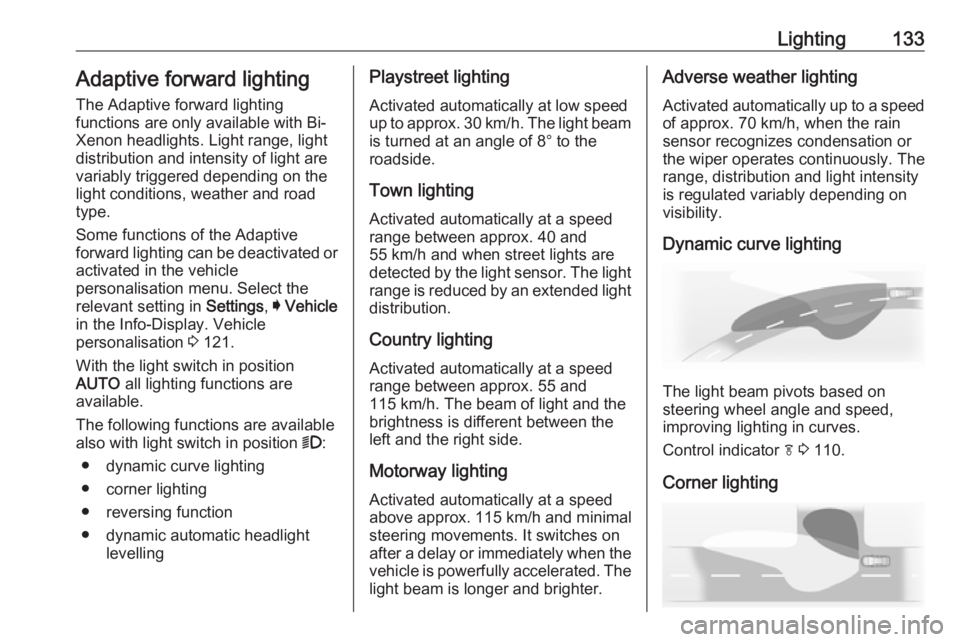
Dynamic curve lighting
The light beam pivots based on
steering wheel angle and speed,
improving lighting in curves.
Control indicator f 3 110.
Corner lighting
Page 137 of 327

Lighting135Dynamic automatic headlight
levelling
To prevent oncoming traffic from
dazzle, headlight levelling is
automatically adjusted based on
inclination information measured by
front and rear axle, acceleration or
deceleration and vehicle speed.
Fault in Adaptive forward lighting
system
When the system detects a failure in
the Adaptive forward lighting system,
the system moves to a preset position to avoid dazzling of oncoming traffic.
If this is not possible, the affected
headlight will be automatically
switched off. In any case, one
headlight will stay on. A warning is
displayed in the Driver Information
Centre.Hazard warning flashers
Operated by pressing ¨.
In the event of an accident with airbag
deployment the hazard warning
flashers are activated automatically.
Turn and lane-change
signalslever up:right turn signallever down:left turn signal
If the lever is moved past the
resistance point, the turn signal is
switched on constantly. When the
steering wheel moves back, the turn
signal is automatically deactivated.
For three flashes, e.g. when changing
lanes, press the lever until resistance
is felt and then release.
Page 139 of 327
Lighting137Reversing lights
The reversing light comes on when
the ignition is on and reverse gear is
selected.
Misted light covers The inside of the light housing may
mist up briefly in poor, wet and cold weather conditions, in heavy rain or
after washing. The mist disappears
quickly by itself; to help switch on the
headlights.Interior lighting
Instrument panel
illumination control
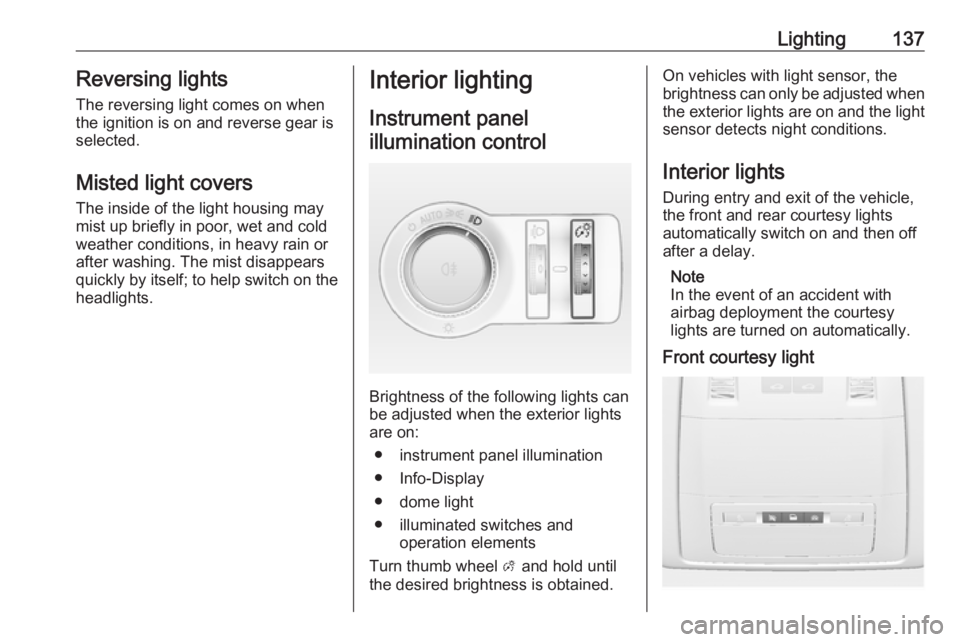
Brightness of the following lights can
be adjusted when the exterior lights
are on:
● instrument panel illumination
● Info-Display
● dome light
● illuminated switches and operation elements
Turn thumb wheel A and hold until
the desired brightness is obtained.
On vehicles with light sensor, the
brightness can only be adjusted when
the exterior lights are on and the light sensor detects night conditions.
Interior lights
During entry and exit of the vehicle,
the front and rear courtesy lights
automatically switch on and then off
after a delay.
Note
In the event of an accident with
airbag deployment the courtesy
lights are turned on automatically.
Front courtesy light