OPEL INSIGNIA BREAK 2017.5 Infotainment system
Manufacturer: OPEL, Model Year: 2017.5, Model line: INSIGNIA BREAK, Model: OPEL INSIGNIA BREAK 2017.5Pages: 127, PDF Size: 2.4 MB
Page 21 of 127

Basic operation21Touch and hold the respective
favourite screen button. The
favourites page is minimised and the list of albums is redisplayed.
Select the album you wish to store as
a favourite. The selected album is
stored as a favourite.
Example: Destination
Press ; and select NAV on the home
screen.
Select DESTINATION , select
RECENT in the interaction selector
bar and then touch the desired
destination from the list 3 49.
To store the address as a favourite, reveal the favourites list and scroll to
the respective favourites page.
Touch and hold the respective
favourite screen button. The selected
address is stored as a favourite.
Example: Telephone number
Press ; and select PHONE on the
home screen.
Select KEYPAD and enter the
number you wish to call 3 69.To store this number as a favourite,
reveal the favourites list and scroll tothe respective favourites page.
Touch and hold the respective
favourite screen button. The number
is stored as a favourite.
Retrieving favourites Display a favourites page (see above)
and scroll to the desired favourites
page (if necessary).
Note
Unavailable favourites are greyed
out.
Select the respective favourite screen
button. Depending on the kind of
favourite selected, a radio station or
track is played, a phone call is
initiated, a route is calculated or an
application is started.
Note
The active favourite is highlighted.
Editing favourites
Select SETTINGS on the home
screen, Radio and then Manage
Favourites . A three-row view of thefavourites list is displayed with the
editing options shown in the
interaction selector bar.
Renaming favourites
Scroll to the respective favourites
page.
Select the favourite you wish to edit. Select RENAME .
A keyboard opens up with the current favourite label text displayed in the
entry field as well as in the label
preview area.
Enter the new label text and select
Save . You are returned to the
favourites page.
Page 22 of 127
22Basic operationSelect H at the bottom of the screen
to reveal the interaction selector bar
and then select DONE to return to the
settings menu.
Deleting favourites
Scroll to the respective favourites
page.
Select the favourite you wish to
delete.
Select DELETE . The favourite and all
associated data are deleted.
Select DONE to return to the settings
menu.
Moving favourites
Scroll to the respective favourites page.
Drag the favourite you wish to move to its new position.
To store a favourite in a location
beyond the favourites page currently
visible, drag it to the p or q symbols
on top of the favourites page. The list
starts scrolling. To stop scrolling,
navigate back to the favourites page
area.Select DONE to confirm the action
and return to the settings menu.
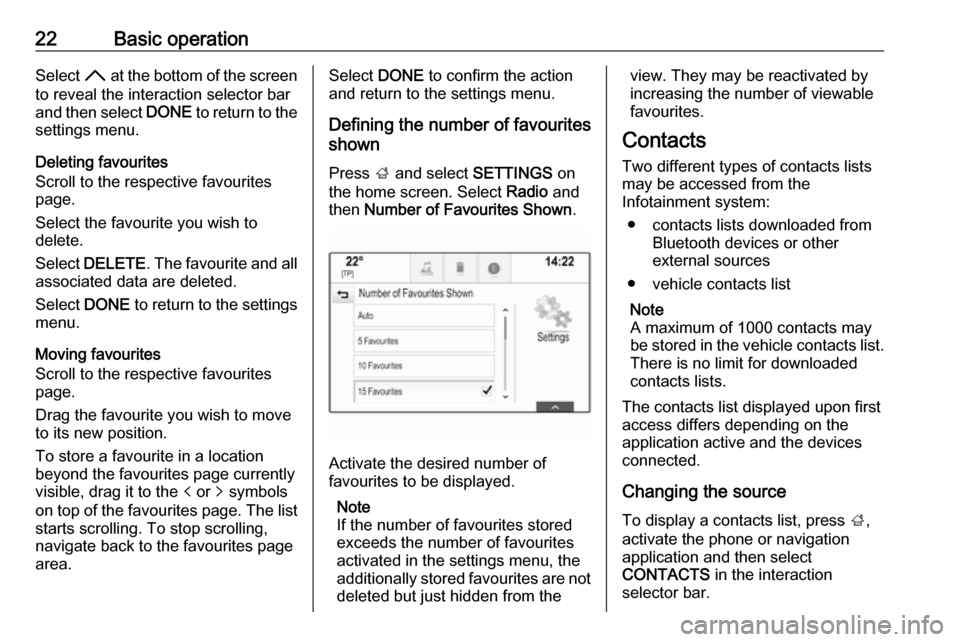
Defining the number of favourites
shown
Press ; and select SETTINGS on
the home screen. Select Radio and
then Number of Favourites Shown .
Activate the desired number of
favourites to be displayed.
Note
If the number of favourites stored
exceeds the number of favourites
activated in the settings menu, the
additionally stored favourites are not
deleted but just hidden from the
view. They may be reactivated by
increasing the number of viewable favourites.
Contacts Two different types of contacts lists
may be accessed from the
Infotainment system:
● contacts lists downloaded from Bluetooth devices or other
external sources
● vehicle contacts list
Note
A maximum of 1000 contacts may
be stored in the vehicle contacts list.
There is no limit for downloaded
contacts lists.
The contacts list displayed upon first
access differs depending on the
application active and the devices
connected.
Changing the source To display a contacts list, press ;,
activate the phone or navigation
application and then select
CONTACTS in the interaction
selector bar.
Page 23 of 127
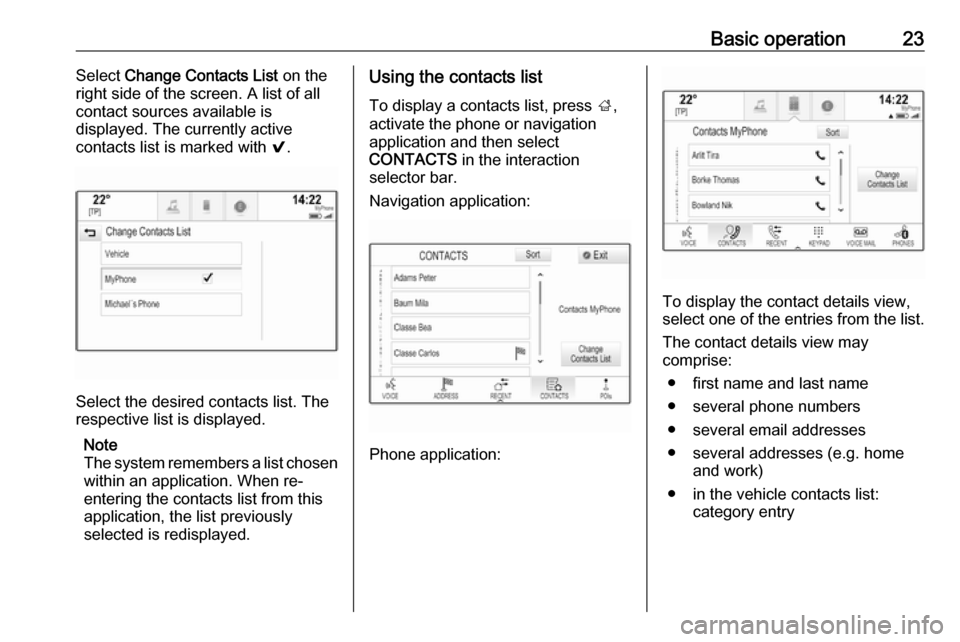
Basic operation23Select Change Contacts List on the
right side of the screen. A list of all contact sources available is
displayed. The currently active
contacts list is marked with 9.
Select the desired contacts list. The
respective list is displayed.
Note
The system remembers a list chosen within an application. When re-
entering the contacts list from this
application, the list previously
selected is redisplayed.
Using the contacts list
To display a contacts list, press ;,
activate the phone or navigation
application and then select
CONTACTS in the interaction
selector bar.
Navigation application:
Phone application:
To display the contact details view,
select one of the entries from the list.
The contact details view may
comprise:
● first name and last name● several phone numbers
● several email addresses
● several addresses (e.g. home and work)
● in the vehicle contacts list: category entry
Page 24 of 127
24Basic operation● in the vehicle contacts list: notesfield
● for POI entries: information on business hours, menu (e.g.
restaurant), prices etc.
Note
The data is ordered depending on
the application active, e.g. in the
phone application, the phone
numbers are displayed first.
Select the desired entry.
Adding new contacts
To add information from the
application menus to the vehicle
contacts list, open the respective
application.
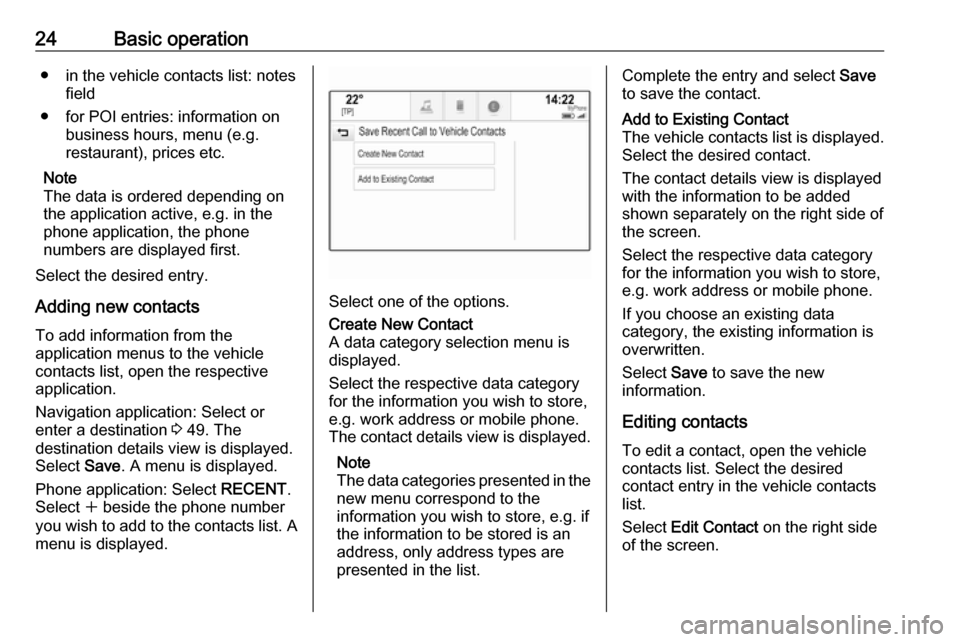
Navigation application: Select or
enter a destination 3 49. The
destination details view is displayed.
Select Save. A menu is displayed.
Phone application: Select RECENT.
Select w beside the phone number
you wish to add to the contacts list. A menu is displayed.
Select one of the options.
Create New Contact
A data category selection menu is displayed.
Select the respective data category
for the information you wish to store,
e.g. work address or mobile phone.
The contact details view is displayed.
Note
The data categories presented in the new menu correspond to the
information you wish to store, e.g. if
the information to be stored is an
address, only address types are
presented in the list.Complete the entry and select Save
to save the contact.Add to Existing Contact
The vehicle contacts list is displayed. Select the desired contact.
The contact details view is displayed with the information to be added
shown separately on the right side of
the screen.
Select the respective data category
for the information you wish to store,
e.g. work address or mobile phone.
If you choose an existing data
category, the existing information is
overwritten.
Select Save to save the new
information.
Editing contacts
To edit a contact, open the vehicle
contacts list. Select the desired
contact entry in the vehicle contacts
list.
Select Edit Contact on the right side
of the screen.
Page 25 of 127
Basic operation25
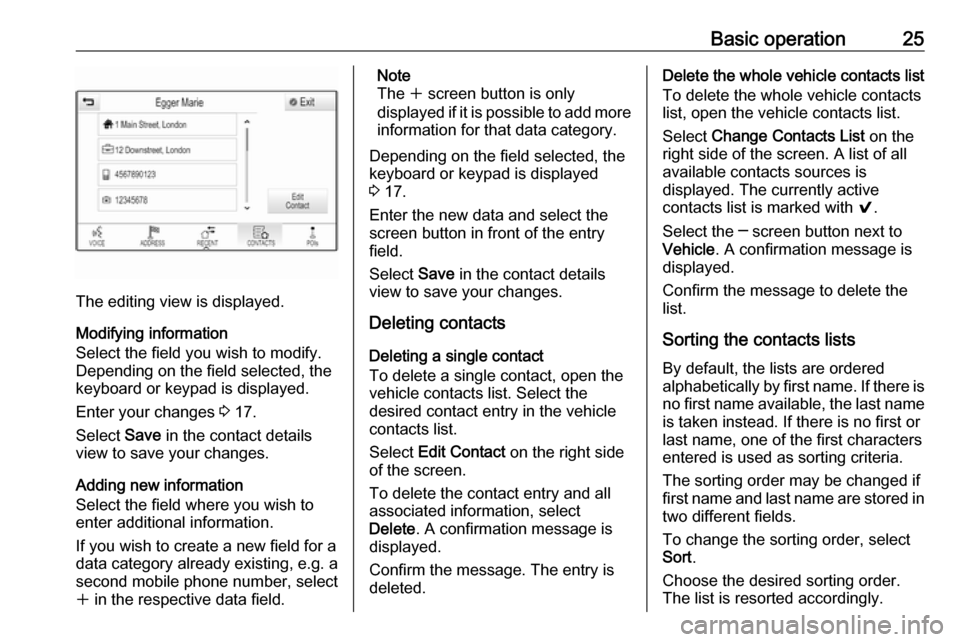
The editing view is displayed.
Modifying information
Select the field you wish to modify.
Depending on the field selected, the
keyboard or keypad is displayed.
Enter your changes 3 17.
Select Save in the contact details
view to save your changes.
Adding new information
Select the field where you wish to
enter additional information.
If you wish to create a new field for a
data category already existing, e.g. a
second mobile phone number, select
w in the respective data field.
Note
The w screen button is only
displayed if it is possible to add more information for that data category.
Depending on the field selected, the
keyboard or keypad is displayed
3 17.
Enter the new data and select the
screen button in front of the entry
field.
Select Save in the contact details
view to save your changes.
Deleting contacts
Deleting a single contact
To delete a single contact, open the
vehicle contacts list. Select the
desired contact entry in the vehicle
contacts list.
Select Edit Contact on the right side
of the screen.
To delete the contact entry and all
associated information, select
Delete . A confirmation message is
displayed.
Confirm the message. The entry is
deleted.Delete the whole vehicle contacts list
To delete the whole vehicle contacts
list, open the vehicle contacts list.
Select Change Contacts List on the
right side of the screen. A list of all available contacts sources is
displayed. The currently active
contacts list is marked with 9.
Select the ─ screen button next to Vehicle . A confirmation message is
displayed.
Confirm the message to delete the list.
Sorting the contacts lists By default, the lists are ordered
alphabetically by first name. If there is
no first name available, the last name
is taken instead. If there is no first or
last name, one of the first characters
entered is used as sorting criteria.
The sorting order may be changed if
first name and last name are stored in
two different fields.
To change the sorting order, select
Sort .
Choose the desired sorting order.
The list is resorted accordingly.
Page 26 of 127
26Basic operationTone settings
In the tone settings menu, the tone
characteristics can be set. The menu
may be accessed from each audio
main menu.
Note
A customised set of tone settings
may be stored as a favourite. For a
detailed description 3 18.
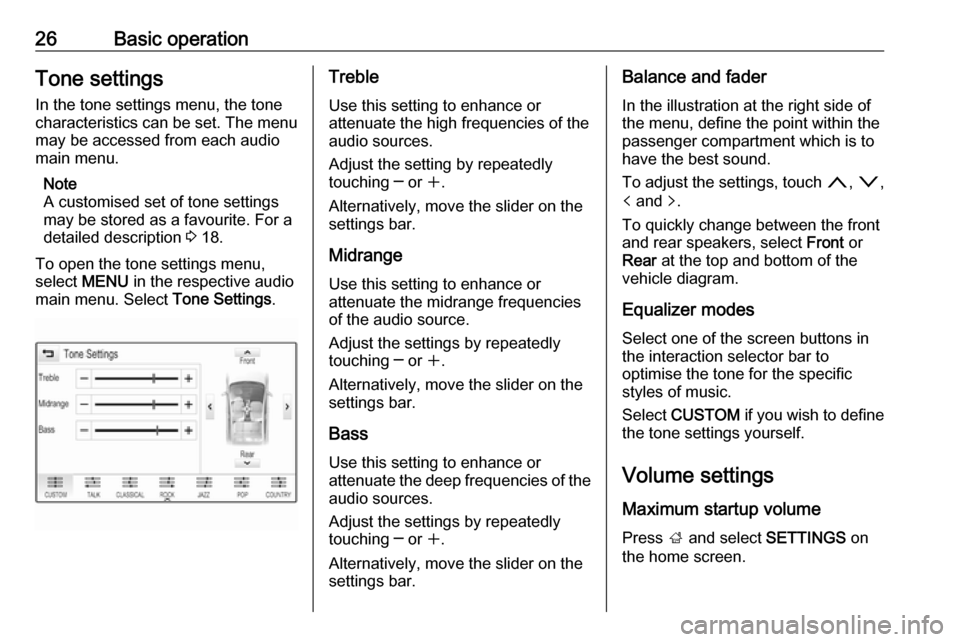
To open the tone settings menu,
select MENU in the respective audio
main menu. Select Tone Settings.Treble
Use this setting to enhance or
attenuate the high frequencies of the
audio sources.
Adjust the setting by repeatedly
touching ─ or w.
Alternatively, move the slider on the
settings bar.
MidrangeUse this setting to enhance or
attenuate the midrange frequencies
of the audio source.
Adjust the settings by repeatedly
touching ─ or w.
Alternatively, move the slider on the
settings bar.
Bass
Use this setting to enhance or
attenuate the deep frequencies of the audio sources.
Adjust the settings by repeatedly
touching ─ or w.
Alternatively, move the slider on the
settings bar.Balance and fader
In the illustration at the right side of the menu, define the point within thepassenger compartment which is to
have the best sound.
To adjust the settings, touch n, o ,
p and q.
To quickly change between the front
and rear speakers, select Front or
Rear at the top and bottom of the
vehicle diagram.
Equalizer modes Select one of the screen buttons in
the interaction selector bar to
optimise the tone for the specific
styles of music.
Select CUSTOM if you wish to define
the tone settings yourself.
Volume settings
Maximum startup volume
Press ; and select SETTINGS on
the home screen.
Page 27 of 127
Basic operation27Scroll through the list and select
Radio and then Maximum Start-Up
Volume .
Touch ─ or w to set the desired
volume.
Automatic volume adjustment
Press ; and select SETTINGS on
the home screen.
Scroll through the list and select
Radio and then Auto Volume .
To adjust the degree of volume adaptation, set Auto Volume to one of
the available options.
Off : no enhancement of volume with
increasing vehicle speed.
High : maximum enhancement of
volume with increasing vehicle
speed.
Volume of traffic announcements To adjust the volume of traffic
announcements, set the desired
volume while a traffic announcement
is given out by the system. The
respective setting is then stored by
the system.System settings
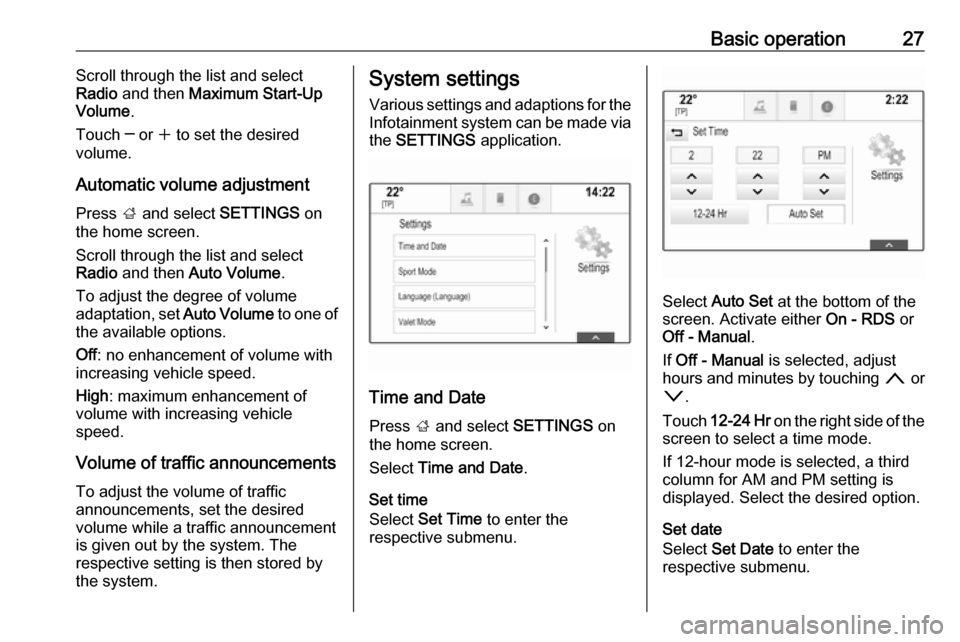
Various settings and adaptions for theInfotainment system can be made via
the SETTINGS application.
Time and Date
Press ; and select SETTINGS on
the home screen.
Select Time and Date .
Set time
Select Set Time to enter the
respective submenu.
Select Auto Set at the bottom of the
screen. Activate either On - RDS or
Off - Manual .
If Off - Manual is selected, adjust
hours and minutes by touching n or
o .
Touch 12-24 Hr on the right side of the
screen to select a time mode.
If 12-hour mode is selected, a third
column for AM and PM setting is
displayed. Select the desired option.
Set date
Select Set Date to enter the
respective submenu.
Page 28 of 127
28Basic operationNote
If date information is automatically
provided, this menu item is not
available.
Select Auto Set at the bottom of the
screen. Activate either On - RDS or
Off - Manual .
If Off - Manual is selected, adjust the
date by touching n or o.
Clock display
Select Clock Display to enter the
respective submenu.
To turn off the digital clock display in
the menus, select Off.
Language Press ; and select SETTINGS on
the home screen.
Scroll through the list and select
Language .
Note
The language currently active is
marked with 9.
Scroll through the list and select the
desired language.Valet mode
If valet mode is activated, all vehicle
displays are locked and no changes
may be performed within the system.
Note
Vehicle-related messages and the
rear view camera remain enabled.
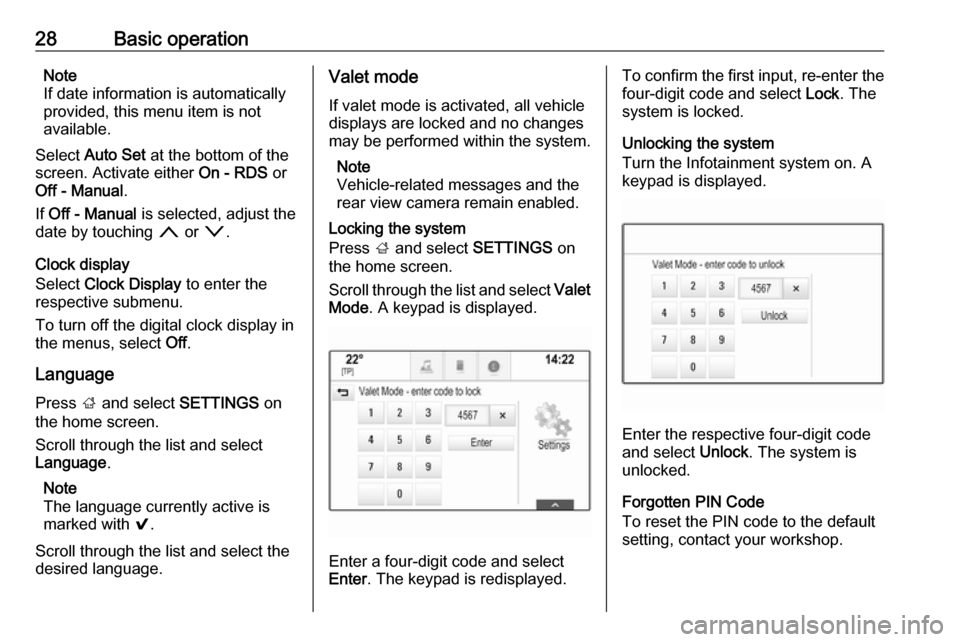
Locking the system
Press ; and select SETTINGS on
the home screen.
Scroll through the list and select Valet
Mode . A keypad is displayed.
Enter a four-digit code and select
Enter . The keypad is redisplayed.
To confirm the first input, re-enter the
four-digit code and select Lock. The
system is locked.
Unlocking the system
Turn the Infotainment system on. A
keypad is displayed.
Enter the respective four-digit code
and select Unlock. The system is
unlocked.
Forgotten PIN Code
To reset the PIN code to the default
setting, contact your workshop.
Page 29 of 127
Basic operation29DisplayPress ; and select SETTINGS on
the home screen.
Scroll through the list and select
Display .
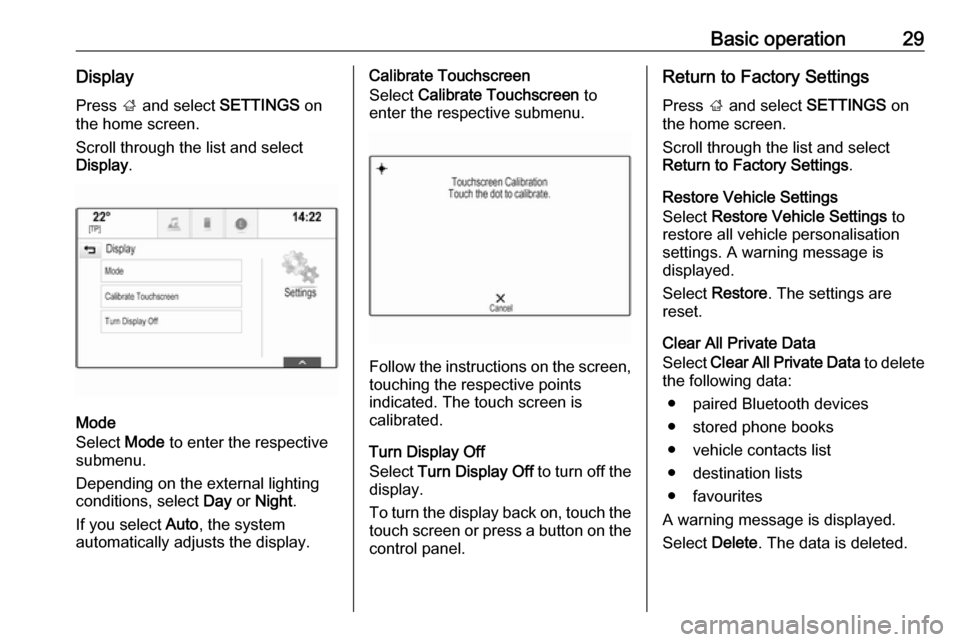
Mode
Select Mode to enter the respective
submenu.
Depending on the external lighting
conditions, select Day or Night .
If you select Auto, the system
automatically adjusts the display.
Calibrate Touchscreen
Select Calibrate Touchscreen to
enter the respective submenu.
Follow the instructions on the screen,
touching the respective points
indicated. The touch screen is
calibrated.
Turn Display Off
Select Turn Display Off to turn off the
display.
To turn the display back on, touch the touch screen or press a button on the
control panel.
Return to Factory Settings
Press ; and select SETTINGS on
the home screen.
Scroll through the list and select
Return to Factory Settings .
Restore Vehicle Settings
Select Restore Vehicle Settings to
restore all vehicle personalisation
settings. A warning message is
displayed.
Select Restore . The settings are
reset.
Clear All Private Data
Select Clear All Private Data to delete
the following data:
● paired Bluetooth devices● stored phone books
● vehicle contacts list
● destination lists
● favourites
A warning message is displayed.
Select Delete. The data is deleted.
Page 30 of 127
30Basic operationRestore Radio Settings
Select Restore Radio Settings to
reset the following data:
● tone settings
● volume settings
● speech settings
● application tray
● contacts sources
A warning message is displayed.
Select Restore . The settings are
reset.
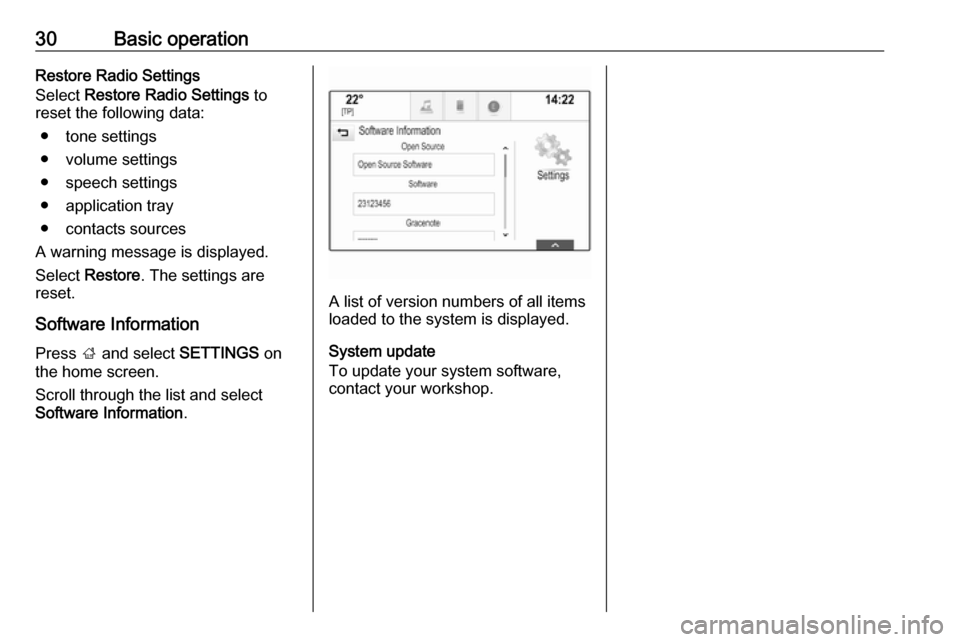
Software Information Press ; and select SETTINGS on
the home screen.
Scroll through the list and select
Software Information .
A list of version numbers of all items
loaded to the system is displayed.
System update
To update your system software, contact your workshop.