change time OPEL INSIGNIA BREAK 2017.5 Infotainment system
[x] Cancel search | Manufacturer: OPEL, Model Year: 2017.5, Model line: INSIGNIA BREAK, Model: OPEL INSIGNIA BREAK 2017.5Pages: 127, PDF Size: 2.4 MB
Page 7 of 127
Introduction7Important information on
operation and traffic safety9 Warning
Drive safely at all times. Only
operate the Infotainment system if the traffic conditions allow a safeusage.
In the interest of safety, it might be
appropriate to stop the vehicle
before operating the Infotainment
system (e.g. for entries of
addresses).
9 Warning
The usage of the navigation
system does not release the driver
from the responsibility for a
correct, vigilant attitude in road
traffic. Always follow the
applicable traffic rules.
9 Warning
In some areas one-way streets
and other roads and entrances
(e.g. pedestrian zones) that you
are not allowed to turn into are not marked on the map. In such areas
the Infotainment system may
issue a warning that must be
accepted. Here you must pay
particular attention to one-way
streets, roads and entrances that
you are not allowed to drive into.
Radio reception
Radio reception may be disrupted by
static, noise, distortion or loss of
reception due to:
● changes in distance from the transmitter
● multi-path reception due to reflection
● shadowing
Theft-deterrent feature
The Infotainment system is equipped
with an electronic security system for
the purpose of theft deterrence.
The Infotainment system therefore
functions only in your vehicle and is
worthless to a thief.
Page 37 of 127
External devices37Bluetooth device management
To change the Bluetooth device
connected, select MENU in the
interaction selector bar.
Select Manage Bluetooth Devices to
display the device list.
For a detailed description 3 67.
File formats Only devices formatted in the FAT32,
NTFS and HFS+ file systems are
supported.
Note
Some files may not be played
properly. This might be due to a
different recording format or the
condition of the file.
Files from online shops to which
Digital Rights Management (DRM)
has been applied cannot be played.
The Infotainment system can play the following audio and movie files stored
on external devices.
Audio files
The playable audio file formats are
MP3, WMA, AAC, M4A and AIF.When playing a file with ID3 tag
information, the Infotainment system
can display information, e.g. on the
track title and artist.
Movie files
The playable movie file formats are
AVI, MPG, MP4, XVID and WMV.
Common audio and video
combinations for mobile devices are
generally supported.
Playing audio Starting playback
If not connected, connect the device
3 36.
Press ; and select AUDIO on the
home screen.
Repeatedly select MEDIA in the
interaction selector bar to activate the desired media source.
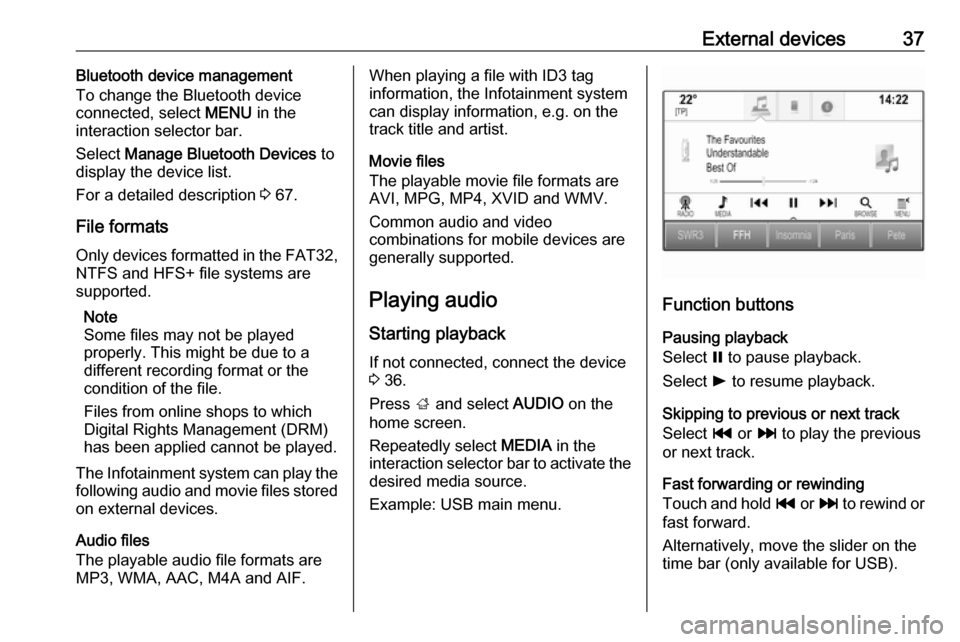
Example: USB main menu.
Function buttons
Pausing playback
Select = to pause playback.
Select l to resume playback.
Skipping to previous or next track
Select t or v to play the previous
or next track.
Fast forwarding or rewinding
Touch and hold t or v to rewind or
fast forward.
Alternatively, move the slider on the
time bar (only available for USB).
Page 39 of 127

External devices39Alternatively, move the slider on the
time bar.
Video menu
To display the video menu, select
MENU in the interaction selector bar.
Using smartphone applications
The phone projection applications
Apple CarPlay™ and Android™ Auto
display selected apps from your
smartphone on the Infotainment
screen and allow their operation
directly via the Infotainment controls.
Check with the device's manufacturer
if this function is compatible with your smartphone and if this application is
available in the country you are in.
Preparing the smartphone
Android phone: Download the
Android Auto app to your smartphone from the Google Play™ Store.
iPhone ®
: Make sure Siri ®
is activated
on your smartphone.Activating phone projection in the
settings menu
Press ; and then select SETTINGS
on the home screen.
Scroll through the list and select
Apple CarPlay or Android Auto to
display a submenu.
Make sure the respective application
is activated.
To display a list of all devices
registered for this function, select
Manage Devices .
Connecting the mobile phone Connect the smartphone to the USBport 3 36.
Starting phone projection To start the phone projection function,
press ; and then select
PROJECTION .
Note
If the application is recognised by
the Infotainment system, the
application icon may change to
Apple CarPlay or Android Auto .To start the function, you can
alternatively press and hold ; for a
few seconds.
The phone projection screen
displayed depends on your
smartphone and software version.
Returning to the Infotainment
screen
Press ;.
Using apps Via the SHOP application, external
apps can be downloaded to the
Infotainment system.
User registration
When first starting the SHOP
application, a user registration is
required.
Press ; and then select SHOP.
Follow the instructions on the screen: 1. Start the registration process.
2. Enter your first and last name.
Page 43 of 127
Navigation43Important informationTMC traffic information system and
dynamic route guidance
The TMC traffic information system
receives all current traffic information from TMC radio stations. This
information is included in the
calculation of the overall route. During
this process, the route is planned so that traffic problems related to pre-
selected criteria are avoided.
If there is a traffic problem during
active route guidance, depending on
the pre-settings, a message appears
as to whether the route should be
changed.
TMC traffic information is displayed in
the map display as symbols or as
detailed text on the TMC messages
menu.
To be able to use TMC traffic
information, the system must receive
TMC stations in the relevant region.
The TMC traffic stations can be
selected in the navigation menu
3 43.Map data
All required map data is stored within
the Infotainment system. To update
your map software via the USB port,
contact your workshop.
Usage
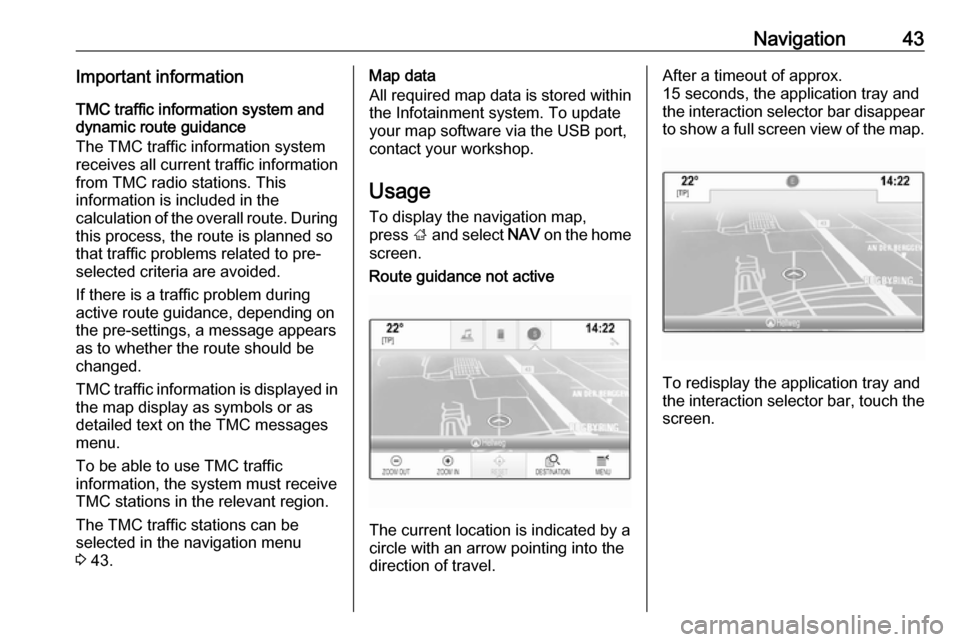
To display the navigation map,
press ; and select NAV on the home
screen.Route guidance not active
The current location is indicated by a
circle with an arrow pointing into the
direction of travel.
After a timeout of approx.
15 seconds, the application tray and
the interaction selector bar disappear
to show a full screen view of the map.
To redisplay the application tray and
the interaction selector bar, touch the
screen.
Page 58 of 127
58NavigationIf this station is no longer received,
the system switches back to the
Auto function.
Route settings
Select MENU in the interaction
selector bar and then select Routing
Preferences to display the respective
submenu.
Route style
To define by what criteria a route may
be calculated, select Route Style.
Select Fast, Eco Friendly or Short
from the list.
If Eco Friendly has been selected, the
eco-friendly route style may be
adapted to the load of the vehicle.
Select Edit Eco Profile to display the
respective submenu.
Repeatedly select Roof Load and
Trailer to toggle between the
available load options. Set the
options as needed.
Road selection
Select from the list which road types
may be included in the calculation of
the route.Route modification
To modify the route during active
route guidance, touch the arrow
symbol indicating your next turning
manoeuvre on the right side of the
screen.
The route guidance menu is
displayed.
Note
The route guidance menu may only
be displayed if route guidance is
active.
The route guidance menu provides
additional options to change route
settings during active route guidance.
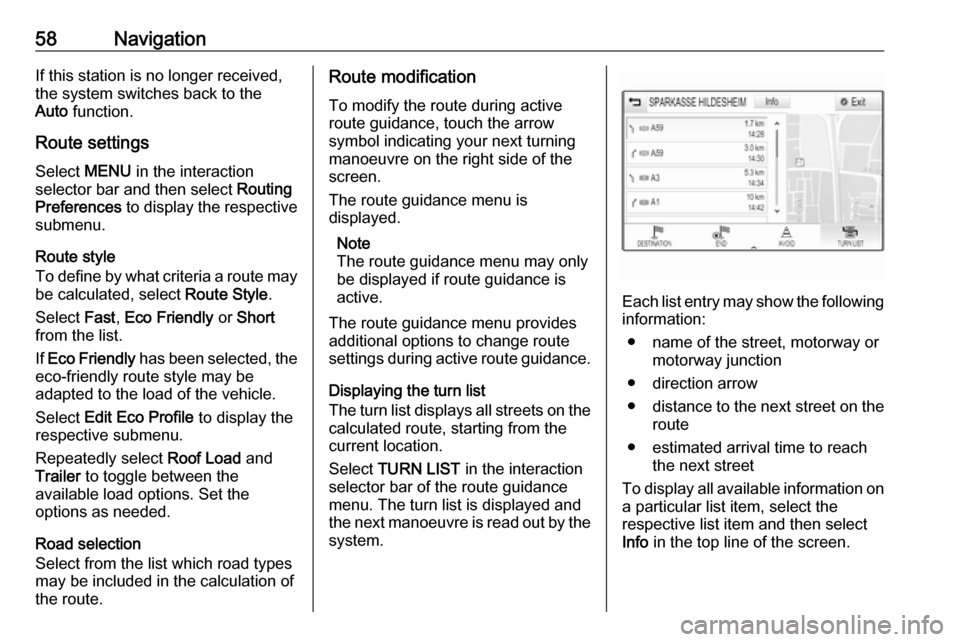
Displaying the turn list
The turn list displays all streets on the
calculated route, starting from the
current location.
Select TURN LIST in the interaction
selector bar of the route guidance
menu. The turn list is displayed and
the next manoeuvre is read out by the
system.
Each list entry may show the following
information:
● name of the street, motorway or motorway junction
● direction arrow
● distance to the next street on the
route
● estimated arrival time to reach the next street
To display all available information on a particular list item, select the
respective list item and then select
Info in the top line of the screen.
Page 59 of 127
Navigation59Excluding streets from route
guidance
After route guidance has been
started, you may exclude streets from
the previously calculated route. The
route is then recalculated bypassing
the streets excluded.
Select AVOID in the interaction
selector bar of the route guidance
menu. The turn list is displayed.
Select the street, motorway or
motorway junction you wish to avoid.
You are prompted with a message.
Select the desired distance option.
The respective street or motorway is displayed in the Avoided Areas
section on top of the turn list indicated
by a red 9.
Note
The Avoided Areas section also
comprises roads automatically
avoided by the system due to traffic
incidents.
To reinclude the avoided street or
motorway into the route, deselect the
respective list item.Displaying the waypoint list
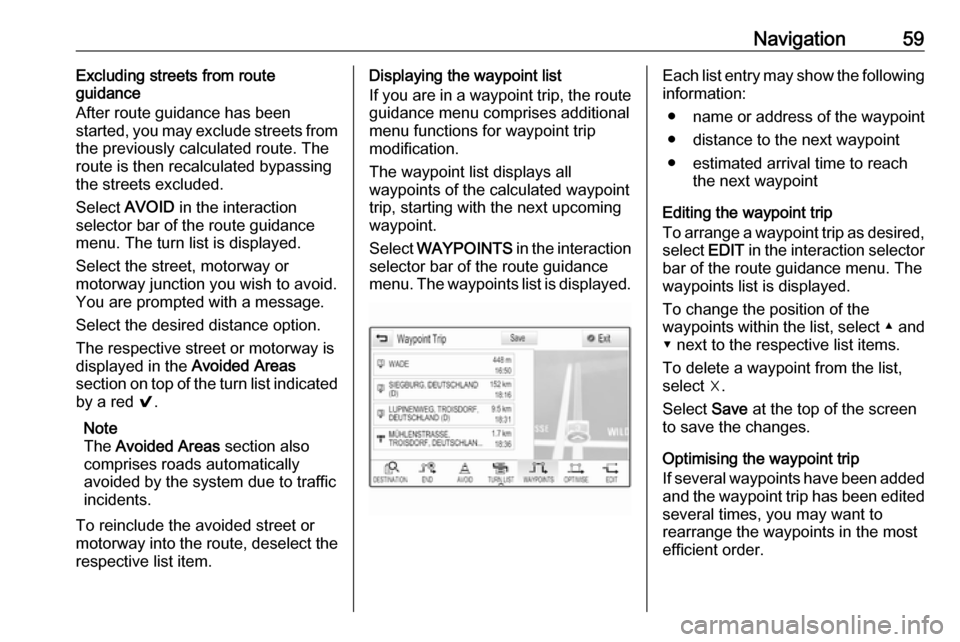
If you are in a waypoint trip, the route guidance menu comprises additional
menu functions for waypoint trip
modification.
The waypoint list displays all
waypoints of the calculated waypoint
trip, starting with the next upcoming
waypoint.
Select WAYPOINTS in the interaction
selector bar of the route guidance
menu. The waypoints list is displayed.Each list entry may show the following information:
● name or address of the waypoint
● distance to the next waypoint
● estimated arrival time to reach the next waypoint
Editing the waypoint trip
To arrange a waypoint trip as desired,
select EDIT in the interaction selector
bar of the route guidance menu. The
waypoints list is displayed.
To change the position of the
waypoints within the list, select ▲ and
▼ next to the respective list items.
To delete a waypoint from the list,
select ☓.
Select Save at the top of the screen
to save the changes.
Optimising the waypoint trip
If several waypoints have been added
and the waypoint trip has been edited
several times, you may want to
rearrange the waypoints in the most
efficient order.
Page 62 of 127
62Speech recognitionE.g., if the display is currently set to
English and you want to enter the
name of a city located in France, you
need to change the display language
to French.
Exceptions: If you want to enter
addresses in Belgium, you may
optionally change the display
language to French or Dutch. For
addresses in Switzerland you may
optionally change the display
language to French, German, or
Italian.
For changing the display language,
see "Language" in chapter "System
settings" 3 27.Input order for destination addresses
The order in which the parts of an
address need to be entered using the speech recognition system is
dependent on the country where the
destination is located.
● Austria, Germany:
● Belgium, France, Great Britain:
● Denmark, Italy, Netherlands, Poland, Portugal, Russia, Spain,
Switzerland, Turkey:
Setting up the speech recognition
Several settings and adaptions for the embedded speech recognition of the
Infotainment system can be
performed.
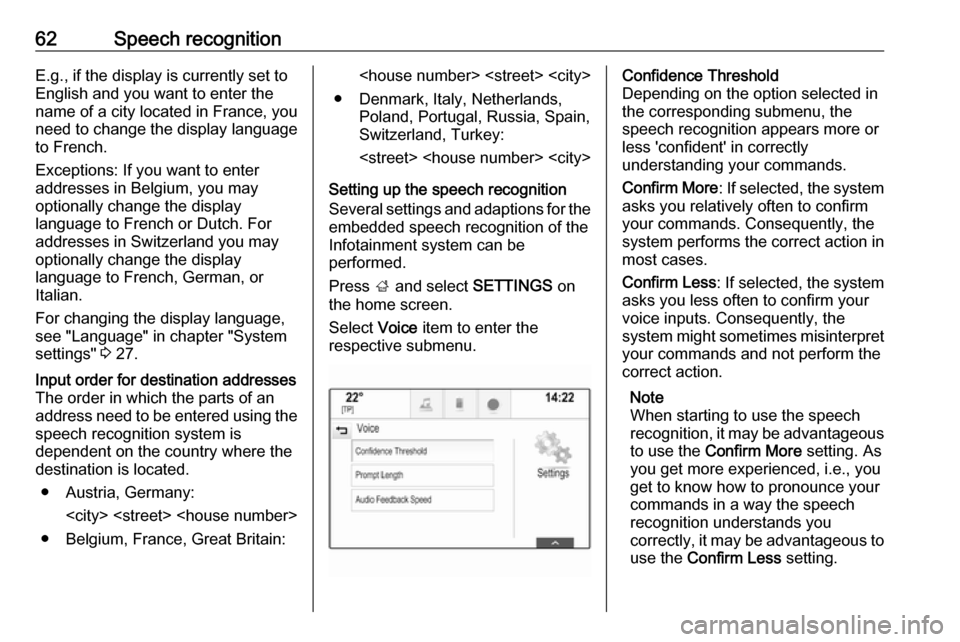
Press ; and select SETTINGS on
the home screen.
Select Voice item to enter the
respective submenu.Confidence Threshold
Depending on the option selected in
the corresponding submenu, the
speech recognition appears more or
less 'confident' in correctly
understanding your commands.
Confirm More : If selected, the system
asks you relatively often to confirm your commands. Consequently, the
system performs the correct action in most cases.
Confirm Less : If selected, the system
asks you less often to confirm your
voice inputs. Consequently, the
system might sometimes misinterpret your commands and not perform the
correct action.
Note
When starting to use the speech
recognition, it may be advantageous
to use the Confirm More setting. As
you get more experienced, i.e., you
get to know how to pronounce your
commands in a way the speech
recognition understands you
correctly, it may be advantageous to
use the Confirm Less setting.
Page 64 of 127

64Speech recognitionAdjusting the volume of voice
prompts
Press ! or # on the steering wheel
upwards (increase volume) or
downwards (decrease volume).
Interrupting a voice prompt
As an experienced user, you can
interrupt a voice prompt by briefly
pressing w on the steering wheel.
A beep is heard immediately, the
speech recognition symbol changes
to red, and a command can be stated
without having to wait.
Cancelling a dialogue sequence
There are various ways to cancel a
dialogue sequence and to deactivate
the speech recognition:
● Say " Cancel" or "Exit".
● Press n on the steering wheel.
● If the speech recognition session
was started via the VOICE
screen button on the centre
display, you may alternatively:
● Press ; on the control panel.
● Select m or Exit in the help
menu.In the following situations, a dialogue
sequence is automatically cancelled:
● If you do not say any command for a certain period of time (by
default you are prompted three times to say a command).
● If you say commands that are not
recognised by the system (by
default you are prompted three
times to say a correct command).
Operation via speech commands
The speech recognition can
understand commands that are either naturally stated in sentence form, or
direct commands stating the
application and the action.
For best results: ● Listen for the voice prompt and wait for the beep before saying a
command or replying.
● Say " Help" or read the example
commands on the screen.● The voice prompt can be interrupted by pressing w again.
● Wait for the beep and then speak
the command naturally, not toofast, not too slow. Use short and
direct commands.
Usually commands can be spoken in
a single command. For example,
"Call David Smith at work", "Play"
followed by the artist or song name,
"Tune to" followed by the radio
waveband and frequency/station
name, or "Find address" followed by
the address e.g. "123 Main Road,
London".
In case of complex commands or
when information is missing, the
system starts a dialogue sequence.
When searching for a "Point of
Interest", only major chains may be
selected by name. Chains are
businesses with at least 20 locations.
For other POIs, say the name of a
category, e.g. "Restaurants",
"Shopping centres", or "Hospitals".
If you say "Phone" or "Phone
commands", the system understands
that a phone call is requested and
responds with relevant questions until
Page 67 of 127

Phone67interference is caused by the
mobile phone or if dangerous
situations can occur.
Bluetooth
The Phone portal is certified by the
Bluetooth Special Interest Group
(SIG).
You will find further information about the specification on the internet at
http://www.bluetooth.com
Bluetooth connection
Bluetooth is a radio standard for the
wireless connection of e.g. mobile
phones or other devices.
To be able to set up a Bluetooth
connection to the Infotainment
system, the Bluetooth function of the
Bluetooth device must be activated.
For further information, please
consult the operating instructions for
the Bluetooth device.
Via the Bluetooth settings menu,
pairing (PIN code exchange between
Bluetooth device and Infotainment
system) and connecting of the
Bluetooth devices to the Infotainment
system are carried out.
Bluetooth settings menu
Press ; and select SETTINGS on
the home screen.
Select Bluetooth to display the
respective submenu.
Pairing a device
Important information ● Up to five devices can be paired to the system.
● Only one paired device can be connected to the Infotainment
system at a time.
● Pairing normally only needs to be
carried out once, unless the
device is deleted from the list of
paired devices. If the device has
been connected previously, theInfotainment system
automatically establishes a
connection.
● Bluetooth operation considerably
drains the device's battery.
Therefore, connect the device to
the USB port for charging.
Pairing via the Settings application 1. Press ; and select SETTINGS
on the home screen.
Select Bluetooth to display the
respective submenu.
2. Select Pair Device .
Alternatively, select Device
Management to display the
device list and then select Pair
Device .
3. A message is displayed on the Infotainment system indicating
the name and PIN code of the
Infotainment system.
4. Start Bluetooth searching on the Bluetooth device to be paired.
5. Confirm the pairing procedure: ● If SSP (secure simple pairing) is supported:
Page 111 of 127
External devices111Picture menuSelect Menu in the bottom line of the
screen to display the Picture Menu.
Slide show time
Select Slide Show Time to display a
list of possible time sequences.
Activate the desired time sequence in which each picture is supposed to be
displayed in a slide show.
Clock and temperature display
To display time and temperature in
full screen mode, activate Clock.
Temp. Display .
Display settings
Select Display Settings to open a
submenu for the adjustment of
brightness and contrast.
Touch + or - to adjust the settings.
Playing movies
You can view movies from a USB device connected to the USB port.
Note
For your safety, the movie function is
not available while driving.
Activating the movie function
If the device is not yet connected to
the Infotainment system, connect the
device 3 107.
Press ; and then select GALLERY
to open the media main menu.
Touch m to open the movie main
menu and then select the desired
folder and/or movie.
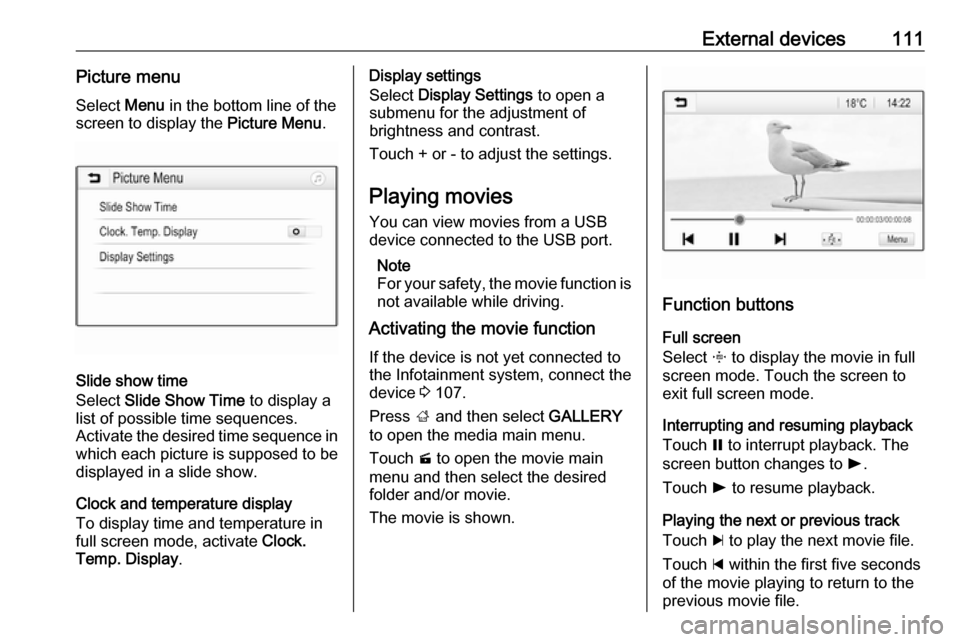
The movie is shown.
Function buttons
Full screen
Select x to display the movie in full
screen mode. Touch the screen to
exit full screen mode.
Interrupting and resuming playback
Touch = to interrupt playback. The
screen button changes to l.
Touch l to resume playback.
Playing the next or previous track
Touch c to play the next movie file.
Touch d within the first five seconds
of the movie playing to return to the
previous movie file.