ESP OPEL INSIGNIA BREAK 2017.5 Manual user
[x] Cancel search | Manufacturer: OPEL, Model Year: 2017.5, Model line: INSIGNIA BREAK, Model: OPEL INSIGNIA BREAK 2017.5Pages: 303, PDF Size: 8.46 MB
Page 66 of 303

64Seats, restraintsIL:suitable for particular ISOFIX restraint systems of the 'specific-vehicle', 'restricted' or 'semi-universal' categories.
The ISOFIX restraint system must be approved for the specific vehicle type (refer to the vehicle type list of the child restraint system)IUF:suitable for ISOFIX forward-facing child restraint systems of universal category approved for use in this weight classX:no ISOFIX child restraint system approved in this weight class1:move seat forwards as far as necessary and adjust seat backrest inclination as far as necessary to a vertical positionto ensure that the belt runs forwards from the upper anchorage point2:move seat height adjustment upwards as far as necessary and adjust seat backrest inclination as far as necessary
to a vertical position to ensure that the belt is tight on the buckle side3:move the respective front seat ahead of the child restraint system forwards as far as necessary4:adjust the respective headrest as necessary or remove if required
ISOFIX size class and seat device
A – ISO/F3:forward-facing child restraint system for children of maximum size in the weight class 9 to 18 kgB – ISO/F2:forward-facing child restraint system for smaller children in the weight class 9 to 18 kgB1 – ISO/F2X:forward-facing child restraint system for smaller children in the weight class 9 to 18 kgC – ISO/R3:rear-facing child restraint system for children of maximum size in the weight class up to 18 kgD – ISO/R2:rear-facing child restraint system for smaller children in the weight class up to 18 kgE – ISO/R1:rear-facing child restraint system for young children in the weight class up to 13 kgF– ISO/L1:left lateral facing position child restraint system (carry-cot)G – ISO/L2:right lateral facing position child restraint system (carry-cot)
Permissible options for fitting an i-Size child restraint system with ISOFIX brackets
On front passenger seat
On rear outboard seatsOn rear centre seat
activated airbagdeactivated airbagi-Size child restraint systemsXXi - UX
Page 74 of 303

72Storage
● Pull the release lever on one orboth outer sides and fold down
the backrests onto the seat
cushion. When folding the
backrests, pull the seat belts along with them.
9 Warning
Take care when folding down the
right outer seat backrest if the
centre seat backrest is already
folded down. Risk of injury due to bolt protruding from the inner side
of the backrest.
● Alternatively fold seat backrests from the load compartment: pullswitch on left or right sidewall of
the load compartment to fold the
corresponding part of the rear
seat backrest.
9 Warning
Take care when operating the rear
backrests from the load
compartment. The backrest is
folded with considerable force.
Risk of injury, particularly to
children.
Ensure that nothing is attached to
the rear seats or located on the
seat cushion.
● To fold up, raise the backrests and guide them into an upright
position until they engage
audibly.
The backrests are properly
engaged when the red mark near the release lever is no longer
visible.
Page 86 of 303

84Instruments and controls7'' Colour-Info-Display
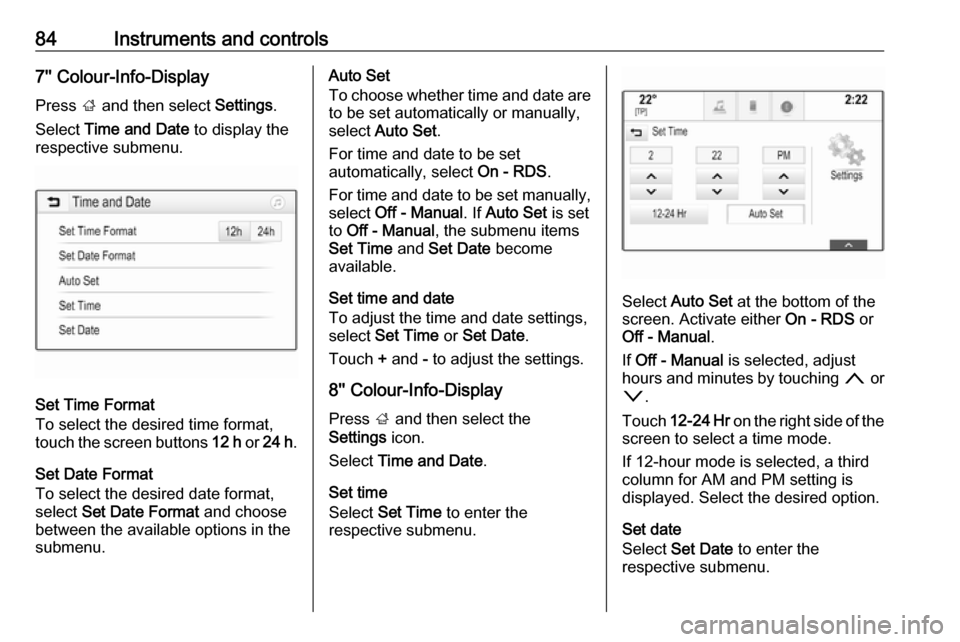
Press ; and then select Settings.
Select Time and Date to display the
respective submenu.
Set Time Format
To select the desired time format,
touch the screen buttons 12 h or 24 h .
Set Date Format
To select the desired date format,
select Set Date Format and choose
between the available options in the
submenu.
Auto Set
To choose whether time and date are
to be set automatically or manually,
select Auto Set .
For time and date to be set
automatically, select On - RDS.
For time and date to be set manually, select Off - Manual . If Auto Set is set
to Off - Manual , the submenu items
Set Time and Set Date become
available.
Set time and date
To adjust the time and date settings, select Set Time or Set Date .
Touch + and - to adjust the settings.
8'' Colour-Info-Display
Press ; and then select the
Settings icon.
Select Time and Date .
Set time
Select Set Time to enter the
respective submenu.
Select Auto Set at the bottom of the
screen. Activate either On - RDS or
Off - Manual .
If Off - Manual is selected, adjust
hours and minutes by touching n or
o .
Touch 12-24 Hr on the right side of the
screen to select a time mode.
If 12-hour mode is selected, a third
column for AM and PM setting is
displayed. Select the desired option.
Set date
Select Set Date to enter the
respective submenu.
Page 87 of 303

Instruments and controls85Note
If date information is automatically
provided, this menu item is not
available.
Select Auto Set at the bottom of the
screen. Activate either On - RDS or
Off - Manual .
If Off - Manual is selected, adjust the
date by touching n or o.
Clock display
Select Clock Display to enter the
respective submenu.
To turn off the digital clock display in
the menus, select Off.Power outlets
A 12 Volt power outlet is located in the
centre console.
Do not exceed the maximum power
consumption of 120 watts.
With ignition off, the power outlet is
deactivated. Additionally, the power outlet is deactivated in the event of
low vehicle battery voltage.
Electrical accessories that are
connected must comply with the
electromagnetic compatibility
requirements laid down in
DIN VDE 40 839.
Do not connect any current-delivering accessories, e.g. electrical charging
devices or batteries.
Do not damage the outlets by using
unsuitable plugs.
Stop-start system 3 157.
USB charging port
An USB port for charging devices is
located below the foldable armrest.
The USB port has also a data
connection to the Infotainment
system.
Page 96 of 303

94Instruments and controlsOdometer
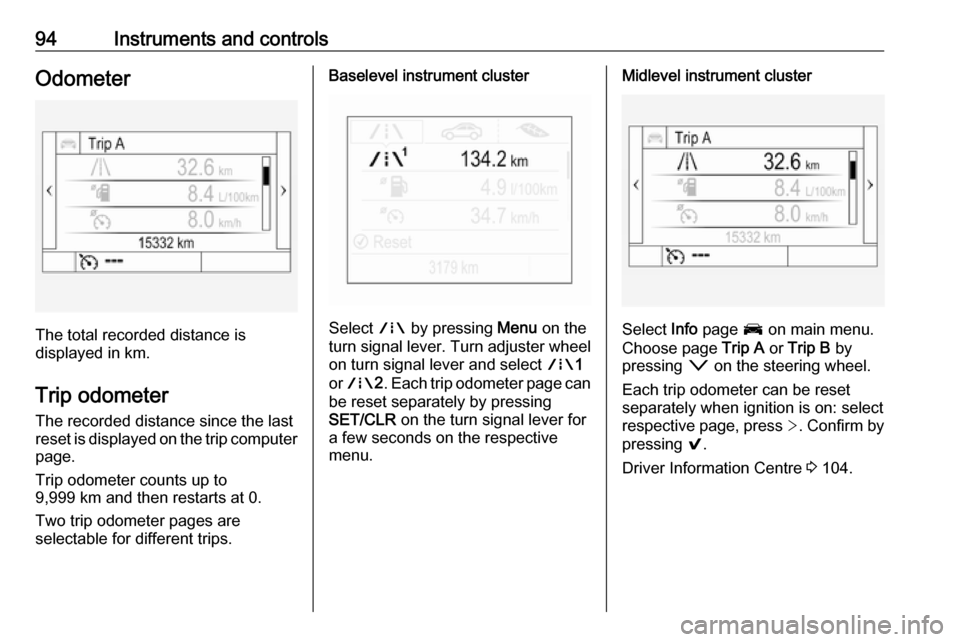
The total recorded distance is
displayed in km.
Trip odometer The recorded distance since the last
reset is displayed on the trip computer
page.
Trip odometer counts up to
9,999 km and then restarts at 0.
Two trip odometer pages are
selectable for different trips.
Baselevel instrument cluster
Select ; by pressing Menu on the
turn signal lever. Turn adjuster wheel
on turn signal lever and select ;1
or ; 2. Each trip odometer page can
be reset separately by pressing
SET/CLR on the turn signal lever for
a few seconds on the respective
menu.
Midlevel instrument cluster
Select Info page J on main menu.
Choose page Trip A or Trip B by
pressing o on the steering wheel.
Each trip odometer can be reset separately when ignition is on: select
respective page, press >. Confirm by
pressing 9.
Driver Information Centre 3 104.
Page 97 of 303

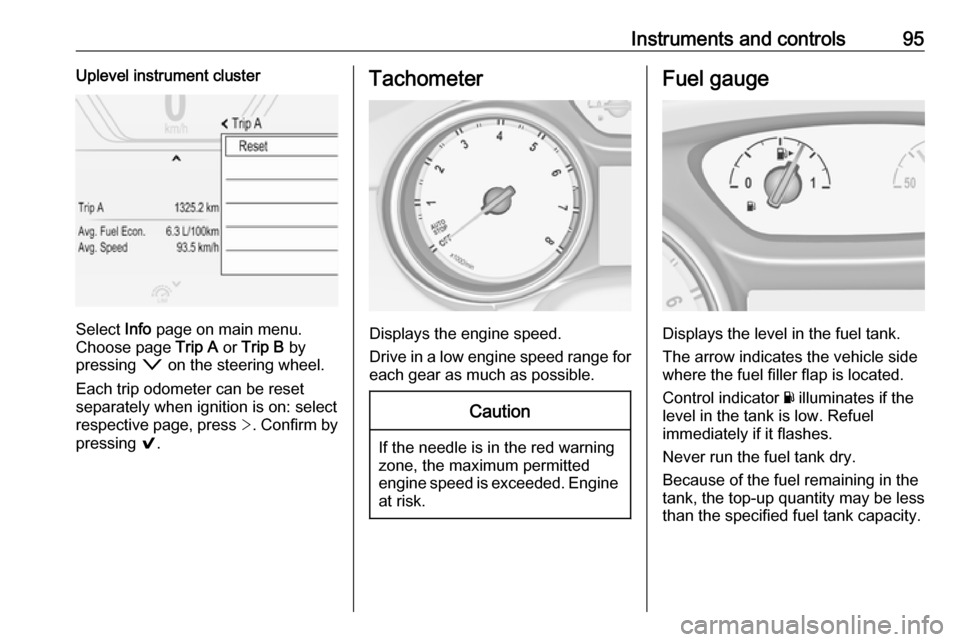
Instruments and controls95Uplevel instrument cluster
Select Info page on main menu.
Choose page Trip A or Trip B by
pressing o on the steering wheel.
Each trip odometer can be reset separately when ignition is on: select
respective page, press >. Confirm by
pressing 9.
Tachometer
Displays the engine speed.
Drive in a low engine speed range for each gear as much as possible.
Caution
If the needle is in the red warning
zone, the maximum permitted
engine speed is exceeded. Engine at risk.
Fuel gauge
Displays the level in the fuel tank.
The arrow indicates the vehicle side
where the fuel filler flap is located.
Control indicator Y illuminates if the
level in the tank is low. Refuel
immediately if it flashes.
Never run the fuel tank dry.
Because of the fuel remaining in the
tank, the top-up quantity may be less
than the specified fuel tank capacity.
Page 110 of 303

108Instruments and controlsTrip odometer 1/A or 2/B
Trip odometer displays the current
distance since a certain reset.
Trip odometer counts up to a distance
of 9,999 km then restarts at 0.
To reset on Baselevel display, press
SET/CLR for a few seconds, on
Midlevel and Uplevel display, press
é and confirm with 9.
The information of trip odometer page 1 and 2 can be reset separately for
odometer, average consumption and
average speed while the respective
display is active.
Average fuel consumption 1/A or 2/B
Display of average consumption. The
measurement can be reset at any
time and starts with a default value.
To reset on Baselevel display, press
SET/CLR for a few seconds, on
Midlevel and Uplevel display, press
é and confirm with 9.
Average speed 1/A or 2/B
Display of average speed. The
measurement can be reset at any
time.To reset on Baselevel display, press
SET/CLR for a few seconds, on
Midlevel and Uplevel display, press
é and confirm with 9.
Digital speed
Digital display of the instantaneous
speed.
Fuel range
Range is calculated from current fuel
tank level and current consumption.
The display shows average values.
After refuelling, the range is updated
automatically after a brief delay.
When the fuel level in the tank is low, a message appears on the display
and control indicator Y in the fuel
gauge illuminates.
When the tank must be refuelled
immediately, a warning message
appears and remains on the display.
Additionally, control indicator Y in the
fuel gauge flashes 3 102.
Instantaneous fuel consumption
Display of the instantaneous
consumption.Remaining oil life
Indicates an estimate of the oil's
useful life. The number in % means
the remaining of current oil life 3 96.
Tire pressure
Checks tyre pressure of all wheels
during driving 3 252.
Timer
To start and stop press 9. To reset,
press é and confirm Reset.
Traffic sign assistant
Displays the detected traffic signs for
the current route section 3 215.
Following distance
Displays the distance in seconds to a
preceding moving vehicle 3 192. If
Adaptive cruise control is active this
page shows the following distance
setting instead.
Blank page
A blank page can be selected when
no DIC information is requested.
Page 114 of 303

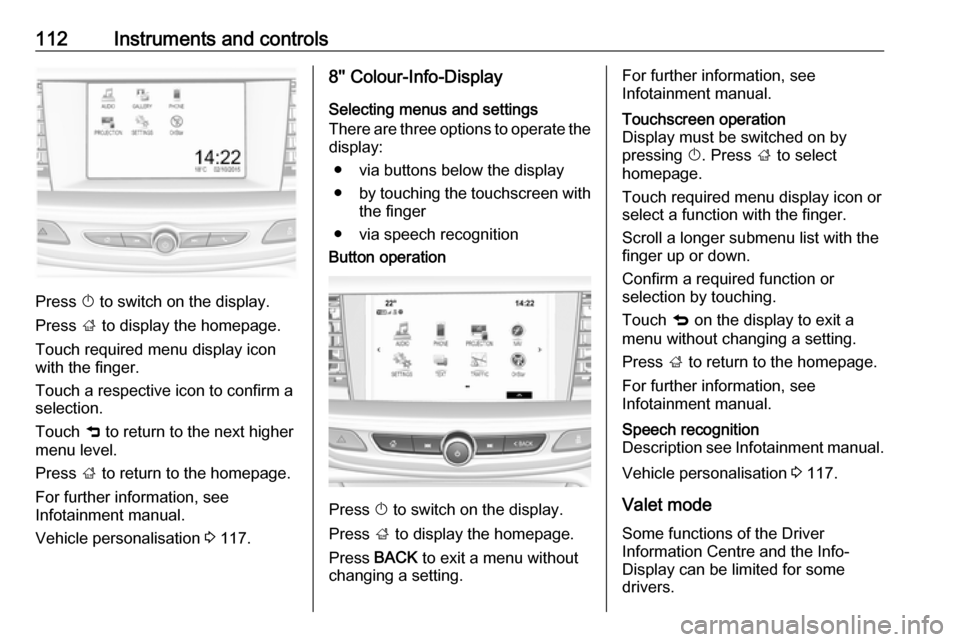
112Instruments and controls
Press X to switch on the display.
Press ; to display the homepage.
Touch required menu display icon
with the finger.
Touch a respective icon to confirm a
selection.
Touch 9 to return to the next higher
menu level.
Press ; to return to the homepage.
For further information, see Infotainment manual.
Vehicle personalisation 3 117.
8'' Colour-Info-Display
Selecting menus and settings
There are three options to operate the
display:
● via buttons below the display
● by touching the touchscreen with
the finger
● via speech recognitionButton operation
Press X to switch on the display.
Press ; to display the homepage.
Press BACK to exit a menu without
changing a setting.
For further information, see
Infotainment manual.Touchscreen operation
Display must be switched on by
pressing X. Press ; to select
homepage.
Touch required menu display icon or select a function with the finger.
Scroll a longer submenu list with the
finger up or down.
Confirm a required function or
selection by touching.
Touch q on the display to exit a
menu without changing a setting.
Press ; to return to the homepage.
For further information, see
Infotainment manual.Speech recognition
Description see Infotainment manual.
Vehicle personalisation 3 117.
Valet mode
Some functions of the Driver
Information Centre and the Info-
Display can be limited for some
drivers.
Page 119 of 303

Instruments and controls1171. Switch off any electricalconsumers which are not requiredfor a safe ride, e.g. seat heating,
heated rear window or other main consumers.
2. Charge the vehicle battery by driving continuously for a while or
by using a charging device.
The warning message will disappear
after the engine has been started
twice without a voltage drop.
If the vehicle battery cannot be
recharged, have the cause of the fault
remedied by a workshop.Vehicle personalisation
The vehicle's behaviour can be
personalised by changing the settings
in the Info-Display.
Some of the personal settings for
different drivers can be memorised individually for each vehicle key.
Memorised settings 3 23.
Depending on vehicle equipment and
country-specific regulations some of
the functions described below may
not be available.
Some functions are only displayed or
active when the engine is running.
Personal settings 7" Colour-Info-Display
Press ;, select Settings and then
Vehicle on the touch-screen.
In the corresponding submenus the
following settings can be changed:
Vehicle ● Climate & Air Quality
Auto Fan Max Speed : Modifies
the level of the cabin airflow of the climate control in automatic
mode.
Auto Heated Seats :
Automatically activates the seat heating.
Auto Defog : Supports
windscreen dehumidification by
automatically selecting the
necessary settings and
automatic air conditioning mode.
Page 121 of 303

Instruments and controls119delays the actual locking of the
doors until all doors are closed.
● Remote Lock, Unlock, Start
Remote Unlock Light Feedback :
Activates or deactivates the
hazard warning flasher feedback whilst unlocking.
Remote Lock Feedback :
Changes what kind of feedback
is given when locking the vehicle.
Remote Door Unlock : Changes
the configuration to unlock only
the driver's door or the whole
vehicle whilst unlocking.
Relock Remotely Unlocked
Doors : Activates or deactivates
the automatic relock function
after unlocking without opening
the vehicle.
Remote Window Operation :
Activates or deactivates the
operation of power windows with remote control.
Passive Door Unlock : Changes
the configuration to unlock only
the driver's door or the whole
vehicle whilst unlocking.Passive Door Lock : Activates or
deactivates the passive locking
function. This feature locks the
vehicle automatically after
several seconds if all doors have been closed and an electronic
key has been removed from the
vehicle.
Remote Left in Vehicle Alert :
Activates or deactivates the
warning chime when the
electronic key remains in the
vehicle.
Personal settings 8" Colour-Info-Display
Press ; then select the SETTINGS
icon.
In the corresponding submenus the
following settings can be changed:
Vehicle ● Climate and Air Quality
Auto Fan Speed : Modifies the
level of the cabin airflow of the
climate control in automatic
mode.
Auto Heated Seats :
Automatically activates the seat
heating.
Auto Demist : Supports
windscreen dehumidification by
automatically selecting the
necessary settings and
automatic air conditioning mode.