ECO mode OPEL INSIGNIA BREAK 2019.5 Manual user
[x] Cancel search | Manufacturer: OPEL, Model Year: 2019.5, Model line: INSIGNIA BREAK, Model: OPEL INSIGNIA BREAK 2019.5Pages: 323, PDF Size: 9.49 MB
Page 5 of 323

Introduction3Vehicle specific dataPlease enter your vehicle's data on
the previous page to keep it easily
accessible.
Refer to the sections "Service and
maintenance", "Technical data", the
vehicle’s identification plate and
national registration documents.
Introduction
Your vehicle is a designed
combination of advanced technology, safety, environmental friendliness
and economy.
This Owner's Manual provides you
with all the necessary information to
enable you to drive your vehicle
safely and efficiently.
Make sure your passengers are
aware of the possible risk of accident
and injury which may result from
improper use of the vehicle.
You must always comply with the
specific laws and regulations of the
country that you are in. These laws
may differ from the information in this Owner's Manual.Disregarding the description given in
this manual may affect your warranty.
When this Owner's Manual refers to a
workshop visit, we recommend your
Opel Service Partner. For gas
vehicles, we recommend an Opel
Repairer authorised for servicing gas
vehicles.
All Opel Service Partners provide
first-class service at reasonable
prices. Experienced mechanics
trained by Opel work according to
specific Opel instructions.
The customer literature pack should
always be kept ready to hand in the
vehicle.
Using this manual ● This manual describes all options
and features available for this
model. Certain descriptions,
including those for display and
menu functions, may not apply to
your vehicle due to model
variant, country specifications,
special equipment or
accessories.● The "In brief" section will give you
an initial overview.
● The table of contents at the beginning of this manual and
within each section shows where the information is located.
● The index will enable you to search for specific information.
● This Owner's Manual depicts left-
hand drive vehicles. Operation is similar for right-hand drive
vehicles.
● The Owner's Manual uses the engine identifier code. The
corresponding sales designation
and engineering code can be
found in the section "Technical
data".
● Directional data, e.g. left or right, or front or back, always relate to
the direction of travel.
● Displays may not support your specific language.
● Display messages and interior labelling are written in bold
letters.
Page 25 of 323
Keys, doors and windows23Unlocking
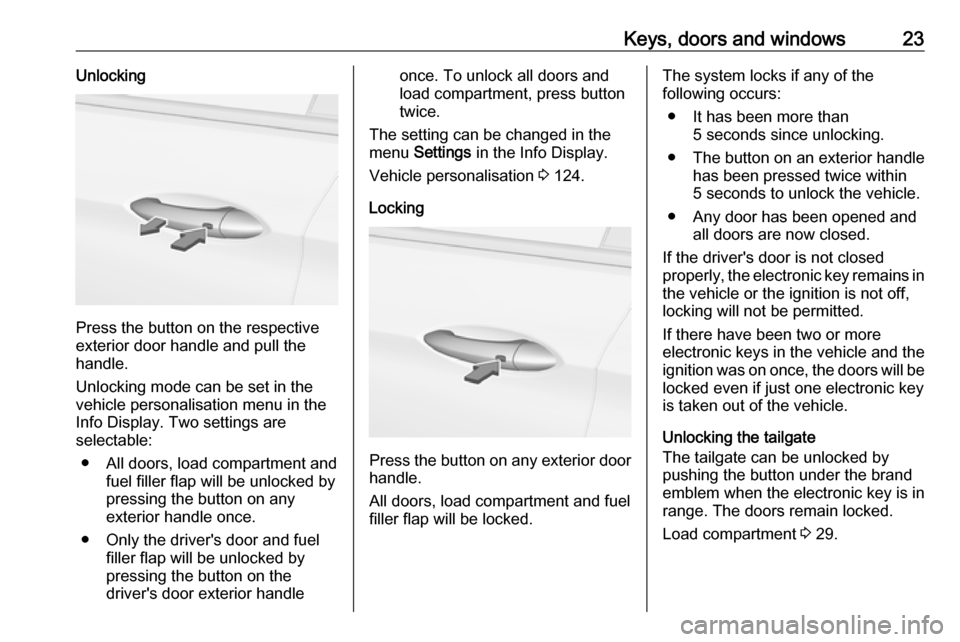
Press the button on the respective
exterior door handle and pull the
handle.
Unlocking mode can be set in the
vehicle personalisation menu in the
Info Display. Two settings are
selectable:
● All doors, load compartment and fuel filler flap will be unlocked by
pressing the button on any
exterior handle once.
● Only the driver's door and fuel filler flap will be unlocked by
pressing the button on the
driver's door exterior handle
once. To unlock all doors and
load compartment, press button
twice.
The setting can be changed in the
menu Settings in the Info Display.
Vehicle personalisation 3 124.
Locking
Press the button on any exterior door
handle.
All doors, load compartment and fuel
filler flap will be locked.
The system locks if any of the
following occurs:
● It has been more than 5 seconds since unlocking.
● The button on an exterior handle has been pressed twice within
5 seconds to unlock the vehicle.
● Any door has been opened and all doors are now closed.
If the driver's door is not closed
properly, the electronic key remains in the vehicle or the ignition is not off,
locking will not be permitted.
If there have been two or more
electronic keys in the vehicle and the
ignition was on once, the doors will be
locked even if just one electronic key
is taken out of the vehicle.
Unlocking the tailgate
The tailgate can be unlocked by
pushing the button under the brand
emblem when the electronic key is in
range. The doors remain locked.
Load compartment 3 29.
Page 26 of 323
24Keys, doors and windowsUnlocking and opening the power
tailgate
The power tailgate can be unlocked and opened hands-free by moving
the foot below the rear bumper.
Alternatively, press the button switch
under the brand emblem. The
electronic key has to be in range. The doors remain locked.
Load compartment 3 29.
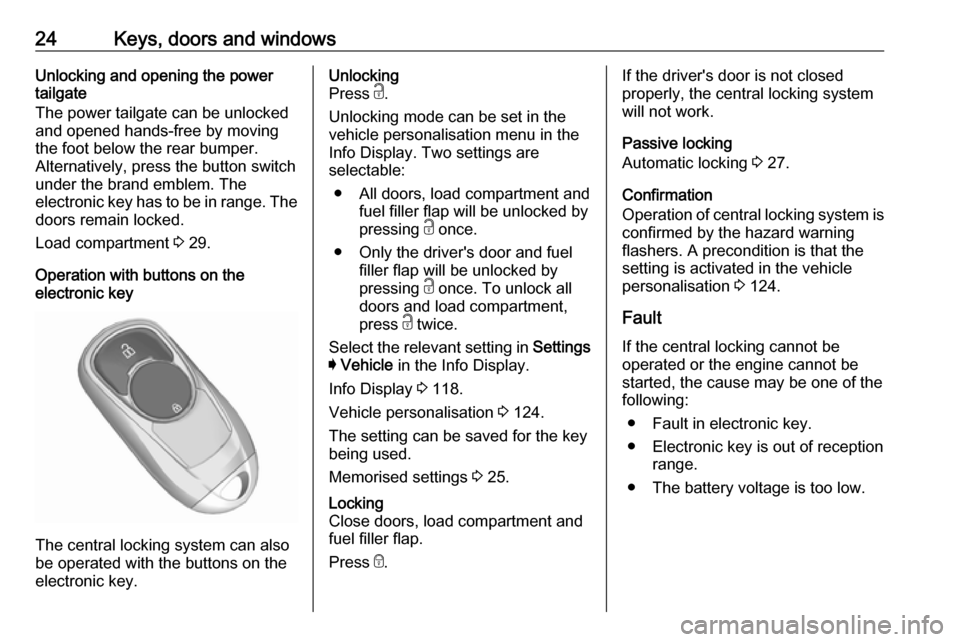
Operation with buttons on the
electronic key
The central locking system can also
be operated with the buttons on the
electronic key.
Unlocking
Press c.
Unlocking mode can be set in the
vehicle personalisation menu in the
Info Display. Two settings are
selectable:
● All doors, load compartment and fuel filler flap will be unlocked by
pressing c once.
● Only the driver's door and fuel filler flap will be unlocked by
pressing c once. To unlock all
doors and load compartment,
press c twice.
Select the relevant setting in Settings
I Vehicle in the Info Display.
Info Display 3 118.
Vehicle personalisation 3 124.
The setting can be saved for the key
being used.
Memorised settings 3 25.Locking
Close doors, load compartment and
fuel filler flap.
Press e.If the driver's door is not closed
properly, the central locking system will not work.
Passive locking
Automatic locking 3 27.
Confirmation
Operation of central locking system is
confirmed by the hazard warning
flashers. A precondition is that the
setting is activated in the vehicle
personalisation 3 124.
Fault
If the central locking cannot be
operated or the engine cannot be
started, the cause may be one of the
following:
● Fault in electronic key.
● Electronic key is out of reception range.
● The battery voltage is too low.
Page 34 of 323
32Keys, doors and windows● press C on the open tailgate,
or
● press C on the inside of the
driver's door.
Pressing one of the switches again
will reverse the direction of
movement.
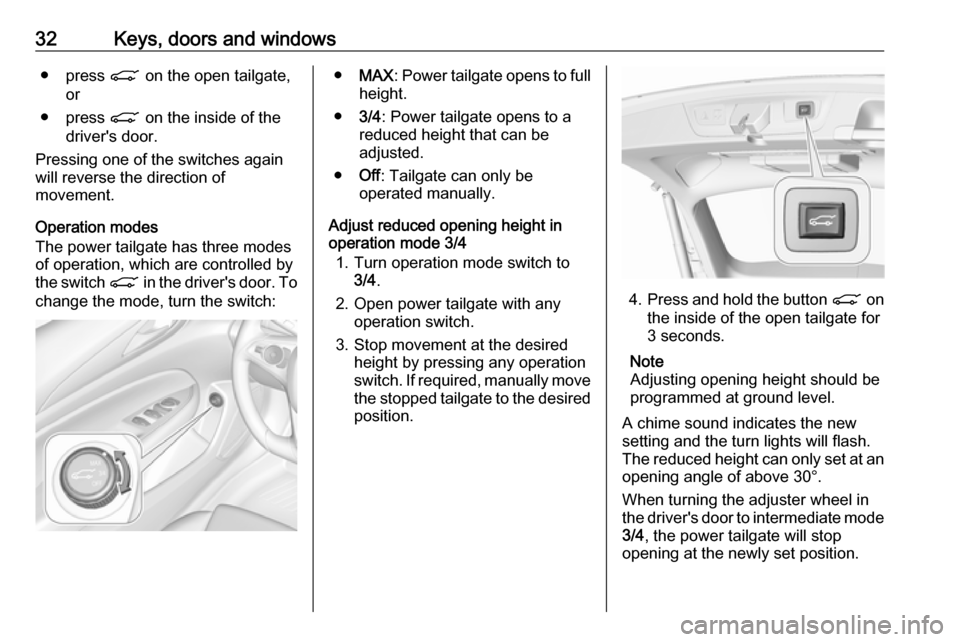
Operation modes
The power tailgate has three modes
of operation, which are controlled by
the switch C in the driver's door. To
change the mode, turn the switch:● MAX : Power tailgate opens to full
height.
● 3/4: Power tailgate opens to a
reduced height that can be
adjusted.
● Off: Tailgate can only be
operated manually.
Adjust reduced opening height in
operation mode 3/4
1. Turn operation mode switch to 3/4 .
2. Open power tailgate with any operation switch.
3. Stop movement at the desired height by pressing any operation
switch. If required, manually move
the stopped tailgate to the desired
position.
4. Press and hold the button C on
the inside of the open tailgate for
3 seconds.
Note
Adjusting opening height should be programmed at ground level.
A chime sound indicates the new
setting and the turn lights will flash.
The reduced height can only set at an
opening angle of above 30°.
When turning the adjuster wheel in
the driver's door to intermediate mode 3/4 , the power tailgate will stop
opening at the newly set position.
Page 110 of 323

108Instruments and controlsFlashes
Electric parking brake is in service mode. Stop vehicle, apply and
release the electric parking brake to
reset.9 Warning
Have the cause of the fault
remedied immediately by a
workshop. Avoid parking on
inclines until the cause of the fault has been remedied.
Antilock brake system
(ABS)
u illuminates yellow.
Illuminates for a few seconds after the
ignition is switched on. The system is ready for operation when the control
indicator extinguishes.
If the control indicator does not go out after a few seconds, or if it illuminates while driving, there is a fault in the
ABS. The brake system remains
operational but without ABS
regulation.
Antilock brake system 3 175.
Gear shifting
R or S with the number of a higher or
lower gear is indicated, when up- or
downshifting is recommended for fuel
saving reasons.
Following distance
E indicates the alert sensitivity
setting of the forward collision alert, using filled distance bars.
Forward collision alert 3 196.
Lane keep assist a illuminates green or yellow, or
flashes yellow.
Illuminates green
The system is switched on and ready
to operate.
Illuminates yellow
The system approaches a detected
lane marking without using the turn
light in that direction.Flashes yellow
The system recognizes that the lane
is departed significantly.
Lane keep assist 3 224.
Electronic Stability Control off
t illuminates yellow.
The system is deactivated.
Electronic Stability Control and Traction Control system
b illuminates or flashes yellow.
Illuminates
A fault in the system is present.
Continued driving is possible. Driving
stability, however, may deteriorate
depending on road surface
conditions.
Have the cause of the fault remedied
by a workshop.
Page 119 of 323

Instruments and controls117fuel consumption. Simultaneously the
average consumption value is
indicated.
Depending on vehicle version, the
Eco Index shows values referring to
trip odometer page A/1 or the current
driving cycle. In the last case, the
indicator is reset when ignition is switched on the next time.
Audio menu G
Enables browsing for music, selecting
from favourites or changing the audio source.
For further information, see
Infotainment manual.
Phone menu $
Enables managing and performing of
phone calls, scrolling through
contacts or operating hands-free
phoning.
For further information, see
Infotainment manual.
Navigation menu §
Enables route guidance.For further information, see
Infotainment manual.
Vehicle information menu, ?,
Options or %
The following list contains all possible Options Menu pages. Some may notbe available for your particular
vehicle. Depending on the display
some functions are symbolised.
● Units
● Display
● Info Page Options
● Home Page Options
● Adaptive Cruise
● Speed Warning
● Tyre Load
● Gauges
● Software Information
● Head-up Display
● AdBlue Level
Units
Select display unit system: imperial or metric.Display
Press é and select Sport or Touring
mode. Sport mode includes more
vehicle information, Tour mode
includes more media information.
This setting is only available with
Uplevel display.
Info Page Options
A list of all pages in the Info Menu is
displayed, see above. Select the
pages to be displayed in the Info
Menu. Selected pages have a 0. Non
viewable functions have a blank
checkbox.
Home Page Options
Select, which values are shown on
the Driver Information Center home
page, e.g. speed or fuel range.
Adaptive Cruise
Activates or deactivates intelligent
adaptive cruise control 3 185.
Speed Warning
The speed warning page allows you
to set a speed that you do not want to
exceed.
Page 122 of 323
120Instruments and controlsConfirm a required function or
selection by touching.
Touch O to exit a menu with saving of
the changed setting.
Touch icon & to leave a menu without
saving.
Touch ; to return to the homepage.
For further information, see
Infotainment manual.Speech recognition
Description see Infotainment manual.
Vehicle personalisation 3 124.
Valet mode
If activated, some functions of the
Driver Information Centre and the Info Display are limited. The load
compartment is being locked and cannot be unlocked.
Head-up display The head-up display shows driver
information concerning the
instrument cluster onto the
windscreen on the driver's side.
The information appears as an image
projected from a lense in the
instrument panel onto the windscreen
directly ahead in driver's view. The
image appears focused out toward
the front of the vehicle.
Depending on the equipment head-
up display can indicate:
● general driving information
● alerts from driver assistance systems
● automatic transmission selector lever position
● gear shift indication
● audio / phone information
● turn-by-turn navigation information if equipped with
navigation Infotainment.
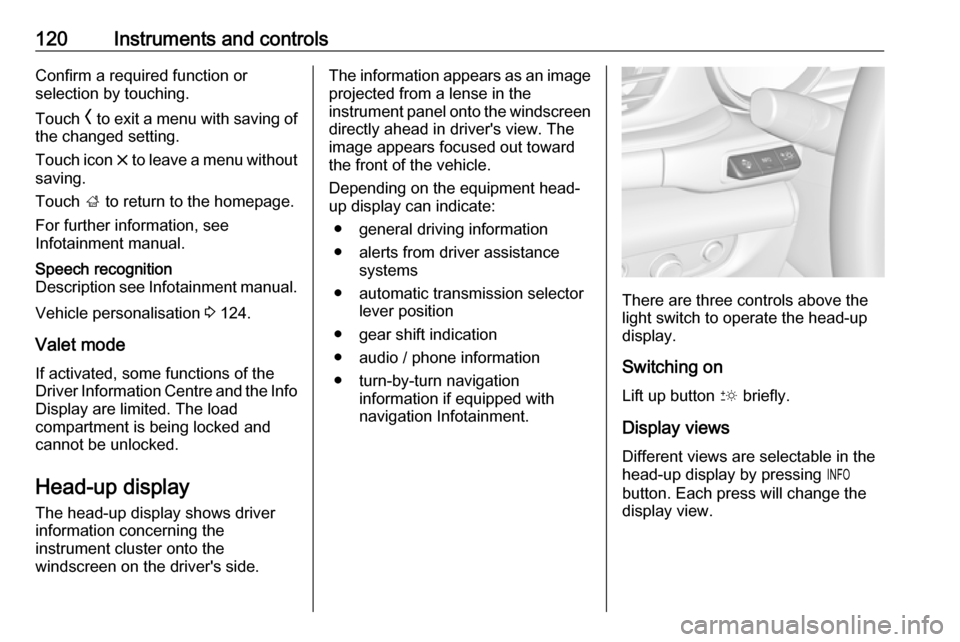
There are three controls above the
light switch to operate the head-up display.
Switching on
Lift up button & briefly.
Display views
Different views are selectable in the
head-up display by pressing /
button. Each press will change the
display view.
Page 138 of 323

136LightingVehicles without LED matrix
headlights
High beam is switched on
automatically at a speed above
40 km/h. High beam is switched off at a speed below 20 km/h, but high
beam assist remains active.
Vehicles with LED matrix
headlights
This feature allows the high beam to
function as main driving light at night.
Each LED on right or left side is
triggered or faded out particularly according to the traffic situation. This
gives the best light distribution
without dazzling other road users.
High beam is switched on
automatically at a speed above
50 km/h. High beam is switched off at a speed below 35 km/h, but highbeam assist remains active.
Motorway mode
High beam assist includes a special
motorway mode. When driving faster
than 105 km/h on motorways for a
certain time, the light beam becomes
smaller to avoid dazzling of oncoming
traffic.
Activation
Activate high beam assist by pressing f .
The green control indicator f
illuminates continuously when the
high beam assist is activated, the blue
one 7 illuminates when high beam is
on.
Control indicator f 3 110, 7
3 110.
Deactivation With high beam on, pull the indicator
lever once to deactivate high beam
assist. If a headlight flash is activated
when the high beam is off, the high
beam assist will remain activated.
Pushing the indicator lever to activate manual high beam will deactivate
high beam assist.
Press f once to deactivate high
beam assist.
Page 152 of 323

150Climate control● Cooling must be activated in theclimate setting menu for optimalcooling and demisting. Press
Climate to enter the menu and
follow the touch button to switch on air conditioning A/C.
● Set the preselected temperatures separately for
driver and front passenger using
the left and right rotary knob.
Recommended temperature is
22 °C. Temperature is indicated
briefly in displays beside the
rotary knobs and in the climate setting menu.
● Air recirculation mode n should
be deactivated. When
deactivated the LED in the button is not illuminated.
Manual settings Climate control system settings can
be changed by activating the buttons
and rotary knobs as described below.
Changing a setting will deactivate the automatic mode.Fan speed (
)
Press upper button ( to increase or
lower button ) to decrease fan speed.
The fan speed is indicated as pop-up in the Info Display. Fan speed can
also be changed by touch buttons in
the climate setting display. Press
Climate to enter the menu.
Pressing the lower button ) for longer:
fan and cooling are switched off.
To return to automatic mode: press
AUTO .
Air distribution w, x , y
Press Climate to enter the menu.
Touch:
w:to windscreen and front door
windowsx:to head area and rear seats via
adjustable air ventsy:to front and rear foot well and
windscreen
To return to automatic air distribution
press AUTO .
Page 161 of 323
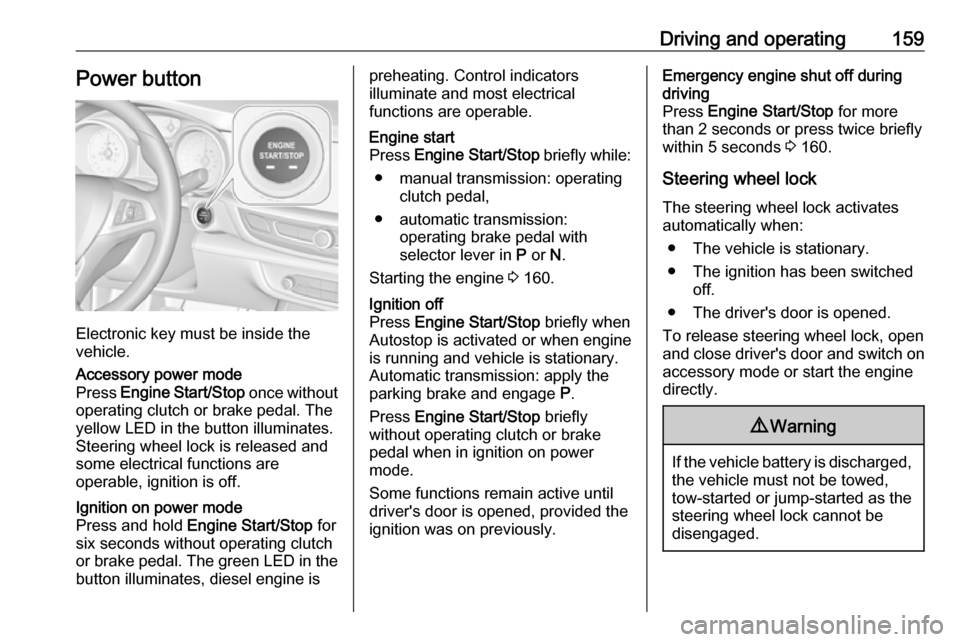
Driving and operating159Power button
Electronic key must be inside the
vehicle.
Accessory power mode
Press Engine Start/Stop once without
operating clutch or brake pedal. The yellow LED in the button illuminates.
Steering wheel lock is released and
some electrical functions are
operable, ignition is off.Ignition on power mode
Press and hold Engine Start/Stop for
six seconds without operating clutch
or brake pedal. The green LED in the button illuminates, diesel engine ispreheating. Control indicators
illuminate and most electrical
functions are operable.Engine start
Press Engine Start/Stop briefly while:
● manual transmission: operating clutch pedal,
● automatic transmission: operating brake pedal with
selector lever in P or N.
Starting the engine 3 160.Ignition off
Press Engine Start/Stop briefly when
Autostop is activated or when engine is running and vehicle is stationary.
Automatic transmission: apply the
parking brake and engage P.
Press Engine Start/Stop briefly
without operating clutch or brake pedal when in ignition on power
mode.
Some functions remain active until
driver's door is opened, provided the
ignition was on previously.Emergency engine shut off during
driving
Press Engine Start/Stop for more
than 2 seconds or press twice briefly
within 5 seconds 3 160.
Steering wheel lock The steering wheel lock activates
automatically when:
● The vehicle is stationary.
● The ignition has been switched off.
● The driver's door is opened.
To release steering wheel lock, open
and close driver's door and switch on accessory mode or start the engine
directly.9 Warning
If the vehicle battery is discharged,
the vehicle must not be towed,
tow-started or jump-started as the
steering wheel lock cannot be
disengaged.