warning OPEL INSIGNIA BREAK 2019 Manual user
[x] Cancel search | Manufacturer: OPEL, Model Year: 2019, Model line: INSIGNIA BREAK, Model: OPEL INSIGNIA BREAK 2019Pages: 347, PDF Size: 9.79 MB
Page 85 of 347

Storage83
● Attach hooks of safety netcassette to lashing eyes in the
floor in front of rear seats. To get
access to the lashing eyes, push
hooks in the perforated parts in
the floor cover on both sides.
● Tension both straps by pulling at the loose end.
● Push down head restraints and fold down rear seat backrests
3 75.
Removal
● Pull the flap at the tightener on
both sides to release the straps.
● Remove and compress one side of safety net rod from installation
opening. Remove other side of
safety net rod from installation
opening.
● Roll up safety net.
● Detach hooks from the lashing eyes.
Warning triangle
Grand Sport
Stow the warning triangle in the space
at the rear of the load compartment.
Page 86 of 347
84StorageSports Tourer, Country Tourer
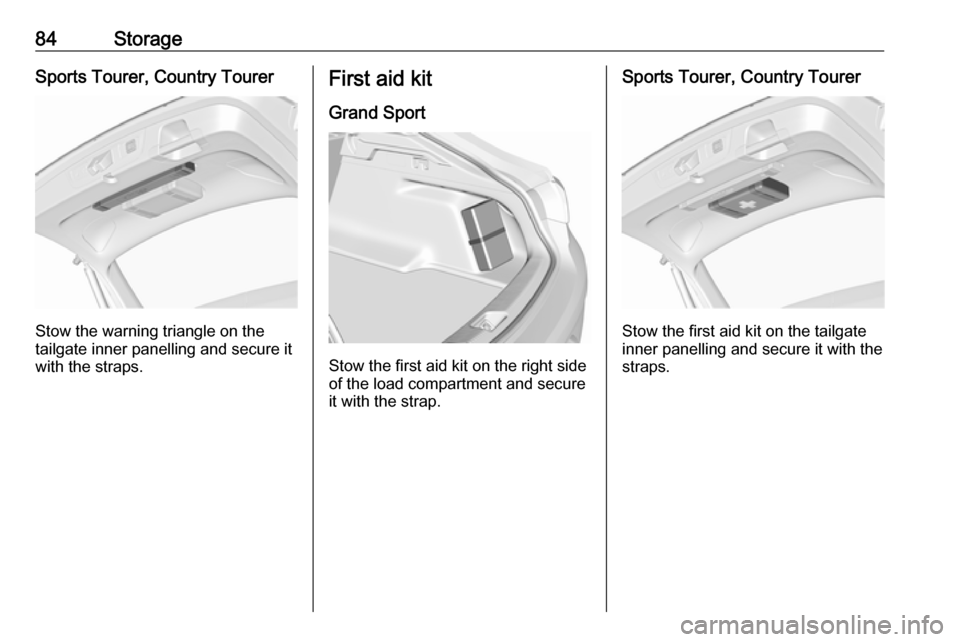
Stow the warning triangle on the
tailgate inner panelling and secure it with the straps.
First aid kit
Grand Sport
Stow the first aid kit on the right side
of the load compartment and secure it with the strap.
Sports Tourer, Country Tourer
Stow the first aid kit on the tailgate
inner panelling and secure it with the straps.
Page 88 of 347

86Storage● Do not allow the load to protrudeabove the upper edge of the
backrests.
● Do not place any objects on the load compartment cover or theinstrument panel, and do notcover the sensor on top of the
instrument panel.
● The load must not obstruct the operation of the pedals, parking
brake and gear selector, or
hinder the freedom of movement
of the driver. Do not place any
unsecured objects in the interior.
● Do not drive with an open load compartment.9Warning
Always ensure that the load in the
vehicle is securely stowed.
Otherwise objects can be thrown
around inside the vehicle and
cause personal injury or damage
to the load or vehicle.
● The payload is the difference between the permitted grossvehicle weight (see identification
plate 3 304) and the EC kerb
weight.
To calculate the payload, enter the data for your vehicle in the
weights table at the front of this
manual.
The EC kerb weight includes
weights for the driver (68 kg),
luggage (7 kg) and all fluids (fuel
tank 90% full).
Optional equipment and
accessories increase the kerb
weight.
● Driving with a roof load increases
the sensitivity of the vehicle to
cross-winds and has a
detrimental effect on vehicle
handling due to the vehicle's
higher centre of gravity.
Distribute the load evenly and secure it properly with retaining
straps. Adjust the tyre pressure
and vehicle speed according to
the load conditions. Check and
retighten the straps frequently.
Do not drive faster than 120 km/ h.The permissible roof load is
100 kg. The roof load is the
combined weight of the roof rack and the load.
Page 89 of 347

Instruments and controls87Instruments and
controlsControls ....................................... 88
Steering wheel adjustment ........88
Steering wheel controls .............88
Heated steering wheel ...............88
Horn ........................................... 89
Windscreen wiper and washer ..89
Rear window wiper and washer ...................................... 91
Outside temperature ..................92
Clock ......................................... 92
Power outlets ............................. 93
Navigation map card port ..........94
Inductive charging .....................94
Ashtrays .................................... 95
Warning lights, gauges and indi‐ cators ........................................... 96
Instrument cluster ......................96
Speedometer ........................... 101
Odometer ................................ 102
Trip odometer .......................... 102
Tachometer ............................. 103
Fuel gauge .............................. 103
Engine coolant temperature gauge ..................................... 104Service display........................ 104
Control indicators ....................105
Turn lights ................................ 105
Seat belt reminder ...................105
Airbag and belt tensioners .......106
Airbag deactivation ..................106
Charging system .....................107
Malfunction indicator light ........107
Brake and clutch system .........107
Electric parking brake ..............107
Electric parking brake fault ......107
Antilock brake system (ABS) ...108
Gear shifting ............................ 108
Following distance ...................108
Lane keep assist .....................108
Electronic Stability Control off . 108
Electronic Stability Control and Traction Control system .........108
Traction Control system off .....109
Engine coolant temperature ....109
Preheating ............................... 109
AdBlue ..................................... 109
Tyre pressure monitoring system .................................... 109
Engine oil pressure ..................109
Low fuel ................................... 110
Immobiliser .............................. 110
Exterior light ............................ 110
High beam ............................... 110
High beam assist .....................110LED headlights ........................ 110
Front fog lights ......................... 110
Rear fog light ........................... 111
Cruise control .......................... 111
Adaptive cruise control ............111
Vehicle detected ahead ...........111
Pedestrian detection ................111
Speed limiter ........................... 111
Traffic sign assistant ................111
Door open ................................ 111
Displays ..................................... 112
Driver Information Centre ........112
Info Display .............................. 119
Head-up display ......................120
Vehicle messages ......................123
Warning chimes .......................123
Battery voltage ........................ 124
Vehicle personalisation ..............124
Telematics service .....................127
OnStar ..................................... 127
Page 94 of 347
92Instruments and controlsThe rear window washer system is
deactivated when the fluid level is
low.
Washer fluid 3 259.
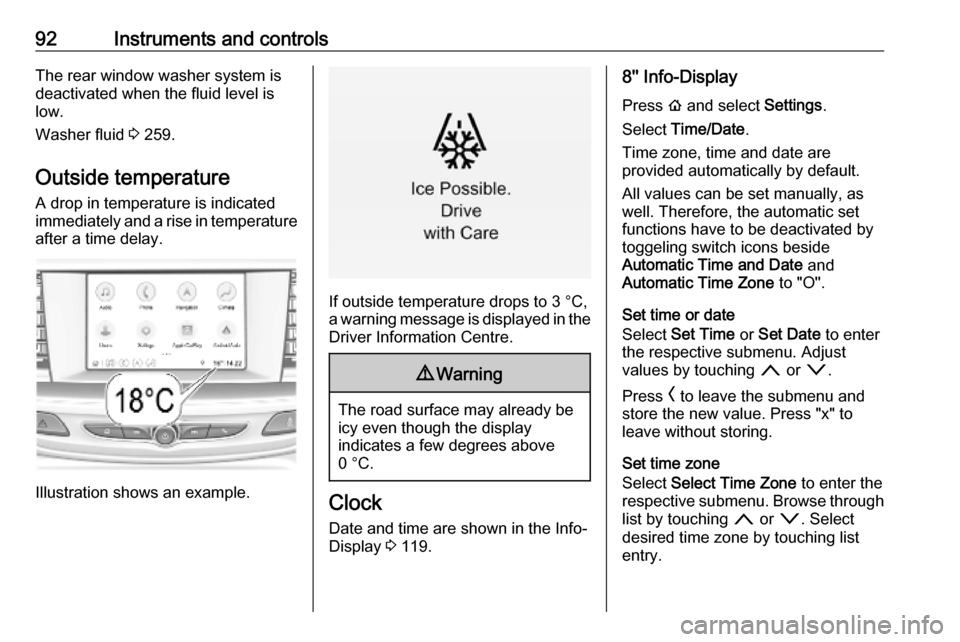
Outside temperature A drop in temperature is indicated
immediately and a rise in temperature
after a time delay.
Illustration shows an example.
If outside temperature drops to 3 °C,
a warning message is displayed in the Driver Information Centre.
9 Warning
The road surface may already be
icy even though the display
indicates a few degrees above
0 °C.
Clock
Date and time are shown in the Info-
Display 3 119.
8'' Info-Display
Press ! and select Settings.
Select Time/Date .
Time zone, time and date are
provided automatically by default.
All values can be set manually, as
well. Therefore, the automatic set
functions have to be deactivated by
toggeling switch icons beside
Automatic Time and Date and
Automatic Time Zone to "O".
Set time or date
Select Set Time or Set Date to enter
the respective submenu. Adjust
values by touching n or o.
Press O to leave the submenu and
store the new value. Press "x" to
leave without storing.
Set time zone
Select Select Time Zone to enter the
respective submenu. Browse through list by touching n or o. Select
desired time zone by touching list entry.
Page 96 of 347
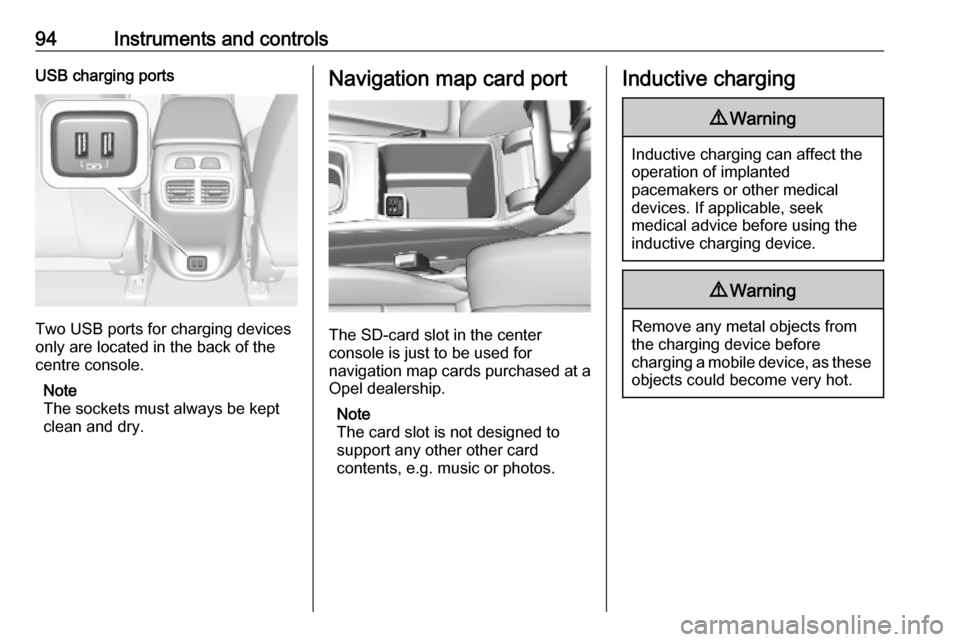
94Instruments and controlsUSB charging ports
Two USB ports for charging devices
only are located in the back of the
centre console.
Note
The sockets must always be kept
clean and dry.
Navigation map card port
The SD-card slot in the center
console is just to be used for
navigation map cards purchased at a
Opel dealership.
Note
The card slot is not designed to
support any other other card
contents, e.g. music or photos.
Inductive charging9 Warning
Inductive charging can affect the
operation of implanted
pacemakers or other medical
devices. If applicable, seek
medical advice before using the
inductive charging device.
9 Warning
Remove any metal objects from
the charging device before
charging a mobile device, as these objects could become very hot.
Page 98 of 347

96Instruments and controlsWarning lights, gauges
and indicators
Instrument cluster
Depending on the version, three
instrument clusters are available:
● Baselevel
● Midlevel
● Uplevel
Uplevel instrument cluster can be
displayed as Sport mode or Tour
mode.
Page 105 of 347
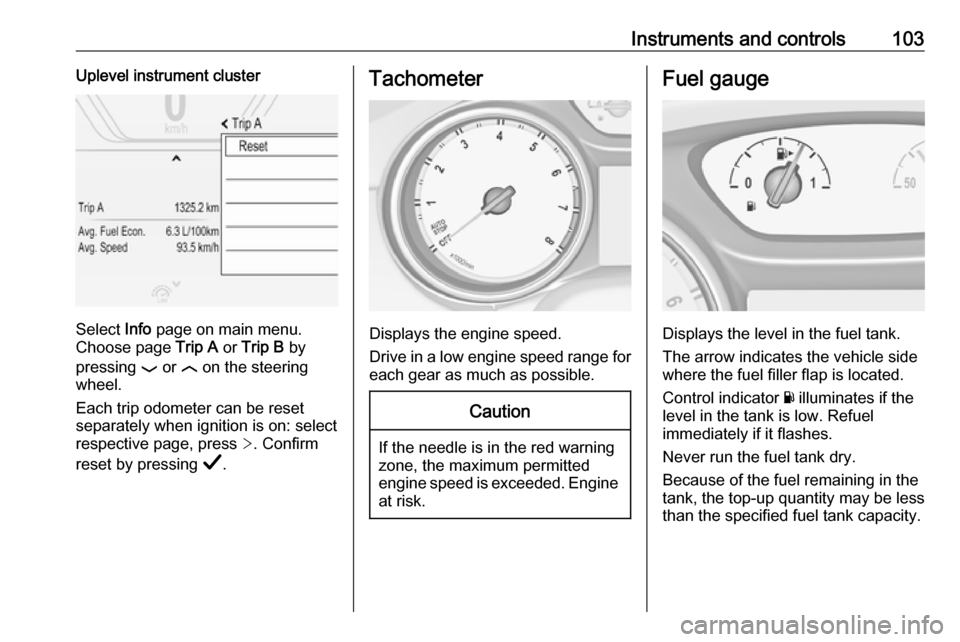
Instruments and controls103Uplevel instrument cluster
Select Info page on main menu.
Choose page Trip A or Trip B by
pressing P or N on the steering
wheel.
Each trip odometer can be reset separately when ignition is on: select
respective page, press >. Confirm
reset by pressing Å.
Tachometer
Displays the engine speed.
Drive in a low engine speed range for each gear as much as possible.
Caution
If the needle is in the red warning
zone, the maximum permitted
engine speed is exceeded. Engine at risk.
Fuel gauge
Displays the level in the fuel tank.
The arrow indicates the vehicle side
where the fuel filler flap is located.
Control indicator Y illuminates if the
level in the tank is low. Refuel
immediately if it flashes.
Never run the fuel tank dry.
Because of the fuel remaining in the
tank, the top-up quantity may be less
than the specified fuel tank capacity.
Page 107 of 347

Instruments and controls105Select Info, " or ? Menu by
pressing è on steering wheel. Press
å to select Oil Life page.
Remaining oil life duration is indicated
in percentage.
Reset On Baselevel display press
SET/CLR on turn signal lever for
several seconds to reset. The ignition must be switched on but engine not
running.
On Midlevel display press Å on
steering wheel. Confirm reset by
choosing Yes and pressing Å again.
The ignition must be switched on but
engine not running.
On Uplevel display press é on
steering wheel to open the subfolder. Select Reset and confirm by pressing
Å . The ignition must be switched on
but engine not running.
The system must be reset every time
the engine oil is changed to allow
proper functionality. Seek the
assistance of a workshop.Next service
A message appears in the Driver
Information Centre, when
maintenance of the vehicle is
required. Have maintenance work
carried out by a workshop within one week or 500 km, whichever occursfirst.
Service information 3 301.
Control indicators The control indicators described are
not present in all vehicles. The
description applies to all instrument
versions. Depending on the
equipment, the position of the control indicators may vary. When the
ignition is switched on, most control
indicators will illuminate briefly as a
functionality test.
The control indicator colours mean:red:danger, important reminderyellow:warning, information, faultgreen:confirmation of activationblue:confirmation of activationwhite:confirmation of activationSee all control indicators on different
instrument clusters 3 96.
Turn lights
O illuminates or flashes green.
Illuminates briefly The parking lights are switched on.
Flashes
A turn signal or the hazard warning
flashers are activated.
Rapid flashing: failure of a turn signal
light or associated fuse, failure of turn signal light on trailer.
Bulb replacement 3 262, Fuses
3 272.
Turn signals 3 139.
Seat belt reminder
Seat belt reminder on front seats
X for driver seat illuminates or flashes
red in the instrument cluster.
Page 108 of 347
106Instruments and controls
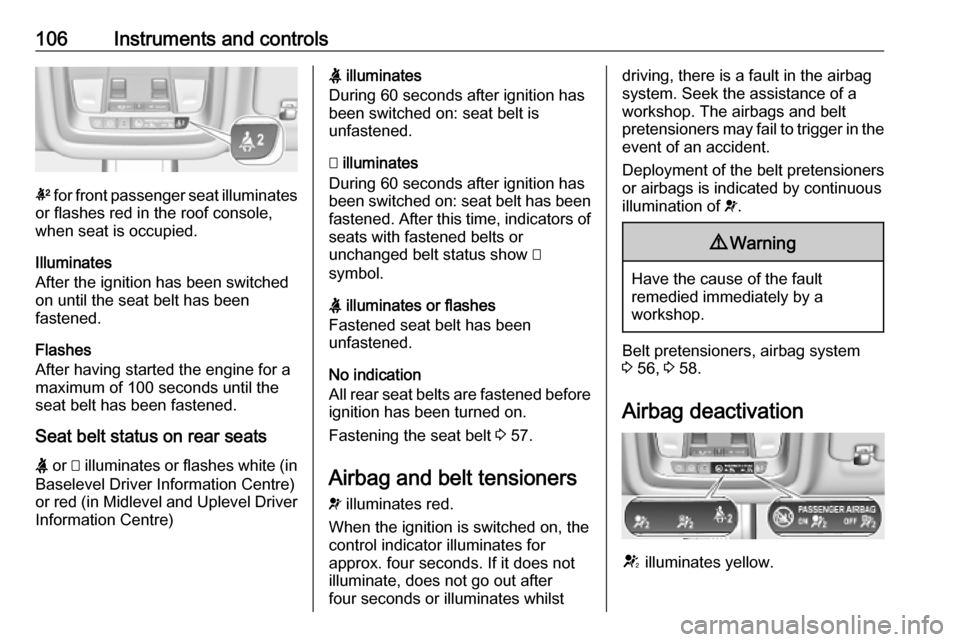
k for front passenger seat illuminates
or flashes red in the roof console,
when seat is occupied.
Illuminates
After the ignition has been switched on until the seat belt has been
fastened.
Flashes
After having started the engine for a
maximum of 100 seconds until the
seat belt has been fastened.
Seat belt status on rear seats
X or > illuminates or flashes white (in
Baselevel Driver Information Centre)
or red (in Midlevel and Uplevel Driver Information Centre)
X illuminates
During 60 seconds after ignition has
been switched on: seat belt is
unfastened.
> illuminates
During 60 seconds after ignition has
been switched on: seat belt has been fastened. After this time, indicators of
seats with fastened belts or
unchanged belt status show >
symbol.
X illuminates or flashes
Fastened seat belt has been
unfastened.
No indication
All rear seat belts are fastened before
ignition has been turned on.
Fastening the seat belt 3 57.
Airbag and belt tensioners v illuminates red.
When the ignition is switched on, the control indicator illuminates for
approx. four seconds. If it does not
illuminate, does not go out after
four seconds or illuminates whilstdriving, there is a fault in the airbag
system. Seek the assistance of a
workshop. The airbags and belt
pretensioners may fail to trigger in the event of an accident.
Deployment of the belt pretensioners
or airbags is indicated by continuous
illumination of v.9 Warning
Have the cause of the fault
remedied immediately by a
workshop.
Belt pretensioners, airbag system
3 56, 3 58.
Airbag deactivation
V illuminates yellow.