change wheel OPEL INSIGNIA BREAK 2020 Manual user
[x] Cancel search | Manufacturer: OPEL, Model Year: 2020, Model line: INSIGNIA BREAK, Model: OPEL INSIGNIA BREAK 2020Pages: 315, PDF Size: 9.45 MB
Page 13 of 315

In brief111Power windows .....................41
2 Exterior mirrors .....................38
3 Central locking system ..........26
4 Side air vents ...................... 149
5 Cruise control .....................178
Speed limiter ....................... 180
Adaptive cruise control .......181
Forward collision alert .........190
6 Turn and lane-change
signals, headlight flash,
low/high beam, high beam
assist ................................... 135
Exit lighting ......................... 138
Parking lights ...................... 136
Buttons for Driver
Information Centre ..............111
7 Instruments ........................ 101
Driver Information Centre .... 111
8 Buttons for Driver
Information Centre ..............111
9 Head-up display ..................11810Windscreen wiper and
washer, headlight washer,
rear wiper and washer .........90
11 Centre air vents .................. 149
12 Hazard warning flashers ....134
13 Info Display ......................... 117
14 Anti-theft alarm system
status LED ........................... 35
15 Electronic Stability Control . 175
Traction Control system .....174
16 Glovebox .............................. 74
17 Controls for Info Display
operation ............................. 117
18 Climate control system ........ 140
19 Power outlet .......................... 94
20 Flexride controls .................. 176
Parking assist / advanced
parking assist .....................199
Lane keep assist ................218
Eco button for stop-start
system ................................. 157
21 Manual transmission ..........169
Automatic transmission ......16522Electric parking brake .........171
23 Power switch ....................... 153
24 Steering wheel adjustment ..89
25 Horn ..................................... 90
26 Bonnet release lever ..........231
27 Fuse box ............................ 252
28 Light switch ........................ 129
Headlight range
adjustment ......................... 132
Front / rear fog lights ..........135
Instrument illumination .......136
29 Head-up display controls ....118
Page 61 of 315

Seats, restraints59Using the seat belt while pregnant9Warning
The lap belt must be positioned as
low as possible across the pelvis
to prevent pressure on the
abdomen.
Airbag system
The airbag system consists of a
number of individual systems
depending on the scope of
equipment.
When triggered, the airbags inflate
within milliseconds. They also deflate
so quickly that it is often unnoticeable
during the collision.9 Warning
The airbag system deploys in an
explosive manner, repairs must be performed by skilled personnel
only.
9 Warning
Adding accessories that change
the vehicle's frame, bumper
system, height, front end or side
sheet metal, may keep the airbag
system from working properly. The operation of the airbag system can
also be affected by changing any
parts of the front seats, seat belts,
airbag sensing and diagnostic
module, steering wheel,
instrument panel, inner door seals including the speakers, any of the
airbag modules, ceiling or pillar
trim, front sensors, side impact
sensors or airbag wiring.
Note
The airbag systems and belt
pretensioner control electronics are
located in the centre console area.
Do not put any magnetic objects in
this area.
Do not affix any objects onto the
airbag covers and do not cover them with other materials. Have damagedcovers replaced by a workshop.
Each airbag is triggered only once.
Have deployed airbags replaced by
a workshop. Furthermore, it may be
necessary to have the steering
wheel, the instrument panel, parts of
the panelling, the door seals,
handles and the seats replaced.
Page 106 of 315

104Instruments and controlsCaution
If engine coolant temperature is
too high, stop vehicle, switch off
engine. Danger to engine. Check
coolant level.
Service display
The engine oil life system informs
when to change the engine oil and
filter. Based on driving conditions, the interval at which an engine oil and
filter change will be indicated can vary
considerably.
When the system has calculated that
engine oil life has been diminished,
Change Engine Oil Soon appears in
the Driver Information Centre. Have engine oil and filter changed by a
workshop within one week or
500 km, whichever occurs first.
This can be an additional engine oil
and filter change or part of a regular
service.
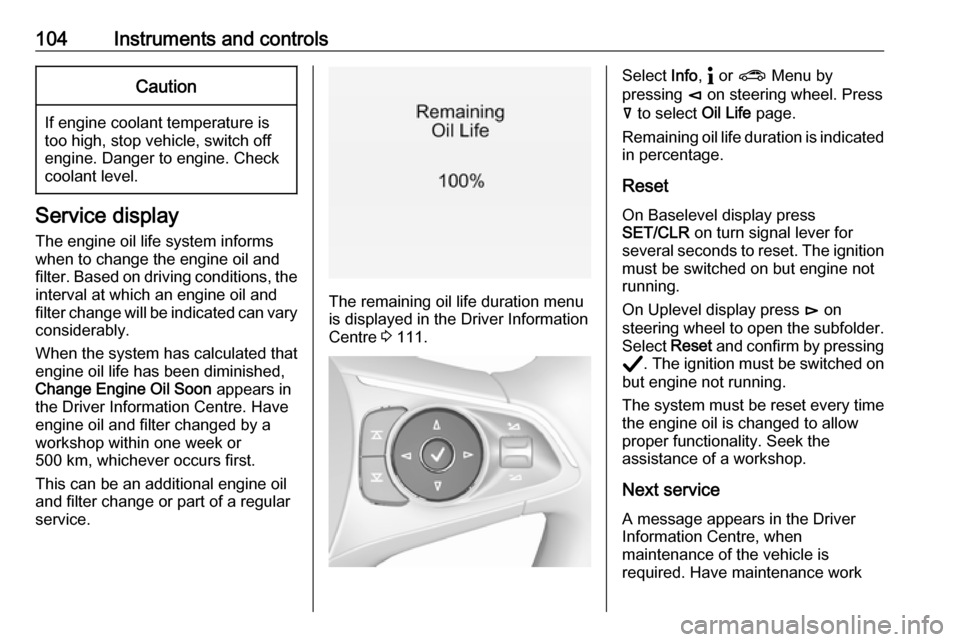
The remaining oil life duration menu
is displayed in the Driver Information
Centre 3 111.
Select Info, " or ? Menu by
pressing è on steering wheel. Press
å to select Oil Life page.
Remaining oil life duration is indicated
in percentage.
ResetOn Baselevel display press
SET/CLR on turn signal lever for
several seconds to reset. The ignition
must be switched on but engine not
running.
On Uplevel display press é on
steering wheel to open the subfolder. Select Reset and confirm by pressing
Å . The ignition must be switched on
but engine not running.
The system must be reset every time
the engine oil is changed to allow
proper functionality. Seek the
assistance of a workshop.
Next service
A message appears in the Driver
Information Centre, when
maintenance of the vehicle is
required. Have maintenance work
Page 123 of 315

Instruments and controls121The image can temporarily light up
depending on angel and position of
sunlight.
Adjust rotation Select Options /% in the Driver
Information Center main menu.
Select submenu page
Head-Up Display . Press é on the
steering wheel to open adjustment dialogue. Press ä or å to turn
projection clockwise or counter-
clockwise. Press è to leave
adjustment dialogue.
Switching off Hold down & to turn the head-up
display off.
Language
Preferred language can be set in vehicle personalisation menu 3 123.
Units Units can be changed in the settings
menu of the Driver Information Centre
3 111.Care of head-up display
Clean the inside of the windscreen as
needed to remove any dirt or film that
could reduce the sharpness or clarity
of the head-up image.
Clean the head-up display lens in the instrument panel with a soft cloth
sprayed with glass cleaner. Wipe the
lens gently, then dry it.
System limitations Head-up display may not operate
properly when:
● The lens in the instrument panel is covered by objects or
windscreen and lens are not
clean.
● Display brightness is too dim or bright.
● Image is not adjusted to the proper height.
● The driver wears polarised sunglasses.
If the head-up image is not correct for other reasons, contact a workshop.
The windscreen is part of the head-up display system.Windscreen replacement 3 41.
Page 137 of 315

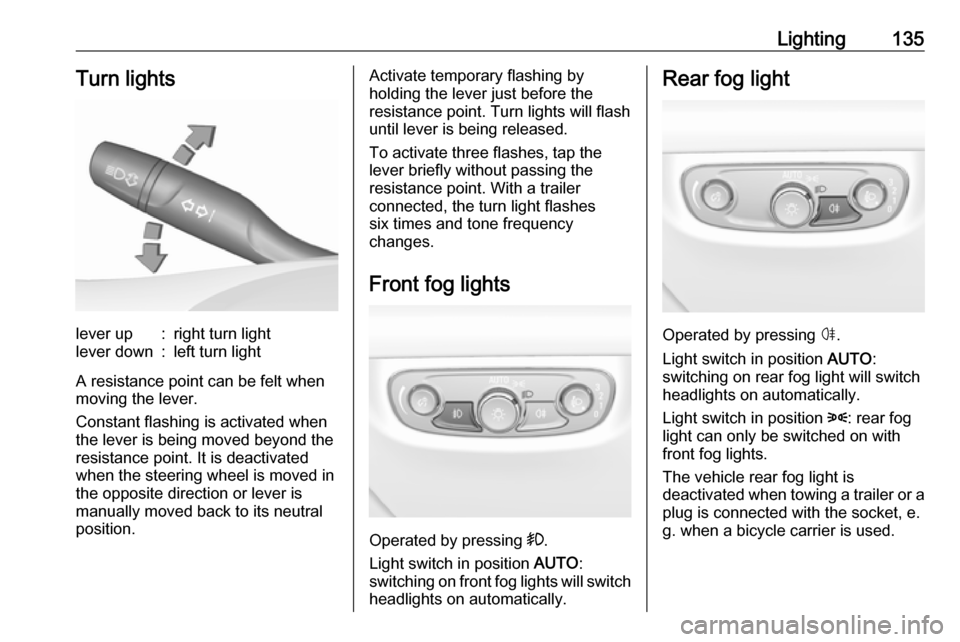
Lighting135Turn lightslever up:right turn lightlever down:left turn light
A resistance point can be felt when
moving the lever.
Constant flashing is activated when
the lever is being moved beyond the
resistance point. It is deactivated
when the steering wheel is moved in
the opposite direction or lever is
manually moved back to its neutral
position.
Activate temporary flashing by
holding the lever just before the
resistance point. Turn lights will flash
until lever is being released.
To activate three flashes, tap the
lever briefly without passing the
resistance point. With a trailer
connected, the turn light flashes
six times and tone frequency
changes.
Front fog lights
Operated by pressing >.
Light switch in position AUTO:
switching on front fog lights will switch headlights on automatically.
Rear fog light
Operated by pressing ø.
Light switch in position AUTO:
switching on rear fog light will switch
headlights on automatically.
Light switch in position 8: rear fog
light can only be switched on with
front fog lights.
The vehicle rear fog light is
deactivated when towing a trailer or a
plug is connected with the socket, e.
g. when a bicycle carrier is used.
Page 153 of 315

Driving and operating151Driving and
operatingDriving hints ............................... 152
Control of the vehicle ...............152
Steering ................................... 152
Starting and operating ...............152
New vehicle running-in ............152
Ignition switch positions ...........152
Power button ........................... 153
Retained power off ..................155
Starting the engine ..................155
Overrun cut-off ........................ 157
Stop-start system ....................157
Parking .................................... 159
Engine exhaust .......................... 160
Exhaust filter ............................ 160
Catalytic converter ...................162
AdBlue ..................................... 162
Automatic transmission ..............165
Transmission display ...............165
Gear selection ......................... 165
Manual mode ........................... 166
Electronic driving programmes 167
Fault ........................................ 168
Interruption of power supply ....168Manual transmission ..................169
Drive systems ............................ 170
All-wheel drive ......................... 170
Brakes ........................................ 170
Antilock brake system .............170
Parking brake .......................... 171
Brake assist ............................. 173
Hill start assist ......................... 173
Ride control systems .................174
Traction Control system ..........174
Electronic Stability Control ......175
Interactive driving system ........176
Driver assistance systems .........178
Cruise control .......................... 178
Speed limiter ........................... 180
Adaptive cruise control ............181
Forward collision alert .............190
Following distance indication ...193
Active emergency braking .......194
Front pedestrian protection .....197
Parking assist .......................... 199
Side blind spot alert .................206
Lane change alert ....................207
Panoramic view system ...........209
Rear view camera ...................211
Rear cross traffic alert .............213
Traffic sign assistant ................214
Lane keep assist .....................218Fuel............................................ 221
Fuel for petrol engines .............221
Fuel for diesel engines ............222
Refuelling ................................ 223
Trailer hitch ................................ 225
General information .................225
Driving characteristics and towing tips .............................. 225
Trailer towing ........................... 225
Towing equipment ...................226
Trailer stability assist ...............228
Page 169 of 315

Driving and operating167Steering wheel paddles
Move selector lever out of position D
towards the left in position M.
Manual mode M can be activated
from position D in each driving
situation and speed.
Pull steering wheel paddles to select
gears manually.
Pull right paddle + to shift to a higher
gear.
Pull left paddle - to shift to a lower
gear.
Multiple pulls allow gears to be
skipped.
The selected gear is indicated in the
instrument cluster.
Temporary manual mode in drive
mode D
Manual paddle shifting is also
possible in automatic mode D. Upon
completion of manual shifting
operation, transmission changes to
automatic mode D after a defined
time.
To interrupt manual mode and return
to D, do one of the following:
● Press + paddle for 1 second.
● Move selector lever towards the left to manual mode and back to
position D.
If the vehicle is at a standstill and
engine is idling, the transmission will
remain in temporary manual mode. It
changes to automatic mode when
accelerator pedal is operated for a
defined time, and no paddle shifting
at the steering wheel is performed.
General
If a higher gear is selected when
vehicle speed is too low, or a lower
gear when vehicle speed is too high,the shift is not executed. This can
cause a message in the Driver
Information Centre.
In manual mode, no automatic
shifting to a higher gear takes place
at high engine revolutions, except
activating the kickdown function.
Gear shift indication
The symbol R or S with a number
beside it is indicated when gear
shifting is recommended for fuel
saving reasons.
Shift indication appears only in
manual mode.
Electronic driving programmes
● When SPORT mode is engaged,
the vehicle shifts at higher engine speeds (unless cruise control is
on).
SPORT mode 3 176.
Page 178 of 315

176Driving and operating
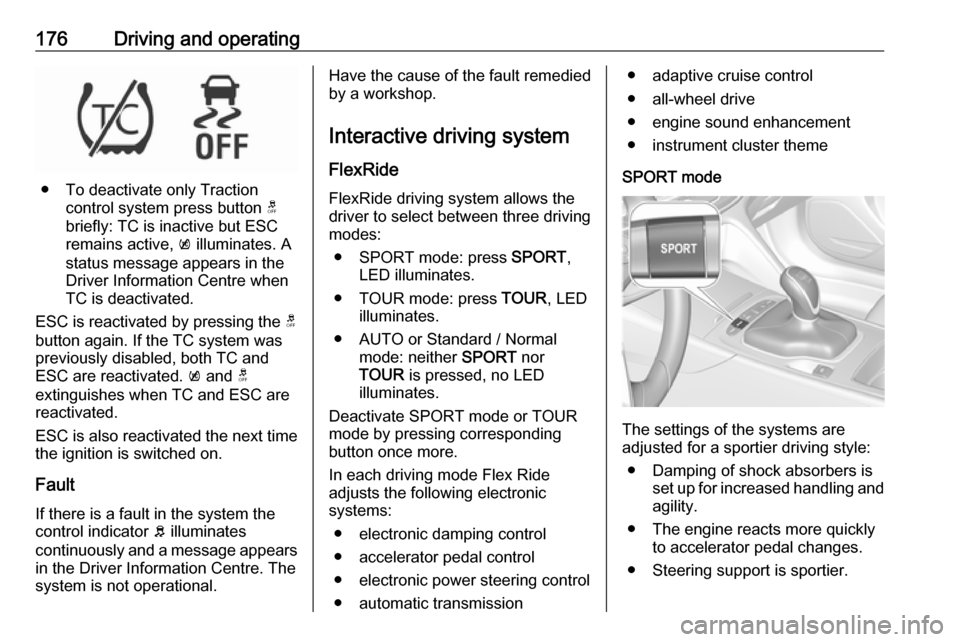
● To deactivate only Tractioncontrol system press button t
briefly: TC is inactive but ESC
remains active, k illuminates. A
status message appears in the
Driver Information Centre when
TC is deactivated.
ESC is reactivated by pressing the t
button again. If the TC system was
previously disabled, both TC and
ESC are reactivated. k and t
extinguishes when TC and ESC are reactivated.
ESC is also reactivated the next time
the ignition is switched on.
Fault
If there is a fault in the system the
control indicator b illuminates
continuously and a message appears in the Driver Information Centre. The
system is not operational.
Have the cause of the fault remedied by a workshop.
Interactive driving system FlexRide
FlexRide driving system allows the
driver to select between three driving
modes:
● SPORT mode: press SPORT,
LED illuminates.
● TOUR mode: press TOUR, LED
illuminates.
● AUTO or Standard / Normal mode: neither SPORT nor
TOUR is pressed, no LED
illuminates.
Deactivate SPORT mode or TOUR
mode by pressing corresponding
button once more.
In each driving mode Flex Ride
adjusts the following electronic
systems:
● electronic damping control
● accelerator pedal control
● electronic power steering control ● automatic transmission● adaptive cruise control
● all-wheel drive
● engine sound enhancement
● instrument cluster theme
SPORT mode
The settings of the systems are
adjusted for a sportier driving style:
● Damping of shock absorbers is set up for increased handling andagility.
● The engine reacts more quickly to accelerator pedal changes.
● Steering support is sportier.
Page 179 of 315

Driving and operating177● Automatic transmission shiftpoints optimised for sporty
driving.
● Adaptive cruise control is adjusted for a sportier driving
style.
● All-wheel drive supports active sporty driving of the vehicle.
● Engine sound enhancement intensifies interior engine sound
in a sporty manner.
● Cluster theme changes to sport.
TOUR modeTOUR mode adjusts the settings of
the systems for a comfortable driving
style.
● Damping of shock absorbers is adapted for increased driving
comfort.
● Steering efforts are reduced. ● Adaptive cruise control is adjusted for a more relaxed
driving style.
AUTO mode
All versions except GSi: All settings of the systems are preset to standard
values optimised for daily driving
(default mode). This is the fully
adaptive mode, adjusting systems to
both comfort and sport settings
depending on driving style and driving
situation.
Normal mode
GSi versions only: All settings of the
systems are preset to standard
values optimised for daily driving
(default mode). This mode keeps the
standard values independent of
driving style or driving situation.Adaptive drive mode control
Within each manually selected driving
mode SPORT , TOUR or AUTO , Drive
Mode Control (DMC) detects and
analyses continuously the driving
situation and the driver's driving style. If necessary, DMC automatically
adjusts damping and steering for the
duration of the occuring situation.
If, for example, normal settings are
active in AUTO mode and DMC
detects a sporty driving behaviour, it
automatically changes systems into
sporty settings unless the driver
deselects sporty damping or steering
in the Sport Mode Customisation .
If, for another example, comfort
settings are active in TOUR mode
and whilst driving on a winding road a sudden hard brake is necessary,DMC will detect the dynamic vehicle
condition and changes the settings
for suspension back to normal
(default) setting to enhance vehicle
stability.
When the driving characteristic or the
dynamic vehicle state returns to the
former state, DMC will change to
preselected settings.
Page 181 of 315

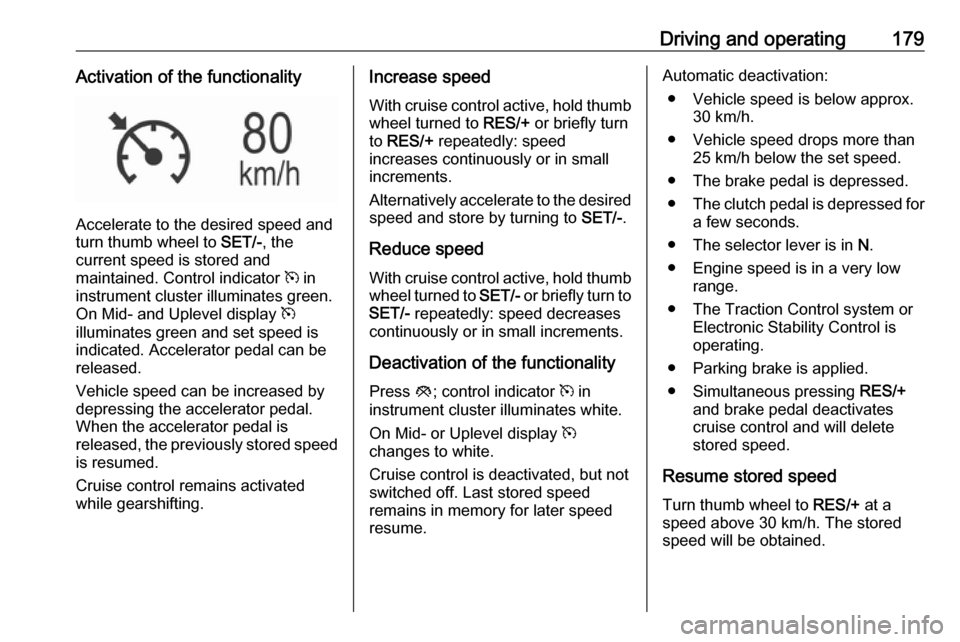
Driving and operating179Activation of the functionality
Accelerate to the desired speed and
turn thumb wheel to SET/-, the
current speed is stored and
maintained. Control indicator m in
instrument cluster illuminates green.
On Mid- and Uplevel display m
illuminates green and set speed is
indicated. Accelerator pedal can be
released.
Vehicle speed can be increased by
depressing the accelerator pedal.
When the accelerator pedal is
released, the previously stored speed
is resumed.
Cruise control remains activated
while gearshifting.
Increase speed
With cruise control active, hold thumb
wheel turned to RES/+ or briefly turn
to RES/+ repeatedly: speed
increases continuously or in small
increments.
Alternatively accelerate to the desired speed and store by turning to SET/-.
Reduce speed With cruise control active, hold thumb
wheel turned to SET/- or briefly turn to
SET/- repeatedly: speed decreases
continuously or in small increments.
Deactivation of the functionality
Press y; control indicator m in
instrument cluster illuminates white.
On Mid- or Uplevel display m
changes to white.
Cruise control is deactivated, but not
switched off. Last stored speed
remains in memory for later speed
resume.Automatic deactivation:
● Vehicle speed is below approx. 30 km/h.
● Vehicle speed drops more than 25 km/h below the set speed.
● The brake pedal is depressed.
● The clutch pedal is depressed for
a few seconds.
● The selector lever is in N.
● Engine speed is in a very low range.
● The Traction Control system or Electronic Stability Control is
operating.
● Parking brake is applied.
● Simultaneous pressing RES/+
and brake pedal deactivates
cruise control and will delete
stored speed.
Resume stored speed
Turn thumb wheel to RES/+ at a
speed above 30 km/h. The stored
speed will be obtained.