light OPEL INSIGNIA BREAK 2020 Manual user
[x] Cancel search | Manufacturer: OPEL, Model Year: 2020, Model line: INSIGNIA BREAK, Model: OPEL INSIGNIA BREAK 2020Pages: 315, PDF Size: 9.45 MB
Page 3 of 315

Introduction.................................... 2
In brief ............................................ 6
Keys, doors and windows ............21
Seats, restraints ........................... 46
Storage ........................................ 74
Instruments and controls .............88
Lighting ...................................... 129
Climate control ........................... 140
Driving and operating .................151
Vehicle care ............................... 229
Service and maintenance ..........278
Technical data ........................... 281
Customer information ................297
Index .......................................... 308Contents
Page 13 of 315

In brief111Power windows .....................41
2 Exterior mirrors .....................38
3 Central locking system ..........26
4 Side air vents ...................... 149
5 Cruise control .....................178
Speed limiter ....................... 180
Adaptive cruise control .......181
Forward collision alert .........190
6 Turn and lane-change
signals, headlight flash,
low/high beam, high beam
assist ................................... 135
Exit lighting ......................... 138
Parking lights ...................... 136
Buttons for Driver
Information Centre ..............111
7 Instruments ........................ 101
Driver Information Centre .... 111
8 Buttons for Driver
Information Centre ..............111
9 Head-up display ..................11810Windscreen wiper and
washer, headlight washer,
rear wiper and washer .........90
11 Centre air vents .................. 149
12 Hazard warning flashers ....134
13 Info Display ......................... 117
14 Anti-theft alarm system
status LED ........................... 35
15 Electronic Stability Control . 175
Traction Control system .....174
16 Glovebox .............................. 74
17 Controls for Info Display
operation ............................. 117
18 Climate control system ........ 140
19 Power outlet .......................... 94
20 Flexride controls .................. 176
Parking assist / advanced
parking assist .....................199
Lane keep assist ................218
Eco button for stop-start
system ................................. 157
21 Manual transmission ..........169
Automatic transmission ......16522Electric parking brake .........171
23 Power switch ....................... 153
24 Steering wheel adjustment ..89
25 Horn ..................................... 90
26 Bonnet release lever ..........231
27 Fuse box ............................ 252
28 Light switch ........................ 129
Headlight range
adjustment ......................... 132
Front / rear fog lights ..........135
Instrument illumination .......136
29 Head-up display controls ....118
Page 15 of 315
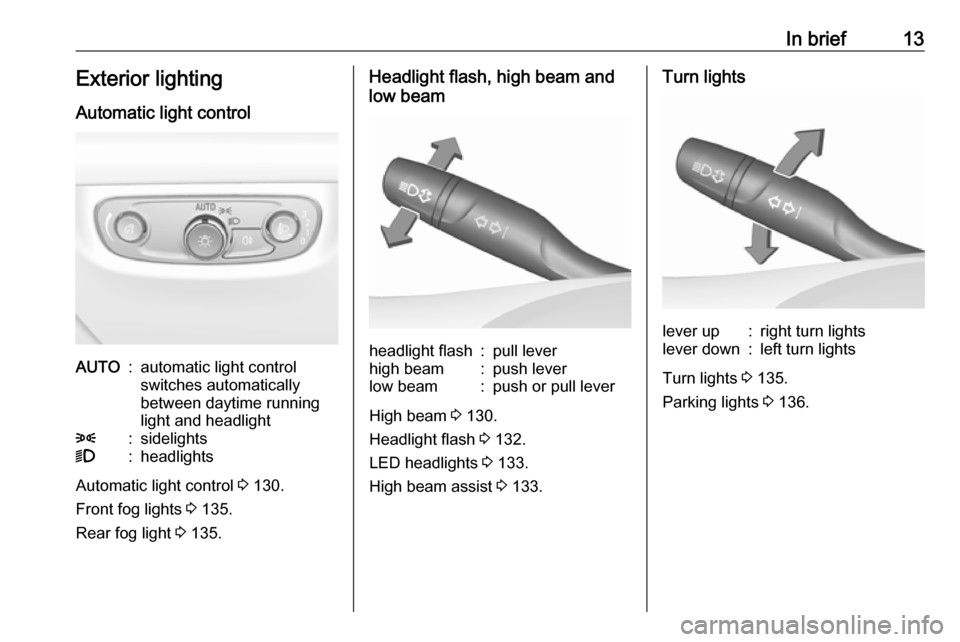
In brief13Exterior lightingAutomatic light controlAUTO:automatic light control
switches automatically
between daytime running
light and headlight8:sidelights9:headlights
Automatic light control 3 130.
Front fog lights 3 135.
Rear fog light 3 135.
Headlight flash, high beam and
low beamheadlight flash:pull leverhigh beam:push leverlow beam:push or pull lever
High beam 3 130.
Headlight flash 3 132.
LED headlights 3 133.
High beam assist 3 133.
Turn lightslever up:right turn lightslever down:left turn lights
Turn lights 3 135.
Parking lights 3 136.
Page 17 of 315
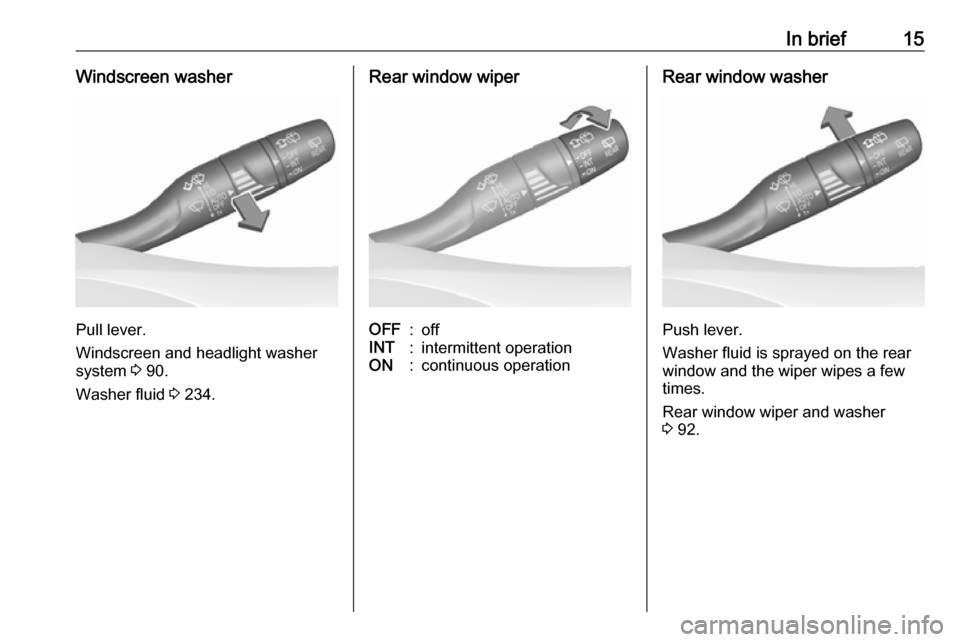
In brief15Windscreen washer
Pull lever.
Windscreen and headlight washer
system 3 90.
Washer fluid 3 234.
Rear window wiperOFF:offINT:intermittent operationON:continuous operationRear window washer
Push lever.
Washer fluid is sprayed on the rear
window and the wiper wipes a few
times.
Rear window wiper and washer
3 92.
Page 20 of 315
18In briefStarting off
Check before starting off ● Tyre pressure 3 255 and
condition 3 293.
● Engine oil level and fluid levels 3 232.
● All windows, mirrors, exterior lighting and number plates are
free from dirt, snow and ice and
are operational.
● Proper position of mirrors 3 38,
seats 3 48 and seat belts
3 58.
● Brake function at low speed, particularly if the brakes are wet.Starting the engine
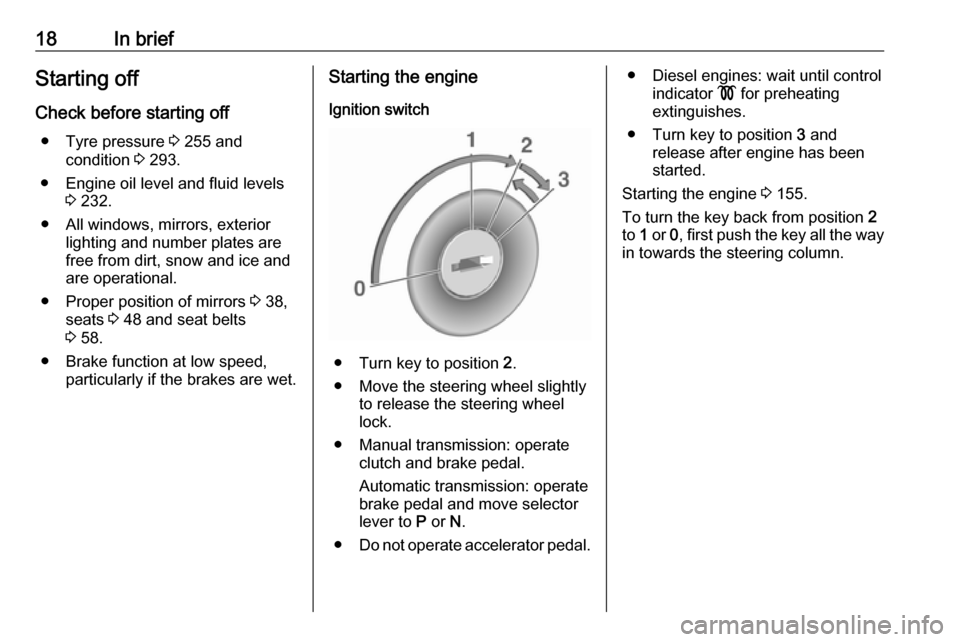
Ignition switch
● Turn key to position 2.
● Move the steering wheel slightly to release the steering wheel
lock.
● Manual transmission: operate clutch and brake pedal.
Automatic transmission: operate
brake pedal and move selector
lever to P or N.
● Do not operate accelerator pedal.
● Diesel engines: wait until control
indicator ! for preheating
extinguishes.
● Turn key to position 3 and
release after engine has been
started.
Starting the engine 3 155.
To turn the key back from position 2
to 1 or 0, first push the key all the way
in towards the steering column.
Page 28 of 315

26Keys, doors and windowsIf the driver's door is not closed
properly, the central locking system
will not work.
Passive locking
Automatic locking 3 28.
Confirmation
Operation of central locking system is confirmed by the hazard warning
flashers. A precondition is that the
setting is activated in the vehicle
personalisation 3 123.
Fault
If the central locking cannot be
operated or the engine cannot be
started, the cause may be one of the
following:
● Fault in electronic key.
● Electronic key is out of reception range.
● The battery voltage is too low.● Overload of the central locking system by operating at frequent
intervals, the power supply is
interrupted for a short time.
● Interference from higher-power radio waves from other sources.
To rectify the cause of the fault,
change the position of the electronic
key.
Manual unlocking 3 26.
Memorised settings
Whenever the ignition is switched off, some of the following settings are
automatically memorised by the
currently used remote control unit or
the electronic key:
● automatic climate control
● lighting
● Infotainment system
● central locking system
● FlexRide interactive driving system
● comfort settingsThe saved settings are automatically
used the next time the ignition is
switched on with the memorised
electronic key 3 23.
A precondition is that Personalisation
by Driver is activated in the personal
settings of the Info Display. This must
be set for each electronic key which is
used. The status change is available
only after locking and unlocking the
vehicle.
The assigned memory position of the power seat is automatically recalled
when switching on ignition and Auto
Memory Recall is activated in the Info
Display for the memorised electronic
key.
Power seat 3 51.
Vehicle personalisation 3 123.
Central locking system
Unlocks and locks doors, load
compartment and fuel filler flap.
A pull on an interior door handle
unlocks the respective door. Pulling
the handle once more opens the door.
Page 33 of 315
Keys, doors and windows31Closing
Use the interior handle.
Central locking system 3 26.
Power tailgate
9 Warning
Take care when operating the
power tailgate. Risk of injury,
particularly to children.
Keep a close watch on the
movable tailgate when operating.
Ensure that nothing becomes
trapped during operating and no
one is standing within the moving
area.
The power tailgate can be operated
by:
● The electronic key.
● Hands-free operation with motion
sensor below the rear bumper.
● The button under the exterior tailgate moulding and C in the
open tailgate.
● The switch C on the inside of
the driver's door.
On vehicles with automatic
transmission, the tailgate can only be operated when the vehicle is
stationary and with selector lever in P.
The turn lights flash and a chime sounds when the power tailgate is
operating.
Note
Operating the power tailgate does
not operate the central locking
system. To open the tailgate with the button on the electronic key, or with
the tailgate button or via hands-free
operation, it is not necessary to
unlock the vehicle. A precondition is
that the electronic key is outside the
vehicle, within a range of approx.
1 m of the tailgate.
Do not leave the electronic key in the
load compartment.
Lock the vehicle after closing if it was
unlocked previously.
Central locking system 3 26.
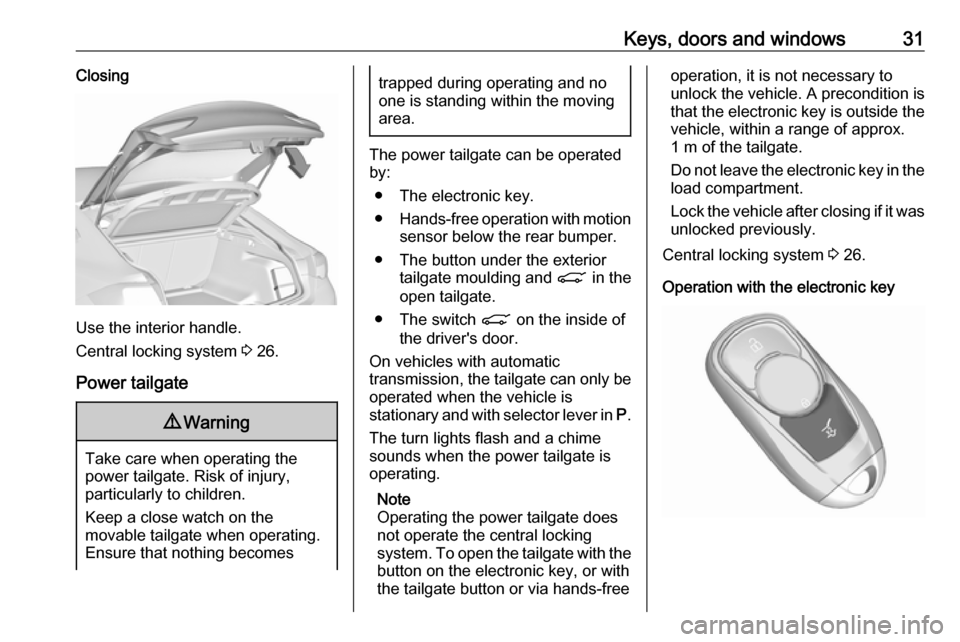
Operation with the electronic key
Page 36 of 315
34Keys, doors and windows
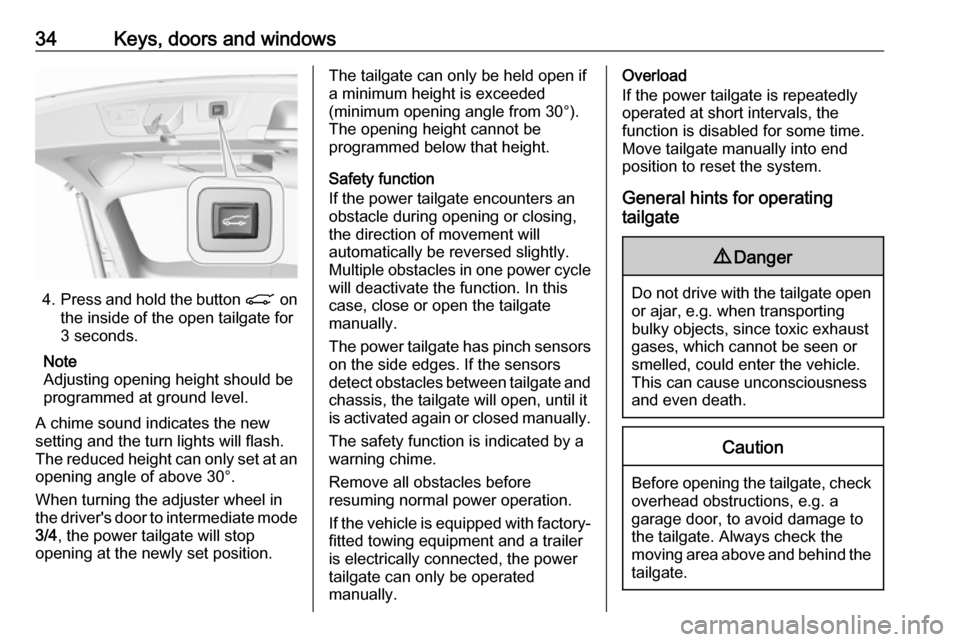
4.Press and hold the button C on
the inside of the open tailgate for
3 seconds.
Note
Adjusting opening height should be programmed at ground level.
A chime sound indicates the new
setting and the turn lights will flash.
The reduced height can only set at an opening angle of above 30°.
When turning the adjuster wheel in
the driver's door to intermediate mode 3/4 , the power tailgate will stop
opening at the newly set position.
The tailgate can only be held open if a minimum height is exceeded
(minimum opening angle from 30°).
The opening height cannot be
programmed below that height.
Safety function
If the power tailgate encounters an obstacle during opening or closing,
the direction of movement will
automatically be reversed slightly.
Multiple obstacles in one power cycle
will deactivate the function. In this
case, close or open the tailgate
manually.
The power tailgate has pinch sensors
on the side edges. If the sensors
detect obstacles between tailgate and chassis, the tailgate will open, until it
is activated again or closed manually.
The safety function is indicated by a
warning chime.
Remove all obstacles before
resuming normal power operation.
If the vehicle is equipped with factory-
fitted towing equipment and a trailer
is electrically connected, the power
tailgate can only be operated
manually.Overload
If the power tailgate is repeatedly
operated at short intervals, the
function is disabled for some time.
Move tailgate manually into end
position to reset the system.
General hints for operating
tailgate9 Danger
Do not drive with the tailgate open
or ajar, e.g. when transporting
bulky objects, since toxic exhaust
gases, which cannot be seen or
smelled, could enter the vehicle.
This can cause unconsciousness
and even death.
Caution
Before opening the tailgate, check overhead obstructions, e.g. a
garage door, to avoid damage to
the tailgate. Always check the
moving area above and behind the
tailgate.
Page 39 of 315
Keys, doors and windows373. Close doors.
4. Activate the anti-theft alarm system.
Status message is displayed in the
Driver Information Centre.
Status LED
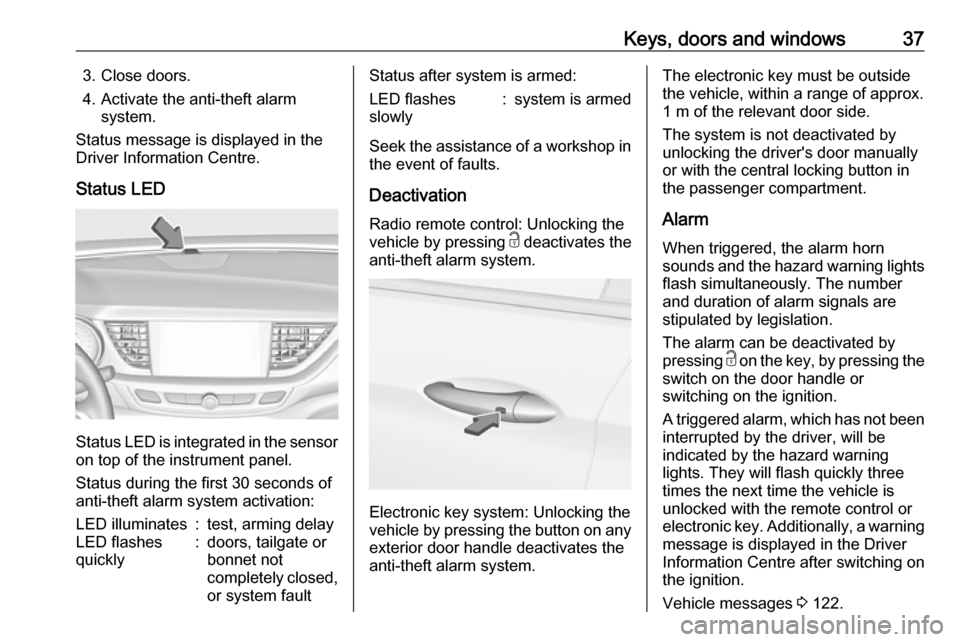
Status LED is integrated in the sensor
on top of the instrument panel.
Status during the first 30 seconds of
anti-theft alarm system activation:
LED illuminates:test, arming delayLED flashes
quickly:doors, tailgate or
bonnet not
completely closed,
or system faultStatus after system is armed:LED flashes
slowly:system is armed
Seek the assistance of a workshop in
the event of faults.
Deactivation
Radio remote control: Unlocking the
vehicle by pressing c deactivates the
anti-theft alarm system.
Electronic key system: Unlocking the
vehicle by pressing the button on any
exterior door handle deactivates the
anti-theft alarm system.
The electronic key must be outside
the vehicle, within a range of approx. 1 m of the relevant door side.
The system is not deactivated by
unlocking the driver's door manually
or with the central locking button in
the passenger compartment.
Alarm
When triggered, the alarm horn
sounds and the hazard warning lights flash simultaneously. The number
and duration of alarm signals are
stipulated by legislation.
The alarm can be deactivated by
pressing c on the key, by pressing the
switch on the door handle or
switching on the ignition.
A triggered alarm, which has not been interrupted by the driver, will be
indicated by the hazard warning
lights. They will flash quickly three
times the next time the vehicle is
unlocked with the remote control or
electronic key. Additionally, a warning
message is displayed in the Driver
Information Centre after switching on
the ignition.
Vehicle messages 3 122.
Page 41 of 315
Keys, doors and windows39Then swivel the control to adjust the
mirror.
Folding mirrors
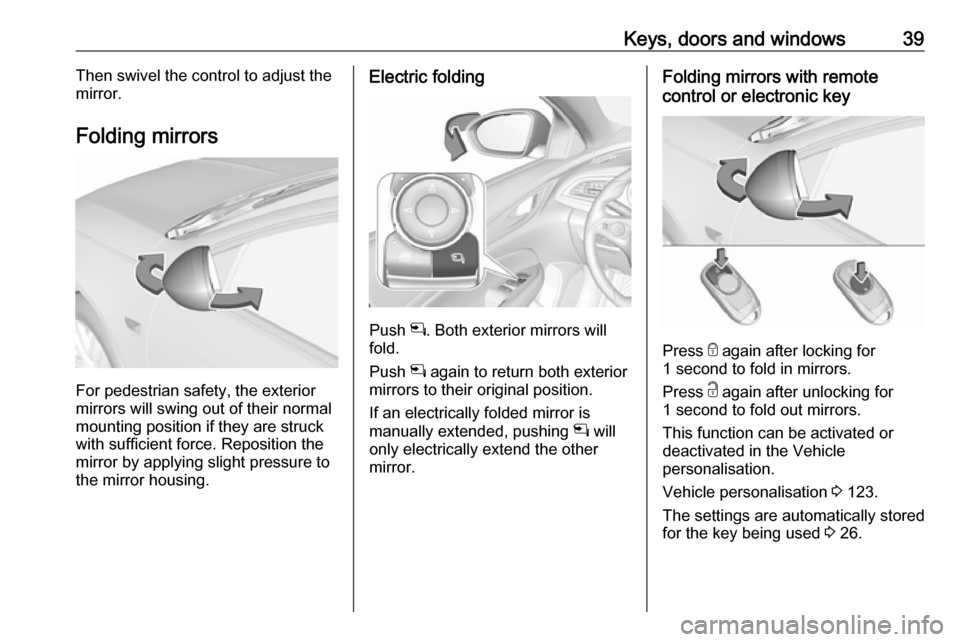
For pedestrian safety, the exterior
mirrors will swing out of their normal
mounting position if they are struck
with sufficient force. Reposition the mirror by applying slight pressure tothe mirror housing.
Electric folding
Push n. Both exterior mirrors will
fold.
Push n again to return both exterior
mirrors to their original position.
If an electrically folded mirror is
manually extended, pushing n will
only electrically extend the other mirror.
Folding mirrors with remote
control or electronic key
Press e again after locking for
1 second to fold in mirrors.
Press c again after unlocking for
1 second to fold out mirrors.
This function can be activated or
deactivated in the Vehicle
personalisation.
Vehicle personalisation 3 123.
The settings are automatically stored
for the key being used 3 26.