ESP OPEL MOKKA 2014 Manual user
[x] Cancel search | Manufacturer: OPEL, Model Year: 2014, Model line: MOKKA, Model: OPEL MOKKA 2014Pages: 217, PDF Size: 6 MB
Page 5 of 217

Introduction3Vehicle specific data
Please enter your vehicle's data on
the previous page to keep it easily
accessible. This information is
available in the sections "Service and maintenance" and "Technical data"
as well as on the identification plate.
Introduction
Your vehicle is a designed
combination of advanced technology, safety, environmental friendliness
and economy.
This Owner's Manual provides you
with all the necessary information to
enable you to drive your vehicle
safely and efficiently.
Make sure your passengers are
aware of the possible risk of accident
and injury which may result from
improper use of the vehicle.
You must always comply with the
specific laws and regulations of the
country that you are in. These laws
may differ from the information in this Owner's Manual.When this Owner's Manual refers to aworkshop visit, we recommend your
Opel Dealer. For gas vehicles we
recommend an Opel Repairer
authorised for servicing gas vehicles.
All Opel Dealers provide first-class service at reasonable prices.
Experienced mechanics trained by
Opel work according to specific Opel
instructions.
The customer literature pack should
always be kept ready to hand in the
vehicle.
Using this manual ■ This manual describes all options and features available for this
model. Certain descriptions,
including those for display and
menu functions, may not apply to
your vehicle due to model variant,
country specifications, special
equipment or accessories.
■ The "In brief" section will give you an initial overview.■ The table of contents at thebeginning of this manual and withineach section shows where the
information is located.
■ The index will enable you to search
for specific information.
■ This Owner's Manual depicts left- hand drive vehicles. Operation is
similar for right-hand drive vehicles.
■ The Owner's Manual uses the factory engine designations. The
corresponding sales designations
can be found in the section
"Technical data".
■ Directional data, e.g. left or right, or
front or back, always relate to thedirection of travel.
■ The vehicle display screens may not support your specific language.
■ Display messages and interior labelling are written in bold letters.
Page 24 of 217

22Keys, doors and windows
A precondition is that Personalization
by driver is activated in the personal
settings of the Graphic-Info-Display. This must be set for each key used.
On vehicles equipped with
Colour-Info-Display, the
personalisation is permanently
activated.
Vehicle personalisation 3 99.
Central locking system Unlocks and locks doors, load
compartment and fuel filler flap.
A pull on an interior door handle
unlocks the respective door. Pulling the handle again opens the door.
Note
In the event of an accident in which
airbags or belt pretensioners are
deployed, the vehicle is
automatically unlocked.
Note
A short time after unlocking with the
remote control the doors are locked
automatically if no door has been
opened.Unlocking
Radio remote control
Press button c.
Two settings are selectable: ■ To unlock only the driver's door, load compartment and fuel filler
flap; press button c once. To unlock
all doors; press button c twice
or
■ press button c once to unlock all
doors, load compartment and fuel
filler flap
The setting can be changed in the
menu Settings in the Info-Display.
Vehicle personalisation 3 99.
The setting can be saved for the key being used. Memorised settings
3 21.
Locking Close doors, load compartment and
fuel filler flap.
Press button e.
If the driver's door is not closed
properly, the central locking system will not work.
Page 32 of 217
30Keys, doors and windows
payment must be attached in these
areas. Otherwise data recording
malfunctions may occur.
Windscreen stickers
Do not attach stickers such as toll
road stickers or similar on the
windscreen in the area of the interior
mirror. Otherwise the detection zone
of the sensor and the view area of the camera in the mirror housing could be restricted.
Manual windows The door windows can be opened or
closed with the window winders.
Power windows9 Warning
Take care when operating the
power windows. Risk of injury,
particularly to children.
If there are children on the rear seats, switch on the child safety
system for the power windows.
Keep a close watch on the
windows when closing them.
Ensure that nothing becomes
trapped in them as they move.
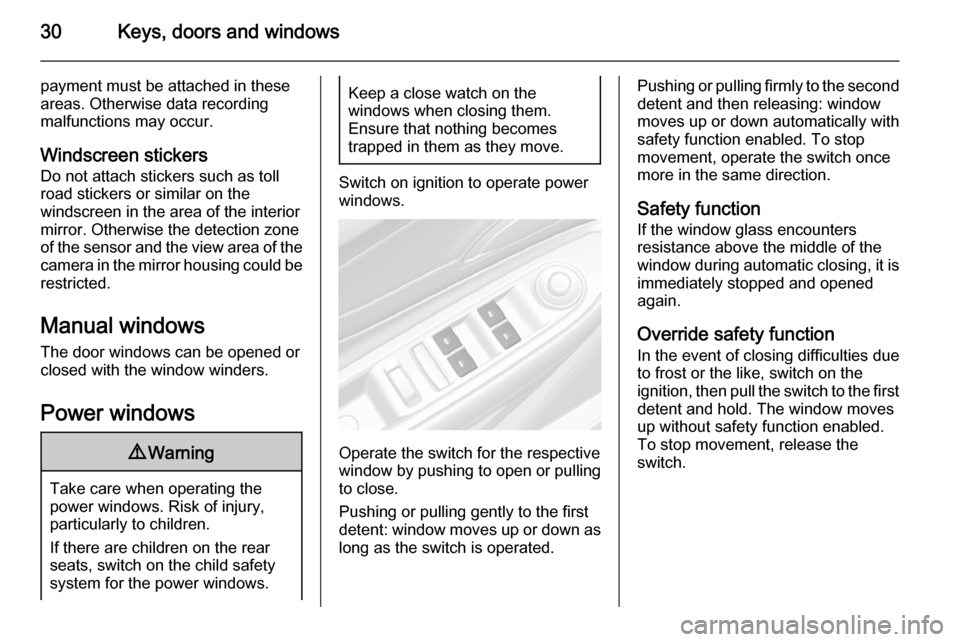
Switch on ignition to operate power
windows.
Operate the switch for the respective
window by pushing to open or pulling to close.
Pushing or pulling gently to the first
detent: window moves up or down as long as the switch is operated.
Pushing or pulling firmly to the second
detent and then releasing: window
moves up or down automatically with
safety function enabled. To stop
movement, operate the switch once
more in the same direction.
Safety function
If the window glass encounters
resistance above the middle of the
window during automatic closing, it is
immediately stopped and opened again.
Override safety function
In the event of closing difficulties due
to frost or the like, switch on the
ignition, then pull the switch to the first
detent and hold. The window moves
up without safety function enabled.
To stop movement, release the
switch.
Page 40 of 217
38Seats, restraints
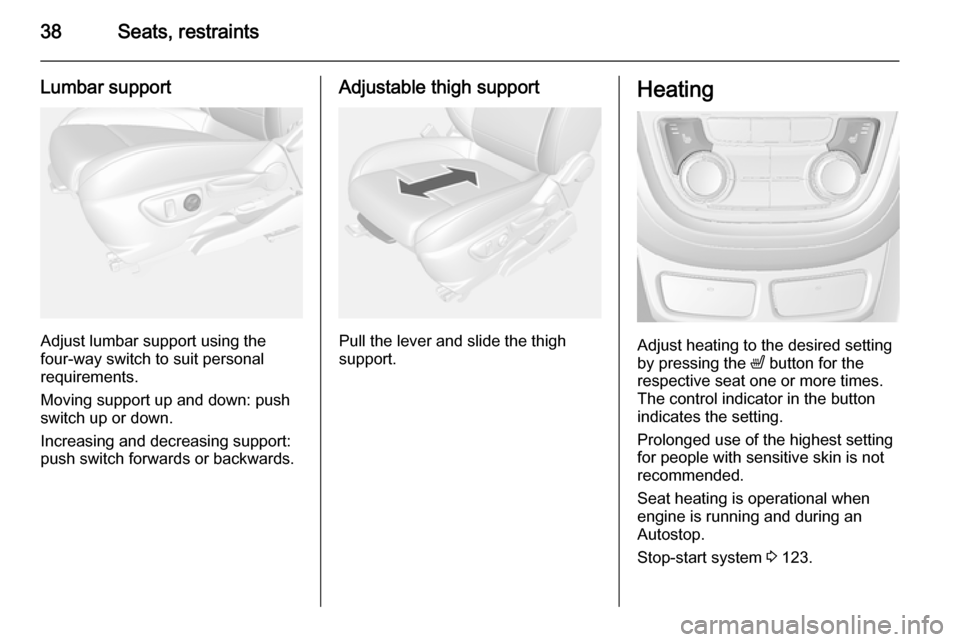
Lumbar support
Adjust lumbar support using the
four-way switch to suit personal
requirements.
Moving support up and down: push
switch up or down.
Increasing and decreasing support:
push switch forwards or backwards.
Adjustable thigh support
Pull the lever and slide the thigh
support.
Heating
Adjust heating to the desired setting
by pressing the ß button for the
respective seat one or more times.
The control indicator in the button
indicates the setting.
Prolonged use of the highest setting
for people with sensitive skin is not
recommended.
Seat heating is operational when engine is running and during an
Autostop.
Stop-start system 3 123.
Page 50 of 217
48Seats, restraints
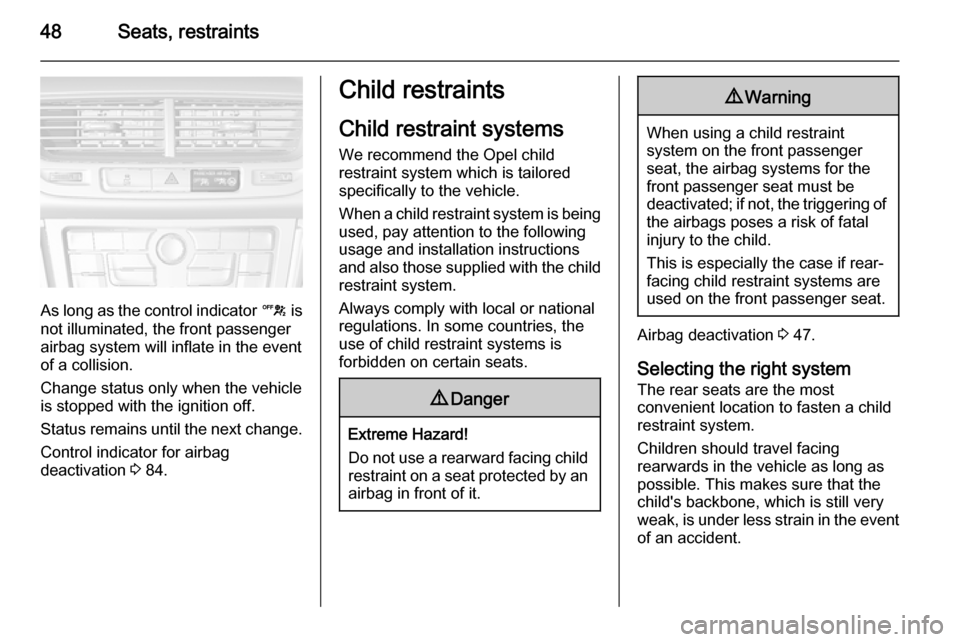
As long as the control indicator c is
not illuminated, the front passenger
airbag system will inflate in the event
of a collision.
Change status only when the vehicle is stopped with the ignition off.
Status remains until the next change.
Control indicator for airbag
deactivation 3 84.
Child restraints
Child restraint systems
We recommend the Opel child
restraint system which is tailored
specifically to the vehicle.
When a child restraint system is being used, pay attention to the following
usage and installation instructions and also those supplied with the child
restraint system.
Always comply with local or national
regulations. In some countries, the
use of child restraint systems is
forbidden on certain seats.9 Danger
Extreme Hazard!
Do not use a rearward facing child restraint on a seat protected by an airbag in front of it.
9 Warning
When using a child restraint
system on the front passenger
seat, the airbag systems for the
front passenger seat must be
deactivated; if not, the triggering of the airbags poses a risk of fatal
injury to the child.
This is especially the case if rear-
facing child restraint systems are
used on the front passenger seat.
Airbag deactivation 3 47.
Selecting the right system The rear seats are the most
convenient location to fasten a child restraint system.
Children should travel facing
rearwards in the vehicle as long as
possible. This makes sure that the child's backbone, which is still very
weak, is under less strain in the event of an accident.
Page 80 of 217

78Instruments and controls
■Display digital clock : Switches on/
off indication of time on the display.
■ RDS clock synchronization : The
RDS signal of most VHF
transmitters automatically sets the time. RDS time synchronisation
can take a few minutes. Some
transmitters do not send a correct
time signal. In such cases, it is
recommended to switch off
automatic time synchronisation.
Vehicle personalisation 3 99.
Time and date settings
CD 600/Navi 950
Press the CONFIG button and then
select the Time and Date menu item
to display the respective submenu.
Note
If RDS Auto Time Adjust is activated,
time and date are automatically set
by the system.
See Infotainment system manual for further information.
Set time
To adjust the time settings, select the
Set Time menu item. Turn the
multifunction knob to adjust the first
setting.
Press the multifunction knob to
confirm the input. The coloured
background moves to the next
setting.
Adjust all settings.
Set date
To adjust the time settings, select the
Set Date menu item. Turn the
multifunction knob to adjust the first
setting.
Press the multifunction knob to
confirm the input. The coloured
background moves to the next
setting.
Adjust all settings.
Time format
To choose the desired time format,
select 12 hr / 24 hr Format . Activate
12 Hour or 24 Hour .
Vehicle personalisation 3 99.
Page 101 of 217
Instruments and controls99
Average speed
Display of average speed. The
measurement can be reset at any
time.
To reset, press the SET/CLR button
for a few seconds.
Route guidance
Additionally to the navigation
information in the Colour-Info-
Display, route guidance is displayed
in the Driver Information Centre.Vehicle personalisation
The vehicle can be personalised by
changing the settings in the
Infotainment system.
Depending on vehicle equipment
some of the functions described
below may not be available.
Settings in the
Graphic-Info-Display
CD 400
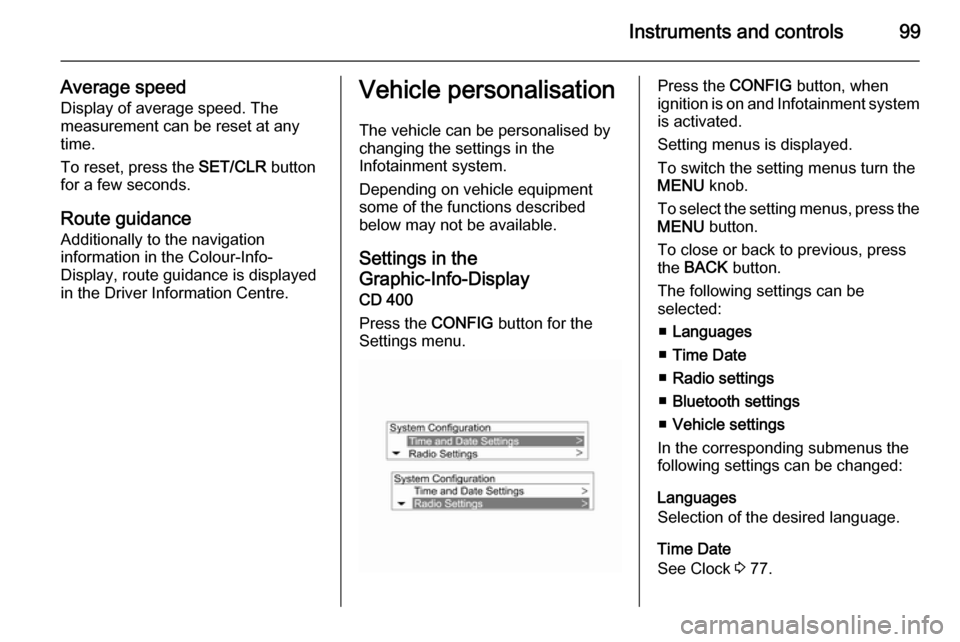
Press the CONFIG button for the
Settings menu.Press the CONFIG button, when
ignition is on and Infotainment system is activated.
Setting menus is displayed.
To switch the setting menus turn the
MENU knob.
To select the setting menus, press the
MENU button.
To close or back to previous, press
the BACK button.
The following settings can be
selected:
■ Languages
■ Time Date
■ Radio settings
■ Bluetooth settings
■ Vehicle settings
In the corresponding submenus the
following settings can be changed:
Languages
Selection of the desired language.
Time Date
See Clock 3 77.
Page 103 of 217
Instruments and controls101
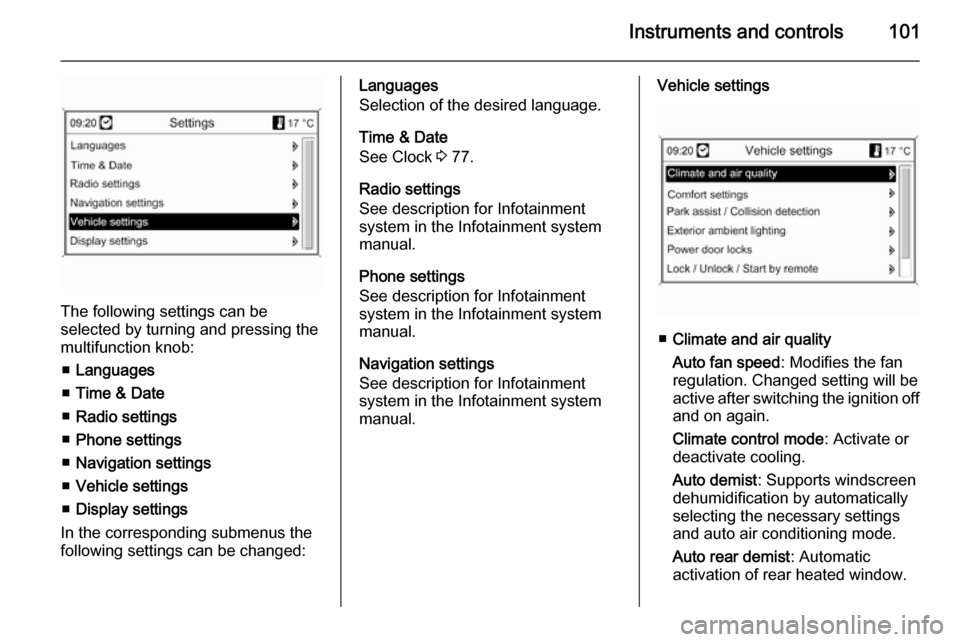
The following settings can be
selected by turning and pressing the
multifunction knob:
■ Languages
■ Time & Date
■ Radio settings
■ Phone settings
■ Navigation settings
■ Vehicle settings
■ Display settings
In the corresponding submenus the
following settings can be changed:
Languages
Selection of the desired language.
Time & Date
See Clock 3 77.
Radio settings
See description for Infotainment
system in the Infotainment system
manual.
Phone settings
See description for Infotainment
system in the Infotainment system
manual.
Navigation settings
See description for Infotainment
system in the Infotainment system
manual.Vehicle settings
■ Climate and air quality
Auto fan speed : Modifies the fan
regulation. Changed setting will be
active after switching the ignition off
and on again.
Climate control mode : Activate or
deactivate cooling.
Auto demist : Supports windscreen
dehumidification by automatically
selecting the necessary settings
and auto air conditioning mode.
Auto rear demist : Automatic
activation of rear heated window.
Page 105 of 217
Instruments and controls103
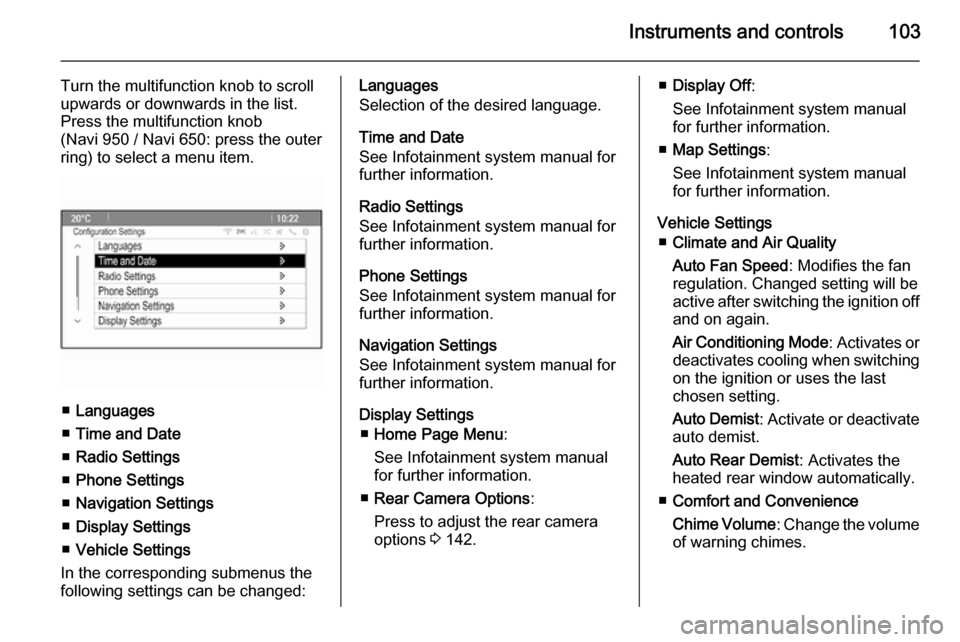
Turn the multifunction knob to scroll
upwards or downwards in the list.
Press the multifunction knob
(Navi 950 / Navi 650: press the outer
ring) to select a menu item.
■ Languages
■ Time and Date
■ Radio Settings
■ Phone Settings
■ Navigation Settings
■ Display Settings
■ Vehicle Settings
In the corresponding submenus the
following settings can be changed:
Languages
Selection of the desired language.
Time and Date
See Infotainment system manual for
further information.
Radio Settings
See Infotainment system manual for
further information.
Phone Settings
See Infotainment system manual for
further information.
Navigation Settings
See Infotainment system manual for
further information.
Display Settings ■ Home Page Menu :
See Infotainment system manual
for further information.
■ Rear Camera Options :
Press to adjust the rear camera
options 3 142.■ Display Off :
See Infotainment system manual for further information.
■ Map Settings :
See Infotainment system manual
for further information.
Vehicle Settings ■ Climate and Air Quality
Auto Fan Speed : Modifies the fan
regulation. Changed setting will be
active after switching the ignition off
and on again.
Air Conditioning Mode : Activates or
deactivates cooling when switching
on the ignition or uses the last
chosen setting.
Auto Demist : Activate or deactivate
auto demist.
Auto Rear Demist : Activates the
heated rear window automatically.
■ Comfort and Convenience
Chime Volume : Change the volume
of warning chimes.
Page 120 of 217

118Climate control
Temperature preselectionTemperatures can be set to the
desired value.
If the minimum temperature is set, the
climate control system runs at
maximum cooling.
If the maximum temperature is set, the climate control system runs at maximum heating.
Note
If the temperature will be reduced for
climate comfort reasons, an
Autostop can be inhibited or the
engine will restart automatically,
when cooling is switched on.
Stop-start system 3 123.
The temperature can be adjusted separately for driver and front
passenger side.
Demisting and defrosting thewindows V
■ Press button V.
■ Press cooling button n.■ Temperature and air distribution
are set automatically and the fan
runs at high speed.
■ Switch on heated rear window Ü.
■ To return to automatic mode: press
button V or AUTO .
Note
If the V button is pressed while the
engine is running, an Autostop will
be inhibited until the V button is
pressed again.
If the V button is pressed while the
engine is in an Autostop, the engine will restart automatically.
Manual settings Climate control system settings can
be changed by activating the buttons
and rotary knobs as follows.
Changing a setting will deactivate the
automatic mode.
Fan speed Z
The selected fan speed is indicated
with x and a number in the display. If
the fan is switched off the air
conditioning is also deactivated.To return to automatic mode: Press
AUTO button.
Air distribution l, M , K
Press appropriate button for desired
adjustment. Activation is indicated by
the LED in the button.l=to windscreen and front door
windows.M=to head area.K=to foot well.
Combination of settings are possible.
Return to automatic air distribution:
Deactivate corresponding setting or
press button AUTO.
Cooling n
Activate or deactivate with the n
button.
The air conditioning system cools and
dehumidifies (dries) when outside temperature is above a specific level.
Therefore condensation may form
and drip from under the vehicle.