warning light OPEL MOKKA 2014 Manual user
[x] Cancel search | Manufacturer: OPEL, Model Year: 2014, Model line: MOKKA, Model: OPEL MOKKA 2014Pages: 217, PDF Size: 6 MB
Page 13 of 217

In brief11
1Side air vents ...................... 119
2 Light switch ......................... 105
3 Turn and lane-change
signals ................................. 110
Headlight flash ....................106
Low beam and high beam ..106
4 Cruise control ...................... 136
Speed limiter ....................... 137
Forward collision alert .........139
5 Instruments ........................... 80
6 Horn ..................................... 74
Driver airbag ........................ 45
7 Steering wheel controls .......73
8 Windscreen wiper,
windscreen washer system ...74
Rear wiper, rear washer system ................................... 76
9 Centre air vents adjustment 119
10 Centre air vents ................... 119
11 Electronic Stability Control . 134
12 Hazard warning flashers ....11013 Control indicator for airbag
deactivation .......................... 84
14 Instrument panel storage
button .................................... 55
15 Passenger airbag
deactivation ........................... 47
16 Glovebox .............................. 56
17 Infotainment system
18 Eco button for stop-start
system ................................. 123
19 AUX input, USB input, SD
card slot
20 Selector lever, manual
transmission ....................... 131
Automatic transmission ......128
21 Parking brake ......................133
22 Power outlet .......................... 79
23 Parking assist ..................... 141
Descent control system ......... 86
24 Climate control system ........ 115
25 Accelerator pedal ................122
26 Ignition switch with
steering wheel lock ............122
27 Brake pedal ......................... 13228Clutch pedal ........................ 121
29 Steering wheel adjustment ..73
30 Instrument panel storage ......55
31 Bonnet release lever ..........155
Page 37 of 217

Seats, restraints35
Horizontal adjustment
To adjust horizontally, pull the head
restraint forwards. It engages in three
positions.
To return to its rearmost position, pull fully forwards and release.
Head restraints on rear seats
Height adjustment
Pull the head restraint upwards.
To move down, press the catch (1)
and push the head restraint
downwards.
Removal
Raise head restraint to its full height.
Press the catches (1) and (2) at the
same time.
Pull up the head restraint.
Front seats
Seat position9 Warning
Only drive with the seat correctly
adjusted.
■ Sit with buttocks as far back against
the backrest as possible. Adjust the distance between the seat and the
pedals so that legs are slightly
angled when pressing the pedals.
Slide the front passenger seat as
far back as possible.
Page 38 of 217

36Seats, restraints
■ Sit with shoulders as far backagainst the backrest as possible.Set the backrest rake so that it is
possible to easily reach the
steering wheel with arms slightly
bent. Maintain contact between
shoulders and the backrest when
turning the steering wheel. Do not
tilt the backrest too far back. We
recommend a maximum rake of
approx. 25°.
■ Adjust the steering wheel 3 73.
■ Set seat height high enough to have a clear field of vision on all
sides and of all display instruments. There should be at least one hand
of clearance between head and the
headlining. Your thighs should rest
lightly on the seat without pressing
into it.
■ Adjust the head restraint 3 34.
■ Adjust the height of the seat belt 3 40.■ Adjust the thigh support so that
there is a space approx. two fingers
wide between the edge of the seat
and the hollow of the knee.
■ Adjust the lumbar support so that it
supports the natural shape of the
spine.
Seat adjustment9 Danger
Do not sit nearer than 25 cm from
the steering wheel, to permit safe
airbag deployment.
9 Warning
Never adjust seats while driving as
they could move uncontrollably.
Drive only with engaged seats and
backrests.
Seat positioning
Pull handle, slide seat, release
handle.
Page 42 of 217

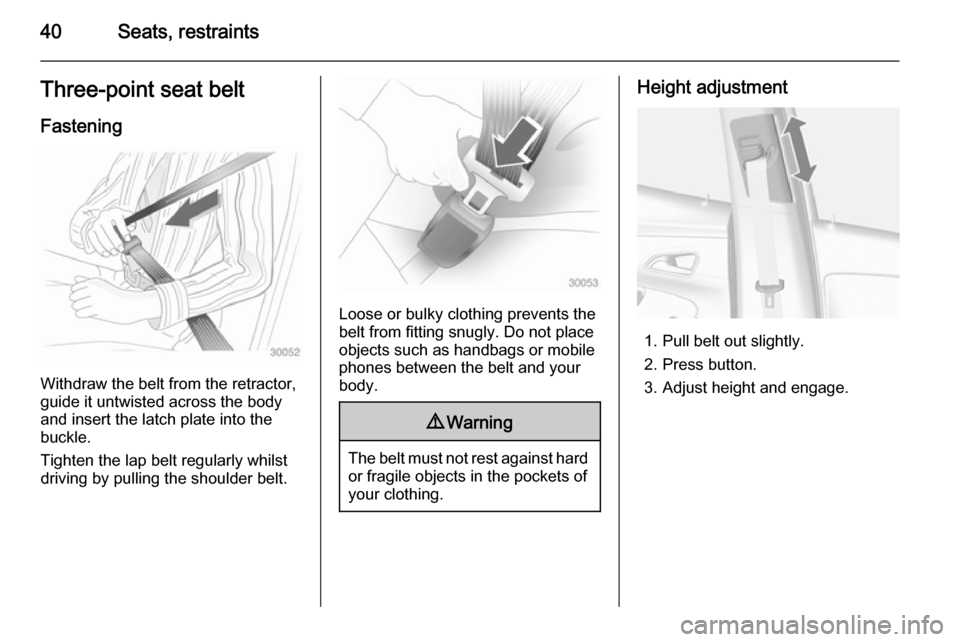
40Seats, restraintsThree-point seat belt
Fastening
Withdraw the belt from the retractor,
guide it untwisted across the body
and insert the latch plate into the
buckle.
Tighten the lap belt regularly whilst
driving by pulling the shoulder belt.
Loose or bulky clothing prevents the
belt from fitting snugly. Do not place
objects such as handbags or mobile
phones between the belt and your body.
9 Warning
The belt must not rest against hard
or fragile objects in the pockets of
your clothing.
Height adjustment
1. Pull belt out slightly.
2. Press button.
3. Adjust height and engage.
Page 49 of 217

Seats, restraints479Warning
Keep the area in which the airbag
inflates clear of obstructions.
The hooks in the roof frame are
only suitable for hanging up light
articles of clothing, without coat
hangers. Do not keep any items in these clothes.
Airbag deactivation
The front passenger airbag system
must be deactivated if a child restraint system is to be fitted on this seat. The
side airbag and curtain airbag
systems, the belt pretensioners and
all driver airbag systems will remain
active.
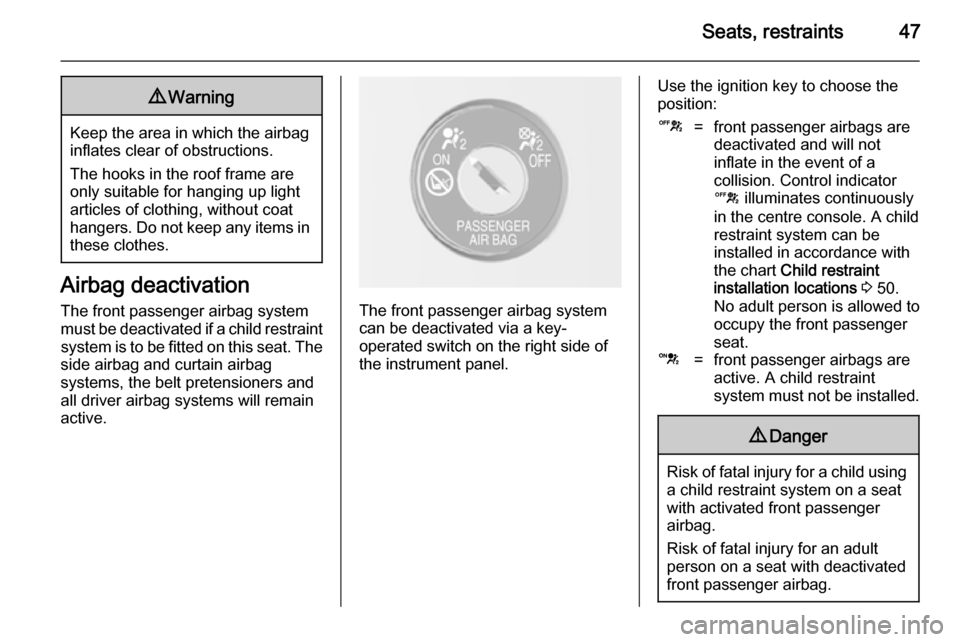
The front passenger airbag system can be deactivated via a key-
operated switch on the right side of the instrument panel.
Use the ignition key to choose the
position:c=front passenger airbags are
deactivated and will not
inflate in the event of a
collision. Control indicator
c illuminates continuously
in the centre console. A child
restraint system can be
installed in accordance with
the chart Child restraint
installation locations 3 50.
No adult person is allowed to
occupy the front passenger
seat.d=front passenger airbags are
active. A child restraint
system must not be installed.9 Danger
Risk of fatal injury for a child using
a child restraint system on a seat
with activated front passenger
airbag.
Risk of fatal injury for an adult
person on a seat with deactivated
front passenger airbag.
Page 67 of 217

Storage65
To increase visibility, the tail lights ofthe vehicle are activated when the
rear carrier system is folded back.9 Warning
When folding the rear carrier
system forwards again, take care that the system is engaged
securely.
Removing bicycles
Undo strap retainers on both bicycle
tyres.
Turn knob anti-clockwise and remove
mounting brackets.
Detaching adapter
Detach the adapter before removing the bicycle on the rear carrier system.
1. Fold in wheel recesses.
2. Unbutton the strap.
3. Turn the lever ( 1) forwards and
hold.
4. Lift the adapter ( 2) at the rear and
remove.
Disassembling the bicycle rack
Swivel clamp sidewards ( 1) and pull
out locking pin. Remove upper part of rack ( 2).
Page 69 of 217

Storage67
Swivel both clamping levers inwards
as far as they will go. Fasten strap.
Fold in tail lamps
Remove both screws. Pull tail lamps
out of the retainer and swivel them
forwards.
Push the tail lamps into the retainer
and reinstall screws to fix the lamps
Fold in number plate holder
Lift the number plate holder and fold
it forwards.
Retracting the rear carrier systemCaution
Take care that all foldable parts,
e.g. wheel recesses and mounting brackets, are stowed accurately.
Otherwise the rear carrier system might get damaged when trying to retract it.
Push the release lever up and hold.
Lift the system slightly and push it into the bumper until it engages.
Release lever must return to original
position.
9 Warning
If the system cannot be correctly
engaged, please seek the
assistance of a workshop.
Load compartment
Load compartment extensionCaution
First turn down the rear seat
cushion before folding the rear
seat backrest.
Disregard may lead to damage to
the rear seat.
1. Push head restraints down by pressing the catch.
Note
To ensure enough room for rear seat
cushion operation, slide the front
seat forward and move the front seat backrest upright.
Page 75 of 217

Instruments and controls73Instruments and
controlsControls ....................................... 73
Warning lights, gauges and indi‐ cators ........................................... 80
Information displays .....................89
Vehicle messages ........................ 94
Trip computer ............................... 97
Vehicle personalisation ................99Controls
Steering wheel adjustment
Unlock lever, adjust steering wheel,
then engage lever and ensure it is fully locked.
Do not adjust steering wheel unless
vehicle is stationary and steering
wheel lock has been released.
Steering wheel controls
The Infotainment system and the
cruise control can be operated via the controls on the steering wheel.
Further information is available in the
Infotainment system manual.
Cruise control 3 136
Page 82 of 217

80Instruments and controlsWarning lights, gauges
and indicators
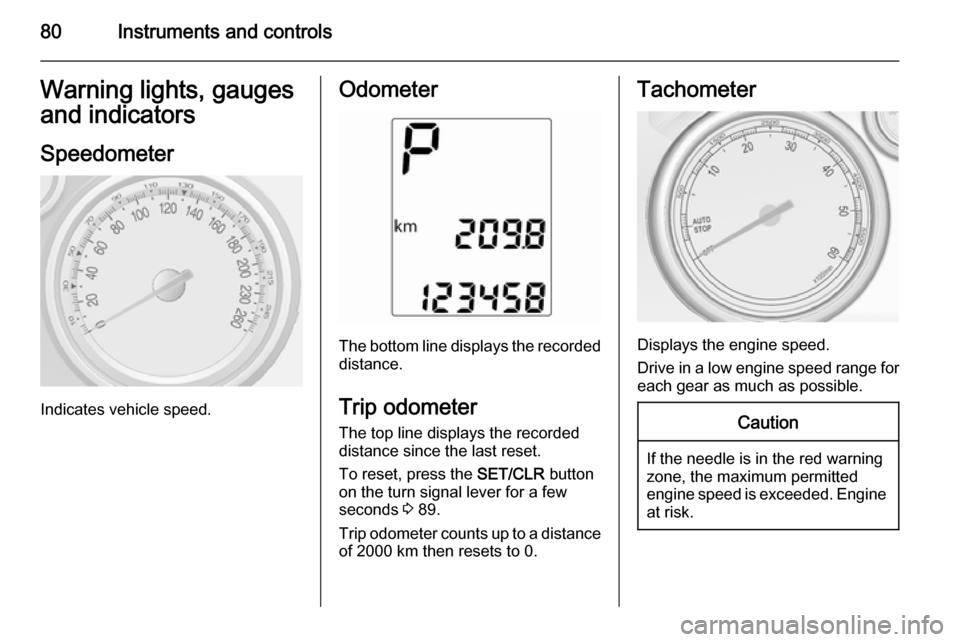
Speedometer
Indicates vehicle speed.
Odometer
The bottom line displays the recorded distance.
Trip odometer The top line displays the recorded
distance since the last reset.
To reset, press the SET/CLR button
on the turn signal lever for a few
seconds 3 89.
Trip odometer counts up to a distance
of 2000 km then resets to 0.
Tachometer
Displays the engine speed.
Drive in a low engine speed range for each gear as much as possible.
Caution
If the needle is in the red warning
zone, the maximum permitted
engine speed is exceeded. Engine at risk.
Page 86 of 217

84Instruments and controls
Control indicators in the centreconsole
Turn signal
O illuminates or flashes green.
Illuminates briefly The parking lights are switched on.
Flashes A turn signal or the hazard warning
flashers are activated.
Rapid flashing: failure of a turn signal
light or associated fuse, failure of turn
signal light on trailer.
Bulb replacement 3 161, Fuses
3 167.
Turn signals 3 110.
Seat belt reminder X for driver's seat illuminates or
flashes red.
k for front passenger seat illuminates
or flashes red, when seat is occupied.
Y for rear seats illuminate in the
Driver Information Centre (DIC).
When the ignition is switched on, the indicator light illuminates for severalseconds.
If seat belt becomes unbuckled when the vehicle is moving, the indicator
light illuminates.
If the seat belt is buckled, the indicator light extinguishes.
Three-point seat belts 3 40.
Airbag and belt tensioners
v illuminates red.When the ignition is switched on, the
control indicator illuminates for a few seconds. If it does not illuminate,
does not go out after a few seconds
or illuminates whilst driving, there is a
fault in the airbag system. Seek the
assistance of a workshop. The
airbags and belt pretensioners may
fail to trigger in the event of an
accident.
Deployment of the belt pretensioners
or airbags is indicated by continuous
illumination of v.9 Warning
Have the cause of the fault
remedied immediately by a
workshop.
Belt pretensioners, airbag system
3 39, 3 42.
Airbag deactivation
V illuminates yellow.
The front passenger airbag is
activated.