navigation system OPEL MOKKA X 2017 Infotainment system
[x] Cancel search | Manufacturer: OPEL, Model Year: 2017, Model line: MOKKA X, Model: OPEL MOKKA X 2017Pages: 155, PDF Size: 2.56 MB
Page 46 of 155
46Navigationuser defined POIs can be
downloaded to the Infotainment
system.
For each POI, you need to define the GPS coordinates (longitude and
latitude values) of the respective
location and a descriptive name.
After downloading the POI data to the Infotainment system, you will find the
respective POIs as selectable
destinations in the My POIs menu,
see "POIs entry" in chapter
"Destination input" 3 47.
Creating a text file with POI data
Create a text file (e.g. by using a
simple text editor software) with an arbitrary name and the file
extension .poi, e.g. "TomsPOIs.poi".
Note
Character encoding UTF-8
(Unicode) needs to be selected
when storing the text file. Otherwise
the POI data may not be imported
correctly to the system.
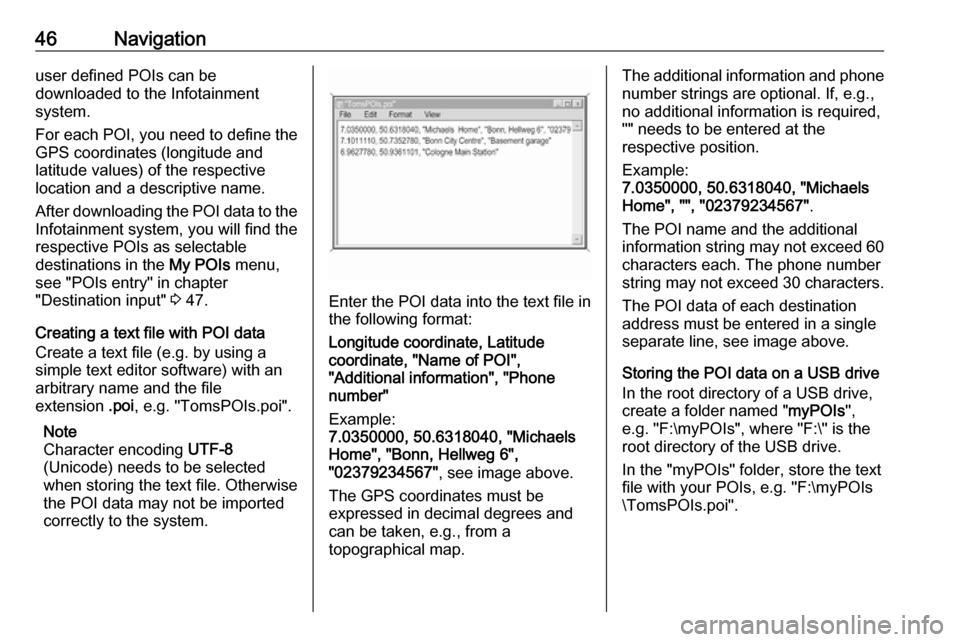
Enter the POI data into the text file in the following format:
Longitude coordinate, Latitude
coordinate, "Name of POI",
"Additional information", "Phone
number"
Example:
7.0350000, 50.6318040, "Michaels
Home", "Bonn, Hellweg 6",
"02379234567" , see image above.
The GPS coordinates must be
expressed in decimal degrees and
can be taken, e.g., from a
topographical map.
The additional information and phone
number strings are optional. If, e.g., no additional information is required,
"" needs to be entered at the
respective position.
Example:
7.0350000, 50.6318040, "Michaels
Home", "", "02379234567" .
The POI name and the additional
information string may not exceed 60 characters each. The phone number
string may not exceed 30 characters.
The POI data of each destination
address must be entered in a single
separate line, see image above.
Storing the POI data on a USB drive
In the root directory of a USB drive,
create a folder named " myPOIs",
e.g. "F:\myPOIs", where "F:\" is the
root directory of the USB drive.
In the "myPOIs" folder, store the text
file with your POIs, e.g. "F:\myPOIs
\TomsPOIs.poi".
Page 47 of 155

Navigation47Organising the POI data in several
subfolders
Optionally, you can organise the text
files in several randomly named
subfolders (max. depth of subfolder
structure: 2).
Examples: F:\myPOIs\AnnsPOIs or
F:\myPOIs\MyJourney\London,
where F:\ is the root directory of the
USB drive.
Note
In a folder only subfolders or only POI files may be stored. A mixture of
both will not be imported correctly to the system.
After downloading individual POI data
organised in that way to the
Infotainment system (see download description further below), the My
POIs menu will show a list of
selectable submenus.
After selecting a submenu, further
submenus or the related list of
imported POI categories will be
displayed.Downloading the POI data to the
Infotainment system
Connect the USB device with your
user defined POI data to the USB port
3 34 of the Infotainment system.
A message is displayed that prompts
you to confirm the download.
After confirmation, the POI data will
be downloaded to the Infotainment system.
The downloaded POIs are then
selectable as destinations via the My
POIs menu, see "POIs entry" in
chapter "Destination input" 3 47.
Destination input The navigation application provides
different options to set a destination
for route guidance.
Press ; and select NAV on the Home
screen to display the navigation map.
Select DESTINATION in the
interaction selector bar and then
select one of the different address
entry options.
One-shot destination entry
Touch the entry field in the top line of
the menu. A keyboard is displayed.
For a detailed description on the
keyboards 3 15.
Enter an address or search term and
confirm your input.
Two lists with possible destinations
are created. To switch between the
list tabs, touch Address or POI in the
top line of the screen.
Address list:
Page 49 of 155
Navigation49If there is more than one destination
possible according to the information
entered, a list of all matching
destinations found is displayed.
Select the desired address.
The destination details view is
displayed.
To start route guidance, select Go.
Crossroad entry screen
Select CROSSROADS . The
Crossroads Entry screen is
displayed.
Touch one of the entry fields next to
the address part entries. A keyboard
is displayed.
For a detailed description on the
keyboards 3 15.
Enter the required destination
information.
To confirm your input, select 9 in the
top right corner of the screen.
If there is more than one destination
possible according to the information
entered, a list of all matching
destinations found is displayed.
Select the desired address.
The destination details view is
displayed.
To start route guidance, select Go.
POIs entry
A point of interest (POI) is a specific
location that might be of general interest, e.g. a petrol station, a
parking area or a restaurant.
The data stored within the navigation
system contains a great number of
predefined POIs, which are indicated
on the map (if activated, 3 41).
You may also store individual POIs
within the system, see "Creating and downloading user defined POIs" inchapter "Usage" 3 41. Those POIs
are selectable as destinations via the
POI main category My POIs.
To select a POI as a destination for
route guidance, select
DESTINATION in the interaction
selector bar and then select POIs. A
list for search area selection is
displayed.
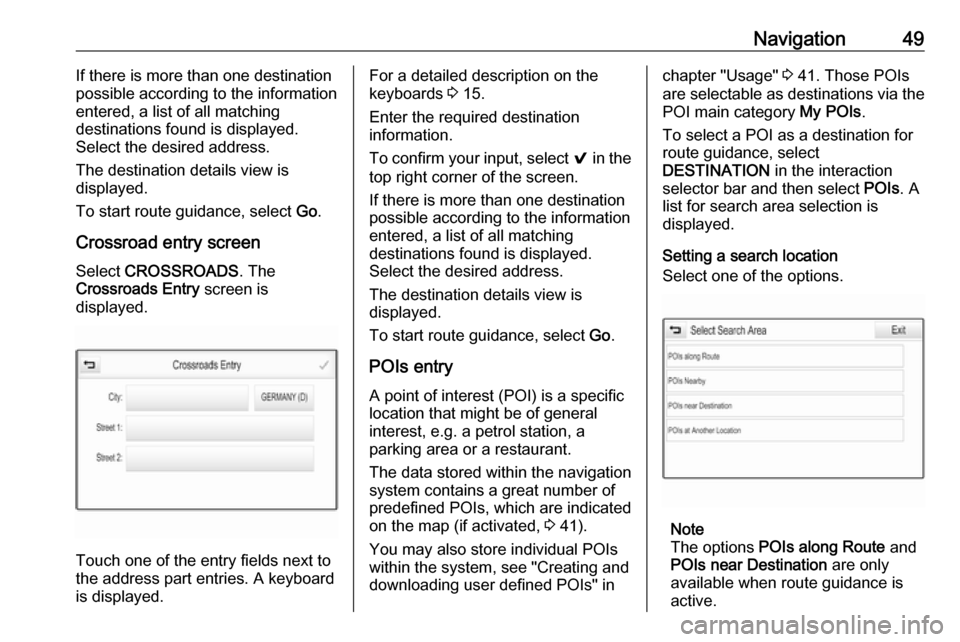
Setting a search location
Select one of the options.
Note
The options POIs along Route and
POIs near Destination are only
available when route guidance is active.
Page 53 of 155

Navigation53New destinationTo set a new destination, you may
cancel route guidance to the current
destination and then enter a new
destination. Or you may directly enter
a new destination.
While under active route guidance,
select DESTINATION in the
interaction selector bar of the map
view.
Alternatively, touch the arrow symbol
indicating your next turning
manoeuvre on the right side of the
screen to display the route guidance
menu. Select DESTINATION in the
interaction selector bar of the route
guidance menu.
Enter or select a new address.
Select Go. You are prompted with a
message.
Select Set New Destination . The
route is recalculated and the new
destination is set.
Calling a destination
After entering a destination and
before starting route guidance, the
destination details view is displayed.To initiate a phone call to the selected location, select Call.
Note
The Call screen button is only
available if a phone number is stored
for the respective location.
Storing destinations
Contacts entry
After entering a destination and
before starting route guidance, the
destination details view is displayed.
To save the respective destination in
the contacts list, select Save. For a
detailed description on how to save
an address in the contacts list 3 20.
Note
The Save screen button is only
available if the address has not yet been stored in the system.
Favourite
Favourites may be stored from almost
all screen views.
For a detailed description on how to store destination favourites 3 16.Guidance
Route guidance is provided by the
navigation system through visual
instructions and voice prompts (voice guidance).Visual instructions
Visual instructions are provided on
the displays.Navigation voice prompts
Navigation voice prompts announce
which direction to follow, when
approaching an intersection at which
you need to turn.
To activate the voice prompts
function and set the volume, see
"Navigation voice settings" below.
Page 54 of 155

54NavigationStarting and cancelling route
guidance
Starting route guidance
To start route guidance to a new
destination chosen, select Go in the
destination details view.
To directly start route guidance to the last destination chosen, select
MENU in the interaction selector bar
and then select Resume to.
Route guidance to the last destination selected is restarted.
Cancelling route guidance
To cancel route guidance, you may
optionally:
● Touch x on the navigation map
screen.
● Select MENU in the interaction
selector bar and then select
Cancel Route .
● Touch the arrow symbol indicating your next turning
manoeuvre on the right side of
the screen to display the route
guidance menu (see "Route
guidance menu" below).Select END in the interaction
selector bar.
Navigation voice settings
Mute
To temporarily mute the output of
navigation voice prompts, select y on
the left side of the map screen. The
icon changes to z.
To unmute the system, select z
again.
Voice prompts
Select MENU in the interaction
selector bar and then select Navigation Voice Preferences to
display the respective submenu.
If Voice Prompts - On is set,
navigation voice prompts are read out
by the system during active route guidance.
Set Voice Prompts - On or Voice
Prompts - Off .
If set to Off, no navigation voice
prompts are provided by the system.Voice prompts during phone calls
Select MENU in the interaction
selector bar and then select Navigation Voice Preferences to
display the respective submenu.
Select Prompts During Phone Calls .
If On is selected, navigation voice
prompts are also read out during
phone calls.
If Off is selected, no voice prompts
are given out. If Beeps is selected, a
beep sounds instead of the
announcement.
Volume
To adjust the volume of the voice
prompts, select ─ or w.
Information on traffic incidents Traffic list
To display a list of traffic incidents
close to the current location of the vehicle, press ; and select
TRAFFIC .
Page 55 of 155
Navigation55Alternatively, select MENU in the
interaction selector bar and then select Traffic to display the respective
submenu. Select Show Nearby
Traffic Incidents .
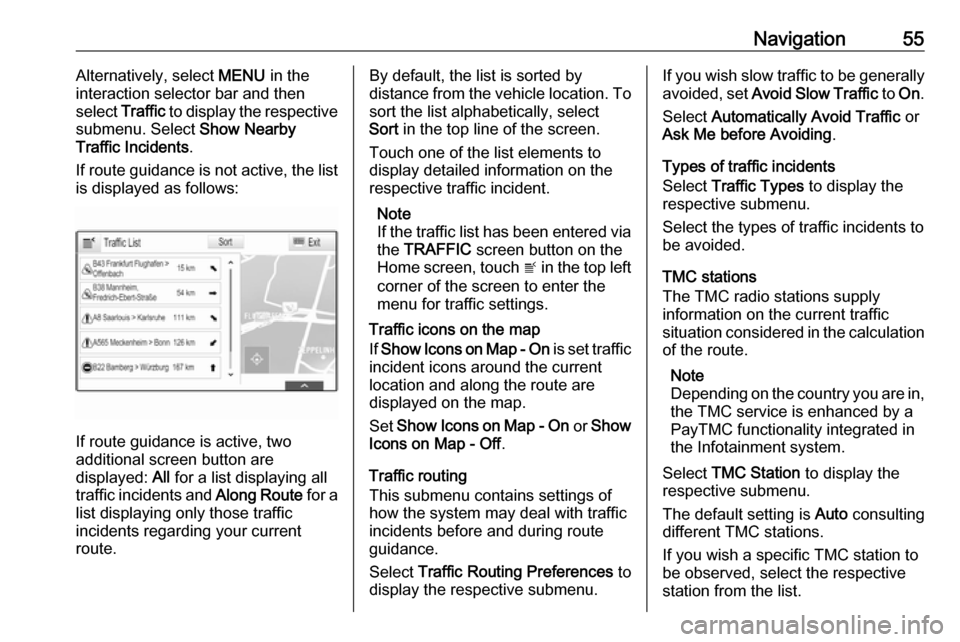
If route guidance is not active, the list is displayed as follows:
If route guidance is active, two
additional screen button are
displayed: All for a list displaying all
traffic incidents and Along Route for a
list displaying only those traffic
incidents regarding your current
route.
By default, the list is sorted by
distance from the vehicle location. To sort the list alphabetically, select
Sort in the top line of the screen.
Touch one of the list elements to
display detailed information on the
respective traffic incident.
Note
If the traffic list has been entered via
the TRAFFIC screen button on the
Home screen, touch w in the top left
corner of the screen to enter the menu for traffic settings.
Traffic icons on the map
If Show Icons on Map - On is set traffic
incident icons around the current
location and along the route are
displayed on the map.
Set Show Icons on Map - On or Show
Icons on Map - Off .
Traffic routing
This submenu contains settings of
how the system may deal with traffic
incidents before and during route
guidance.
Select Traffic Routing Preferences to
display the respective submenu.If you wish slow traffic to be generally
avoided, set Avoid Slow Traffic to On .
Select Automatically Avoid Traffic or
Ask Me before Avoiding .
Types of traffic incidents
Select Traffic Types to display the
respective submenu.
Select the types of traffic incidents to be avoided.
TMC stations
The TMC radio stations supply
information on the current traffic
situation considered in the calculation
of the route.
Note
Depending on the country you are in, the TMC service is enhanced by a
PayTMC functionality integrated in
the Infotainment system.
Select TMC Station to display the
respective submenu.
The default setting is Auto consulting
different TMC stations.
If you wish a specific TMC station to
be observed, select the respective
station from the list.
Page 56 of 155
56NavigationIf this station is no longer received,
the system switches back to the
Auto function.
Route settings
Select MENU in the interaction
selector bar and then select Routing
Preferences to display the respective
submenu.
Route style
To define by what criteria a route may
be calculated, select Route Style.
Select Fast, Eco Friendly or Short
from the list.
If Eco Friendly has been selected, the
eco-friendly route style may be
adapted to the load of the vehicle.
Select Edit Eco Profile to display the
respective submenu.
Repeatedly select Roof Load and
Trailer to toggle between the
available load options. Set the
options as needed.
Road selection
Select from the list which road types
may be included in the calculation of
the route.Route modification
To modify the route during active
route guidance, touch the arrow
symbol indicating your next turning
manoeuvre on the right side of the
screen.
The route guidance menu is
displayed.
Note
The route guidance menu may only
be displayed if route guidance is
active.
The route guidance menu provides
additional options to change route
settings during active route guidance.
Displaying the turn list
The turn list displays all streets on the
calculated route, starting from the
current location.
Select TURN LIST in the interaction
selector bar of the route guidance
menu. The turn list is displayed and
the next manoeuvre is read out by the
system.
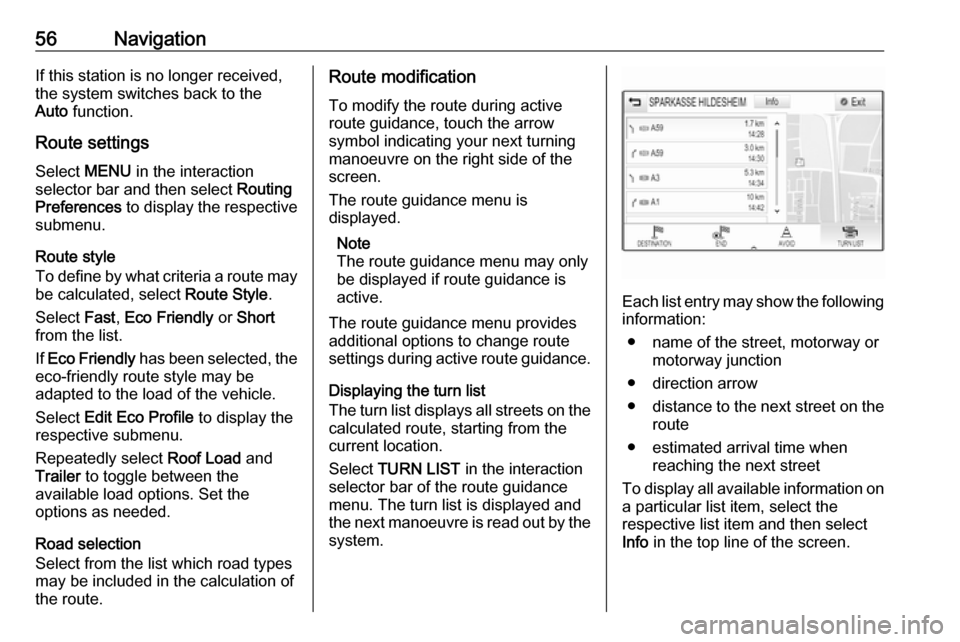
Each list entry may show the following
information:
● name of the street, motorway or motorway junction
● direction arrow
● distance to the next street on the
route
● estimated arrival time when reaching the next street
To display all available information on a particular list item, select the
respective list item and then select
Info in the top line of the screen.
Page 57 of 155
Navigation57Excluding streets from route
guidance
After route guidance has been
started, you may exclude streets from
the previously calculated route. The
route is then recalculated bypassing
the streets excluded.
Select AVOID in the interaction
selector bar of the route guidance
menu. The turn list is displayed.
Select the street, motorway or
motorway junction you wish to avoid.
You are prompted with a message.
Select the desired distance option.
The respective street or motorway is displayed in the Avoided Areas
section on top of the turn list indicated
by a red 9.
Note
The Avoided Areas section also
comprises roads automatically
avoided by the system due to traffic
incidents.
To reinclude the avoided street or
motorway into the route, unselect the
respective list item.Displaying the waypoint list
If you are in a waypoint trip, the route guidance menu comprises additional
menu functions for waypoint trip
modification.
The waypoint list displays all
waypoints of the calculated waypoint
trip, starting with the next upcoming
waypoint.
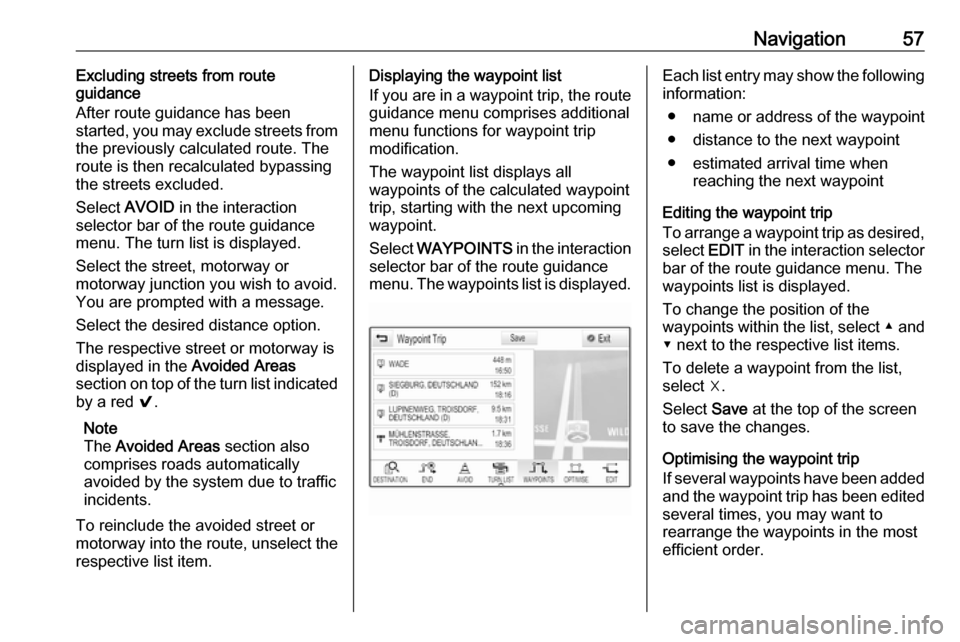
Select WAYPOINTS in the interaction
selector bar of the route guidance
menu. The waypoints list is displayed.Each list entry may show the following information:
● name or address of the waypoint
● distance to the next waypoint
● estimated arrival time when reaching the next waypoint
Editing the waypoint trip
To arrange a waypoint trip as desired,
select EDIT in the interaction selector
bar of the route guidance menu. The
waypoints list is displayed.
To change the position of the
waypoints within the list, select ▲ and
▼ next to the respective list items.
To delete a waypoint from the list,
select ☓.
Select Save at the top of the screen
to save the changes.
Optimising the waypoint trip
If several waypoints have been added
and the waypoint trip has been edited
several times, you may want to
rearrange the waypoints in the most
efficient order.
Page 76 of 155

76Frequently asked questions?Where are the favourites stored
and how can I recall them?
! The favourites are stored in the
favourites list. To recall a favourite, select the respective screen button
on the favourites row displayed.
On certain screens, the favourites list is hidden to extend the main
content view. On these screens,
select n on the lower right of the
screen or drag the interaction
selector bar upwards with a finger.
Detailed description 3 16.
Navigation? After entering a destination
address, an error message is
shown. What am I doing wrong?
! For full address entry, the
navigation system expects a
certain input order. Depending on
the country in which the entered
address is located, a different input
order might be required. Add the
country name at the end of the
entry if a destination in another
country has been entered.
Detailed description 3 47.? How can I cancel active route
guidance?
! To cancel route guidance, select
MENU in the interaction selector
bar and then select Cancel Route.
Detailed description 3 53.
Audio? How can I change the audio
source?
! By selecting
RADIO repeatedly,
you can toggle through all
available radio sources (AM/FM/
DAB). By selecting MEDIA
repeatedly, you can toggle through all available media sources.
Detailed description for radio 3 29,
external devices 3 34.? How can I browse radio stations or
media music?
! To browse radio stations or media
music, such as playlists or albums, select BROWSE on the audio
screen.
Detailed description for radio 3 29,
external devices 3 35.Other? How can I improve the
performance of the voice
recognition?
! The voice recognition is designed
to understand naturally
pronounced voice commands.
Wait for the beep tone and speak
afterwards. Try to speak naturally,
not too fast or too loud.
Detailed description 3 59.? How can I improve the touch
screen's performance?
! The touch screen is pressure-
sensitive. Especially when doing
drag gestures, try to apply more
pressure with the finger.
Detailed description 3 12.
Page 78 of 155

78IndexAActivating Bluetooth music ...........35
Activating phone projection ..........37
Activating radio ............................. 29
Activating the Infotainment system 10
Activating the navigation system ..41
Activating the phone portal ...........67
Activating USB........................ 35, 36
Address book................................ 47
Application tray ............................. 14
Audio files ..................................... 34
Automatic volume adjustment Auto volume .............................. 24
Auto Set ........................................ 25
Auto volume.................................. 24
B Balance......................................... 24
Basic operation ............................. 12
Application tray.......................... 14
Character recognition pane .......15
Contacts .................................... 20
Favourites ................................. 16
Home screen ............................. 14
Interaction selector bar .............14
Keyboard ................................... 15
Keypad ...................................... 15
Bass.............................................. 24 Bluetooth connection ....................65
Bluetooth music ............................ 34C
Category list.................................. 29
Character modifiers ......................15
Character recognition pane ..........15
Clock display ................................ 25
Contacts ................................. 20, 47
Modifying ................................... 20
Retrieving .................................. 20
Storing ....................................... 20
Control elements Infotainment system ....................8
Steering wheel ............................ 8
Control elements overview .............8
D DAB .............................................. 31
DAB linking ................................... 31
Date .............................................. 25
Destination input ..........................47
Digital audio broadcasting ............31
Displaying favourites ....................16
Display mode ................................ 25
E Emergency call ............................. 67
EQ ................................................ 24
Equaliser....................................... 24
F
Fader ............................................ 24
Favourites ..................................... 16