wheel size OPEL MOKKA X 2019.5 Manual user
[x] Cancel search | Manufacturer: OPEL, Model Year: 2019.5, Model line: MOKKA X, Model: OPEL MOKKA X 2019.5Pages: 247, PDF Size: 6.86 MB
Page 177 of 247

Vehicle care175Vehicle careGeneral Information...................175
Accessories and vehicle modifications .......................... 175
Vehicle storage ........................176
End-of-life vehicle recovery .....176
Vehicle checks ........................... 177
Performing work ......................177
Bonnet ..................................... 177
Engine oil ................................. 178
Engine coolant ......................... 179
Power steering fluid .................179
Washer fluid ............................ 180
Brakes ..................................... 180
Brake fluid ............................... 180
Vehicle battery ......................... 181
Diesel fuel system bleeding .....182
Wiper blade replacement ........182
Bulb replacement .......................183
Halogen headlights ..................184
Front fog lights ......................... 185
Tail lights ................................. 186
Number plate light ...................187
Rear fog light ........................... 187
Electrical system ........................188
Fuses ....................................... 188Engine compartment fuse box . 189
Instrument panel fuse box .......190
Load compartment fuse box ....192
Vehicle tools .............................. 194
Tools ........................................ 194
Wheels and tyres .......................194
Winter tyres ............................. 194
Tyre designations ....................195
Tyre pressure .......................... 195
Tyre pressure monitoring system .................................... 196
Tread depth ............................. 200
Changing tyre and wheel size . 201
Wheel covers ........................... 201
Tyre chains .............................. 201
Tyre repair kit .......................... 202
Wheel changing .......................205
Spare wheel ............................ 206
Jump starting ............................. 209
Towing ....................................... 211
Towing the vehicle ...................211
Towing another vehicle ...........212
Appearance care .......................213
Exterior care ............................ 213
Interior care ............................. 215General Information
Accessories and vehicle modifications
We recommend the use of genuine
parts and accessories and factory
approved parts specific for your
vehicle type. We cannot assess or
guarantee reliability of other products
- even if they have a regulatory or
otherwise granted approval.
Any modification, conversion or other
changes made to standard vehicle
specifications (including, without
limitation, software modifications,
modifications of the electronic control units) may invalidate the warrantyoffered by Opel. Furthermore, such
changes may affect driver assistance
systems, fuel consumption, CO 2
emissions and other emissions of the
vehicle. They may also invalidate the
vehicle operating permit.
Page 196 of 247

194Vehicle careVehicle tools
Tools
Vehicles with tyre repair kit
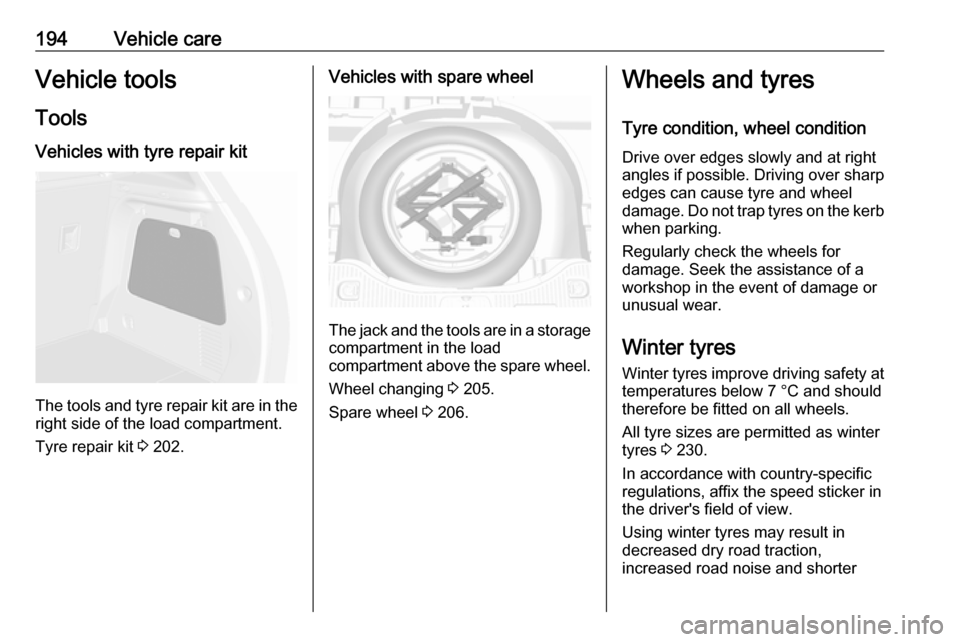
The tools and tyre repair kit are in the
right side of the load compartment.
Tyre repair kit 3 202.
Vehicles with spare wheel
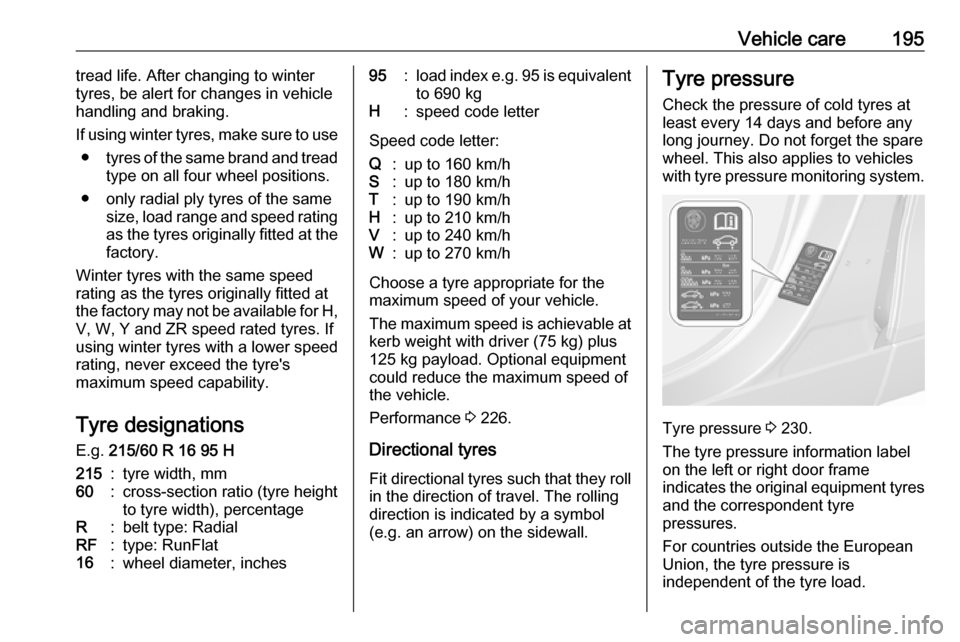
The jack and the tools are in a storage
compartment in the load
compartment above the spare wheel.
Wheel changing 3 205.
Spare wheel 3 206.
Wheels and tyres
Tyre condition, wheel condition
Drive over edges slowly and at right
angles if possible. Driving over sharp
edges can cause tyre and wheel
damage. Do not trap tyres on the kerb when parking.
Regularly check the wheels for
damage. Seek the assistance of a workshop in the event of damage or
unusual wear.
Winter tyres Winter tyres improve driving safety at
temperatures below 7 °C and should
therefore be fitted on all wheels.
All tyre sizes are permitted as winter
tyres 3 230.
In accordance with country-specific
regulations, affix the speed sticker in
the driver's field of view.
Using winter tyres may result in
decreased dry road traction,
increased road noise and shorter
Page 197 of 247

Vehicle care195tread life. After changing to winter
tyres, be alert for changes in vehicle
handling and braking.
If using winter tyres, make sure to use ● tyres of the same brand and tread
type on all four wheel positions.
● only radial ply tyres of the same size, load range and speed ratingas the tyres originally fitted at the factory.
Winter tyres with the same speed
rating as the tyres originally fitted at
the factory may not be available for H,
V, W, Y and ZR speed rated tyres. If
using winter tyres with a lower speed
rating, never exceed the tyre's
maximum speed capability.
Tyre designations
E.g. 215/60 R 16 95 H215:tyre width, mm60:cross-section ratio (tyre height
to tyre width), percentageR:belt type: RadialRF:type: RunFlat16:wheel diameter, inches95:load index e.g. 95 is equivalent
to 690 kgH:speed code letter
Speed code letter:
Q:up to 160 km/hS:up to 180 km/hT:up to 190 km/hH:up to 210 km/hV:up to 240 km/hW:up to 270 km/h
Choose a tyre appropriate for the
maximum speed of your vehicle.
The maximum speed is achievable at kerb weight with driver (75 kg) plus125 kg payload. Optional equipment
could reduce the maximum speed of
the vehicle.
Performance 3 226.
Directional tyres
Fit directional tyres such that they roll in the direction of travel. The rolling
direction is indicated by a symbol
(e.g. an arrow) on the sidewall.
Tyre pressure
Check the pressure of cold tyres at
least every 14 days and before any
long journey. Do not forget the spare
wheel. This also applies to vehicles
with tyre pressure monitoring system.
Tyre pressure 3 230.
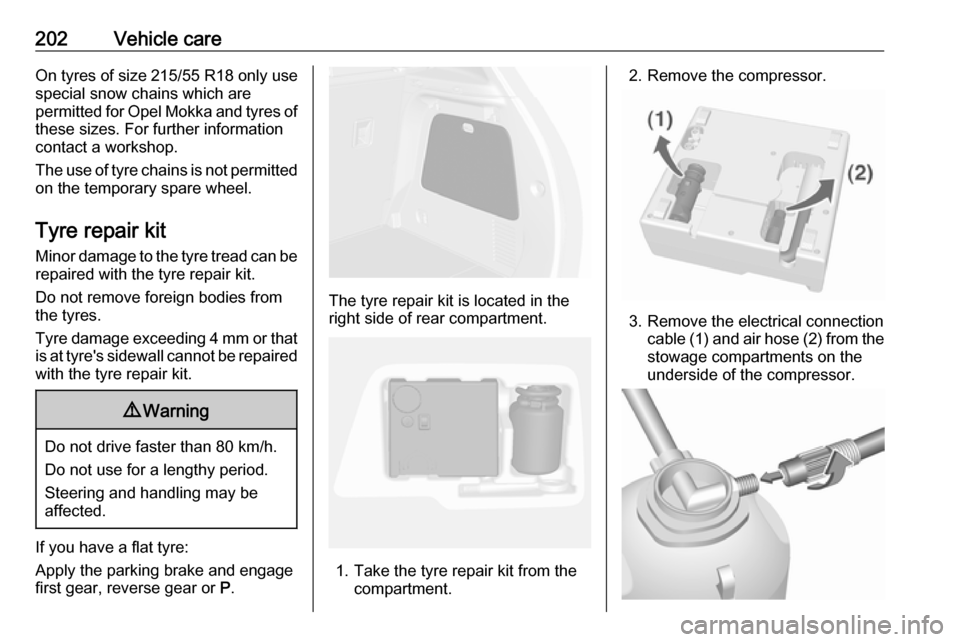
The tyre pressure information label
on the left or right door frame
indicates the original equipment tyres
and the correspondent tyre
pressures.
For countries outside the European
Union, the tyre pressure is
independent of the tyre load.
Page 203 of 247

Vehicle care201Changing tyre and wheelsize
If tyres of a different size than those
fitted at the factory are used, it may be necessary to reprogramme the
nominal tyre pressure and make
other vehicle modifications.
After converting to a different tyre
size, have the label with tyre
pressures replaced and the tyre
pressure monitoring system
reinitialised. 3 1969 Warning
The use of unsuitable tyres or
wheels may lead to accidents and will invalidate the vehicle
operating permit.
Wheel covers
Wheel covers and tyres that are
factory-approved for the respective
vehicle and comply with all of the
relevant wheel and tyre combination requirements must be used.
If the wheel covers and tyres used are
not factory-approved, the tyres must
not have a rim protection ridge.
Wheel covers must not impair brake
cooling.9 Warning
Use of unsuitable tyres or wheel
covers could lead to sudden
pressure loss and thereby
accidents.
Vehicles with alloy wheels: When
mounting steel wheels with alloy
wheel nuts, e.g. when changing to
winter tyres, the wheel covers cannot
be attached to the steel wheels.
Tyre chains
Use tyre chains only on front wheels.
9 Warning
Damage may lead to tyre blowout.
Tyre chains are permitted on tyres of
size 215/65 R16, 215/60 R17 and
215/55 R18.
On tyres of size 215/65 R16 and
215/60 R17 always use fine mesh
chains suitable for sport utility
vehicles that add no more than
9 mm to the tyre tread and the inboard sides (including chain lock).
Page 204 of 247

202Vehicle careOn tyres of size 215/55 R18 only use
special snow chains which are
permitted for Opel Mokka and tyres of these sizes. For further information
contact a workshop.
The use of tyre chains is not permitted on the temporary spare wheel.
Tyre repair kit Minor damage to the tyre tread can be
repaired with the tyre repair kit.
Do not remove foreign bodies from
the tyres.
Tyre damage exceeding 4 mm or that
is at tyre's sidewall cannot be repaired with the tyre repair kit.9 Warning
Do not drive faster than 80 km/h.
Do not use for a lengthy period.
Steering and handling may be
affected.
If you have a flat tyre:
Apply the parking brake and engage
first gear, reverse gear or P.
The tyre repair kit is located in the
right side of rear compartment.
1. Take the tyre repair kit from the compartment.
2. Remove the compressor.
3. Remove the electrical connection cable (1) and air hose (2) from the
stowage compartments on the
underside of the compressor.
Page 210 of 247

208Vehicle care
Attach wheel wrench and with the
jack correctly aligned rotate wheel wrench until wheel is clear of the
ground.
5. Unscrew the wheel nuts. 6. Change the wheel. Spare wheel 3 206.
7. Screw on the wheel nuts.
8. Lower the vehicle and remove jack.
9. Install the wheel wrench ensuring that it locates securely and tighten
each nut in a crosswise
sequence. Tightening torque is
140 Nm.
10. Align the valve hole in the wheel cover with the tyre valve before
installing.
Install wheel nut caps.
Install centre cap on alloy wheels.
11. Install vehicle jacking point cover on versions with sill panels.
12. Stow the replaced wheel 3 206
and the vehicle tools 3 194.
13. Check the tyre pressure of the installed tyre and the wheel nut
torque as soon as possible.
Have the defective tyre renewed or
repaired as soon as possible.
Stowing a damaged full size
wheel in the load compartment
The spare wheel well is not designed for other tyre sizes than the spare
wheel.
A damaged full size wheel must be stowed in the load compartment and
secured with a strap.
Vehicle tools 3 194.
To secure the wheel: 1. Position the wheel in the middle of
the load compartment.
2. Place the loop end of the strap through the lashing eye on one
side.
3. Place the hook end of the strap through the loop and pull it until
the strap is fastened securely to
the lashing eye.
Page 211 of 247

Vehicle care209
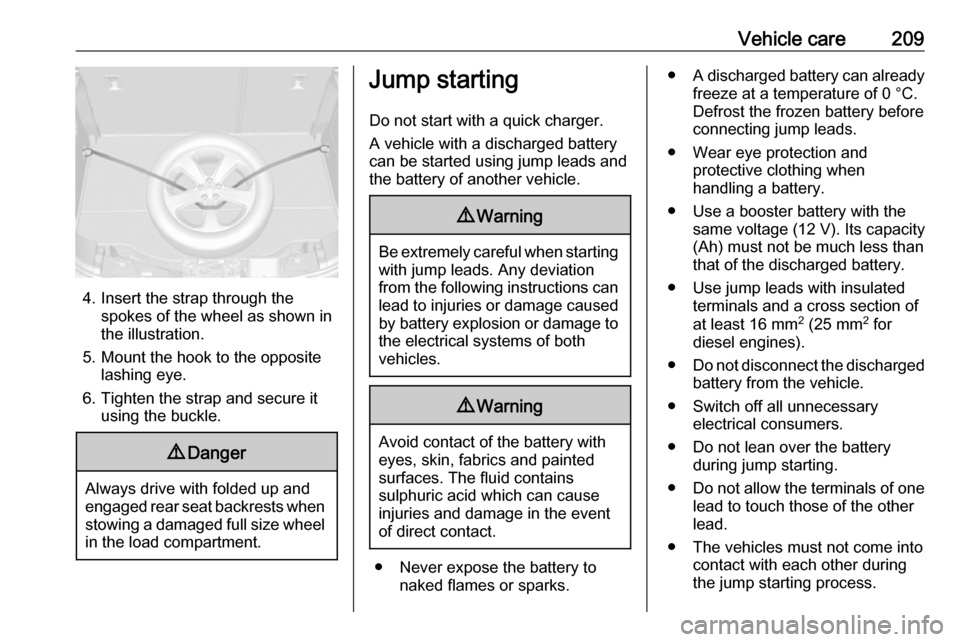
4. Insert the strap through thespokes of the wheel as shown in
the illustration.
5. Mount the hook to the opposite lashing eye.
6. Tighten the strap and secure it using the buckle.
9 Danger
Always drive with folded up and
engaged rear seat backrests when stowing a damaged full size wheel
in the load compartment.
Jump starting
Do not start with a quick charger.
A vehicle with a discharged battery
can be started using jump leads and the battery of another vehicle.9 Warning
Be extremely careful when starting
with jump leads. Any deviation
from the following instructions can
lead to injuries or damage caused
by battery explosion or damage to the electrical systems of both
vehicles.
9 Warning
Avoid contact of the battery with
eyes, skin, fabrics and painted
surfaces. The fluid contains
sulphuric acid which can cause
injuries and damage in the event
of direct contact.
● Never expose the battery to naked flames or sparks.
●A discharged battery can already
freeze at a temperature of 0 °C.
Defrost the frozen battery before
connecting jump leads.
● Wear eye protection and protective clothing when
handling a battery.
● Use a booster battery with the same voltage (12 V). Its capacity
(Ah) must not be much less than
that of the discharged battery.
● Use jump leads with insulated terminals and a cross section of
at least 16 mm 2
(25 mm 2
for
diesel engines).
● Do not disconnect the discharged
battery from the vehicle.
● Switch off all unnecessary electrical consumers.
● Do not lean over the battery during jump starting.
● Do not allow the terminals of one
lead to touch those of the other
lead.
● The vehicles must not come into contact with each other during
the jump starting process.
Page 230 of 247
![OPEL MOKKA X 2019.5 Manual user 228Technical dataVehicle dimensionsLength [mm]4275Width without exterior mirrors [mm]1781Width with two exterior mirrors [mm]2038Height (without antenna) [mm]1659/17465)Length of load compartment floo OPEL MOKKA X 2019.5 Manual user 228Technical dataVehicle dimensionsLength [mm]4275Width without exterior mirrors [mm]1781Width with two exterior mirrors [mm]2038Height (without antenna) [mm]1659/17465)Length of load compartment floo](/img/37/18898/w960_18898-229.png)
228Technical dataVehicle dimensionsLength [mm]4275Width without exterior mirrors [mm]1781Width with two exterior mirrors [mm]2038Height (without antenna) [mm]1659/17465)Length of load compartment floor [mm]731Length of load compartment with folded rear seats [mm]1428Load compartment width [mm]914Load compartment height [mm]808Wheelbase [mm]2555Turning circle diameter [m]10.9/11.3 5)5)
Depending on wheel size and equipment.
Page 242 of 247

240IndexAAccessories and vehicle modifications .......................... 175
Adaptive forward lighting .....96, 115
AdBlue .................................. 95, 139
Adjustable air vents ...................126
Airbag and belt tensioners ...........92
Airbag deactivation ................52, 93
Airbag label................................... 47 Airbag system .............................. 47
Air conditioning regular operation ................................ 127
Air conditioning system .............. 123
Air intake .................................... 127
Air vents...................................... 126
All-wheel drive ........................... 145
Antilock brake system ................ 146
Antilock brake system (ABS) .......94
Anti-theft alarm system ................31
Anti-theft locking system .............. 31
Appearance care ........................213
Automatic anti-dazzle ..................35
Automatic light control ...............112
Automatic locking ........................29
Automatic transmission .............141
Autostop ..................................... 134
Auxiliary heater ........................... 126B
Battery discharge protection ......121
Battery voltage ........................... 105
Bicycle rack .................................. 61
BlueInjection ............................... 139
Bonnet ....................................... 177
Brake and clutch fluid .................217
Brake and clutch system .............93
Brake assist ............................... 147
Brake fluid .................................. 180
Brakes ............................... 146, 180
Breakdown.................................. 211
Bulb replacement ....................... 183
C Capacities .................................. 229
Catalytic converter .....................138
Central locking system ................25
Centre console storage ...............61
Changing tyre and wheel size ...201
Charging system .......................... 93
Child locks ................................... 30
Child restraint installation locations ................................... 56
Child restraints.............................. 53
Child restraint systems ................53
Climate control ............................. 16
Climate control systems .............122
Clock............................................. 81
Code ........................................... 104