OPEL VIVARO 2015 Manual PDF
Manufacturer: OPEL, Model Year: 2015, Model line: VIVARO, Model: OPEL VIVARO 2015Pages: 205, PDF Size: 4.47 MB
Page 71 of 205
Storage69
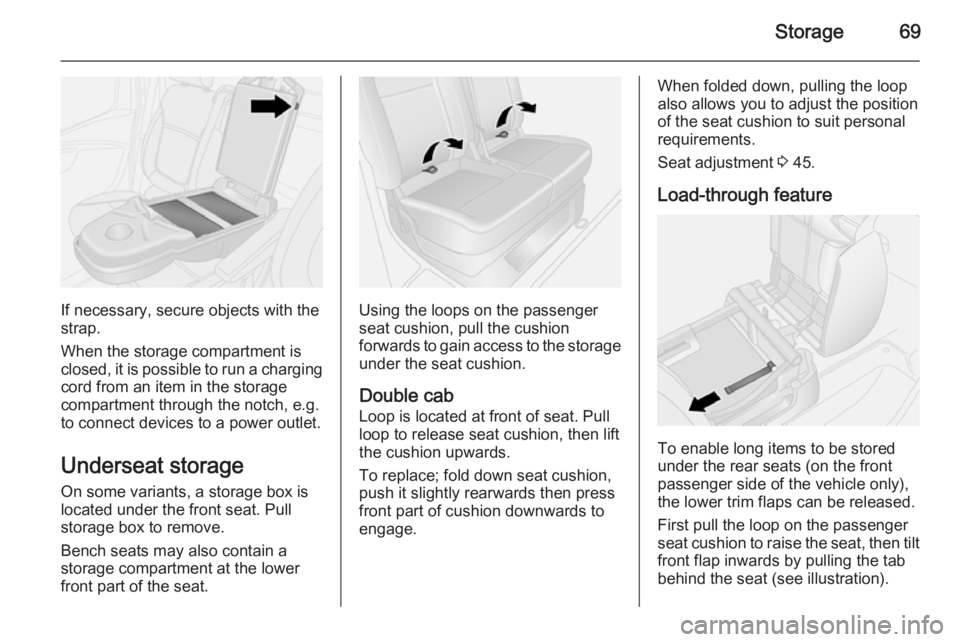
If necessary, secure objects with the
strap.
When the storage compartment is
closed, it is possible to run a charging cord from an item in the storage
compartment through the notch, e.g.
to connect devices to a power outlet.
Underseat storage
On some variants, a storage box is
located under the front seat. Pull
storage box to remove.
Bench seats may also contain a
storage compartment at the lower
front part of the seat.Using the loops on the passenger
seat cushion, pull the cushion
forwards to gain access to the storage
under the seat cushion.
Double cab
Loop is located at front of seat. Pull
loop to release seat cushion, then lift
the cushion upwards.
To replace; fold down seat cushion,
push it slightly rearwards then press
front part of cushion downwards to
engage.
When folded down, pulling the loop
also allows you to adjust the position of the seat cushion to suit personal
requirements.
Seat adjustment 3 45.
Load-through feature
To enable long items to be stored
under the rear seats (on the front
passenger side of the vehicle only),
the lower trim flaps can be released.
First pull the loop on the passenger
seat cushion to raise the seat, then tilt
front flap inwards by pulling the tab
behind the seat (see illustration).
Page 72 of 205
70Storage
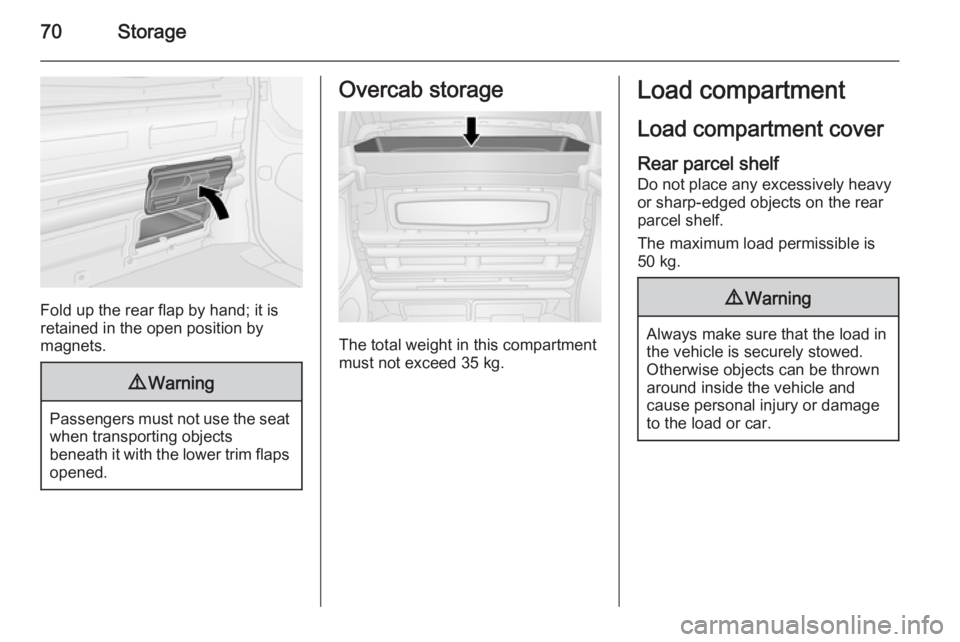
Fold up the rear flap by hand; it is
retained in the open position by
magnets.
9 Warning
Passengers must not use the seat
when transporting objects
beneath it with the lower trim flaps
opened.
Overcab storage
The total weight in this compartment
must not exceed 35 kg.
Load compartment
Load compartment cover Rear parcel shelf
Do not place any excessively heavy
or sharp-edged objects on the rear
parcel shelf.
The maximum load permissible is 50 kg.9 Warning
Always make sure that the load in
the vehicle is securely stowed.
Otherwise objects can be thrown
around inside the vehicle and
cause personal injury or damage
to the load or car.
Page 73 of 205
Storage71
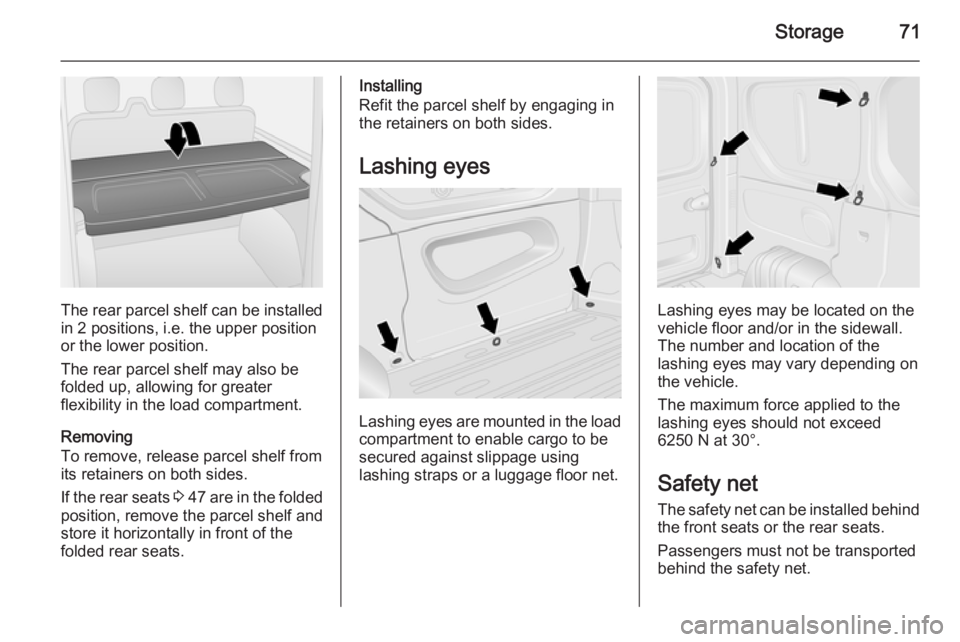
The rear parcel shelf can be installed
in 2 positions, i.e. the upper position
or the lower position.
The rear parcel shelf may also be
folded up, allowing for greater
flexibility in the load compartment.
Removing
To remove, release parcel shelf from
its retainers on both sides.
If the rear seats 3 47 are in the folded
position, remove the parcel shelf and
store it horizontally in front of the
folded rear seats.
Installing
Refit the parcel shelf by engaging in
the retainers on both sides.
Lashing eyes
Lashing eyes are mounted in the load
compartment to enable cargo to be secured against slippage using
lashing straps or a luggage floor net.
Lashing eyes may be located on the
vehicle floor and/or in the sidewall.
The number and location of the
lashing eyes may vary depending on
the vehicle.
The maximum force applied to the
lashing eyes should not exceed
6250 N at 30°.
Safety net
The safety net can be installed behind the front seats or the rear seats.
Passengers must not be transported
behind the safety net.
Page 74 of 205
72Storage
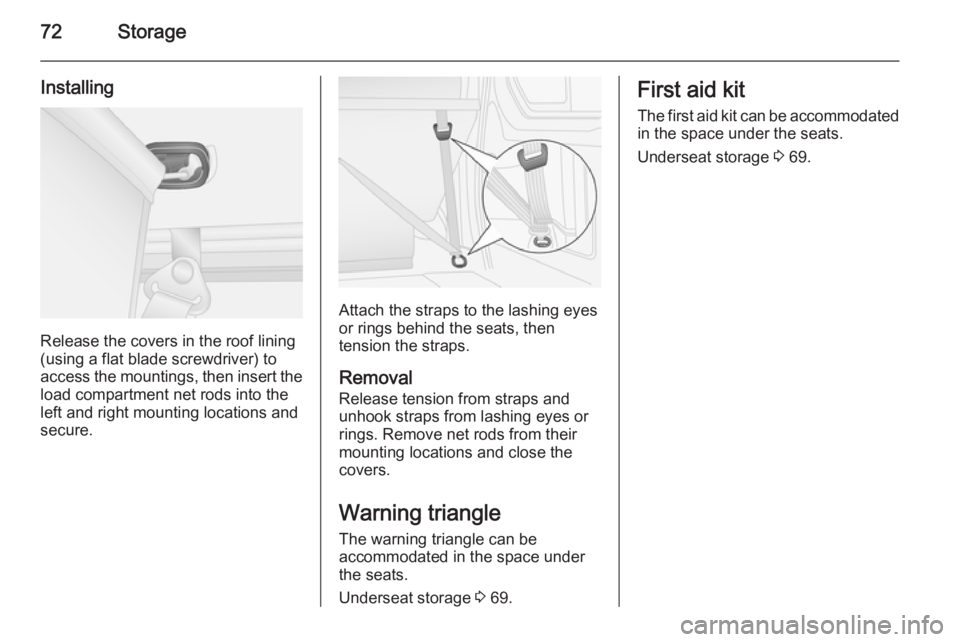
Installing
Release the covers in the roof lining
(using a flat blade screwdriver) to
access the mountings, then insert the
load compartment net rods into the
left and right mounting locations and secure.
Attach the straps to the lashing eyes
or rings behind the seats, then
tension the straps.
Removal Release tension from straps and
unhook straps from lashing eyes or
rings. Remove net rods from their
mounting locations and close the
covers.
Warning triangle The warning triangle can be
accommodated in the space under
the seats.
Underseat storage 3 69.
First aid kit
The first aid kit can be accommodated
in the space under the seats.
Underseat storage 3 69.
Page 75 of 205
Storage73Roof rack system
Roof rack For safety reasons and to avoiddamage to the roof, the vehicle
approved roof rack system is
recommended.
Follow the installation instructions and remove the roof rack when not in
use.
Further information 3 73.Loading information
■ Heavy objects in the load compartment should be evenlydistributed and placed as far
forward as possible. If objects can
be stacked, the heavier objects
should be placed at the bottom.
■ Secure objects with lashing straps attached to lashing eyes 3 71.
■ Secure loose objects in load compartment to prevent sliding.
■ When transporting objects in the load compartment, the backrests ofthe rear seats must not be angled
forward.
■ Do not allow the load to protrude above the upper edge of the
backrests.
■ Do not place any objects on the instrument panel.
■ The load must not obstruct the operation of the pedals, parking
brake and gear selector, or hinder
the freedom of movement of the
driver. Do not place any unsecured
objects in the interior.■ Do not drive with an open load compartment. In addition, the
number plate is only
distinguishable and illuminated correctly if the doors are closed.9 Warning
Always make sure that the load in
the vehicle is securely stowed.
Otherwise objects can be thrown
around inside the vehicle and
cause personal injury or damage
to the load or car.
■ The payload is the difference between the permitted gross
vehicle weight (see identification
plate 3 179) and the EC kerb
weight.
To calculate the payload, enter the
data for your vehicle in the Weights
table at the front of this manual.
The EC kerb weight includes
weights for the driver (68 kg),
luggage (7 kg) and all fluids (tank
90 % full).
Page 76 of 205
74Storage
Optional equipment and
accessories increase the kerb
weight.
■ Driving with a roof load increases the sensitivity of the vehicle to
cross-winds and has a detrimental
effect on vehicle handling due to
the vehicle's higher centre of
gravity. Distribute the load evenly
and secure it properly with retaining
straps. Adjust the tyre pressure and
vehicle speed according to the load conditions. Check and retighten the
straps frequently.
Do not drive faster than 120 km/h.
The permissible roof load is
200 kg for H1 roof variants and
150 kg for H2 roof variants
(excludes Platform cab
conversions). The roof load is the
combined weight of the roof rack
and the load.
Page 77 of 205
Instruments and controls75Instruments and
controlsControls ....................................... 75
Warning lights, gauges and indi‐ cators ........................................... 80
Information displays .....................90
Vehicle messages ........................ 91
Trip computer ............................... 92
Tachograph .................................. 94Controls
Steering wheel adjustment
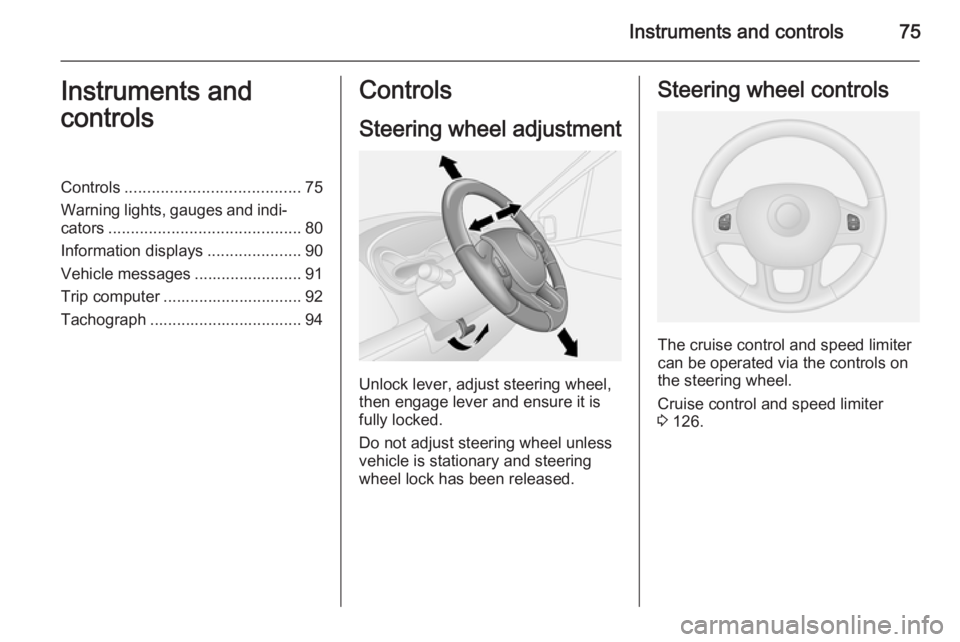
Unlock lever, adjust steering wheel,
then engage lever and ensure it is fully locked.
Do not adjust steering wheel unless
vehicle is stationary and steering
wheel lock has been released.
Steering wheel controls
The cruise control and speed limiter
can be operated via the controls on
the steering wheel.
Cruise control and speed limiter
3 126.
Page 78 of 205
76Instruments and controlsHorn
Press j.
The horn will sound regardless of
ignition switch position.
Steering column controls The Infotainment system can be also
operated via the controls on the
steering column.
Further information is available in the
Infotainment system manual.
Windscreen wiper/washer
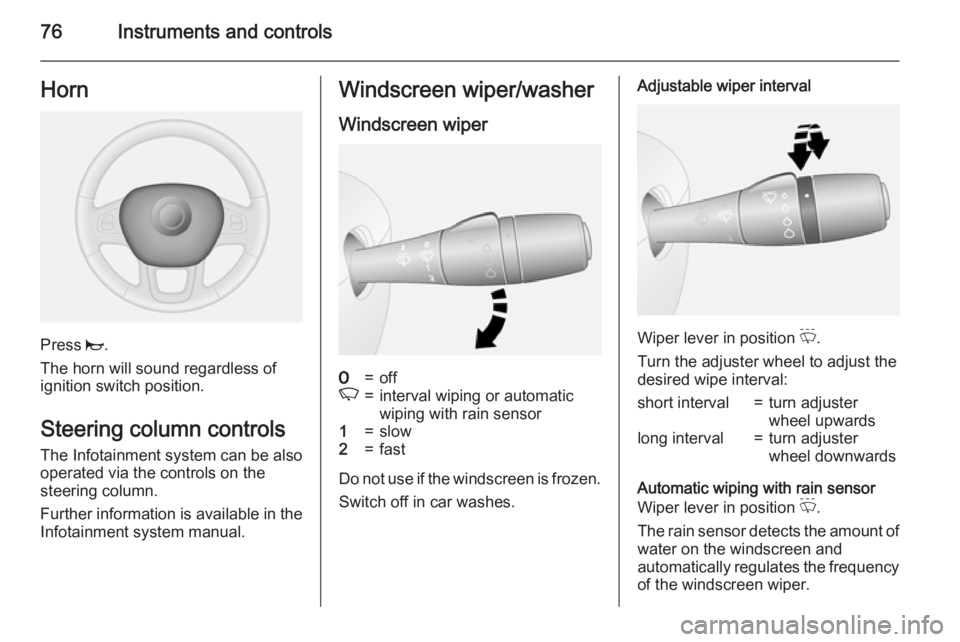
Windscreen wiper7=offK=interval wiping or automatic
wiping with rain sensor1=slow2=fast
Do not use if the windscreen is frozen.
Switch off in car washes.
Adjustable wiper interval
Wiper lever in position P.
Turn the adjuster wheel to adjust the
desired wipe interval:
short interval=turn adjuster
wheel upwardslong interval=turn adjuster
wheel downwards
Automatic wiping with rain sensor
Wiper lever in position P.
The rain sensor detects the amount of water on the windscreen and
automatically regulates the frequency
of the windscreen wiper.
Page 79 of 205
Instruments and controls77
Automatic wiping will need to be
reselected whenever the ignition has
been switched off.
Adjustable sensitivity of the rain
sensor
Turn the adjuster wheel to adjust the
sensitivity:low sensitivity=turn adjuster
wheel upwardshigh sensitivity=turn adjuster
wheel downwards
The rain sensor is located on the
windscreen. Keep the sensor free
from dust, dirt and ice.
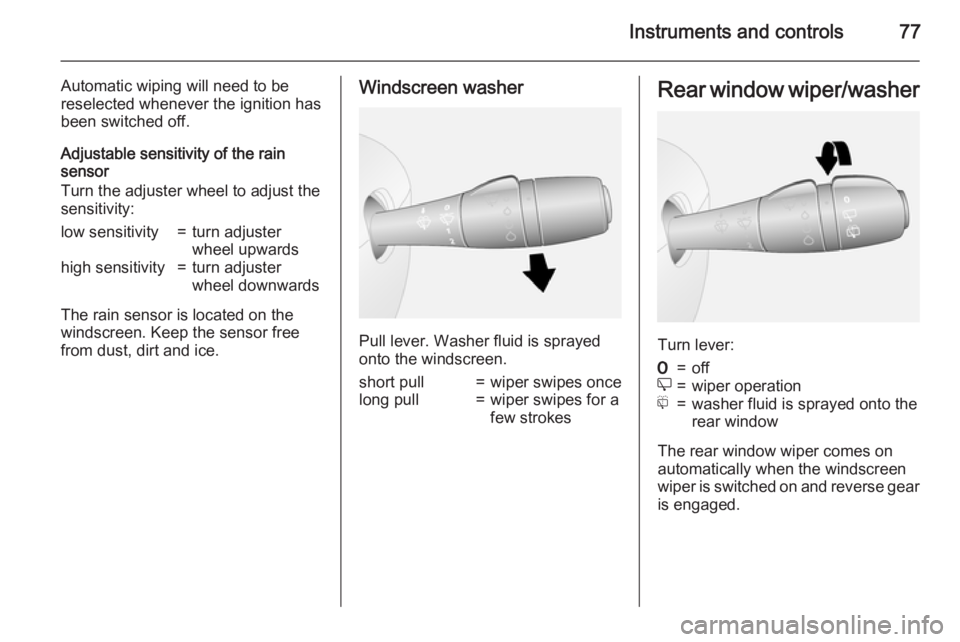
Windscreen washer
Pull lever. Washer fluid is sprayed
onto the windscreen.
short pull=wiper swipes oncelong pull=wiper swipes for a
few strokesRear window wiper/washer
Turn lever:
7=offe=wiper operationf=washer fluid is sprayed onto the
rear window
The rear window wiper comes on
automatically when the windscreen
wiper is switched on and reverse gear
is engaged.
Page 80 of 205
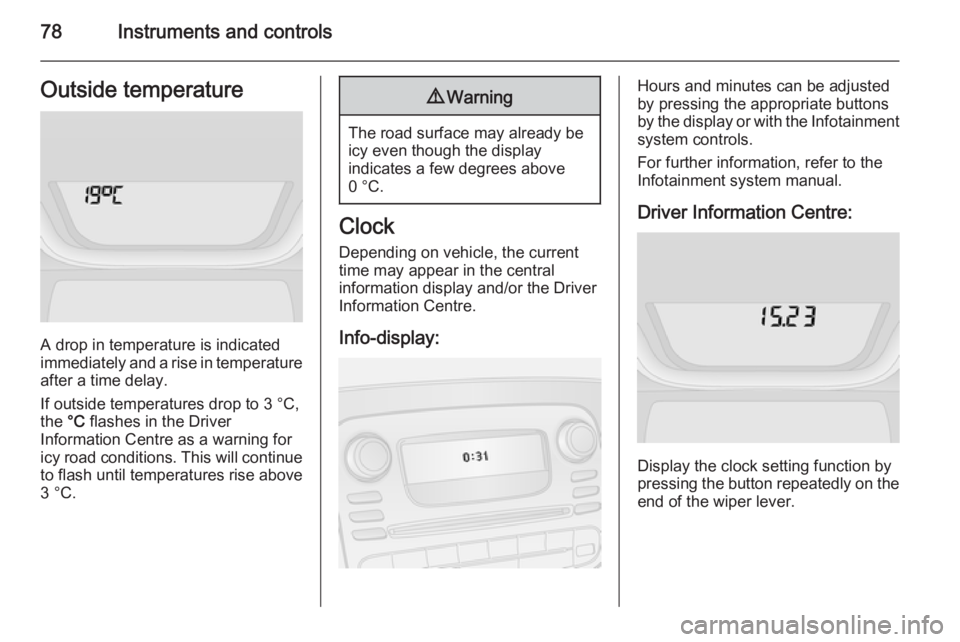
78Instruments and controlsOutside temperature
A drop in temperature is indicated
immediately and a rise in temperature
after a time delay.
If outside temperatures drop to 3 °C, the °C flashes in the Driver
Information Centre as a warning for
icy road conditions. This will continue
to flash until temperatures rise above 3 °C.
9 Warning
The road surface may already be
icy even though the display
indicates a few degrees above
0 °C.
Clock
Depending on vehicle, the current
time may appear in the central
information display and/or the Driver
Information Centre.
Info-display:
Hours and minutes can be adjusted
by pressing the appropriate buttons
by the display or with the Infotainment
system controls.
For further information, refer to the Infotainment system manual.
Driver Information Centre:
Display the clock setting function by
pressing the button repeatedly on the end of the wiper lever.