tow OPEL VIVARO B 2018.5 Manual user
[x] Cancel search | Manufacturer: OPEL, Model Year: 2018.5, Model line: VIVARO B, Model: OPEL VIVARO B 2018.5Pages: 241, PDF Size: 5.58 MB
Page 85 of 241

Storage83hinder the freedom of movement
of the driver. Do not place any
unsecured objects in the interior.
● Do not drive with an open load compartment. In addition, the
number plate is only
distinguishable and illuminated correctly if the doors are closed.9 Warning
Always make sure that the load in
the vehicle is securely stowed.
Otherwise objects can be thrown
around inside the vehicle and
cause personal injury or damage
to the load or car.
● The payload is the difference between the permitted gross
vehicle weight (see identification
plate 3 210) and the EC kerb
weight.
To calculate the payload, enter
the data for your vehicle in the
Weights table at the front of this
manual.
The EC kerb weight includes
weights for the driver (68 kg),
luggage (7 kg) and all fluids (fuel
tank 90% full).
Optional equipment and
accessories increase the kerb
weight.
● Driving with a roof load increases
the sensitivity of the vehicle to
cross-winds and has a
detrimental effect on vehicle
handling due to the vehicle's
higher centre of gravity.
Distribute the load evenly and
secure it properly with retaining
straps. Adjust the tyre pressure
and vehicle speed according to
the load conditions. Check and
retighten the straps frequently.
Do not drive faster than
120 km/h.
The permissible roof load is
200 kg for H1 Roof height
variants and 150 kg for H2 Roof
height variants (excludes
Platform cab conversions). The
roof load is the combined weight
of the roof rack and the load.
Page 114 of 241

112LightingTurn thumb wheel ? to required
position:0:No load4:Loaded up to permissible
maximum weight
Headlights when driving
abroad
The asymmetrical headlight beam
extends visibility at the edge of the
road at the passenger side.
However, when driving in countries
where traffic drives on the opposite
side of the road, adjust the headlights to prevent dazzling of oncoming
traffic.
Adjustment
Open the bonnet 3 167 and identify
the marking (shown in the illustration)
beside each of the headlights.
For each headlight:
Using a screwdriver, turn the screw
by a 1
/4 turn towards the
] symbol to
lower the beams or towards the <
symbol to raise the beams.
Ensure the headlight beams are
returned to their original positions
when required.
Daytime running lights
Daytime running lights increase
visibility of the vehicle during daylight.
They may be switched on
automatically when the engine is
running.
If required, the daytime running lights can be deactivated via the
Infotainment system. For further
information, refer to Infotainment
manual.
Automatic light control 3 111.
Cornering lights
With the low beam switched on,
depending on the steering angle, vehicle speed and gear selected
when cornering, the front fog light will also switch on, to illuminate the
corner of the road on the respective
side.
Page 118 of 241

116LightingLoad compartment lighting
The lower load compartment lights
come on when the load compartment is opened.
Reading lights Front reading light
Operate rocker switch:
press 7:offpress l:on
Glove box lighting
The glovebox light comes on when
the glovebox is opened.
Lighting features
Entry lighting
Welcome lighting
Vehicle lights are switched on for a
short time to facilitate locating the
vehicle when it is dark.
Remote control operation
Lights switch on when unlocking the
vehicle with the remote control.
Electronic key system operation
Press t. Press again to switch off.
Exit lighting
If equipped, headlights come on for
approx. 30 seconds after the vehicle
is parked and the system is activated.
Activating 1. Switch off lights (position 7).
2. Switch off ignition.
3. Remove ignition key.
4. Open driver's door.
5. Pull stalk towards steering wheel.
A corresponding message may
appear in the Driver Information
Centre 3 103.
Page 121 of 241

Climate control119● Open side air vents as requiredand direct them towards door
windows.
● For simultaneous warming of the
foot well, set air distribution
control to J.
Heated rear window 3 45.
Air conditioning system
In addition to the heating and
ventilation system, the air
conditioning system has controls for:A/C:cooling4:air recirculation
Heated seats 3 50.
Cooling (A/C)
Press A/C to switch on cooling.
Activation is indicated by illumination
of the LED in the button. Cooling is
only functional when the engine is
running and climate control fan is switched on.
Press A/C again to switch off cooling.
The air conditioning system cools and
dehumidifies (dries) the air when
outside temperature is above a
specific level. Therefore
condensation may form and drip from under the vehicle.
If no cooling or drying is required,
switch off the cooling system for fuel
saving reasons. Activated cooling
may inhibit an Autostop.
Stop-start system 3 137.
Note
Air conditioning performance is
reduced when ECO mode has been
activated 3 131.
Air recirculation system 4
Press 4
to activate air recirculation
mode. Activation is indicated by
illumination of the LED in the button.
Press 4 again to deactivate air
recirculation mode.
Page 122 of 241

120Climate control9Warning
The exchange of fresh air is
reduced in air recirculation mode.
In operation without cooling, the
air humidity increases, so the
windows may mist up from inside.
The quality of the passenger
compartment air deteriorates,
which may cause the vehicle
occupants to feel drowsy.
In warm and very humid ambient air conditions, the windscreen might mist up from outside when cold air is
directed towards it. If windscreen
mists up from outside, activate
windscreen wiper and avoid the use
of air distribution settings J and V.
Maximum cooling
Briefly open the windows so that hot air can disperse quickly.
● Cooling A/C on.
● Air recirculation system 4 on.
● Set air distribution control to M.
● Set temperature control to coldest level.
● Set fan speed to highest level.
● Open all air vents.
Demisting and defrosting the
windows
● Set temperature control to warmest level.
● Set fan speed to highest level.
● Set air distribution control to V.
● Switch cooling A/C on.
● Switch on heated rear window Ü.
● Open side air vents as required and direct them towards doorwindows.
● For simultaneous warming of the
foot well, set air distribution
control to J.
Heated rear window 3 45.Electronic climate control
system
Controls for: ● air distribution
● temperature
● fan speed
AUTO:automatic modeÊ:demisting and defrostingÜ:heated rear windowA/C OFF:switch off air conditioningu:manual air recirculation
Heated rear window Ü 3 45.
Heated seats 3 50.
Page 133 of 241

Driving and operating131Driving and
operatingDriving hints ............................... 131
Driving economically ...............131
Control of the vehicle ...............132
Steering ................................... 132
Starting and operating ...............133
New vehicle running-in ............133
Ignition switch positions ...........133
Power button ........................... 133
Starting the engine ..................135
Idle speed control ....................136
Vehicle shutdown ....................136
Overrun cut-off ........................ 137
Stop-start system ....................137
Parking .................................... 140
Engine exhaust .......................... 141
Diesel particle filter ..................141
Catalytic converter ...................141
AdBlue ..................................... 142
Manual transmission ..................147
Brakes ........................................ 148
Antilock brake system .............148
Parking brake .......................... 149Brake assist............................. 149
Hill start assist ......................... 149
Ride control systems .................150
Traction Control system ..........150
Electronic stability program .....151
Driver assistance systems .........153
Cruise control .......................... 153
Speed limiter ........................... 155
Parking assist .......................... 156
Rear view camera ...................158
Fuel ............................................ 161
Fuel for diesel engines ............161
Refuelling ................................ 161
Trailer hitch ................................ 163
General information .................163
Driving characteristics and towing tips .............................. 163
Trailer towing ........................... 163
Trailer stability assist ...............164Driving hints
Driving economically ECO mode
ECO mode is a function that
optimises fuel consumption. It affects engine power and torque,
acceleration, gear shift indication,
heating, air conditioning and electrical consumers.
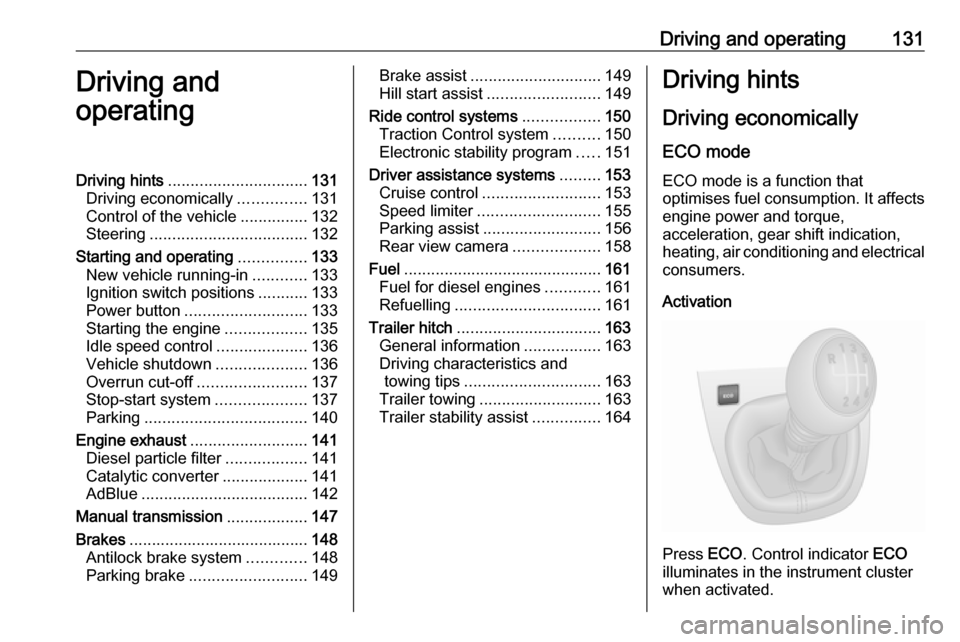
Activation
Press ECO. Control indicator ECO
illuminates in the instrument cluster when activated.
Page 142 of 241

140Driving and operatingIf the Infotainment system is active,
audio sound may briefly be reduced
or interrupted during the restart.
Fault
If a fault occurs in the stop-start
system, the LED in Î illuminates,
and a corresponding message
appears in the Driver Information
Centre 3 103 . Seek the assistance of
a workshop.
Vehicle messages 3 104.
Warning chimes 3 105.
Parking9 Warning
● Do not park the vehicle on an
easily ignitable surface. The
high temperature of the
exhaust system could ignite the
surface.
● Always apply parking brake without pressing release
button. Apply as firmly as
possible on a downhill slope or
uphill slope. Depress brake
pedal at the same time to
reduce operating force.
● Switch off the engine.
● If the vehicle is on a level surface or uphill slope, engage
first gear. On an uphill slope,
turn the front wheels away from
the kerb.
If the vehicle is on a downhill
slope, engage reverse gear.
Turn the front wheels towards the kerb.
● Close the windows.
● Remove the ignition key from the ignition switch. Turn the
steering wheel until the
steering wheel lock is felt to
engage.
● Lock the vehicle by pressing e on
the remote control 3 26.
Activate the anti-theft alarm
system 3 38.
● The engine cooling fans may run
after the engine has been
switched off 3 167.
Caution
After running at high engine
speeds or with high engine loads,
operate the engine briefly at a low load or run in neutral for approx.30 seconds before switching off, in
order to protect the turbocharger.
Vehicle storage 3 166.
Page 143 of 241

Driving and operating141Engine exhaust9Danger
Engine exhaust gases contain
poisonous carbon monoxide,
which is colourless and odourless and could be fatal if inhaled.
If exhaust gases enter the interior
of the vehicle, open the windows.
Have the cause of the fault
rectified by a workshop.
Avoid driving with an open load
compartment, otherwise exhaust
gases could enter the vehicle.
Diesel particle filter
The diesel particle filter system filters
harmful soot particles out of the
exhaust gases. The system includes
a self-cleaning function that runs
automatically during driving without
any notification.
The filter is cleaned by periodically
burning off the soot particles at high
temperature. This process takes
place automatically under set driving
conditions. Autostop is not available
and fuel consumption may be higher
during this period. The emission of
smells and smoke during this process is normal.
Under certain driving conditions, e.g.
short distances, the system cannot
clean itself automatically.
If cleaning of the filter is required and
if previous driving conditions did not
enable automatic cleaning, it will be
indicated by the illumination of control
indicators j 3 99 and Z 3 99 in the
instrument cluster. Seek the
assistance of a workshop
immediately.Caution
If the cleaning process is
interrupted, there is a risk of
provoking severe engine damage.
Cleaning takes place quickest at high engine speeds and loads.
Catalytic converter
The catalytic converter reduces the
amount of harmful substances in the
exhaust gases.Caution
Fuel grades other than those listed on page 3 161, 3 212 could
damage the catalytic converter or
electronic components.
Unburnt fuel will overheat and
damage the catalytic converter.
Therefore avoid excessive use of the starter, running the fuel tank
dry and starting the engine by
pushing or towing.
In the event of misfiring, uneven
engine running, a reduction in engine performance or other unusual
problems, have the cause of the fault
rectified by a workshop as soon as
possible. In an emergency, driving
can be continued for a short period,
keeping vehicle speed and engine
speed low.
Page 150 of 241

148Driving and operatingCaution
It is inadvisable to drive with hand
resting on the selector lever.
Upshift 3 100.
Stop-start system 3 137.
Brakes
The brake system comprises two independent brake circuits.
If a brake circuit fails, the vehicle can
still be braked using the other brake
circuit. However, braking effect is
achieved only when you depress the
brake pedal firmly. You need to use
considerably more force for this. The
braking distance is extended. Seek
the assistance of a workshop before
continuing your journey.
When the engine is not running, the
support of the brake servo unit
disappears once the brake pedal has been depressed once or twice.
Braking effect is not reduced, but
braking requires significantly greater
force. It is especially important to bear this in mind when being towed.
If control indicator R illuminates in
the instrument cluster while driving
and a corresponding message
appears in the Driver Information
Centre 3 103, there is a fault in the
braking system. Seek the assistance
of a workshop immediately.Control indicator R 3 99.
Vehicle messages 3 104.
Antilock brake system Antilock brake system (ABS)
prevents the wheels from locking.
ABS starts to regulate brake pressure
as soon as a wheel shows a tendency to lock. The vehicle remains
steerable, even during hard braking.
ABS control is made apparent
through a pulse in the brake pedal
and the noise of the regulation
process.
For optimum braking, keep the brake
pedal fully depressed throughout the
braking process, despite the fact that
the pedal is pulsating. Do not reduce
the pressure on the pedal.
After starting-off, the system performs a self-test which may be audible.
Control indicator u 3 100.
Fault
If control indicator u does not go out
a few seconds after the ignition is switched on, or if it illuminates while
Page 165 of 241

Driving and operating163Place the nozzle in straight position to
the filler neck and press with slight
force to insert.
To refuel, switch on pump nozzle.
After automatic cut-off, it can be
topped up by operating the pump
nozzle a maximum of two more times.Caution
Wipe off any overflowing fuel
immediately.
When refuelling is complete, replace
the fuel filler cap and turn clockwise
as far as it will go.
Close the fuel filler flap.
Fuel filler cap Only use genuine fuel filler caps.Diesel-engined vehicles have special
fuel filler caps.
Trailer hitch
General information
Entrust retrofitting of towing
equipment to a workshop. It may be
necessary to make changes that
affect the cooling system, heat
shields or other equipment. Only use
towing equipment that has been
approved for your vehicle.
Driving characteristics and towing tips
In the case of trailers with brakes,
attach the breakaway stopping cable.
Before attaching a trailer, lubricate
the coupling ball. However, do not do
so if a stabiliser, which acts on the
coupling ball, is being used to reduce
snaking movements. For trailers with
low driving stability the use of a
stabiliser is recommended.
A maximum speed of 80 km/h must
not be exceeded, even in countries
where higher speeds are permitted.If the trailer starts snaking, drive more slowly, do not attempt to correct the
steering and brake sharply if
necessary.
When driving downhill, drive in the
same gear as if driving uphill and
drive at a similar speed.
Adjust tyre pressure to the value
specified for full load 3 223.
Trailer towing
Trailer loads The permissible trailer loads are
vehicle and engine-dependent
maximum values which must not be
exceeded. The actual trailer load is the difference between the actual
gross weight of the trailer and the
actual coupling socket load with the
trailer coupled.
The permissible trailer loads are
specified in the vehicle documents. In
general, they are valid for gradients
up to max. 12%.
The permitted trailer load applies up
to the specified incline and up to an
altitude of 1000 m above sea level.