ignition OPEL VIVARO B 2018 Manual user
[x] Cancel search | Manufacturer: OPEL, Model Year: 2018, Model line: VIVARO B, Model: OPEL VIVARO B 2018Pages: 237, PDF Size: 5.57 MB
Page 42 of 237
40Keys, doors and windowsTo silence the alarm siren (if
triggered) and therefore deactivate
the anti-theft alarm system, reconnect vehicle battery and unlock the vehicle
or switch on the ignition.
Immobiliser
The immobiliser is part of the ignition
switch and checks whether the
vehicle is allowed to be started with the key being used.
The immobiliser is activated
automatically after the key has been removed from the ignition switch and
also if the key is left in the ignition
switch when the engine is turned off.
If the engine cannot be started, switch off the ignition and remove key, wait
approx. two seconds and then repeat
the start attempt. If start attempt is
unsuccessful, attempt to start the
engine using the spare key and seek
the assistance of a workshop.Note
Radio Frequency Identification
(RFID) tags may cause interference with the key. Do not have it placednear the key when starting the
vehicle.
Note
The immobiliser does not lock the doors. You should always lock the
vehicle after leaving it and switch on the anti-theft alarm system 3 26,
3 38.Exterior mirrors
Convex shape The convex exterior mirror contains
an aspherical area and reduces blind spots. The shape of the mirror makes
objects appear smaller, which will affect the ability to estimate
distances.
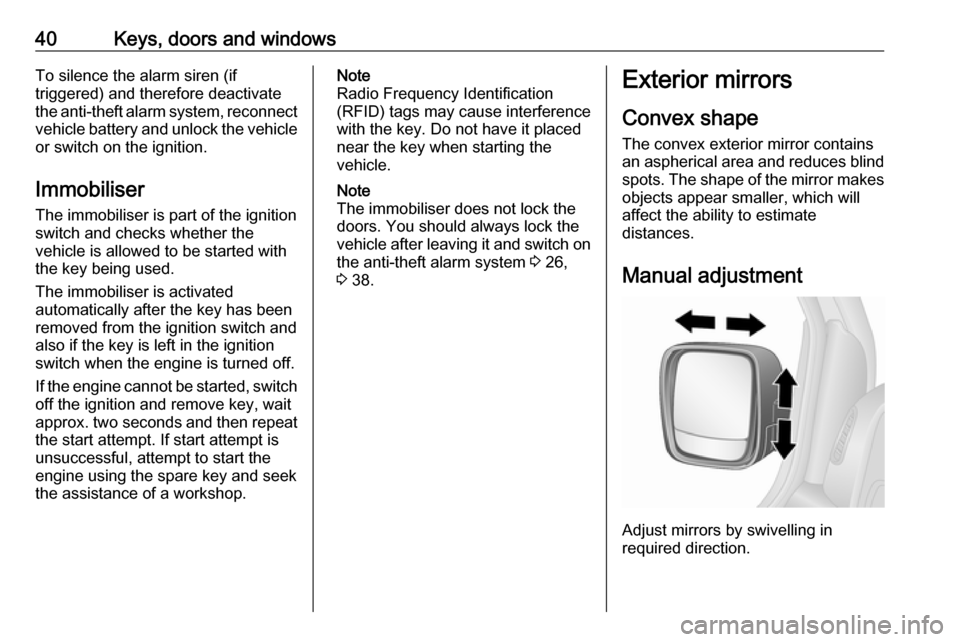
Manual adjustment
Adjust mirrors by swivelling in
required direction.
Page 45 of 237
Keys, doors and windows43Windows
Windscreen
Heat-reflecting windscreen
The heat-reflecting windscreen has a
coating which reflects solar radiation. Also data signals, e.g. from toll
stations, might be reflected.
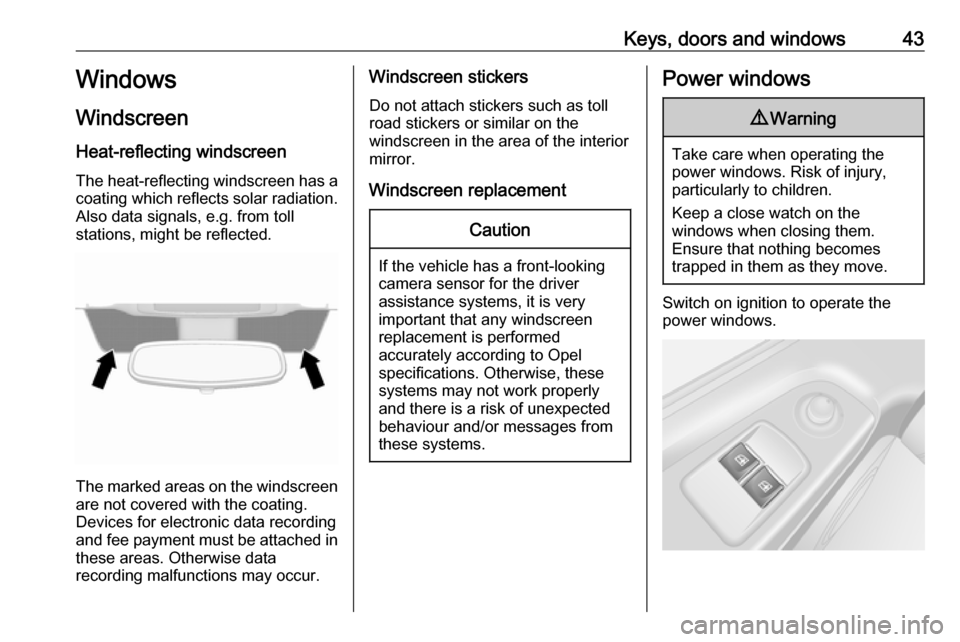
The marked areas on the windscreen are not covered with the coating.
Devices for electronic data recording
and fee payment must be attached in
these areas. Otherwise data
recording malfunctions may occur.
Windscreen stickers
Do not attach stickers such as toll
road stickers or similar on the
windscreen in the area of the interior
mirror.
Windscreen replacementCaution
If the vehicle has a front-looking
camera sensor for the driver
assistance systems, it is very
important that any windscreen
replacement is performed
accurately according to Opel
specifications. Otherwise, these
systems may not work properly
and there is a risk of unexpected
behaviour and/or messages from
these systems.
Power windows9 Warning
Take care when operating the
power windows. Risk of injury,
particularly to children.
Keep a close watch on the
windows when closing them.
Ensure that nothing becomes
trapped in them as they move.
Switch on ignition to operate the power windows.
Page 65 of 237
Seats, restraints639Danger
Do not use a child restraint system
on the passenger seat with active
front airbag.
Airbag deactivation 3 64.
Front airbag system
The front airbag system consists of
one airbag in the steering wheel and
one in the instrument panel on the
front passenger side. These can be
identified by the word AIRBAG.
The front airbag system is triggered in the event of an accident of a certain
severity. The ignition must be
switched on.
The inflated airbags cushion the
impact, thereby reducing the risk of
injury to the upper body and head of
the front seat occupants
considerably.
9 Warning
Optimum protection is only
provided when the seat is in the
proper position.
Seat position 3 47.
Keep the area in which the airbag
inflates clear of obstructions.
Fasten the seat belt correctly and
engage securely. Only then is the
airbag able to protect.
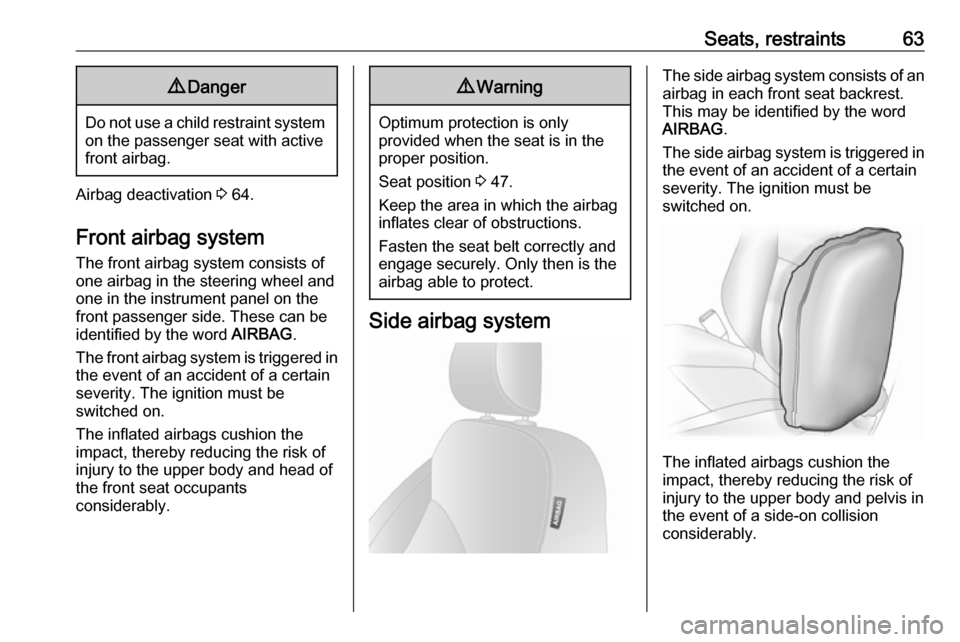
Side airbag system
The side airbag system consists of an
airbag in each front seat backrest.
This may be identified by the word
AIRBAG .
The side airbag system is triggered in the event of an accident of a certain
severity. The ignition must be
switched on.
The inflated airbags cushion the
impact, thereby reducing the risk of
injury to the upper body and pelvis in
the event of a side-on collision
considerably.
Page 66 of 237
64Seats, restraints9Warning
Keep the area in which the airbag
inflates clear of obstructions.
Note
Only use protective seat covers that have been approved for the vehicle.Be careful not to cover the airbags.
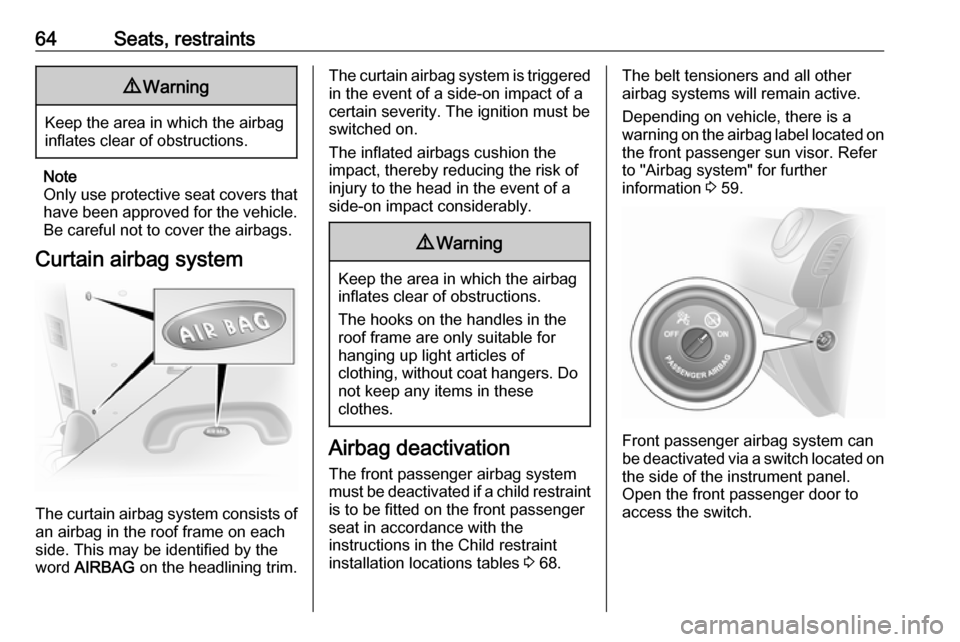
Curtain airbag system
The curtain airbag system consists of an airbag in the roof frame on each
side. This may be identified by the
word AIRBAG on the headlining trim.
The curtain airbag system is triggered
in the event of a side-on impact of a
certain severity. The ignition must be
switched on.
The inflated airbags cushion the
impact, thereby reducing the risk of
injury to the head in the event of a
side-on impact considerably.9 Warning
Keep the area in which the airbag
inflates clear of obstructions.
The hooks on the handles in the
roof frame are only suitable for
hanging up light articles of
clothing, without coat hangers. Do not keep any items in these
clothes.
Airbag deactivation
The front passenger airbag system must be deactivated if a child restraint
is to be fitted on the front passenger
seat in accordance with the
instructions in the Child restraint
installation locations tables 3 68.
The belt tensioners and all other
airbag systems will remain active.
Depending on vehicle, there is a
warning on the airbag label located on the front passenger sun visor. Refer
to "Airbag system" for further
information 3 59.
Front passenger airbag system can
be deactivated via a switch located on the side of the instrument panel.
Open the front passenger door to
access the switch.
Page 67 of 237

Seats, restraints65Press the switch in and rotate to
choose the position:* OFF:front passenger seat airbag
system is deactivated and
will not inflate in the event of a collision. Control indicator
* OFF illuminates
continuously in the roof
console 3 94, 3 97 and
a corresponding message
appears in the Driver
Information Centre 3 102.Ó ON:front passenger airbag
system is active.9 Danger
Deactivate passenger airbag only
in combination with the use of a
child restraint system, subject to
the instructions and restrictions in
the table 3 68.
Otherwise, there is a risk of fatal
injury for a person occupying a
seat with a deactivated front
passenger airbag.
If control indicator ÓON illuminates
after the ignition is switched on and
control indicator *OFF is not
illuminated, the front passenger
airbag system will inflate in the event
of a collision.
If both control indicators ÓON and
* OFF are illuminated
simultaneously, there is a system
failure. The status of the system is not discernible, therefore no person is
permitted to occupy the front
passenger seat. Contact a workshop immediately.
If control indicator F 3 98
illuminates together with v 3 97,
this indicates a fault within the
system. The switch position may have been changed inadvertently with the
ignition on. Turn ignition off and on
again and reset the switch position. If
F and v still remain illuminated, seek
the assistance of a workshop.
Change status only when the vehicle
is stopped with the ignition off. Status remains until the next change.
Control indicator for airbag
deactivation 3 97.Child restraints
Child restraint systems9 Danger
If using a rear-facing child restraint
system on the front passenger
seat, the airbag system for the
front passenger seat must be
deactivated. This also applies to certain forward-facing child
restraint systems as indicated in
the table 3 68.
Airbag deactivation 3 64.
Airbag label 3 59.
We recommend a child restraint system which is tailored specifically to the vehicle. For further information,
contact your workshop.
When a child restraint system is being
used, pay attention to the following
usage and installation instructions
and also those supplied with the child
restraint system.
Page 87 of 237
Instruments and controls85Controls
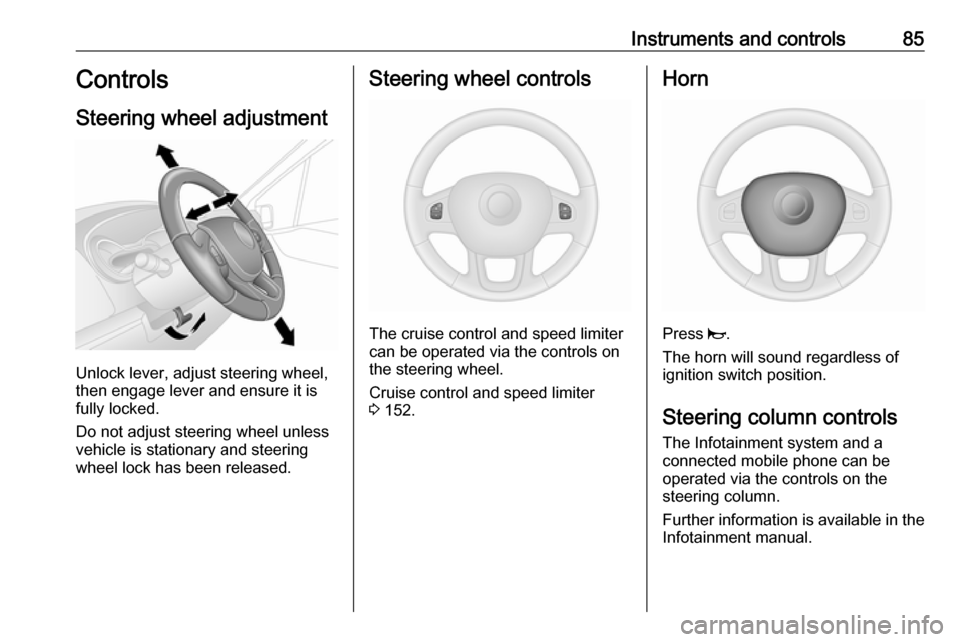
Steering wheel adjustment
Unlock lever, adjust steering wheel,
then engage lever and ensure it is
fully locked.
Do not adjust steering wheel unless
vehicle is stationary and steering
wheel lock has been released.
Steering wheel controls
The cruise control and speed limiter
can be operated via the controls on
the steering wheel.
Cruise control and speed limiter
3 152.
Horn
Press j.
The horn will sound regardless of
ignition switch position.
Steering column controls The Infotainment system and a
connected mobile phone can be
operated via the controls on the
steering column.
Further information is available in the
Infotainment manual.
Page 88 of 237

86Instruments and controlsWindscreen wiper/washerWindscreen wiper7:offAUTO or P:interval wiping or
automatic wiping with
rain sensor1:slow2:fast
Do not use if the windscreen is frozen.
Switch off in car washes.
Adjustable wiper interval
Wiper lever in position AUTO or P.
Turn the adjuster wheel to adjust the
desired wipe interval:
short interval:turn adjuster
wheel upwardslong interval:turn adjuster
wheel downwards
Automatic wiping with rain sensor
Wiper lever in position AUTO or P.
The rain sensor detects the amount of water on the windscreen and
automatically regulates the frequency
of the windscreen wiper.
Automatic wiping will need to be
reselected whenever the ignition has
been switched off.
Adjustable sensitivity of the rain
sensor
Turn the adjuster wheel to adjust the
sensitivity:low sensitivity:turn adjuster
wheel upwardshigh sensitivity:turn adjuster
wheel downwards
The rain sensor is located on the
windscreen. Keep the sensor area
free from dust, dirt and ice.
Page 89 of 237

Instruments and controls87Windscreen washer
Pull lever. Washer fluid is sprayed
onto the windscreen.
short pull:wiper swipes oncelong pull:wiper swipes for a few
strokes
Maintenance position
Depending on version, the
windscreen wiper lever may be
equipped with a maintenance position
to make wiper blade replacement
easier.
Before replacing the wiper blades,
switch on the ignition then move the
wiper lever down as far as it will go;
the wiper stops in a position away
from the bonnet.
Wiper blade replacement 3 174.
Rear window wiper/washer
Turn lever:
7:offe:wiper operationf:washer fluid is sprayed onto the
rear windowThe rear window wiper comes on
automatically when the windscreen
wiper is switched on and reverse gear
is engaged.
Outside temperature
A drop in temperature is indicated
immediately and a rise in temperature
after a time delay.
If outside temperatures drop to 3 °C, the °C flashes in the Driver
Information Centre as a warning for
icy road conditions. This will continue
to flash until temperatures rise above 3 °C.
Page 91 of 237
Instruments and controls89
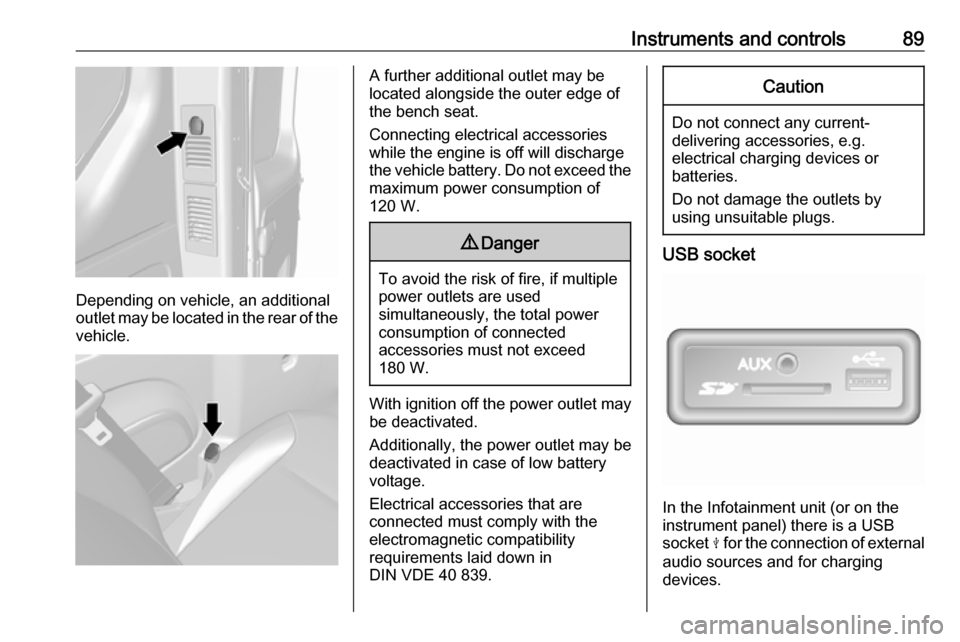
Depending on vehicle, an additional
outlet may be located in the rear of the
vehicle.
A further additional outlet may be
located alongside the outer edge of
the bench seat.
Connecting electrical accessories while the engine is off will discharge
the vehicle battery. Do not exceed the
maximum power consumption of
120 W.9 Danger
To avoid the risk of fire, if multiple
power outlets are used
simultaneously, the total power
consumption of connected
accessories must not exceed
180 W.
With ignition off the power outlet may
be deactivated.
Additionally, the power outlet may be
deactivated in case of low battery
voltage.
Electrical accessories that are
connected must comply with the
electromagnetic compatibility
requirements laid down in
DIN VDE 40 839.
Caution
Do not connect any current- delivering accessories, e.g.
electrical charging devices or
batteries.
Do not damage the outlets by
using unsuitable plugs.
USB socket
In the Infotainment unit (or on the
instrument panel) there is a USB
socket M for the connection of external
audio sources and for charging
devices.
Page 93 of 237
Instruments and controls91Warning lights, gauges
and indicators
Instrument cluster
In some versions, the needles of the
instruments briefly rotate to the end
position when the ignition is switched on.
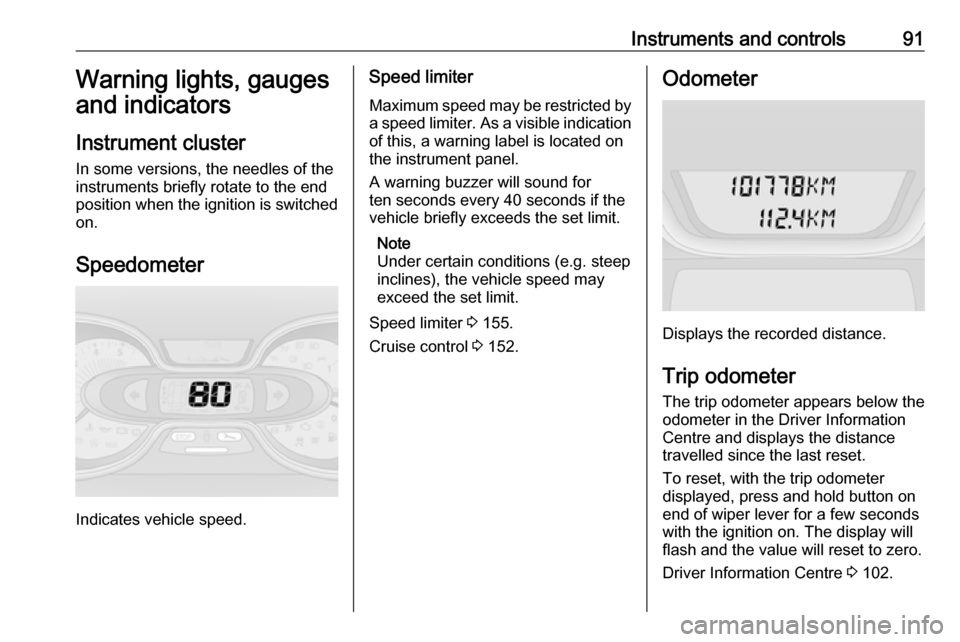
Speedometer
Indicates vehicle speed.
Speed limiter Maximum speed may be restricted by
a speed limiter. As a visible indication
of this, a warning label is located on
the instrument panel.
A warning buzzer will sound for
ten seconds every 40 seconds if the
vehicle briefly exceeds the set limit.
Note
Under certain conditions (e.g. steep
inclines), the vehicle speed may
exceed the set limit.
Speed limiter 3 155.
Cruise control 3 152.Odometer
Displays the recorded distance.
Trip odometer The trip odometer appears below the
odometer in the Driver Information
Centre and displays the distance
travelled since the last reset.
To reset, with the trip odometer
displayed, press and hold button on
end of wiper lever for a few seconds
with the ignition on. The display will
flash and the value will reset to zero.
Driver Information Centre 3 102.