OPEL VIVARO C 2020.25 Manual user
Manufacturer: OPEL, Model Year: 2020.25, Model line: VIVARO C, Model: OPEL VIVARO C 2020.25Pages: 287, PDF Size: 28.79 MB
Page 91 of 287

Storage89Folding
To staw the table use the handle to
move it back in the folded position.
To fold the multifunctional table pull
the handle and move the rear part
downwards until it engages.
Removing
To remove the multifunctional table
pull the handle in the front beyond the point of resistance. Remove the
multifunctional table.
Refitting
The multifunctional table can be fitted in two positions.
Page 92 of 287

90StorageThe handle in the front has to be in the
tightened position. Place the rear of
the multifunctional table on the rail
and tip the front down. Slide the
multifunctional table until it engages.9 Warning
Never use the multifunctional table
in the unfolded position while thevehicle is in motion. Any objects
on the table will turn into
projectiles in the event of a sudden stop or collision.
Ensure that the multifunctional
table is correctly folded before
moving or removing it.
Never use the tables as seats or
lean on them.
Check that there is no object
obstructing the rail and preventing locking.
Roof rack system
Roof rackFor safety reasons and to avoid
damage to the roof, the vehicle
approved roof rack system is
recommended. For further
information contact your workshop.
Follow the installation instructions
and remove the roof rack when not in
use.
The roof load is the combined weight
of the roof rack and the load.
Loading information 3 91.
Mounting
Fasten the roof rack according to the
installation instructions delivered with the roof rack.
The number and location of the
mounting points may vary depending
on the vehicle:Vehicles with glass panel
Mount two roof bars using the
mounting points marked in the
picture.
Permissible roof load L1, L2, L3 max.
100 kg.
Page 93 of 287

Storage91Vehicles without glass panel
Mount three roof bars using the
mounting points marked in the
picture.
Permissible roof load L1, L2, L3 max.
150 kg.
Mount the roof rack using the
mounting points marked in the
picture.
Permissible roof load L1 max.
140 kg.
Permissible roof load L2, L3 max.
170 kg.
Vehicle dimensions 3 270
Loading information
● Heavy objects in the load
compartment should be placed
against the seat backrests. Make
sure that the backrests are
securely engaged. If objects can
be stacked, heavier objects
should be placed at the bottom.
● Prevent sliding of loose objects by securing them with straps
attached to the lashing eyes.
Lashing eyes 3 82.
● Do not allow the load to protrude above the upper edge of the
backrests.
Page 94 of 287

92Storage● Do not place any objects on therear luggage cover or the
instrument panel, and do not cover the sensor on top of the
instrument panel.
● The load must not obstruct the operation of the pedals, parking
brake and gear selector, or
hinder the freedom of movement
of the driver. Do not place any
unsecured objects in the interior.
● Do not drive with an open load compartment.9Warning
Always make sure that the load in
the vehicle is securely stowed.
Otherwise objects can be thrown
around inside the vehicle and
cause personal injury or damage
to the load or car.
● The payload is the difference between the permitted gross
vehicle weight (see identification
plate) and the EC kerb weight.
Identification plate 3 264.
To calculate the payload, enter
the data for your vehicle in the
weights table at the front of this
manual.
The EC kerb weight includes
weights for the driver (68 kg),
luggage (7 kg) and all fluids (fuel
tank 90% full).
Optional equipment and
accessories increase the kerb
weight.
● Driving with a roof load increases
the sensitivity of the vehicle to
cross-winds and has a
detrimental effect on vehicle
handling due to the vehicle's
higher centre of gravity.
Distribute the load evenly and secure it properly with retaining
straps. Adjust the tyre pressure
and vehicle speed according to
the load conditions. Check and
retighten the straps frequently.
Do not drive faster
than 120 km/h.
Page 95 of 287

Instruments and controls93Instruments and
controlsControls ....................................... 94
Steering wheel adjustment ........94
Steering wheel controls .............94
Horn ........................................... 95
Steering column controls ...........95
Windscreen wiper and washer ..95
Rear window wiper and washer ...................................... 97
Outside temperature ..................97
Clock ......................................... 98
Power outlets ............................. 98
Warning lights, gauges and indi‐ cators ......................................... 101
Instrument cluster ....................101
Speedometer ........................... 105
Odometer ................................ 106
Trip odometer .......................... 106
Tachometer ............................. 107
Fuel gauge .............................. 107
Engine coolant temperature gauge ..................................... 108
Engine oil level monitor ...........109
Service display ........................ 109
Control indicators ....................110Turn lights................................ 110
Seat belt reminder ...................110
Airbag and belt tensioners .......111
Airbag deactivation ..................111
Charging system .....................111
Malfunction indicator light ........111
Service vehicle soon ...............112
Stop engine ............................. 112
System check .......................... 112
Brake system ........................... 112
Parking brake .......................... 112
Antilock brake system (ABS) ...112
Gear shifting ............................ 113
Lane departure warning ..........113
Electronic Stability Control and Traction Control system .........113
Engine coolant temperature ....113
Preheating ............................... 113
Exhaust filter ............................ 113
AdBlue ..................................... 114
Deflation detection system ......114
Engine oil pressure ..................114
Low fuel ................................... 114
Autostop .................................. 115
Exterior light ............................ 115
Low beam ................................ 115
High beam ............................... 115
High beam assist .....................115
LED headlights ........................ 115
Front fog lights ......................... 115Rear fog light........................... 115
Rain sensor ............................. 115
Cruise control .......................... 115
Adaptive cruise control ............115
Vehicle detected ahead ...........115
Side blind spot alert .................116
Active emergency braking .......116
Speed limiter ........................... 116
Door open ................................ 116
Displays ..................................... 116
Driver Information Centre ........116
Info Display .............................. 120
Head-up display ......................121
Vehicle messages ......................123
Warning chimes .......................123
Vehicle personalisation ..............124
Telematics services ...................128
Opel Connect .......................... 128
Page 96 of 287

94Instruments and controlsControlsSteering wheel adjustment
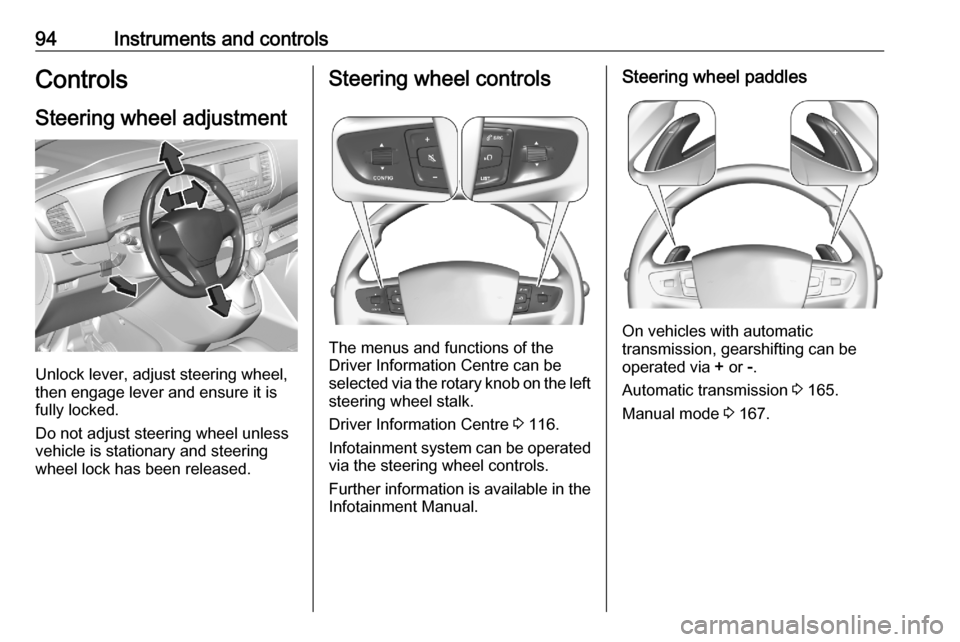
Unlock lever, adjust steering wheel,
then engage lever and ensure it is fully locked.
Do not adjust steering wheel unless
vehicle is stationary and steering
wheel lock has been released.
Steering wheel controls
The menus and functions of the
Driver Information Centre can be
selected via the rotary knob on the left
steering wheel stalk.
Driver Information Centre 3 116.
Infotainment system can be operated
via the steering wheel controls.
Further information is available in the
Infotainment Manual.
Steering wheel paddles
On vehicles with automatic
transmission, gearshifting can be
operated via + or -.
Automatic transmission 3 165.
Manual mode 3 167.
Page 97 of 287

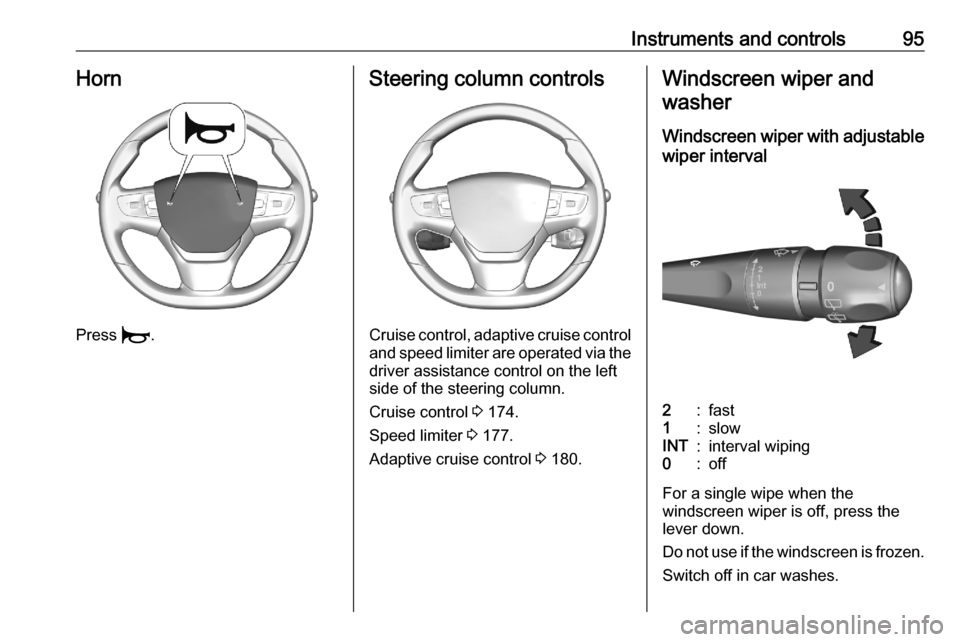
Instruments and controls95Horn
Press d.
Steering column controls
Cruise control, adaptive cruise control
and speed limiter are operated via the
driver assistance control on the left
side of the steering column.
Cruise control 3 174.
Speed limiter 3 177.
Adaptive cruise control 3 180.
Windscreen wiper and
washer
Windscreen wiper with adjustable
wiper interval2:fast1:slowINT:interval wiping0:off
For a single wipe when the
windscreen wiper is off, press the
lever down.
Do not use if the windscreen is frozen.
Switch off in car washes.
Page 98 of 287

96Instruments and controlsTo activate interval wiping mode the
next time ignition is switched on,
press the lever downwards to position
0 and back to INT.
Windscreen wiper with rain sensor2:fast1:slowINT:interval wiping0:offAUTO:automatic wiping with rain
sensor
In AUTO position, the rain sensor
detects the amount of water on the
windscreen and automatically
regulates the frequency of the
windscreen wiper. To deactivate the automatic wiping mode, press the
lever downwards to AUTO again.
If ignition is switched off for more than a minute, automatic wiping mode is
deactivated. To activate automatic
wiping mode the next time ignition is
switched on, press the lever
downwards to AUTO again.
For a single wipe when the
windscreen wiper is off, pull the lever
briefly towards you.
Do not use if the windscreen is frozen.
Switch off in car washes.
Windscreen washerWasher fluid is sprayed onto the
windscreen and the wiper wipes a few
times.
Washer fluid 3 216.
Functionality of the rain sensor
Keep the sensor free from dust, dirt
and ice.
Control indicator y 3 95.
Page 99 of 287

Instruments and controls97Rear window wiper and
washer
Rear window wiper0:offS:intermittent operationR:rear window washer
Do not use if the rear window is
frozen.
Switch off in car washes.
The rear window wiper comes on
automatically when the windscreen
wiper is switched on and reverse gear
is engaged.
Activation or deactivation of this
function can be changed in the
Vehicle personalisation menu 3 124.
Rear window washer
Set to R.
Washer fluid is sprayed onto the rear
window and the wiper wipes a few
times.
The rear window washer system is
deactivated when the fluid level is
low.
Washer fluid 3 216.
Outside temperature
Illustration shows an example.
If outside temperature drops to 3 °C,
a warning message is displayed in the Driver Information Centre.
9 Warning
The road surface may already be
icy even though the display
indicates a few degrees above
0 °C.
Page 100 of 287

98Instruments and controlsClock
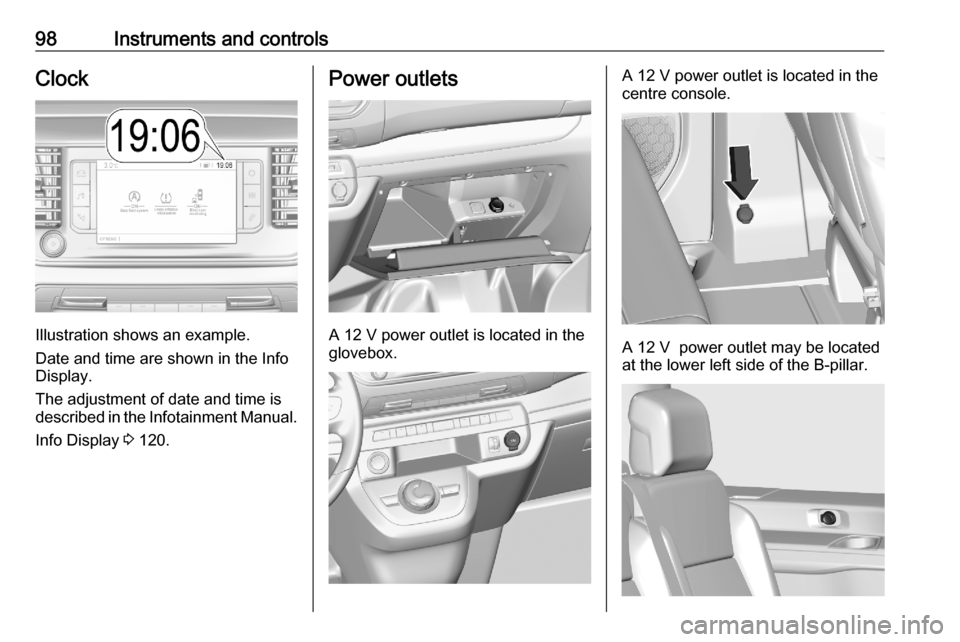
Illustration shows an example.
Date and time are shown in the Info
Display.
The adjustment of date and time is
described in the Infotainment Manual.
Info Display 3 120.
Power outlets
A 12 V power outlet is located in the
glovebox.
A 12 V power outlet is located in the
centre console.
A 12 V power outlet may be located
at the lower left side of the B-pillar.