warning OPEL VIVARO C 2020.25 Manual user
[x] Cancel search | Manufacturer: OPEL, Model Year: 2020.25, Model line: VIVARO C, Model: OPEL VIVARO C 2020.25Pages: 287, PDF Size: 28.79 MB
Page 132 of 287

130LightingLightingExterior lighting.......................... 130
Light switch .............................. 130
Automatic light control .............131
High beam ............................... 131
High beam assist .....................131
Headlight flash ......................... 132
Headlight range adjustment ....132
Headlights when driving abroad .................................... 133
Daytime running lights .............133
Cornering lights .......................133
Hazard warning flashers ..........133
Turn lights ................................ 134
Front fog lights ......................... 134
Rear fog light ........................... 134
Reversing lights .......................135
Misted light covers ...................135
Interior lighting ........................... 135
Instrument panel illumination control ..................................... 135
Interior lights ............................ 135
Reading lights .......................... 136
Sunvisor lights ......................... 137
Lighting features ........................137
Centre console lighting ............137Entry lighting ............................ 137
Exit lighting .............................. 137
Vehicle locator lighting ............138
Peripheral lighting ....................138
Battery discharge protection ....138Exterior lighting
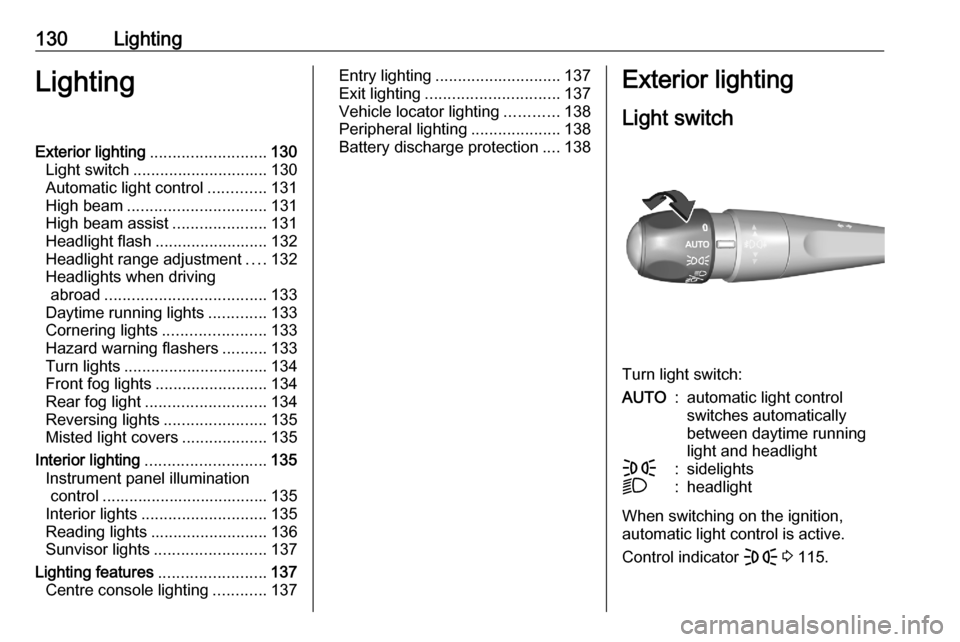
Light switch
Turn light switch:
AUTO:automatic light control
switches automatically
between daytime running
light and headlightF:sidelightsD:headlight
When switching on the ignition,
automatic light control is active.
Control indicator F 3 115.
Page 135 of 287

Lighting133Headlights when driving
abroad
When driving in countries where
traffic drives on the opposite side of
the road, the headlights must be
adjusted to avoid dazzling oncoming
drivers.
Contact your dealer or a qualified workshop.
Daytime running lights Daytime running lights increase
visibility of the vehicle during daylight.
They are switched on automatically
when the engine is running or by
adjusting 0 or AUTO .
The system switches between
daytime running lights and low beam
automatically, depending on the
lighting conditions.Cornering lights
Activated at a speed of up to 40 km/h
when turning off. Depending on the
steering angle or the activation of the turn lights the front fog light illuminate
the direction of travel.
This function can be activated or
deactivated in the vehicle
personalisation 3 124.
Hazard warning flashers
Operated by pressing ç.
Hazard warning flashers are switched
on automatically in the following
situations:
● Braking in an emergency (depending on the force of
deceleration).
● In the event of an accident.
They are switched off the first time
you accelerate or if you press ç.
Page 142 of 287

140Climate controlAdjust the air flow by turning ý to the
desired speed.clockwise:increaseanticklockwise:decrease
Air recirculation system q
Press q to activate air recirculation
mode. The LED in the button
illuminates to indicate activation.
Press q again to deactivate air
recirculation mode.
9 Warning
The exchange of fresh air is
reduced in air recirculation mode.
In operation without cooling the air humidity increases, so the
windows may mist up from inside.
The quality of the passenger
compartment air deteriorates,
which may cause the vehicle
occupants to feel drowsy.
In warm and very humid ambient air conditions, the windscreen may mist
up from outside when cold air is
directed towards it. If windscreen
mists up from outside, activate
windscreen wiper and deactivate w.
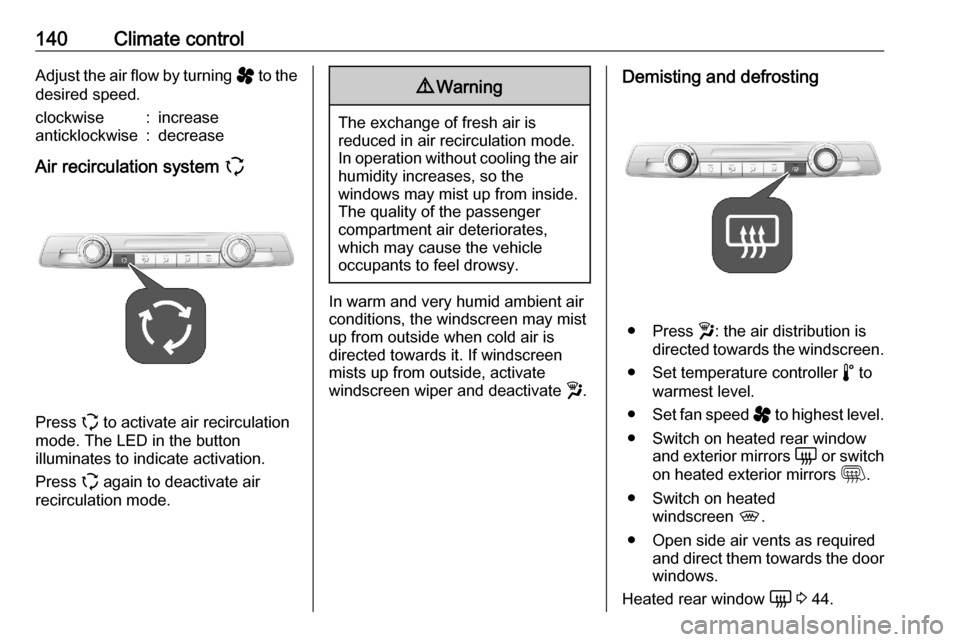
Demisting and defrosting
● Press w: the air distribution is
directed towards the windscreen.
● Set temperature controller ñ to
warmest level.
● Set fan speed ý to highest level.
● Switch on heated rear window and exterior mirrors è or switch
on heated exterior mirrors m.
● Switch on heated windscreen ,.
● Open side air vents as required and direct them towards the doorwindows.
Heated rear window è 3 44.
Page 144 of 287

142Climate controlActivated cooling may inhibit
Autostops. Stop-start system 3 157.
Air recirculation system q
Press q to activate air recirculation
mode. The LED in the button
illuminates to indicate activation.
Press q again to deactivate air
recirculation mode.
9 Warning
The exchange of fresh air is
reduced in air recirculation mode.
In operation without cooling the air humidity increases, so the
windows may mist up from inside.
The quality of the passenger
compartment air deteriorates,
which may cause the vehicle
occupants to feel drowsy.
In warm and very humid ambient air conditions, the windscreen may mist
up from outside when cold air is
directed towards it. If windscreen
mists up from outside, activate
windscreen wiper and deactivate w.
Maximum cooling
Briefly open the windows so that hot
air can disperse quickly.
● Switch on cooling A/C.
● Press q for air recirculation
system on.
● Press x for air distribution.
● Set temperature control ñ to
coldest level.
● Set fan speed ý to highest level.
● Open all vents.
Demisting and defrosting the
windows
● Set fan speed ý to highest level.
● Set temperature controller ñ to
warmest level.
Page 148 of 287

146Climate controlAir conditioning A/C
Press A/C to switch on cooling.
Cooling is only functional when the
engine is running and climate control
fan is switched on.
Press A/C again to switch off cooling.
The air conditioning system cools and
dehumidifies (dries) when outside
temperature is above a specific level. Therefore condensation may form
and drip from under the vehicle.
If no cooling or drying is required,
switch off the cooling system for fuel
saving reasons.
Manual air recirculation q
Press
q to activate the air
recirculation mode. q is shown in the
display to indicate activation.
Press q again to deactivate
recirculation mode.
9 Warning
The exchange of fresh air is
reduced in air recirculation mode.
In operation without cooling, the
air humidity increases, so the
windows may mist up from inside.
The quality of the passenger
compartment air deteriorates,
which may cause the occupants to
feel drowsy.
In warm and very humid ambient air
conditions, the windscreen may mist
up from outside, when cold air is
directed towards it. If windscreen
mists up from outside, activate
windscreen wiper and deactivate w.
Demisting and defrosting the
windows h
●Press h. The LED in the button
illuminates to indicate activation.
Page 151 of 287

Climate control149Air vents
Adjustable air vents Air vents in the instrument panel
Direct the flow of air by tilting and
swivelling the slats.
To close the vent, swivel the slats
inwards.
Outer air vents in the instrument
panel
Direct the flow of air by tilting and
swivelling the slats.
To close the vent, swivel the slats
outwards.
At least two air vents must be open
while cooling is on.
9 Warning
Do not attach any objects to the
slats of the air vents. Risk of
damage and injury in case of an
accident.
Rear air vents in the ceiling
To activate the distribution of
climatised / heated air via the rear air vents, press E.
Page 154 of 287

152Driving and operatingDriving and
operatingDriving hints ............................... 153
Control of the vehicle ...............153
Steering ................................... 153
Starting and operating ...............153
New vehicle running-in ............153
Ignition switch positions ...........153
Power button ........................... 154
Starting the engine ..................155
Overrun cut-off ........................ 157
Stop-start system ....................157
Parking .................................... 160
Engine exhaust .......................... 161
Exhaust filter ............................ 161
Catalytic converter ...................161
AdBlue ..................................... 162
Automatic transmission ..............165
Transmission display ...............166
Gear selection ......................... 166
Manual mode ........................... 167
Electronic driving programmes 168
Fault ........................................ 168
Manual transmission ..................168Brakes........................................ 169
Antilock brake system .............169
Parking brake .......................... 170
Brake assist ............................. 171
Hill start assist ......................... 171
Ride control systems .................171
Electronic Stability Control and Traction Control system .........171
Selective ride control ...............172
Driver assistance systems .........174
Cruise control .......................... 174
Speed limiter ........................... 177
Adaptive cruise control ............180
Forward collision alert .............187
Active emergency braking .......188
Front pedestrian protection .....191
Parking assist .......................... 192
Side blind spot alert .................194
Panoramic view system ...........196
Rear view camera ...................199
Lane departure warning ..........200
Driver alert ............................... 201
Fuel ............................................ 203
Fuel for diesel engines ............203
Refuelling ................................ 204
Trailer hitch ................................ 205
General information .................205
Driving characteristics and towing tips .............................. 205Trailer towing........................... 206
Towing equipment ...................207
Trailer stability assist ...............210
Page 157 of 287

Driving and operating1559Warning
If the vehicle battery is discharged,
the vehicle must not be towed,
tow-started or jump-started as the
steering wheel lock cannot be
disengaged.
Operation on vehicles with
electronic key system in case of
failure
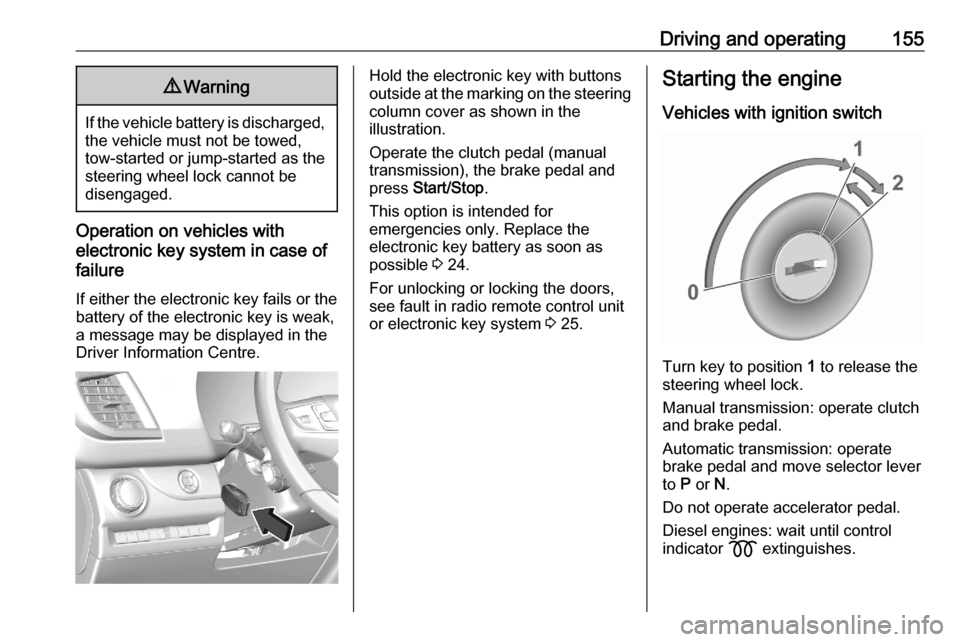
If either the electronic key fails or the
battery of the electronic key is weak,
a message may be displayed in the
Driver Information Centre.
Hold the electronic key with buttons
outside at the marking on the steering column cover as shown in the
illustration.
Operate the clutch pedal (manual
transmission), the brake pedal and
press Start/Stop .
This option is intended for
emergencies only. Replace the
electronic key battery as soon as
possible 3 24.
For unlocking or locking the doors,
see fault in radio remote control unit
or electronic key system 3 25.Starting the engine
Vehicles with ignition switch
Turn key to position 1 to release the
steering wheel lock.
Manual transmission: operate clutch
and brake pedal.
Automatic transmission: operate
brake pedal and move selector lever
to P or N.
Do not operate accelerator pedal.
Diesel engines: wait until control
indicator z extinguishes.
Page 162 of 287

160Driving and operating● climate control system requestsengine start
● air conditioning manually switched on
If an electrical accessory, e.g. a
portable CD player, is connected to
the power outlet, a brief power drop
during the restart might be noticeable.
Parking9 Warning
● Do not park the vehicle on an
easily ignitable surface. The
high temperature of the
exhaust system could ignite the
surface.
● Apply the parking brake.
● If the vehicle is on a level surface or uphill slope, engage
first gear or set the selector
lever to position P (automatic
transmission type A) / N
(automatic transmission type B). On an uphill slope, turn the
front wheels away from the
kerb.
If the vehicle is on a downhill
slope, engage reverse gear or
set the selector lever to position P (automatic transmission type
A) / N (automatic transmission
type B). Turn the front wheels
towards the kerb.
● Close the windows.
● Switch off the engine.
● Remove the ignition key from the ignition switch or switch off
ignition on vehicles with power
button. Turn the steering wheel
until the steering wheel lock is
felt to engage.
● Lock the vehicle.
● Activate the anti-theft alarm system.
● The engine cooling fans may run
after the engine has been
switched off 3 213.
Caution
After running at high engine
speeds or with high engine loads,
operate the engine briefly at a low load or run in neutral for
approx. 30 seconds before
switching off, in order to protect
the turbocharger.
Note
In the event of an accident with
airbag deployment, the engine is
switched off automatically if the
vehicle comes to a standstill within a
certain time.
In countries with extreme low
temperatures it may be necessary to park the vehicle without applied
parking brake. Make sure to park the
vehicle on a level surface.
Page 164 of 287

162Driving and operatingAdBlue
General information The selective catalytic reduction
(BlueInjection) is a method to
substantially reduce the nitrogen
oxides in the exhaust emission. This
is achieved by injecting a Diesel
Exhaust Fluid (DEF) into the exhaust system. The ammonia released by
the fluid reacts with nitrous gases
(NO x) from the exhaust and turns it
into nitrogen and water.
The designation of this fluid is
AdBlue ®
. It is a non-toxic, non-
flammable, colourless and odourless
fluid which consists of 32% urea and
68% water.9 Warning
Avoid contact of your eyes or skin
with AdBlue.
In case of eye or skin contact,
rinse off with water.
Caution
Avoid contact of the paintwork with AdBlue.
In case of contact, rinse off with water.
AdBlue freezes at a temperature of
approx. -11 °C. As the vehicle is
equipped with an AdBlue pre-heater,
the emissions reduction at low
temperatures is ensured. The AdBlue
pre-heater works automatically.
Note
Frozen and again liquefied AdBlue is usable without quality loss.
The typical AdBlue consumption is
approx. 22 l per 10000 km to
15000 km depending on driving
behaviour (e.g. high load or towing).
Level warnings
Depending on the calculated range of AdBlue, different messages are
displayed in the Driver Information
Centre. The messages and the
restrictions are a legal requirement.
1. The first possible warning is Top
up emissions additive: Starting
prevented in 2400 km .
When switching on the ignition,
this warning will show up once
briefly with the calculated range.
Additionally, control indicator
B will illuminate and a chime
will sound. Driving is possible
without any restrictions.
2. The next warning level is entered with a range below 800 km. Themessage with the current range
will always be displayed when
ignition is switched on.
Additionally, control indicator
B will illuminate and a chime
will sound. Refill AdBlue before
entering the next warning level.
When driving, the chime sounds
and the message is displayed
every 100 km until the AdBlue
tank has been topped-up.
3. The next warning level is entered with a range below 100 km. The
message with the current range
will always be displayed when
ignition is switched on.
Additionally, control indicator