ABS OPEL ZAFIRA 2009 Owners Manual
[x] Cancel search | Manufacturer: OPEL, Model Year: 2009, Model line: ZAFIRA, Model: OPEL ZAFIRA 2009Pages: 228, PDF Size: 7.3 MB
Page 23 of 228

In brief
23
Active head restraints on
front seats In the event of a rear-end impact, the
active head restraints tilt forwards
slightly. The head is more effectively
supported by the head restraint and
the risk of whiplash injury is reduced.
Active head restraints can be
recognised by the word
ACTIVE.
Head restraints 3 44. Trip computer
Functions:
■ Range
■ Instantaneous consumption
■ Distance
■ Average speed
■ Absolute consumption
■ Average consumption
■ Stop watch
■ Tyre pressure
Trip computer 3 102, 3 104. Check control
The check control software monitors
■ Fluid levels
■ Tyre pressure
■ Radio remote control battery
■ Anti-theft alarm system
■ Important exterior lighting bulbs, including cables and fuses.
Display messages 3 100.
Page 89 of 228

Instruments and controls
89
Flashes with switched on
ignition
Fault in the electronic immobiliser
system.
The engine cannot be started
3 38.
Brake and clutch system
R illuminates or flashes red.
Illuminated
Illuminates when the hand brake is
released if the brake/clutch fluid level
is too low 3 158. 9
Warning Stop. Do not continue your
journey. Consult a workshop.
Illuminates after the ignition is
switched on if the hand brake is
applied
3 141.
Flashes
On vehicle with automated manual
transmission, flashes for a few
seconds
when the ignition is switched
off if the hand brake is not applied. On vehicles with automated manual
transmission, flashes when the
driver's door is opened if no gear is
engaged and the hand brake is not
applied.
Antilock brake system
(ABS)
u
illuminates red.
Illuminates
for a few seconds after the
ignition is turned on. The system is
ready for operation when the control
indicator goes out.
If the control indicator does not go out
after a few seconds, or if it illuminates
while driving, there is a fault in the
ABS. The brake system remains
operational but without ABS
regulation.
Anti-lock Braking System 3 140.
Sport mode
1 illuminates yellow.
The symbol is illuminated when Sport
mode is on 3 134, 3 138. Winter mode
T
illuminates yellow.
The symbol is illuminated when
Winter mode is on 3 134, 3 138.
Ultrasonic parking assist
r illuminates or flashes yellow.
Illuminated
Fault
in system. Have the cause of the
fault remedied by a workshop.
Flashes
Fault due to sensors that are dirty or
covered by ice or snow.
or
Interference due to external sources
of ultra sound. Once the source of
interference is removed, the system
will operate normally.
Ultrasonic parking sensors 3 145.
Electronic Stability
Program
v flashes or illuminates yellow.
Page 103 of 228
Instruments and controls
103
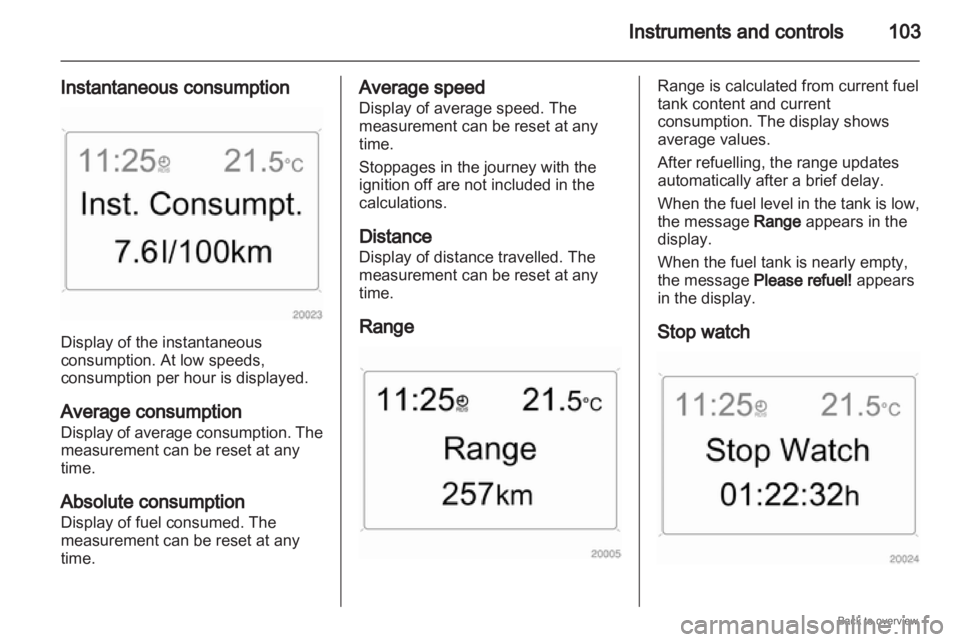
Instantaneous consumption Display of the instantaneous
consumption. At low speeds,
consumption per hour is displayed.
Average consumption
Display
of average consumption. The
measurement can be reset at any
time.
Absolute consumption
Display of fuel consumed. The
measurement can be reset at any
time. Average speed
Display of average speed. The
measurement can be reset at any
time.
Stoppages in the journey with the
ignition off are not included in the
calculations.
Distance
Display of distance travelled. The
measurement can be reset at any
time.
Range Range is calculated from current fuel
tank content and current
consumption. The display shows
average values.
After refuelling, the range updates
automatically after a brief delay.
When
the fuel level in the tank is low,
the message Range appears in the
display.
When the fuel tank is nearly empty,
the message Please refuel! appears
in the display.
Stop watch
Page 104 of 228
104
Instruments and controls
Select the function. Press the OK
button or the left adjuster wheel on the
steering wheel to start or stop the stop
watch.
Restart trip computer
The measurement or calculation of
the following trip computer
information can be restarted:
■ Average consumption,
■ Absolute consumption,
■ Average speed,
■ Distance,
■ Stop watch.
Select the desired trip computer
information 3 93. To restart, press the
OK button or the left adjuster wheel
on the steering wheel for approx.
2 seconds. Trip computer in Graphic-
Info-Display or Colour-
Info-Display
The main page of the trip computer
provides information on range,
current consumption and average
consumption of
BC 1.
To display other trip computer data,
press the BC button on the
infotainment system, select the trip
computer menu from the display or
press the left adjuster wheel on the
steering wheel.
Select BC 1 or BC 2 from the trip
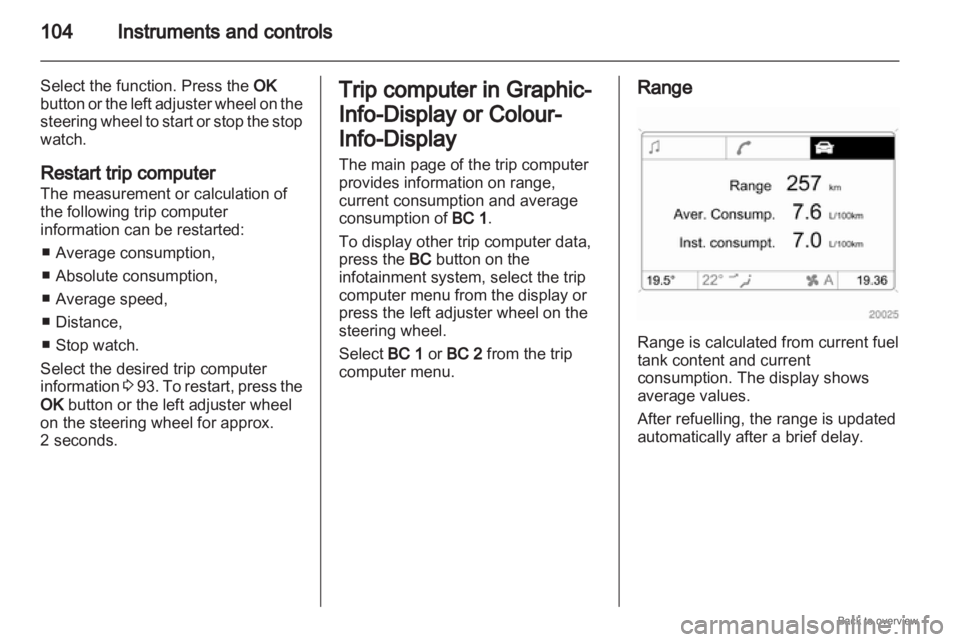
computer menu. Range
Range is calculated from current fuel
tank content and current
consumption. The display shows
average values.
After refuelling, the range is updated
automatically after a brief delay.
Page 105 of 228
Instruments and controls
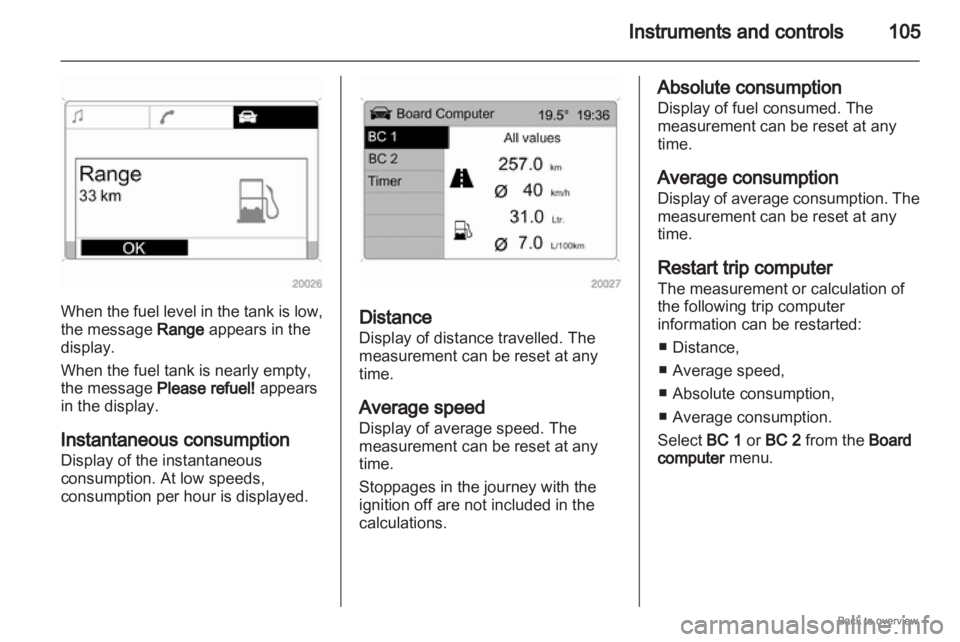
105When the fuel level in the tank is low,
the message Range appears in the
display.
When the fuel tank is nearly empty,
the message Please refuel! appears
in the display.
Instantaneous consumption
Display of the instantaneous
consumption. At low speeds,
consumption per hour is displayed.
Distance
Display of distance travelled. The
measurement can be reset at any
time.
Average speed
Display of average speed. The
measurement can be reset at any
time.
Stoppages in the journey with the
ignition off are not included in the
calculations. Absolute consumption
Display of fuel consumed. The
measurement can be reset at any
time.
Average consumption
Display
of average consumption. The
measurement can be reset at any
time.
Restart trip computer
The measurement or calculation of
the following trip computer
information can be restarted:
■ Distance,
■ Average speed,
■ Absolute consumption,
■ Average consumption.
Select BC 1 or BC 2 from the Board
computer menu.
Page 140 of 228
140
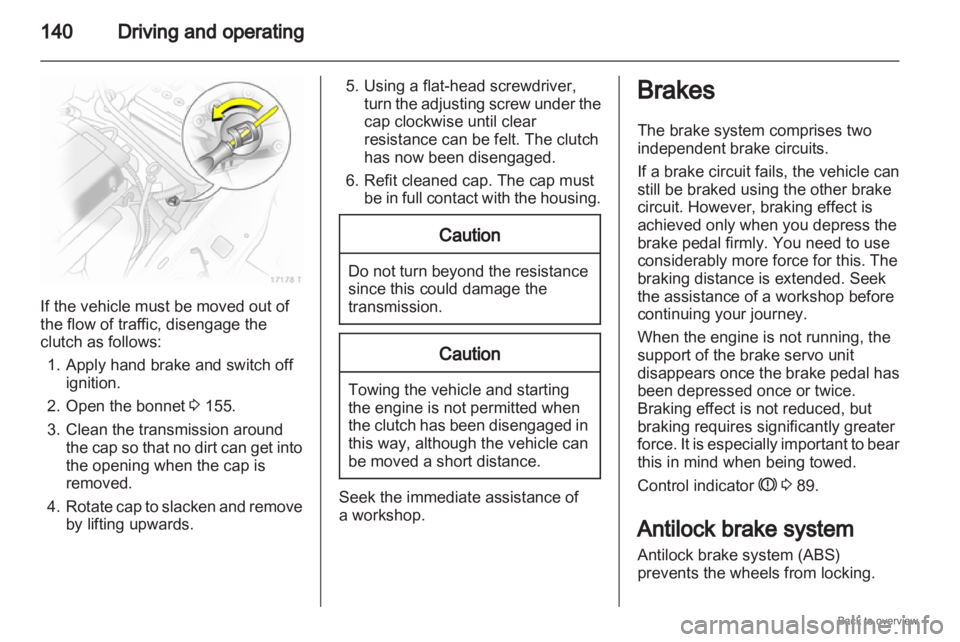
Driving and operatingIf the vehicle must be moved out of
the flow of traffic, disengage the
clutch as follows:
1.
Apply hand brake and switch offignition.
2. Open the bonnet 3 155.
3. Clean the transmission around the cap so that no dirt can get into
the opening when the cap is
removed.
4. Rotate cap to slacken and remove by lifting upwards. 5. Using a flat-head screwdriver,
turn
the adjusting screw under the
cap clockwise until clear
resistance can be felt. The clutch
has now been disengaged.
6. Refit cleaned cap. The cap must be in full contact with the housing. Caution
Do not turn beyond the resistance
since this could damage the
transmission.
Caution
Towing the vehicle and starting
the engine is not permitted when
the
clutch has been disengaged in
this way, although the vehicle can
be moved a short distance. Seek the immediate assistance of
a workshop. Brakes
The brake system comprises two
independent brake circuits.
If a brake circuit fails, the vehicle can
still be braked using the other brake
circuit. However, braking effect is
achieved only when you depress the
brake pedal firmly. You need to use
considerably more force for this. The
braking distance is extended. Seek
the assistance of a workshop before
continuing your journey.
When the engine is not running, the
support of the brake servo unit
disappears
once the brake pedal has
been depressed once or twice.
Braking effect is not reduced, but
braking requires significantly greater
force. It is especially important to bear
this in mind when being towed.
Control indicator R 3 89.
Antilock brake system
Antilock brake system (ABS)
prevents the wheels from locking.
Page 141 of 228
Driving and operating
141
ABS starts to regulate brake pressure
as soon as a wheel shows a tendency
to lock. The vehicle remains
steerable, even during hard braking.
ABS control is made apparent though
a pulse in the brake pedal and the
noise of the regulation process.
For optimum braking, keep the brake
pedal fully depressed throughout the
braking process, despite the fact that
the pedal is pulsating. Do not reduce
the pressure on the pedal.
Control indicator u 3 89.
Adaptive brake lamp
During full braking, all three brake
lamps flash for the duration of ABS
control. Fault
9
Warning If there is a fault in the ABS, the
wheels may be liable to lock due
to braking that is heavier than
normal. The advantages of ABS
are no longer available. During
hard braking, the vehicle can no
longer be steered and may
swerve.
Have the cause of the fault remedied
by a workshop. Parking brake
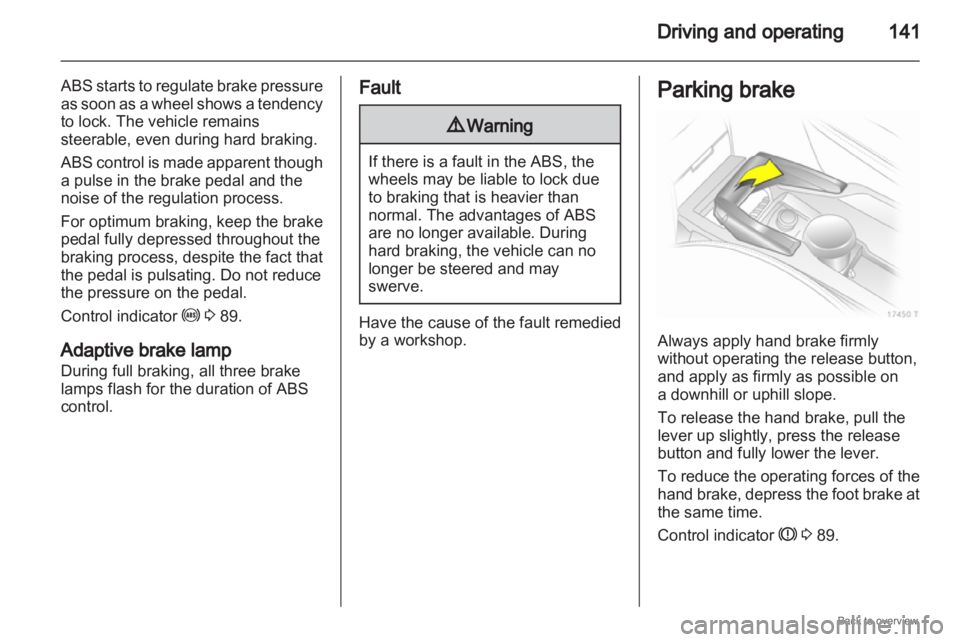
Always apply hand brake firmly
without operating the release button,
and apply as firmly as possible on
a downhill or uphill slope.
To release the hand brake, pull the
lever up slightly, press the release
button and fully lower the lever.
To
reduce the operating forces of the
hand brake, depress the foot brake at
the same time.
Control indicator R 3 89.
Page 143 of 228

Driving and operating
143
Hold the SPORT button depressed
for about 4 seconds. Control indicator
v illuminates. ESPoff also appears in
the service display. 9
Warning Do not deactivate ESP®
Plus
if
a
run-flat tyre 3 has lost pressure.ESP®
Plus
is reactivated by pressing
the SPORT
button. ESPon appears in
the service display. ESP® Plus
is also
reactivated the next time the ignition
is switched on.
Sport mode 3 143.
Interactive driving system
Interactive driving system (IDS Plus
)
combines the electronic stability
program (ESP® Plus
) with the antilock
brake system (ABS) and continuous
damping control (CDC) to improve
driving dynamics and vehicle safety. Sport mode
Suspension and steering become
more direct and provide better
contact with the road surface. The
engine reacts more quickly to
accelerator pedal movements.
Automatic
gear changing is also more
responsive.
Control indicator IDSPlus
3 91.
Activation Press SPORT button.
Control indicator
1 3 89. Winter programme activation not
possible.
Deactivation
Briefly press the SPORT button.
Sport mode is deactivated the next
time the ignition is switched on or if
the Winter programme is activated.
Continuous damping
control
Continuous damping control (CDC)
changes suspension with damping
adaptation
of each shock absorber to
the current driving situation and road
conditions.
When Sport mode is engaged, the
damping control is adapted to
a sportier driving style.
Control indicator IDS+ 3 91.
Page 164 of 228

164
Vehicle care
3. Push bulb into socket slightly, rotate anti-clockwise, remove and
renew bulb.
4. Insert bulb holder in reflector, rotate clockwise to engage.
Fog lights
Have bulbs replaced by a workshop.
Tail lights To change the bulbs on the right side,
open the side cover: push locking
tabs forward and remove cover.
Remove insert with tyre repair kit. To change the bulbs on the left side,
take off the retainer of the load
compartment
cover and open the side
cover: push locking tabs forward and
remove cover. 1. Compress wiring plug and pull
from bulb holder.
2. Unscrew
two plastic securing nuts
from the inside by hand. 3. Remove tail light assembly.
Page 165 of 228

Vehicle care
1654. Disengage locking tabs and
remove bulb holder. 5. Push bulb into socket slightly,
rotate anti-clockwise, remove and
renew bulb.
Tail light/brake light ( 1)
Turn signal light ( 2)
Fog tail light, may be only on one
side (3 )
Reverse light ( 4)
6. Engage bulb holder into the tail light assembly. Connect wiring
plug. Install tail light assembly in
body and tighten securing nuts.
On the right side, fit the insert with
tyre repair kit. Engage side cover.
On the left side engage retainer of
the load compartment cover.
7. After bulb replacement, check the tail lights for proper functionality:
switch on the ignition, operate the
brake, switch on the parking
lights.
Side turn signal lights
Have bulbs replaced by a workshop. Number plate light
1. Insert screwdriver in bulb
housing, press to the side and
release spring.