tailgate OPEL ZAFIRA C 2019 Manual user
[x] Cancel search | Manufacturer: OPEL, Model Year: 2019, Model line: ZAFIRA C, Model: OPEL ZAFIRA C 2019Pages: 317, PDF Size: 9.38 MB
Page 75 of 317
Storage73
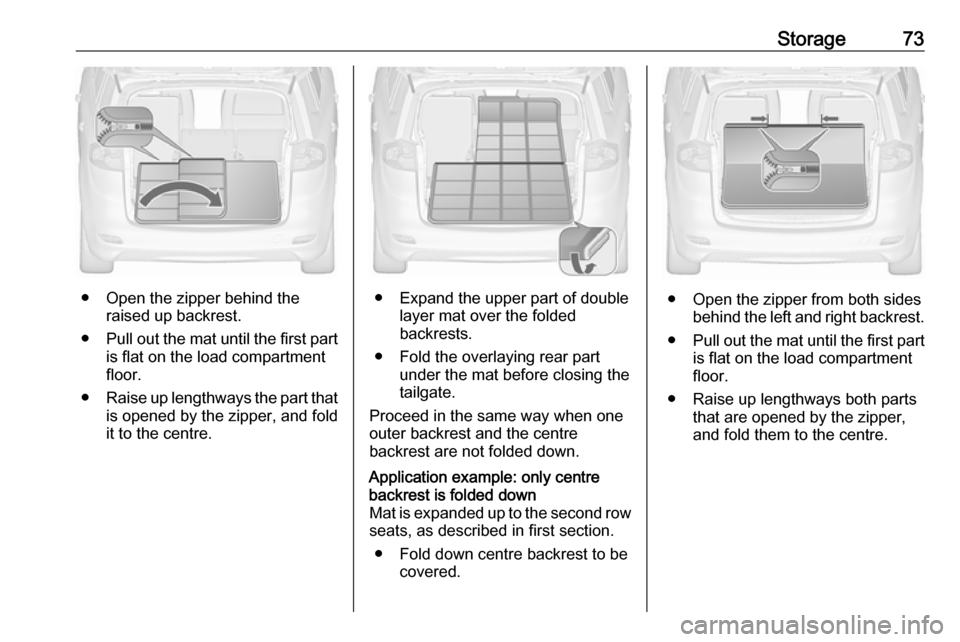
● Open the zipper behind theraised up backrest.
● Pull out the mat until the first part
is flat on the load compartment floor.
● Raise up lengthways the part that
is opened by the zipper, and fold
it to the centre.● Expand the upper part of double layer mat over the folded
backrests.
● Fold the overlaying rear part under the mat before closing the
tailgate.
Proceed in the same way when one
outer backrest and the centre
backrest are not folded down.
Application example: only centre
backrest is folded down
Mat is expanded up to the second row seats, as described in first section.
● Fold down centre backrest to be covered.
● Open the zipper from both sidesbehind the left and right backrest.
● Pull out the mat until the first part
is flat on the load compartment floor.
● Raise up lengthways both parts that are opened by the zipper,and fold them to the centre.
Page 76 of 317

74Storage
● Then expand the small upperpart of double layer mat over the
centre backrest.
● Fold the overlaying rear part under the mat before closing the
tailgate.
The following illustrations show some
further examples.Example for long small objects, e.g.
skis.
Example for side cover protection.
Example for covering folded backrest on second row and one folded seat on
third row.
Page 79 of 317
Storage77Partitioning net in front of tailgate
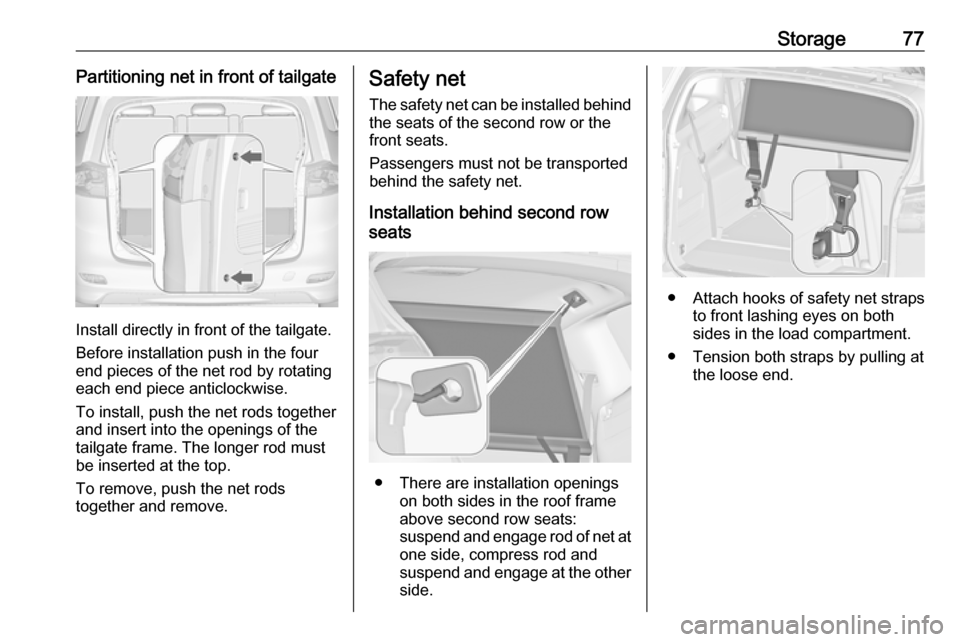
Install directly in front of the tailgate.
Before installation push in the four
end pieces of the net rod by rotating
each end piece anticlockwise.
To install, push the net rods together
and insert into the openings of the
tailgate frame. The longer rod must
be inserted at the top.
To remove, push the net rods
together and remove.
Safety net
The safety net can be installed behind the seats of the second row or the
front seats.
Passengers must not be transported
behind the safety net.
Installation behind second row
seats
● There are installation openings on both sides in the roof frame
above second row seats:
suspend and engage rod of net at
one side, compress rod and
suspend and engage at the other side.
● Attach hooks of safety net straps
to front lashing eyes on both
sides in the load compartment.
● Tension both straps by pulling at the loose end.
Page 80 of 317
78StorageInstallation behind front seats
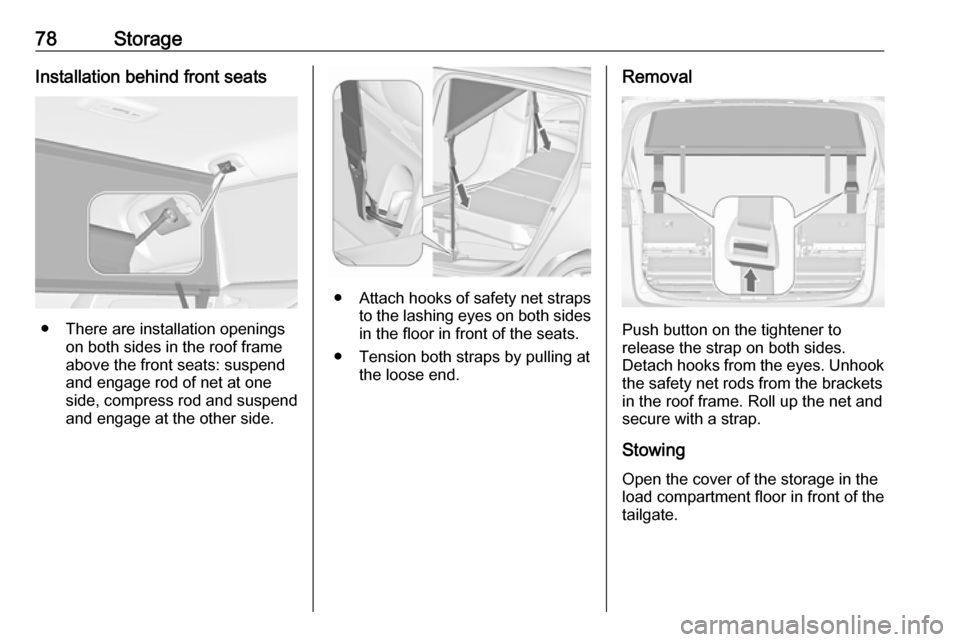
● There are installation openingson both sides in the roof frame
above the front seats: suspend
and engage rod of net at one
side, compress rod and suspend and engage at the other side.
● Attach hooks of safety net straps
to the lashing eyes on both sides in the floor in front of the seats.
● Tension both straps by pulling at the loose end.
Removal
Push button on the tightener to
release the strap on both sides.
Detach hooks from the eyes. Unhook
the safety net rods from the brackets in the roof frame. Roll up the net and
secure with a strap.
Stowing Open the cover of the storage in the
load compartment floor in front of the
tailgate.
Page 81 of 317
Storage79
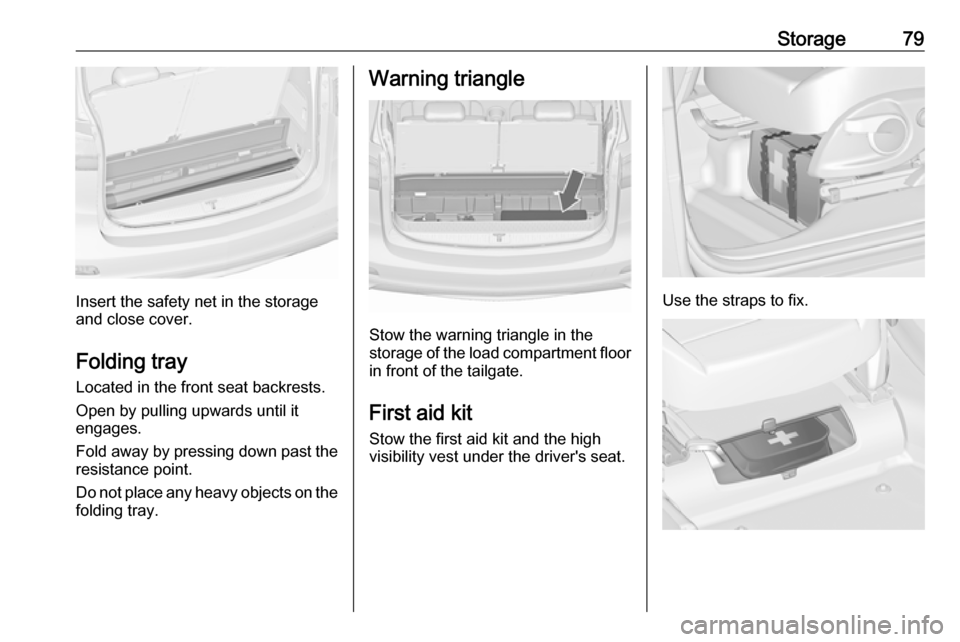
Insert the safety net in the storage
and close cover.
Folding tray Located in the front seat backrests.
Open by pulling upwards until it
engages.
Fold away by pressing down past the resistance point.
Do not place any heavy objects on the
folding tray.
Warning triangle
Stow the warning triangle in the
storage of the load compartment floor
in front of the tailgate.
First aid kit Stow the first aid kit and the high
visibility vest under the driver's seat.
Use the straps to fix.
Page 103 of 317
Instruments and controls101Illuminates whiteThe system is on.
Illuminates green
Cruise control is active. Set speed is
indicated in the Driver Information
Centre.
Cruise control 3 203.
Adaptive cruise control
m illuminates white or green.
C illuminates in the Driver
Information Centre.
m illuminates white
The system is on.
m illuminates green
Adaptive cruise control is active.
When Adaptive cruise control is on or active, C with the set speed is
indicated in the Driver Information
Centre.
Adaptive cruise control 3 206.Vehicle detected ahead
A illuminates green.
Illuminates green
A vehicle ahead is detected in the
same lane.
Adaptive cruise control 3 206,
Forward collision alert 3 212.
Speed limiter
L illuminates in the Driver
Information Centre when Speed
limiter is active. Set speed is indicated
alongside L symbol.
Speed limiter 3 204.
Traffic sign assistant
L displays detected traffic signs as a
control indicator.
Traffic sign assistant 3 224.
Door open h illuminates red.
A door or the tailgate is open.Displays
Driver Information Centre
The Driver Information Centre is
located in the instrument cluster.
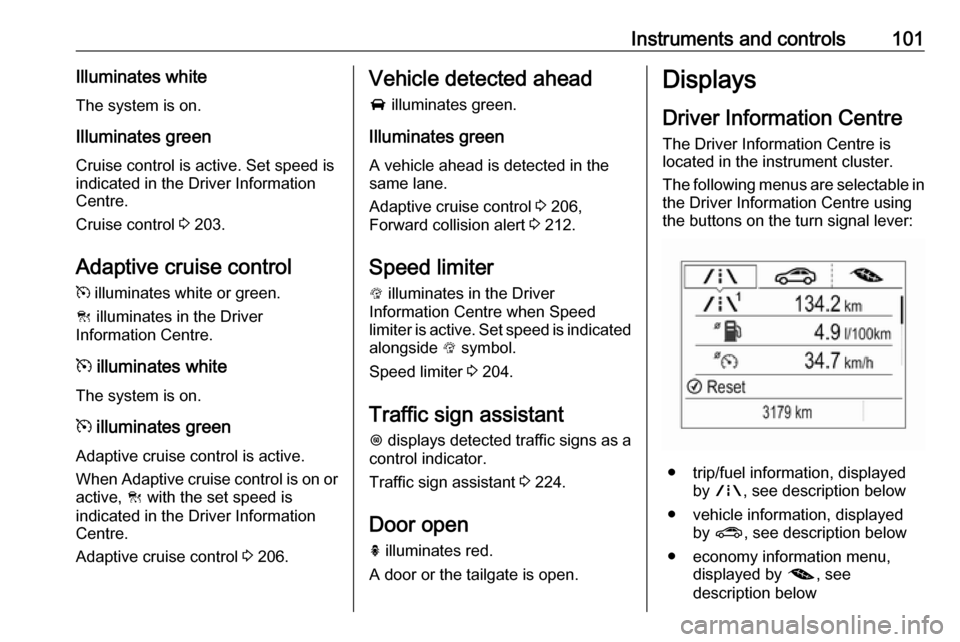
The following menus are selectable in
the Driver Information Centre using
the buttons on the turn signal lever:
● trip/fuel information, displayed by ; , see description below
● vehicle information, displayed by ? , see description below
● economy information menu, displayed by @, see
description below
Page 109 of 317

Instruments and controls107Messages in the Info-DisplaySome important messages appear
additionally in the Info-Display. Some
messages only pop-up for a few
seconds.
Warning chimes
If several warnings appear at the same time, only one warning chime
will sound.
When starting the engine or whilst driving
The warning chime regarding
unfastened seat belts has priority
over any other warning chime.
● If seat belt is not fastened.
● If a door or the tailgate is not fully
closed when starting-off.
● If a certain speed is exceeded with parking brake applied.
● If adaptive cruise control deactivates automatically.
● If approaching a vehicle ahead too closely.●If a programmed speed or speed
limit is exceeded.
● If a warning message appears in the Driver Information Centre.
● If the parking assist detects an object.
● If an unintended lane change occurs.
● If reverse gear is engaged and the rear carrier system is
extended.
● If the exhaust filter has reached the maximum filling level.
When the vehicle is parked and/or
the driver's door is opened
● With exterior lights on.
During an Autostop ● If the driver's door is opened.
● If any condition for an autostart is
not fulfilled.Battery voltage
When the vehicle battery voltage is
running low, a warning message will
appear in the Driver Information
Centre.
1. Switch off immediately any electrical consumers which are
not required for a safe ride, e.g.
seat heating, heated rear window or other main consumers.
2. Charge the vehicle battery by driving continuously for a while or
by using a charging device.
The warning message will disappear
after the engine has been started two
times consecutively without a voltage drop.
If the vehicle battery cannot be
recharged, have the cause of the fault
remedied by a workshop.
Page 225 of 317
Driving and operating223Functionality
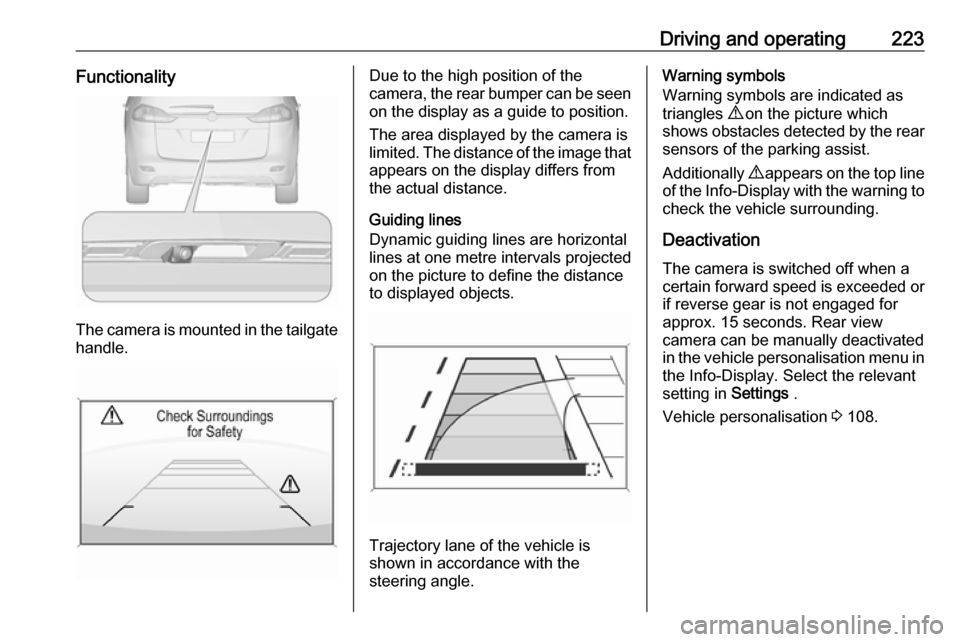
The camera is mounted in the tailgatehandle.
Due to the high position of the
camera, the rear bumper can be seen on the display as a guide to position.
The area displayed by the camera is
limited. The distance of the image that
appears on the display differs from
the actual distance.
Guiding lines
Dynamic guiding lines are horizontal
lines at one metre intervals projected
on the picture to define the distance
to displayed objects.
Trajectory lane of the vehicle is
shown in accordance with the
steering angle.
Warning symbols
Warning symbols are indicated as
triangles 9 on the picture which
shows obstacles detected by the rear
sensors of the parking assist.
Additionally 9 appears on the top line
of the Info-Display with the warning to
check the vehicle surrounding.
Deactivation
The camera is switched off when a
certain forward speed is exceeded or
if reverse gear is not engaged for
approx. 15 seconds. Rear view
camera can be manually deactivated
in the vehicle personalisation menu in the Info-Display. Select the relevant
setting in Settings .
Vehicle personalisation 3 108.
Page 226 of 317
224Driving and operatingDeactivation of guiding lines and
warning symbols
7'' R 4.0 IntelliLink Activation or
deactivation of the visual guiding lines and the warning symbols can be
changed via touch buttons in the
lower zone of the display.
Info-Display 3 105.
Vehicle personalisation 3 108.
Fault
Fault messages are displayed with a
9 on the top line of the Info-Display.
The rear view camera may not
operate properly when:
● The surrounding area is dark.● The sun or the beam of headlights is shining directly into
the camera lens.
● Ice, snow, mud, or anything else covers the camera lens. Clean
the lens, rinse it with water, and
wipe it with a soft cloth.
● The tailgate is not closed correctly.
● The vehicle had a rear-end accident.
● There are extreme temperature changes.
Traffic sign assistant
Functionality The traffic sign assistant system
detects designated traffic signs via a
front camera and displays them in the
Driver Information Centre.
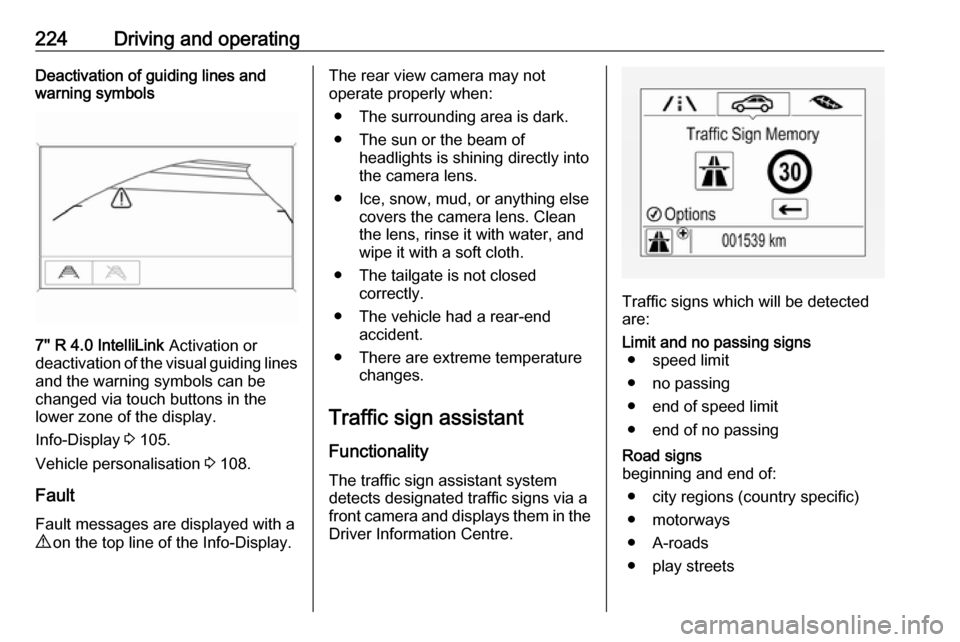
Traffic signs which will be detected are:
Limit and no passing signs ● speed limit
● no passing
● end of speed limit
● end of no passingRoad signs
beginning and end of:
● city regions (country specific)
● motorways
● A-roads
● play streets
Page 253 of 317

Vehicle care251
3. Carefully withdraw the lightassembly from the retaining pins
and remove.
4. Detach the plug connector from the light assembly.
5. Remove and replace the bulb by turning the bulb socket.
Turn signal light ( 1)
Tail lights ( 2)
Brake light ( 3)
Tail lights with Light Emitting
Diode (LED) for tail and brake light
Only the turn signal light ( 1) can
be replaced.
Remove and replace the bulb by
turning the bulb socket.
6. Connect the plug connector to the
light assembly.
7. Fit light assembly onto retaining pins and mount the light assembly
using the screws.
8. Plug in screw cover.
Reverse lights (4) in the tailgate
1. Open the tailgate and remove the
cover.