ignition OPEL ZAFIRA C 2019 Manual user
[x] Cancel search | Manufacturer: OPEL, Model Year: 2019, Model line: ZAFIRA C, Model: OPEL ZAFIRA C 2019Pages: 317, PDF Size: 9.38 MB
Page 206 of 317
204Driving and operatingIncrease speed
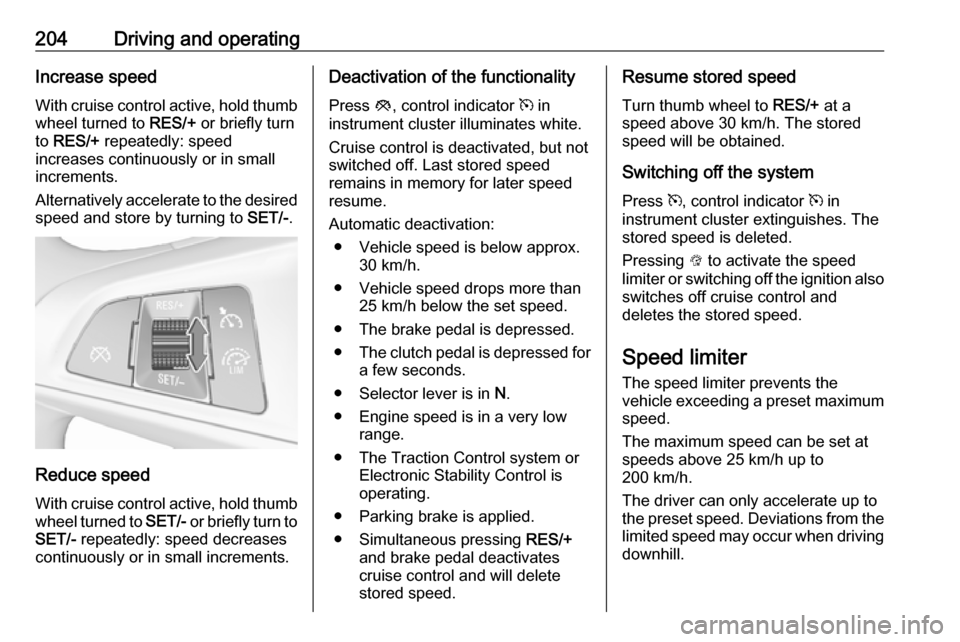
With cruise control active, hold thumb
wheel turned to RES/+ or briefly turn
to RES/+ repeatedly: speed
increases continuously or in small
increments.
Alternatively accelerate to the desired speed and store by turning to SET/-.
Reduce speed
With cruise control active, hold thumb
wheel turned to SET/- or briefly turn to
SET/- repeatedly: speed decreases
continuously or in small increments.
Deactivation of the functionality
Press y, control indicator m in
instrument cluster illuminates white.
Cruise control is deactivated, but not
switched off. Last stored speed
remains in memory for later speed
resume.
Automatic deactivation: ● Vehicle speed is below approx. 30 km/h.
● Vehicle speed drops more than 25 km/h below the set speed.
● The brake pedal is depressed.
● The clutch pedal is depressed for
a few seconds.
● Selector lever is in N.
● Engine speed is in a very low range.
● The Traction Control system or Electronic Stability Control is
operating.
● Parking brake is applied.
● Simultaneous pressing RES/+
and brake pedal deactivates
cruise control and will delete
stored speed.Resume stored speed
Turn thumb wheel to RES/+ at a
speed above 30 km/h. The stored speed will be obtained.
Switching off the system
Press m, control indicator m in
instrument cluster extinguishes. The
stored speed is deleted.
Pressing L to activate the speed
limiter or switching off the ignition also switches off cruise control and
deletes the stored speed.
Speed limiter
The speed limiter prevents the
vehicle exceeding a preset maximum
speed.
The maximum speed can be set at
speeds above 25 km/h up to
200 km/h.
The driver can only accelerate up to
the preset speed. Deviations from the
limited speed may occur when driving downhill.
Page 208 of 317
206Driving and operatingResume limit speed
Turn thumb wheel to RES/+. The
stored speed limit will be obtained
and is indicated without brackets in the Driver Information Centre.
Switching off the system
Press L, the speed limit indication
extinguishes in the Driver Information Centre. The stored speed is deleted.
By pressing m to activate cruise
control or adaptive cruise control,
speed limiter is also deactivated and
the stored speed is deleted.
By switching off the ignition, speed
limiter is also deactivated, but the
speed limit will be stored for next
speed limiter activation.
Adaptive cruise control
Adaptive cruise control is an
enhancement to traditional cruise control with the additional feature ofmaintaining a certain distance behind the vehicle ahead.Adaptive cruise control automatically
decelerates the vehicle when
approaching a slower moving vehicle. It then adjusts the vehicle speed to
follow the vehicle ahead at the
selected following distance. The
vehicle speed increases or decreases to follow the vehicle in front, but willnot exceed the set speed. It may
apply limited braking with activated
brake lights.
The adaptive cruise control can store
and maintain speeds over approx.
50 km/h and brakes automatically to
follow a slower vehicle driving ahead
down to a minimum speed of
30 km/h.
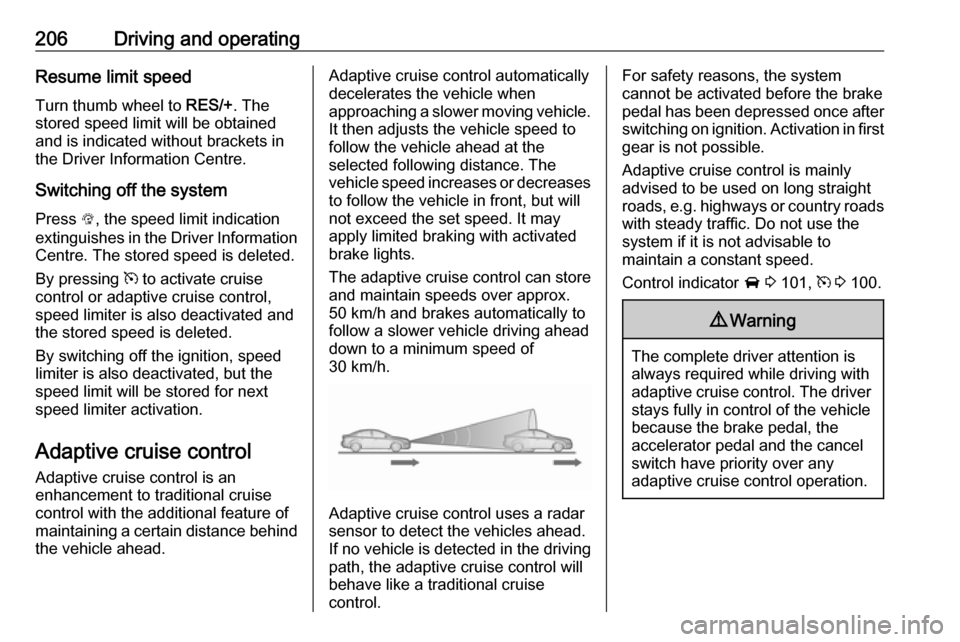
Adaptive cruise control uses a radar
sensor to detect the vehicles ahead.
If no vehicle is detected in the driving path, the adaptive cruise control will
behave like a traditional cruise
control.
For safety reasons, the system
cannot be activated before the brake
pedal has been depressed once after
switching on ignition. Activation in first gear is not possible.
Adaptive cruise control is mainly
advised to be used on long straight
roads, e.g. highways or country roads
with steady traffic. Do not use the
system if it is not advisable to
maintain a constant speed.
Control indicator A 3 101, m 3 100.9 Warning
The complete driver attention is
always required while driving with adaptive cruise control. The driver stays fully in control of the vehicle
because the brake pedal, the
accelerator pedal and the cancel
switch have priority over any
adaptive cruise control operation.
Page 212 of 317

210Driving and operatingSwitching off the system
Press C to switch off adaptive cruise
control. The control indicator m and
C in the Driver Information Centre
extinguish. The stored speed is
deleted.
Switching off the ignition also
switches off adaptive cruise control
and deletes the stored speed.
Driver's attention ● Use adaptive cruise control carefully on bends or mountain
roads, as it can lose the vehicle
ahead and require time to detect
it again.
● Do not use the system on slippery roads as it can create
rapid changes in tyre traction
(wheel spinning), so that you
could lose control of the vehicle.
● Do not use adaptive cruise control during rain, snow or
heavy dirt, as the radar sensor
can be covered by a water film,
dust, ice or snow. This reduces or completely suppresses thevisibility. In case of sensor
blockage, clean the sensor
cover.
System limits ● The system's automatic brake force does not permit hard
braking and the braking level
may not be sufficient to avoid a
collision.
● After a sudden lane change, the system needs a certain time to
detect the next preceding
vehicle. So if a new vehicle is
detected, the system may
accelerate instead of braking.
● Adaptive cruise control does ignore the oncoming traffic.
● Adaptive cruise control does not brake for pedestrians, animals,very slow speed driving or
stopped vehicles.
● Don't use adaptive cruise control when towing a trailer.Bends
The adaptive cruise control calculates
a predicted path based on the
centrifugal force. This predicted path
considers the current bend
characteristic, but cannot consider a
future bend change. The system may lose the current vehicle ahead or
consider a vehicle which is not in the
actual lane. This can happen when
entering or exiting a bend or if the
bend gets stronger or weaker. If it no
longer detects any vehicle ahead,
then control indicator A will
extinguish.
If the centrifugal force is too high in a bend, the system slows down the vehicle slightly. This braking level is
not designed to avoid spinning off the bend. The driver is responsible for
reducing the selected speed before
Page 219 of 317

Driving and operating217Brake preparation system
When approaching a vehicle ahead
so quickly that a collision is likely, the brake preparation system slightlypressurises the brakes. This reduces
the response time, when a manual or automatic braking is requested.
The brake system is prepared so that braking can occur more rapidly.
Emergency automatic braking
After the brake preparation and just
before the imminent collision, this
function automatically applies limited
braking to reduce the impact speed of
the collision.
Forward looking brake assist
In addition to brake preparation
system and emergency automatic
braking, the forward looking brake
assist function makes the brake assist more sensitive. In this way,
depressing the brake pedal slightly
results immediately in a strong
braking. This function helps the driver
brake quicker and stronger before the imminent collision.9 Warning
Active emergency braking is not
designed to apply strong
autonomous braking or to avoid automatically a collision. It is
designed to reduce the vehicle
speed before collision. It may not
react on stopped vehicles,
pedestrians or animals. After a
sudden lane change, the system
needs a certain time to detect the
next preceding vehicle.
The complete attention of the
driver is always required while
driving. The driver shall always be ready to take action and apply the brakes and steer to avoid
collisions. The system is designed
to work with all occupants wearing their seat belts.
System limitations
The active emergency braking has
limited or no function during rain,
snow or heavy dirt, as the radar
sensor can be covered by a water
film, dust, ice or snow. In case of
sensor blockage, clean the sensor
cover.
In some seldom cases the active
emergency braking system may
provide a short automatic braking in
situations that seem to be
unnecessary, for instance due to
traffic signs in a curve or due to
vehicles in another lane. This is
acceptable operation, the vehicle
does not need service. Firmly apply
the accelerator pedal to override the
automatic braking.
Deactivation and re-activation
Settings can be changed in the
vehicle personalisation menu in the
Info-Display.
Select the relevant setting in
Settings in the Info-Display.
Vehicle personalisation 3 108.
We recommend to deactivate the
system in the vehicle personalisation
in the following cases:
● when the vehicle is being towed
● before using an automatic car wash with ignition switched on
Page 220 of 317

218Driving and operating● if the windscreen has beendamaged close to the camera
● if the front bumper has been damaged
Fault
In the event of a system service
requirement, a message is displayed
in the Driver Information Centre.
If the system does not work as it
should, vehicle messages are
displayed in the Driver Information
Centre.
Vehicle messages 3 106.
Parking assist Front-rear parking assist9 Warning
The driver bears full responsibility
for the parking manoeuvre.
Always check the surrounding
area when driving backwards or
forwards while using parking
assist system.
The front-rear parking assist
measures the distance between the vehicle and obstacles in front of and
behind the vehicle. It informs and
warns the driver by giving acoustic
signals and display indication.
It uses two different acoustic warning
signals for the front and rear
monitoring areas, each with a
different tone frequency. The signal
for front obstacles sounds via the
front speakers, for rear obstacles it
sounds via the rear speakers.
The system has four ultrasonic
parking sensors each in the rear and
front bumper.
Activation
When reverse gear is engaged, the
front and rear parking assist is ready
to operate.
The system is also activated
automatically at a speed up to
11 km/h.
An illuminated LED in the parking
assist button r indicates that the
system is ready to operate.
If r is switched off within an ignition
cycle, the front parking assist is
deactivated. If vehicle speed has
exceeded 25 km/h beforehand,
parking assist will be reactivated when speed drops below 11 km/h.
Page 222 of 317
220Driving and operatingThe complete system can be
manually deactivated in the vehicle
personalisation menu in the
Info-Display. It remains deactivated
during the ignition cycle or until
activation in personalisation menu
again. Vehicle personalisation 3 108.
When using the trailer hitch change
the configuration settings in the
vehicle personalisation menu in the
Info-Display. Vehicle personalisation
3 108.
Fault
In the event of a fault or if the system does not work temporarily, e.g.because of high external noise level
or other interference factors, a
message pops-up in the Driver
Information Centre.
Vehicle messages 3 106.Basic notes on parking assist
systems9 Warning
Under certain circumstances,
various reflective surfaces on
objects or clothing as well as
external noise sources may cause the system to fail to detect
obstacles.
Special attention must be paid to
low obstacles which can damage
the lower part of the bumper.
Caution
Performance of the system can be reduced when sensors are
covered, e.g. by ice or snow.
Performance of the parking assist
system can be reduced due to
heavy loading.
Special conditions apply if there
are taller vehicles in the vicinity
(e.g. off-road vehicles, mini vans,
vans). Object identification and
correct distance indication in the
upper part of these vehicles
cannot be guaranteed.
Objects with a very small reflection
cross-section, e.g. objects of
narrow size or soft materials, may
not be detected by the system.
Parking assist systems do not
detect objects outside the
detection range.
Note
The parking assist system
automatically detects factory-fitted
towing equipment. It is deactivated
when the connector is plugged in.
It is possible that the sensor detects a non-existing object (echo
disturbance) caused by external acoustical or mechanic
disturbances.
Page 233 of 317
Driving and operating231and may cause engine stalling, poorstarting or damage on the fuel
injection system.
Refuelling9 Danger
Before refuelling, switch off
ignition and any external heaters
with combustion chambers.
Switch off any mobile phones.
Follow the operating and safety
instructions of the filling station
when refuelling.
9 Danger
Fuel is flammable and explosive.
No smoking. No naked flames or
sparks.
If you can smell fuel in your
vehicle, have the cause of this
remedied immediately by a
workshop.
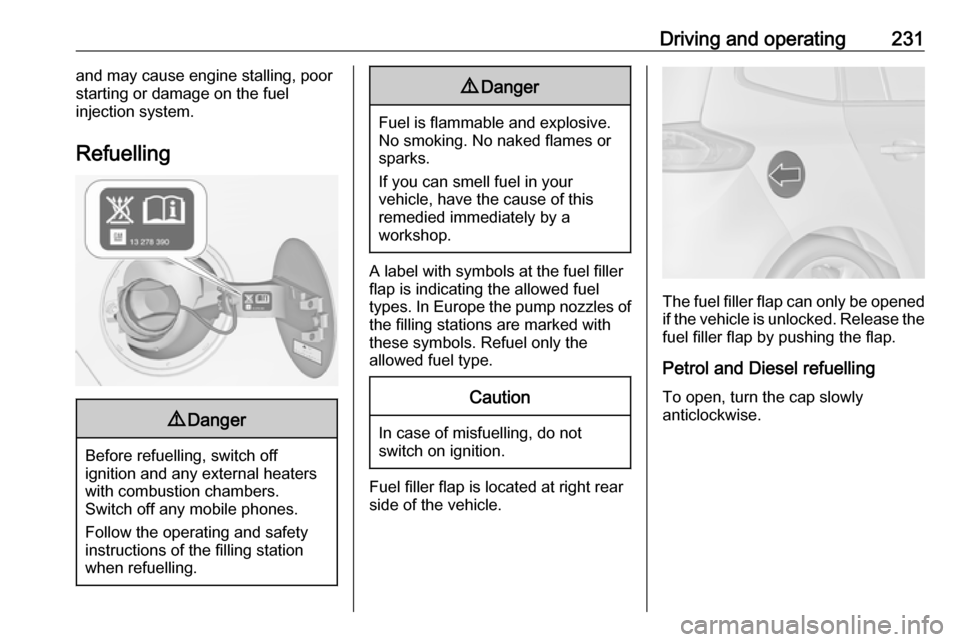
A label with symbols at the fuel filler
flap is indicating the allowed fuel
types. In Europe the pump nozzles of the filling stations are marked with
these symbols. Refuel only the
allowed fuel type.
Caution
In case of misfuelling, do not
switch on ignition.
Fuel filler flap is located at right rear
side of the vehicle.
The fuel filler flap can only be opened
if the vehicle is unlocked. Release the
fuel filler flap by pushing the flap.
Petrol and Diesel refuelling To open, turn the cap slowly
anticlockwise.
Page 242 of 317

240Vehicle care● Since the durability of AdBlue islimited to two years, fluid should
be exchanged if it is too old. Seek the assistance of a workshop.
● Fit the number plate if necessary.
End-of-life vehicle recovery
Information on end-of-life vehicle
recovery centres and the recycling of
end-of-life vehicles is available on our website, where legally required. Only
entrust this work to an authorised
recycling centre.
Gas vehicles must be recycled by a
service centre authorised for gas
vehicles.Vehicle checks
Performing work9 Warning
Only perform engine compartment
checks when the ignition is off.
The cooling fan may start
operating even if the ignition is off.
9 Danger
The ignition system uses
extremely high voltage. Do not
touch.
Bonnet
Opening
Pull the release lever and return it to
its original position.
Page 247 of 317

Vehicle care245
Batteries do not belong in household
waste. They must be disposed of at
an appropriate recycling collection
point.
Laying up the vehicle for more than
four weeks can lead to battery
discharge. Disconnect the clamp from the negative terminal of the vehicle
battery.
Ensure the ignition is switched off
before connecting or disconnecting
the vehicle battery.
Vehicle battery discharge protection
3 123.
Disconnecting the battery
If the vehicle's battery is to be
disconnected (e.g. for maintenance
work), the alarm siren must be
deactivated as follows: switch the
ignition on then off, then disconnect
the vehicle's battery within
15 seconds.
Replacing the vehicle battery Note
Any deviation from the instructions
given in this section may lead to
temporary deactivation or
disturbance of the stop-start system.
When the vehicle battery is being
replaced, please ensure that there
are no open ventilation holes in the
vicinity of the positive terminal. If a
ventilation hole is open in this area, it
must be closed off with a dummy cap, and the ventilation in the vicinity of the
negative terminal must be opened.
Only use vehicle batteries that allow the fuse box to be mounted above the
vehicle battery.
Ensure that the battery is always replaced by the same type of battery.We recommend that you have the
vehicle battery replaced by a
workshop.
Stop-start system 3 185.
Charging the vehicle battery9 Warning
On vehicles with stop-start
system, ensure that the charging potential does not exceed
14.6 volts when using a battery
charger. Otherwise the vehicle
battery might be damaged.
Jump starting 3 276.
Page 248 of 317
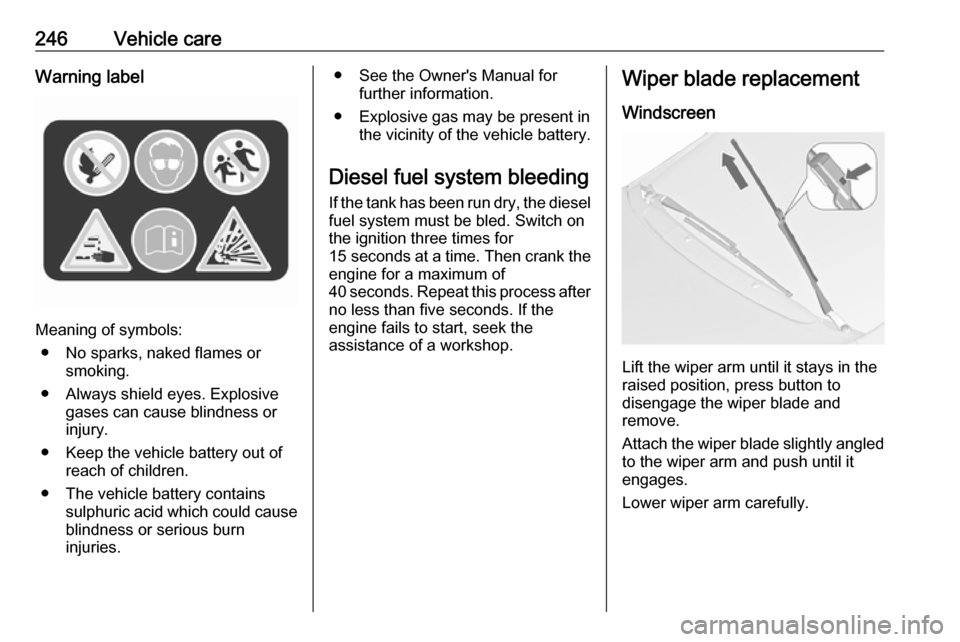
246Vehicle careWarning label
Meaning of symbols:● No sparks, naked flames or smoking.
● Always shield eyes. Explosive gases can cause blindness or
injury.
● Keep the vehicle battery out of reach of children.
● The vehicle battery contains sulphuric acid which could cause
blindness or serious burn
injuries.
● See the Owner's Manual for further information.
● Explosive gas may be present in the vicinity of the vehicle battery.
Diesel fuel system bleeding If the tank has been run dry, the diesel
fuel system must be bled. Switch on
the ignition three times for
15 seconds at a time. Then crank the
engine for a maximum of 40 seconds. Repeat this process after
no less than five seconds. If the
engine fails to start, seek the
assistance of a workshop.Wiper blade replacement
Windscreen
Lift the wiper arm until it stays in the
raised position, press button to
disengage the wiper blade and
remove.
Attach the wiper blade slightly angled
to the wiper arm and push until it
engages.
Lower wiper arm carefully.