OPEL ZAFIRA TOURER 2015 Owners Manual
Manufacturer: OPEL, Model Year: 2015, Model line: ZAFIRA TOURER, Model: OPEL ZAFIRA TOURER 2015Pages: 299, PDF Size: 9.13 MB
Page 161 of 299
Driving and operating159
■ the brake vacuum is not sufficient
■ the vehicle is driven at least at walking speed
■ the climate control system requests
an engine start
■ the air conditioning is manually switched on
If the bonnet is not fully closed, a
warning message is displayed in the
Driver Information Centre.
If an electrical accessory, e.g. a
portable CD player, is connected to
the power outlet, a brief power drop
during engine restart may be
noticeable.
Parking9 Warning
■ Do not park the vehicle on an
easily ignitable surface. The
high temperature of the exhaust
system could ignite the surface.
■ Always apply the parking brake.
Activate the manual parking
brake without pressing the
release button. Apply as firmly
as possible on a downhill slope
or uphill slope. Depress foot
brake at the same time to
reduce operating force.
For vehicles with electric
parking brake, pull switch m for
approx. one second.
The electric parking brake is
applied when control indicator
m illuminates 3 110.
■ Switch off the engine. ■ If the vehicle is on a level surface or uphill slope, engage
first gear or set the selector lever
to position P before removing
the ignition key. On an uphill
slope, turn the front wheels
away from the kerb.
If the vehicle is on a downhill
slope, engage reverse gear or
set the selector lever to position P before removing the ignition
key. Turn the front wheels
towards the kerb.■ Close the windows.
■ Remove the ignition key. Turn the steering wheel until the
steering wheel lock is felt to
engage.
For vehicles with automatic
transmission, the key can only
be removed when the selector
lever is in position P.
■ Lock the vehicle.
■ Activate the anti-theft alarm system.
Note
In the event of an accident with airbag deployment, the engine is
turned off automatically if the vehicle
comes to a standstill within a certain
time.
Page 162 of 299
160Driving and operatingEngine exhaust9Danger
Engine exhaust gases contain
poisonous carbon monoxide,
which is colourless and odourless and could be fatal if inhaled.
If exhaust gases enter the interior
of the vehicle, open the windows.
Have the cause of the fault
rectified by a workshop.
Avoid driving with an open load
compartment, otherwise exhaust
gases could enter the vehicle.
Diesel particle filter
The diesel particle filter system filters
harmful soot particles out of the
exhaust gases. The system includes
a self-cleaning function that runs
automatically during driving without
any notification. The filter is cleaned
by periodically burning off the soot
particles at high temperature. This
process takes place automatically
under set driving conditions and may
take up to 25 minutes. Typically it
needs between 7 and 12 minutes. Autostop is not available and fuel
consumption may be higher during
this period. The emission of smells
and smoke during this process is
normal.
Under certain driving conditions, e.g.
short distances, the system cannot
clean itself automatically.
If the cleaning of the filter is required
and if previous driving conditions did
not enable automatic cleaning, it will
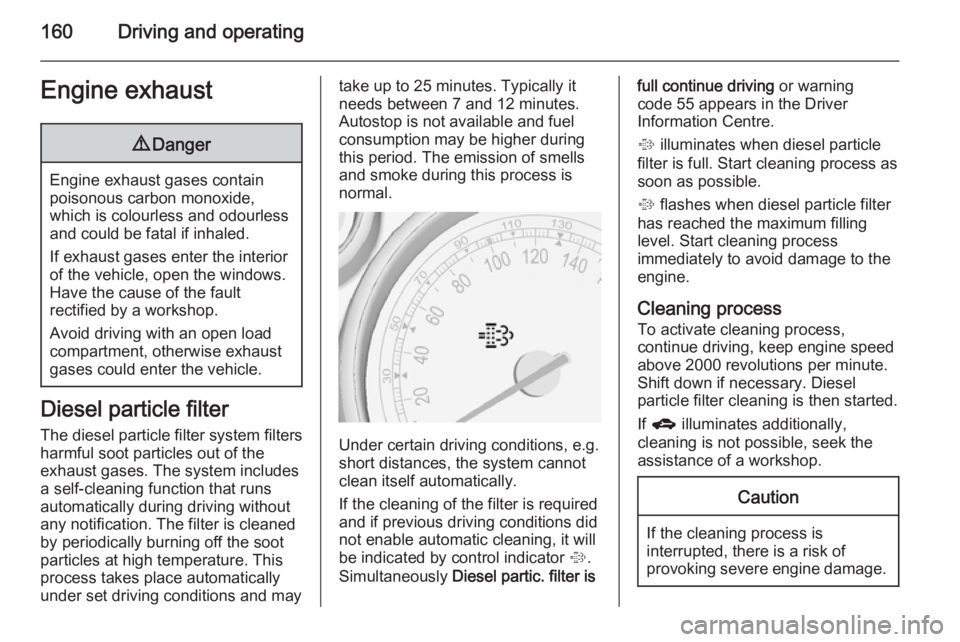
be indicated by control indicator %.
Simultaneously Diesel partic. filter is
full continue driving or warning
code 55 appears in the Driver
Information Centre.
% illuminates when diesel particle
filter is full. Start cleaning process as
soon as possible.
% flashes when diesel particle filter
has reached the maximum filling
level. Start cleaning process
immediately to avoid damage to the
engine.
Cleaning process
To activate cleaning process,
continue driving, keep engine speed
above 2000 revolutions per minute.
Shift down if necessary. Diesel
particle filter cleaning is then started.
If g illuminates additionally,
cleaning is not possible, seek the
assistance of a workshop.Caution
If the cleaning process is
interrupted, there is a risk of
provoking severe engine damage.
Page 163 of 299
Driving and operating161
Cleaning takes place quickest at high
engine speeds and loads.
The control indicator % extinguishes
as soon as the self-cleaning
operation is complete.
Catalytic converter
The catalytic converter reduces the
amount of harmful substances in the
exhaust gases.Caution
Fuel grades other than those listed on pages 3 204, 3 273 could
damage the catalytic converter or
electronic components.
Unburnt petrol will overheat and
damage the catalytic converter.
Therefore avoid excessive use of the starter, running the fuel tank
dry and starting the engine by
pushing or towing.
In the event of misfiring, uneven
engine running, a reduction in engine performance or other unusual
problems, have the cause of the fault
rectified by a workshop as soon as
possible. In an emergency, driving
can be continued for a short period,
keeping vehicle speed and engine
speed low.
AdBlue General information
The selective catalytic reduction
(BlueInjection) is a method to
substantially reduce the nitrogen
oxides in the exhaust emission. This
is achieved by injecting a Diesel
Exhaust Fluid (DEF) into the exhaust system.
The designation of the DEF used is AdBlue Ⓡ 1)
. It is a non-toxic, non-
flammable, colourless and odourless fluid which consists of 32% urea and
68% water.9 Warning
Avoid contact of your eyes or skin
with AdBlue.
In case of eye or skin contact,
rinse off with water.
Caution
Avoid contact of the paintwork with AdBlue.
In case of contact, rinse off with water.
AdBlue freezes at a temperature of
approx. -11 °C. As the vehicle is
equipped with an AdBlue pre-heater,
the emissions reduction at low
temperatures is ensured. The AdBlue
pre-heater works automatically.
Level warnings The AdBlue consumption is approx.0.7 litres per 1000 km and depends
on the driving behaviour.
1) Registered trademark of the Verband der Automobilindustrie e.V. (VDA).
Page 164 of 299
162Driving and operating
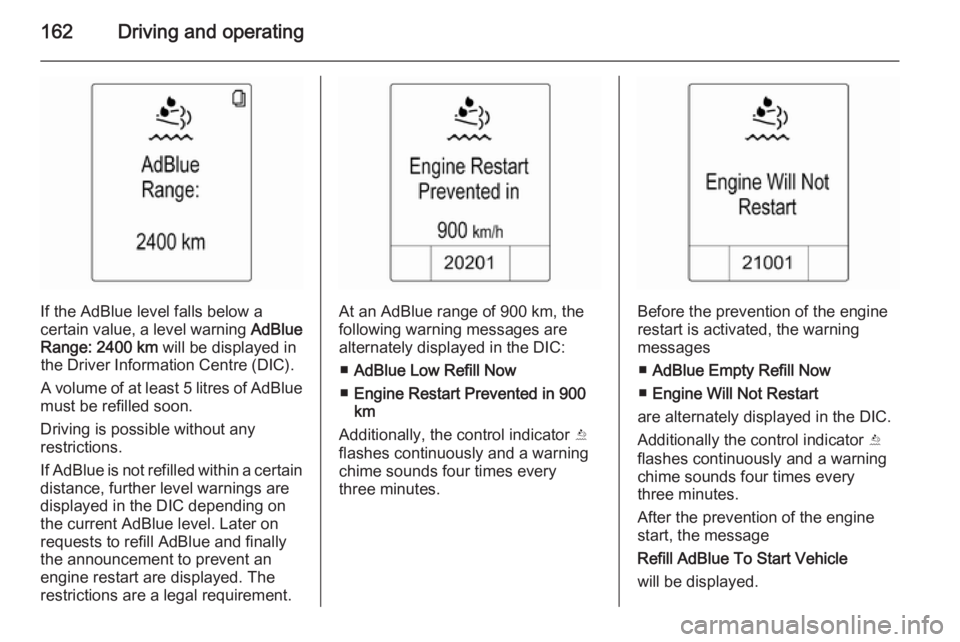
If the AdBlue level falls below a
certain value, a level warning AdBlue
Range: 2400 km will be displayed in
the Driver Information Centre (DIC).
A volume of at least 5 litres of AdBlue
must be refilled soon.
Driving is possible without any
restrictions.
If AdBlue is not refilled within a certain distance, further level warnings are
displayed in the DIC depending on
the current AdBlue level. Later on
requests to refill AdBlue and finally
the announcement to prevent an
engine restart are displayed. The
restrictions are a legal requirement.At an AdBlue range of 900 km, the
following warning messages are
alternately displayed in the DIC:
■ AdBlue Low Refill Now
■ Engine Restart Prevented in 900
km
Additionally, the control indicator Y
flashes continuously and a warning
chime sounds four times every
three minutes.Before the prevention of the engine
restart is activated, the warning
messages
■ AdBlue Empty Refill Now
■ Engine Will Not Restart
are alternately displayed in the DIC.
Additionally the control indicator Y
flashes continuously and a warning
chime sounds four times every
three minutes.
After the prevention of the engine
start, the message
Refill AdBlue To Start Vehicle
will be displayed.
Page 165 of 299
Driving and operating163
To restart the engine, the tank must
be filled with AdBlue first.
Refilling AdBlueCaution
Only use AdBlue that complies
with European standards
DIN 70 070 and ISO 22241-1.
Do not use additives.
Do not dilute AdBlue.
Otherwise the selective catalytic
reduction system could be
damaged.
Note
Only use the designated AdBlue canisters for refilling, to prevent a
topping-up of too much AdBlue.
Additionally, the fumes in the tank
are captured in the canister and do
not emerge.
Since AdBlue has a limited
durability, check the date of expiry
before refilling.
Note
A volume of at least 5 litres of AdBlue must be added when refilling.
Otherwise the refilling of AdBlue
may not be detected by the system.
If AdBlue must be refilled at
temperatures below -11 °C, the
refilling of AdBlue may not be
detected by the system. In this case, park the vehicle in a space with a
higher ambient temperature until
AdBlue is liquefied.
Note
When unscrewing the protective cap
from the filler neck, ammonia fumes may emerge. Do not inhale as the
fumes have a pungent smell. The
fumes are not harmful by inhalation.
The vehicle must be parked on a level surface.
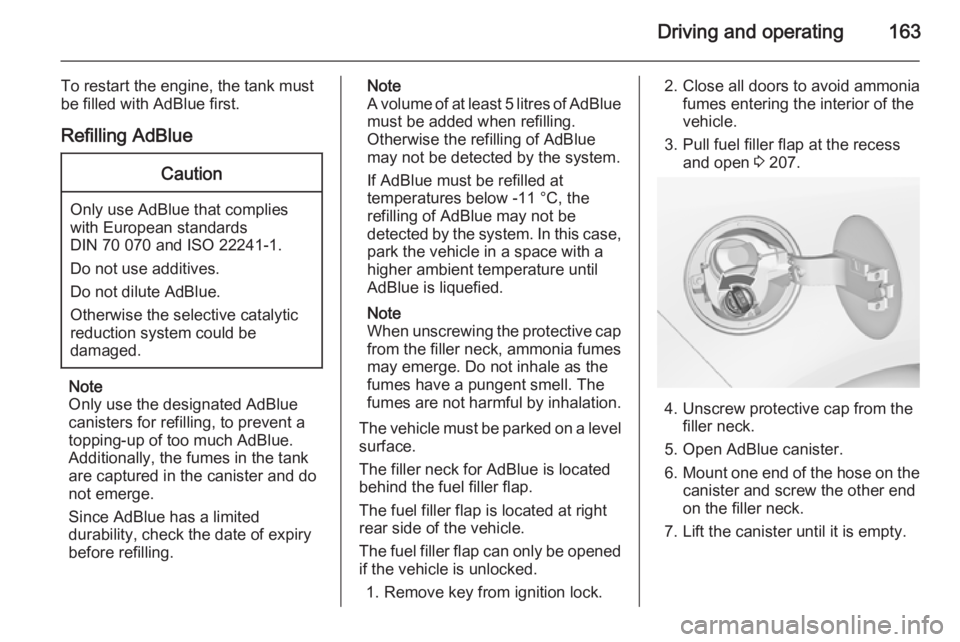
The filler neck for AdBlue is located behind the fuel filler flap.
The fuel filler flap is located at right rear side of the vehicle.
The fuel filler flap can only be opened
if the vehicle is unlocked.
1. Remove key from ignition lock.2. Close all doors to avoid ammonia fumes entering the interior of the
vehicle.
3. Pull fuel filler flap at the recess and open 3 207.
4. Unscrew protective cap from the
filler neck.
5. Open AdBlue canister.
6. Mount one end of the hose on the
canister and screw the other end
on the filler neck.
7. Lift the canister until it is empty.
Page 166 of 299
164Driving and operating
8. Unscrew the hose from the fillerneck.
9. Mount the protective cap and turn
clockwise until it engages.
Note
Dispose of AdBlue canister and
hose according to environmental requirements.
Exchanging AdBlue
If less than 5 litres of AdBlue have
been refilled during the last 2 years,
the remaining fluid should be
exchanged since AdBlue has a
limited durability.Caution
Disregard could lead to damage to
the selective catalytic reduction
system.
Automatic transmission
The automatic transmission permits
automatic gearshifting (automatic
mode) or manual gearshifting
(manual mode).
Transmission display
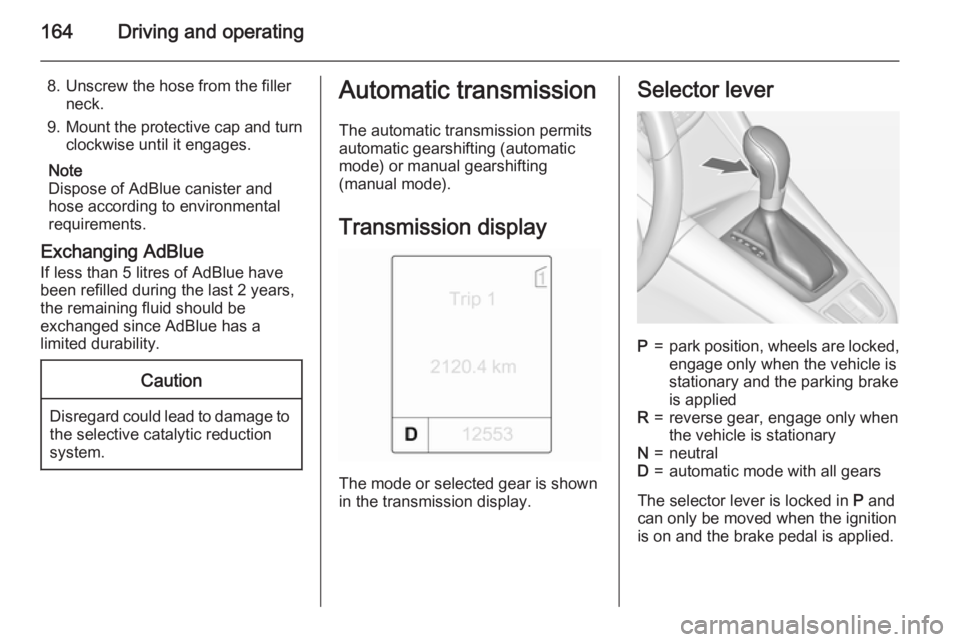
The mode or selected gear is shown
in the transmission display.
Selector leverP=park position, wheels are locked, engage only when the vehicle is
stationary and the parking brake
is appliedR=reverse gear, engage only when
the vehicle is stationaryN=neutralD=automatic mode with all gears
The selector lever is locked in P and
can only be moved when the ignition is on and the brake pedal is applied.
Page 167 of 299
Driving and operating165
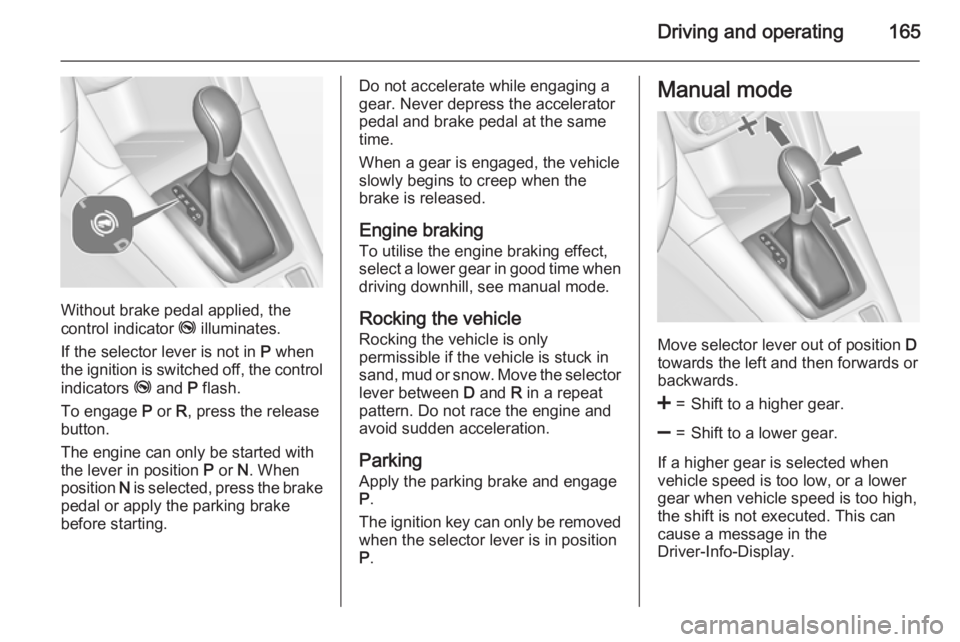
Without brake pedal applied, the
control indicator j illuminates.
If the selector lever is not in P when
the ignition is switched off, the control
indicators j and P flash.
To engage P or R, press the release
button.
The engine can only be started with the lever in position P or N. When
position N is selected, press the brake
pedal or apply the parking brake
before starting.
Do not accelerate while engaging a
gear. Never depress the accelerator
pedal and brake pedal at the same
time.
When a gear is engaged, the vehicle
slowly begins to creep when the
brake is released.
Engine braking To utilise the engine braking effect,select a lower gear in good time when
driving downhill, see manual mode.
Rocking the vehicle
Rocking the vehicle is only
permissible if the vehicle is stuck in
sand, mud or snow. Move the selector
lever between D and R in a repeat
pattern. Do not race the engine and
avoid sudden acceleration.
Parking
Apply the parking brake and engage P .
The ignition key can only be removed
when the selector lever is in position
P .Manual mode
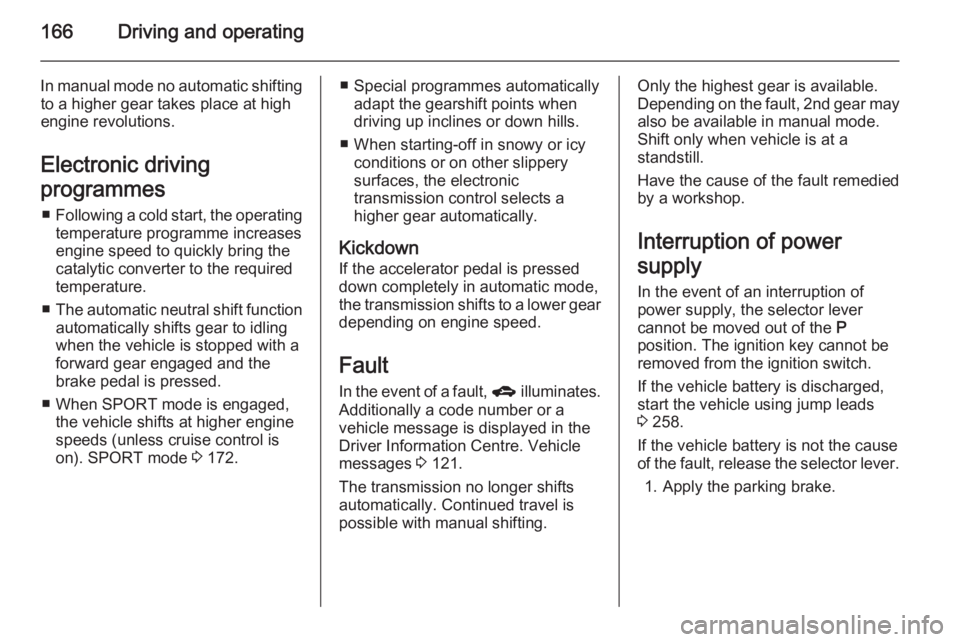
Move selector lever out of position D
towards the left and then forwards or backwards.
<=Shift to a higher gear.]=Shift to a lower gear.
If a higher gear is selected when
vehicle speed is too low, or a lower
gear when vehicle speed is too high,
the shift is not executed. This can
cause a message in the
Driver-Info-Display.
Page 168 of 299
166Driving and operating
In manual mode no automatic shiftingto a higher gear takes place at high
engine revolutions.
Electronic driving
programmes ■ Following a cold start, the operating
temperature programme increasesengine speed to quickly bring the
catalytic converter to the required
temperature.
■ The automatic neutral shift function
automatically shifts gear to idling
when the vehicle is stopped with a
forward gear engaged and the
brake pedal is pressed.
■ When SPORT mode is engaged, the vehicle shifts at higher engine
speeds (unless cruise control is
on). SPORT mode 3 172.■ Special programmes automatically
adapt the gearshift points when
driving up inclines or down hills.
■ When starting-off in snowy or icy conditions or on other slippery
surfaces, the electronic
transmission control selects a
higher gear automatically.
Kickdown If the accelerator pedal is pressed
down completely in automatic mode, the transmission shifts to a lower gear depending on engine speed.
Fault In the event of a fault, g illuminates.
Additionally a code number or a
vehicle message is displayed in the
Driver Information Centre. Vehicle
messages 3 121.
The transmission no longer shifts
automatically. Continued travel is
possible with manual shifting.Only the highest gear is available.
Depending on the fault, 2nd gear may also be available in manual mode.
Shift only when vehicle is at a
standstill.
Have the cause of the fault remedied by a workshop.
Interruption of power
supply In the event of an interruption of
power supply, the selector lever
cannot be moved out of the P
position. The ignition key cannot be
removed from the ignition switch.
If the vehicle battery is discharged,
start the vehicle using jump leads
3 258.
If the vehicle battery is not the cause
of the fault, release the selector lever.
1. Apply the parking brake.
Page 169 of 299
Driving and operating167
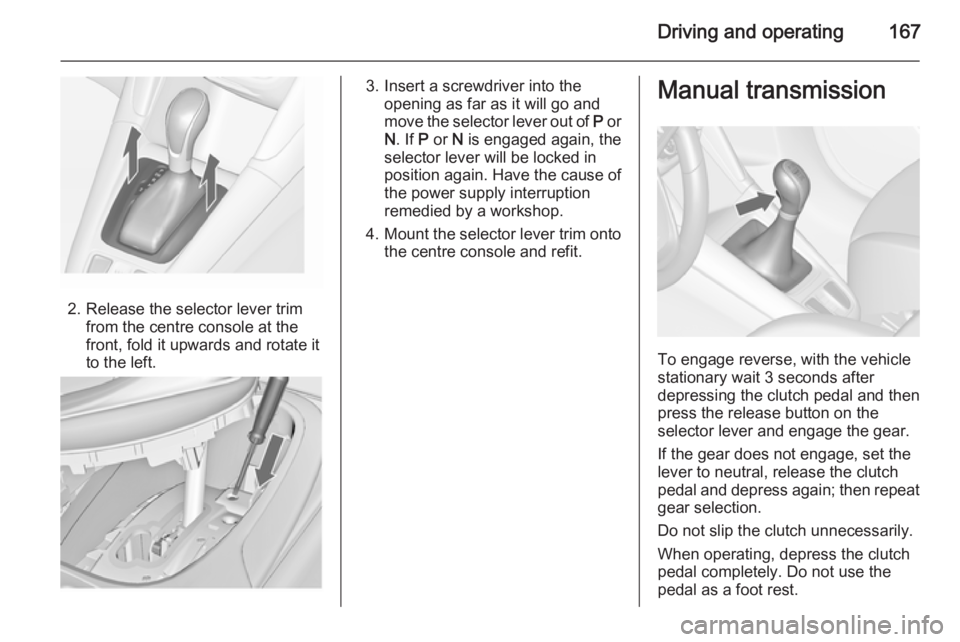
2. Release the selector lever trimfrom the centre console at the
front, fold it upwards and rotate it
to the left.
3. Insert a screwdriver into the opening as far as it will go and
move the selector lever out of P or
N . If P or N is engaged again, the
selector lever will be locked in
position again. Have the cause of
the power supply interruption
remedied by a workshop.
4. Mount the selector lever trim onto
the centre console and refit.Manual transmission
To engage reverse, with the vehicle
stationary wait 3 seconds after
depressing the clutch pedal and then
press the release button on the
selector lever and engage the gear.
If the gear does not engage, set the
lever to neutral, release the clutch
pedal and depress again; then repeat
gear selection.
Do not slip the clutch unnecessarily.
When operating, depress the clutch
pedal completely. Do not use the
pedal as a foot rest.
Page 170 of 299
168Driving and operatingCaution
It is not advisable to drive with thehand resting on the selector lever.
Brakes
The brake system comprises two independent brake circuits.
If a brake circuit fails, the vehicle can
still be braked using the other brake
circuit. However, braking effect is
achieved only when the brake pedal
is depressed firmly. Considerably
more force is needed for this. The
braking distance is extended. Seek the assistance of a workshop before
continuing your journey.
When the engine is not running, the
support of the brake servo unit
disappears once the brake pedal has been depressed once or twice.
Braking effect is not reduced, but
braking requires significantly greater
force. It is especially important to bear
this in mind when being towed.
Control indicator R 3 110.
Antilock brake system
Antilock brake system (ABS)
prevents the wheels from locking.ABS starts to regulate brake pressure as soon as a wheel shows a tendency to lock. The vehicle remains
steerable, even during hard braking.
ABS control is made apparent
through a pulse in the brake pedal
and the noise of the regulation
process.
For optimum braking, keep the brake
pedal fully depressed throughout the
braking process, despite the fact that
the pedal is pulsating. Do not reduce
the pressure on the pedal.
After starting off the system performs
a self-test which may be audible.
Control indicator u 3 111.
Adaptive brake light During full braking, all three brake
lights flash for the duration of ABS
control.