change wheel OPEL ZAFIRA TOURER 2015 Owners Manual
[x] Cancel search | Manufacturer: OPEL, Model Year: 2015, Model line: ZAFIRA TOURER, Model: OPEL ZAFIRA TOURER 2015Pages: 299, PDF Size: 9.13 MB
Page 13 of 299
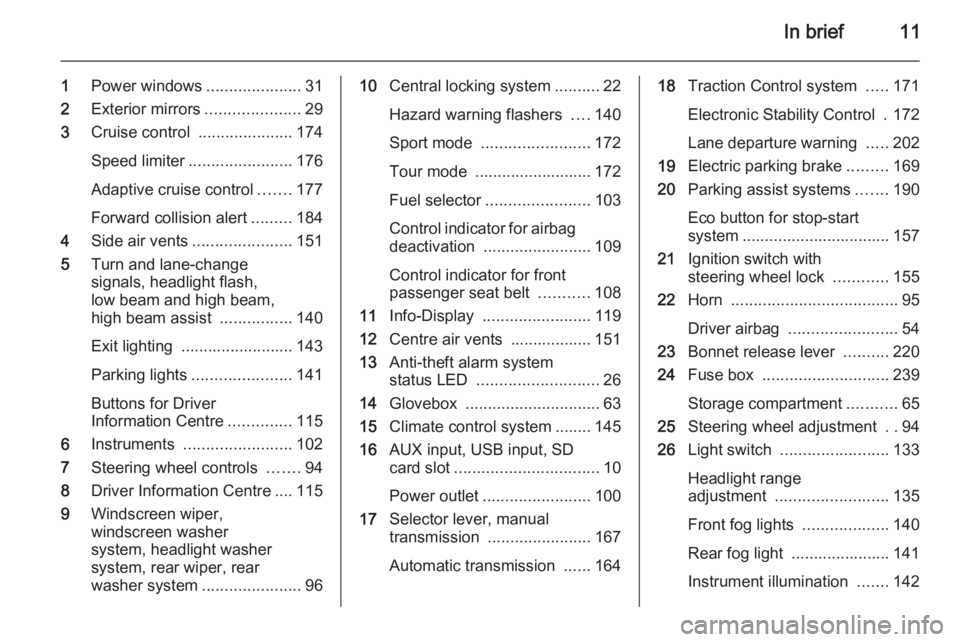
In brief11
1Power windows .....................31
2 Exterior mirrors .....................29
3 Cruise control .....................174
Speed limiter ....................... 176
Adaptive cruise control .......177
Forward collision alert .........184
4 Side air vents ...................... 151
5 Turn and lane-change
signals, headlight flash,
low beam and high beam,
high beam assist ................140
Exit lighting ......................... 143
Parking lights ...................... 141
Buttons for Driver
Information Centre ..............115
6 Instruments ........................ 102
7 Steering wheel controls .......94
8 Driver Information Centre .... 115
9 Windscreen wiper,
windscreen washer
system, headlight washer
system, rear wiper, rear
washer system ......................9610Central locking system ..........22
Hazard warning flashers ....140
Sport mode ........................ 172
Tour mode .......................... 172
Fuel selector ....................... 103
Control indicator for airbag
deactivation ........................ 109
Control indicator for front
passenger seat belt ...........108
11 Info-Display ........................ 119
12 Centre air vents .................. 151
13 Anti-theft alarm system
status LED ........................... 26
14 Glovebox .............................. 63
15 Climate control system ........ 145
16 AUX input, USB input, SD
card slot ................................ 10
Power outlet ........................ 100
17 Selector lever, manual
transmission ....................... 167
Automatic transmission ......16418Traction Control system .....171
Electronic Stability Control . 172
Lane departure warning .....202
19 Electric parking brake .........169
20 Parking assist systems .......190
Eco button for stop-start
system ................................. 157
21 Ignition switch with
steering wheel lock ............155
22 Horn ..................................... 95
Driver airbag ........................ 54
23 Bonnet release lever ..........220
24 Fuse box ............................ 239
Storage compartment ...........65
25 Steering wheel adjustment ..94
26 Light switch ........................ 133
Headlight range
adjustment ......................... 135
Front fog lights ...................140
Rear fog light ...................... 141
Instrument illumination .......142
Page 65 of 299
Storage63StorageStorage compartments................63
Load compartment .......................76
Roof rack system .........................91
Loading information .....................92Storage compartments9Warning
Do not store heavy or sharp
objects in the storage
compartments. Otherwise, the
storage compartment lid could
open and vehicle occupants could be injured by objects being thrown
around in the event of hard
braking, a sudden change in
direction or an accident.
Instrument panel storage
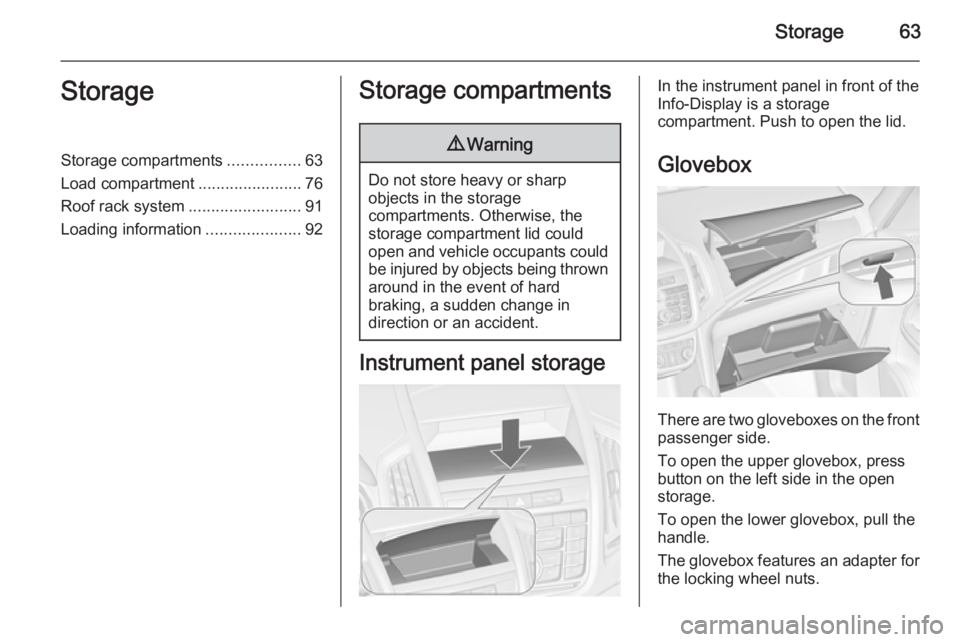
In the instrument panel in front of the
Info-Display is a storage
compartment. Push to open the lid.
Glovebox
There are two gloveboxes on the front
passenger side.
To open the upper glovebox, press
button on the left side in the open
storage.
To open the lower glovebox, pull the handle.
The glovebox features an adapter for the locking wheel nuts.
Page 107 of 299
Instruments and controls105Caution
If engine coolant temperature is
too high, stop vehicle, switch off
engine. Danger to engine. Check
coolant level.
Service display
The engine oil life system lets you
know when to change the engine oil
and filter. Based on driving
conditions, the interval at which an
engine oil and filter change will be
indicated can vary considerably.
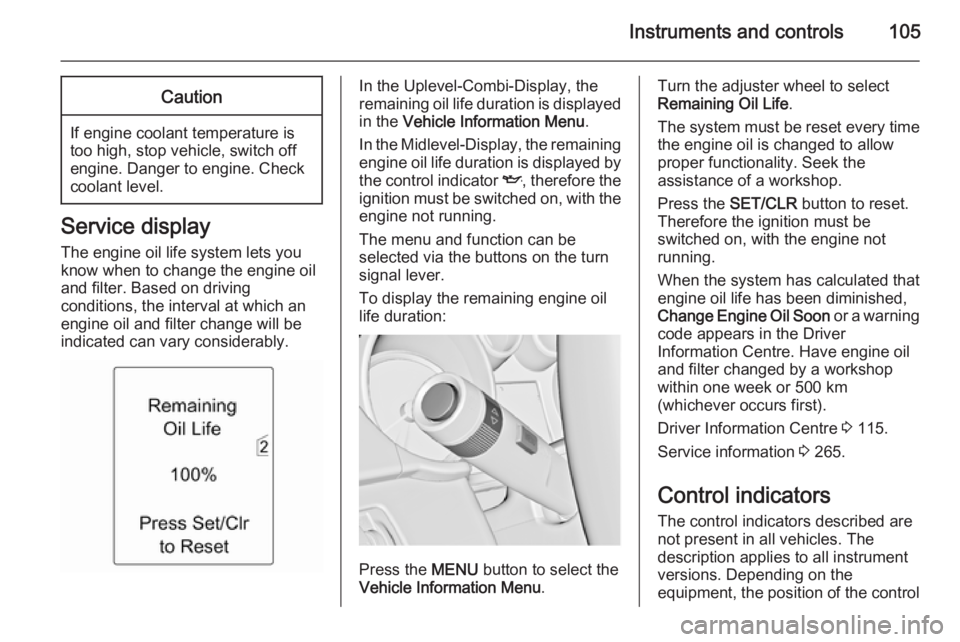
In the Uplevel-Combi-Display, the
remaining oil life duration is displayed
in the Vehicle Information Menu .
In the Midlevel-Display, the remaining engine oil life duration is displayed by
the control indicator I, therefore the
ignition must be switched on, with the
engine not running.
The menu and function can be
selected via the buttons on the turn signal lever.
To display the remaining engine oil life duration:
Press the MENU button to select the
Vehicle Information Menu .
Turn the adjuster wheel to select
Remaining Oil Life .
The system must be reset every time
the engine oil is changed to allow proper functionality. Seek the
assistance of a workshop.
Press the SET/CLR button to reset.
Therefore the ignition must be
switched on, with the engine not
running.
When the system has calculated that
engine oil life has been diminished,
Change Engine Oil Soon or a warning
code appears in the Driver
Information Centre. Have engine oil
and filter changed by a workshop
within one week or 500 km
(whichever occurs first).
Driver Information Centre 3 115.
Service information 3 265.
Control indicators The control indicators described are
not present in all vehicles. The
description applies to all instrument
versions. Depending on the
equipment, the position of the control
Page 118 of 299
116Instruments and controls
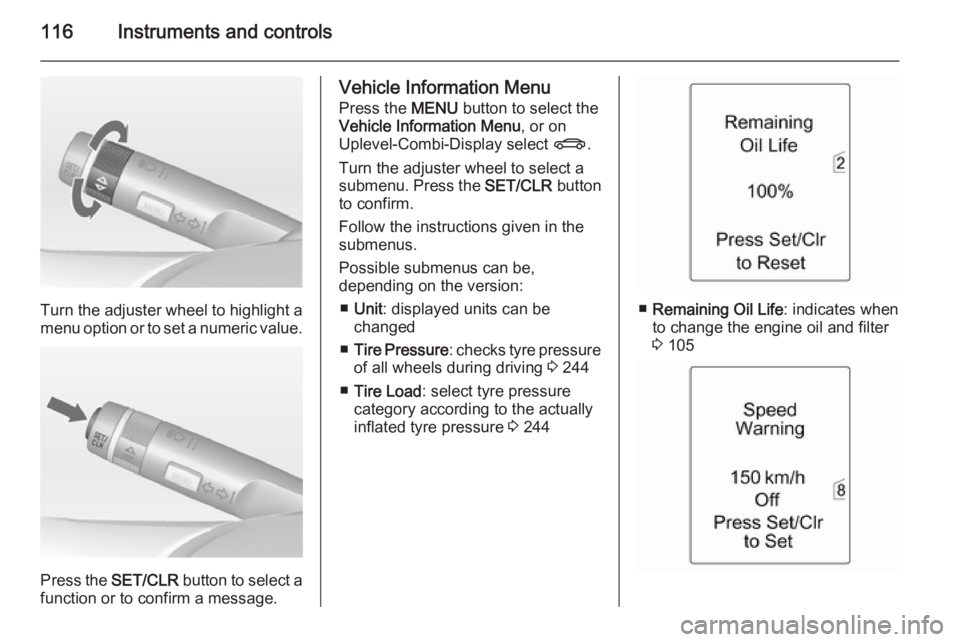
Turn the adjuster wheel to highlight a
menu option or to set a numeric value.
Press the SET/CLR button to select a
function or to confirm a message.
Vehicle Information Menu
Press the MENU button to select the
Vehicle Information Menu , or on
Uplevel-Combi-Display select X.
Turn the adjuster wheel to select a
submenu. Press the SET/CLR button
to confirm.
Follow the instructions given in the submenus.
Possible submenus can be,
depending on the version:
■ Unit : displayed units can be
changed
■ Tire Pressure : checks tyre pressure
of all wheels during driving 3 244
■ Tire Load : select tyre pressure
category according to the actually
inflated tyre pressure 3 244
■ Remaining Oil Life : indicates when
to change the engine oil and filter
3 105
Page 124 of 299
122Instruments and controls
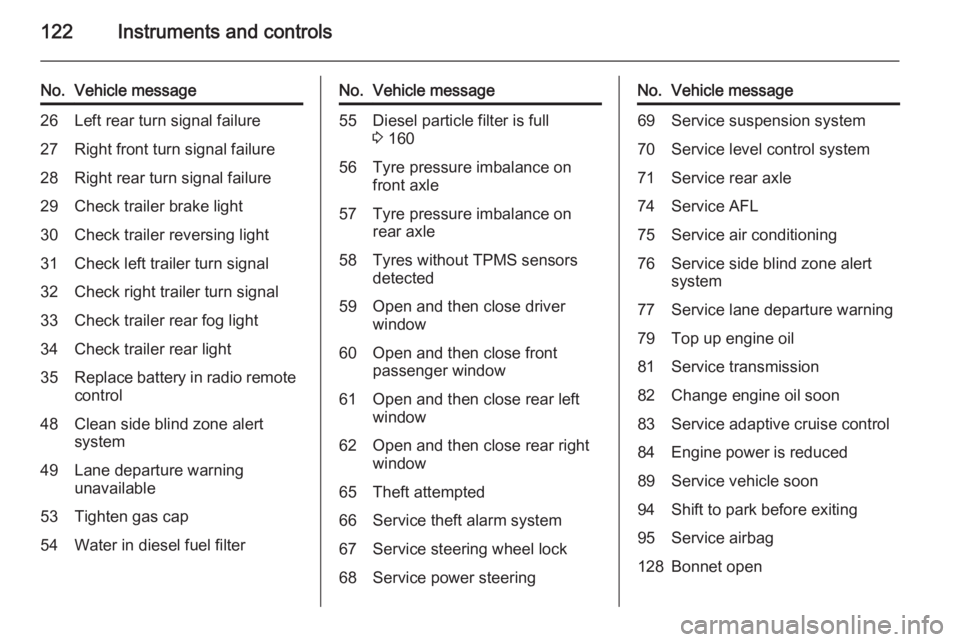
No.Vehicle message26Left rear turn signal failure27Right front turn signal failure28Right rear turn signal failure29Check trailer brake light30Check trailer reversing light31Check left trailer turn signal32Check right trailer turn signal33Check trailer rear fog light34Check trailer rear light35Replace battery in radio remote
control48Clean side blind zone alert
system49Lane departure warning
unavailable53Tighten gas cap54Water in diesel fuel filterNo.Vehicle message55Diesel particle filter is full
3 16056Tyre pressure imbalance on
front axle57Tyre pressure imbalance on
rear axle58Tyres without TPMS sensors
detected59Open and then close driver
window60Open and then close front
passenger window61Open and then close rear left
window62Open and then close rear right
window65Theft attempted66Service theft alarm system67Service steering wheel lock68Service power steeringNo.Vehicle message69Service suspension system70Service level control system71Service rear axle74Service AFL75Service air conditioning76Service side blind zone alert
system77Service lane departure warning79Top up engine oil81Service transmission82Change engine oil soon83Service adaptive cruise control84Engine power is reduced89Service vehicle soon94Shift to park before exiting95Service airbag128Bonnet open
Page 142 of 299
140Lighting
Fault in Adaptive forward
lighting system When the system detects a failure in
the Adaptive forward lighting system,
the system moves to a preset position to avoid dazzling of oncoming traffic.
If this is not possible, the affected
headlight will be automatically
switched off. In any case, one
headlight will stay on. A warning is
displayed in the Driver Information
Centre.
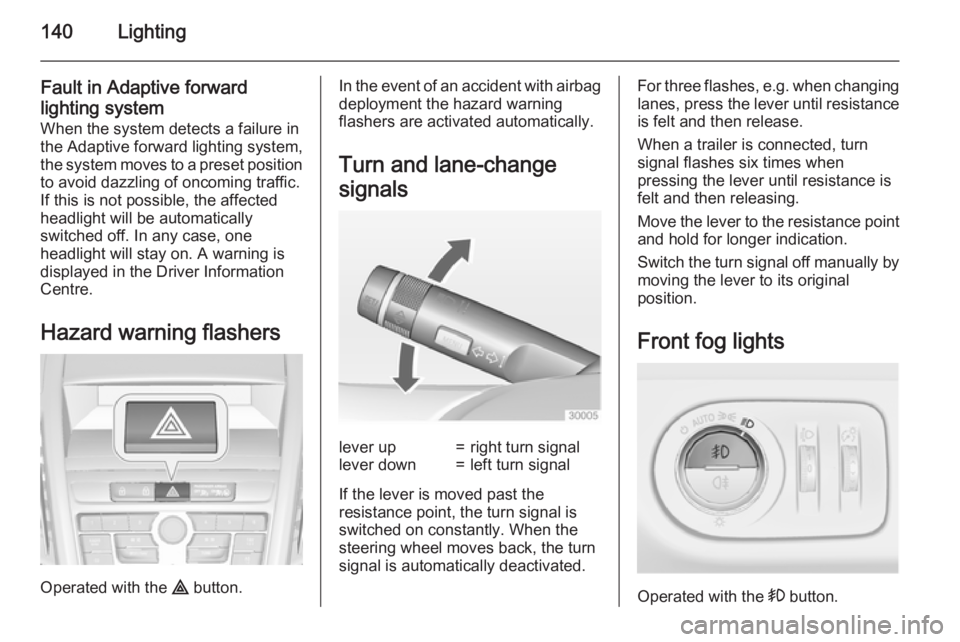
Hazard warning flashers
Operated with the ¨ button.
In the event of an accident with airbag
deployment the hazard warning
flashers are activated automatically.
Turn and lane-change
signalslever up=right turn signallever down=left turn signal
If the lever is moved past the
resistance point, the turn signal is
switched on constantly. When the
steering wheel moves back, the turn
signal is automatically deactivated.
For three flashes, e.g. when changing lanes, press the lever until resistance
is felt and then release.
When a trailer is connected, turn
signal flashes six times when
pressing the lever until resistance is
felt and then releasing.
Move the lever to the resistance point
and hold for longer indication.
Switch the turn signal off manually by moving the lever to its original
position.
Front fog lights
Operated with the > button.
Page 148 of 299
146Climate controlAir conditioning system
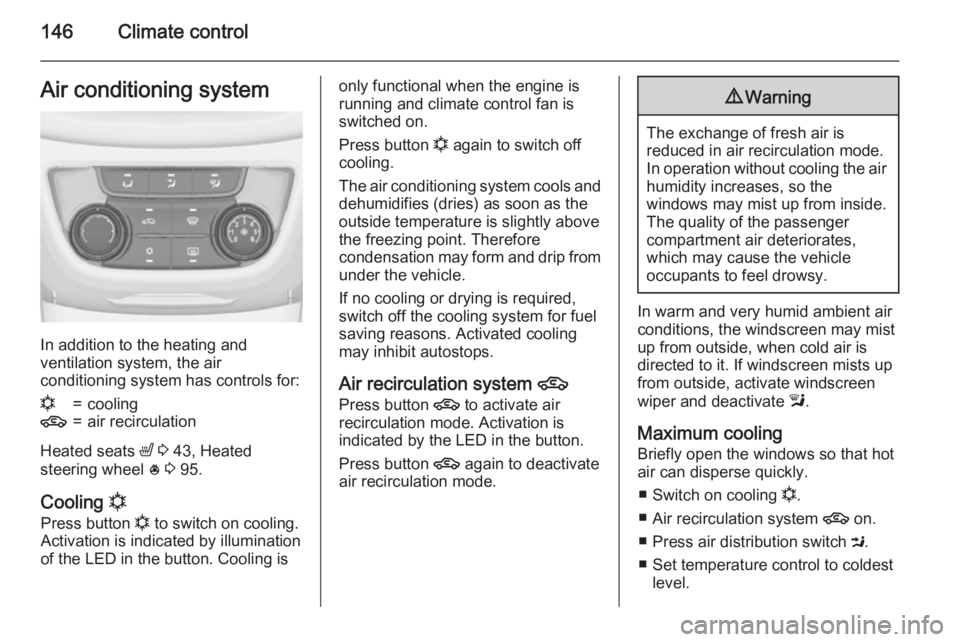
In addition to the heating and
ventilation system, the air
conditioning system has controls for:
n=cooling4=air recirculation
Heated seats ß 3 43, Heated
steering wheel * 3 95.
Cooling n
Press button n to switch on cooling.
Activation is indicated by illumination
of the LED in the button. Cooling is
only functional when the engine is
running and climate control fan is switched on.
Press button n again to switch off
cooling.
The air conditioning system cools and
dehumidifies (dries) as soon as the
outside temperature is slightly above the freezing point. Therefore
condensation may form and drip from
under the vehicle.
If no cooling or drying is required,
switch off the cooling system for fuel
saving reasons. Activated cooling
may inhibit autostops.
Air recirculation system 4
Press button 4 to activate air
recirculation mode. Activation is
indicated by the LED in the button.
Press button 4 again to deactivate
air recirculation mode.9 Warning
The exchange of fresh air is
reduced in air recirculation mode.
In operation without cooling the air humidity increases, so the
windows may mist up from inside.
The quality of the passenger
compartment air deteriorates,
which may cause the vehicle
occupants to feel drowsy.
In warm and very humid ambient air conditions, the windscreen may mist
up from outside, when cold air is
directed to it. If windscreen mists up
from outside, activate windscreen
wiper and deactivate l.
Maximum cooling Briefly open the windows so that hotair can disperse quickly.
■ Switch on cooling n.
■ Air recirculation system 4 on.
■ Press air distribution switch M.
■ Set temperature control to coldest level.
Page 150 of 299
148Climate control
Heated rear window Ü 3 33, Heated
seats ß 3 43, Heated steering wheel
* 3 95.
Climate control settings are shown on
the Graphic-Info-Display, or
depending on the version, on Colour- Info-Display. Setting modifications
are briefly popped-up in both
displays, superimposed over the
currently displayed menu.
The electronic climate control system
is only fully operational when the
engine is running.
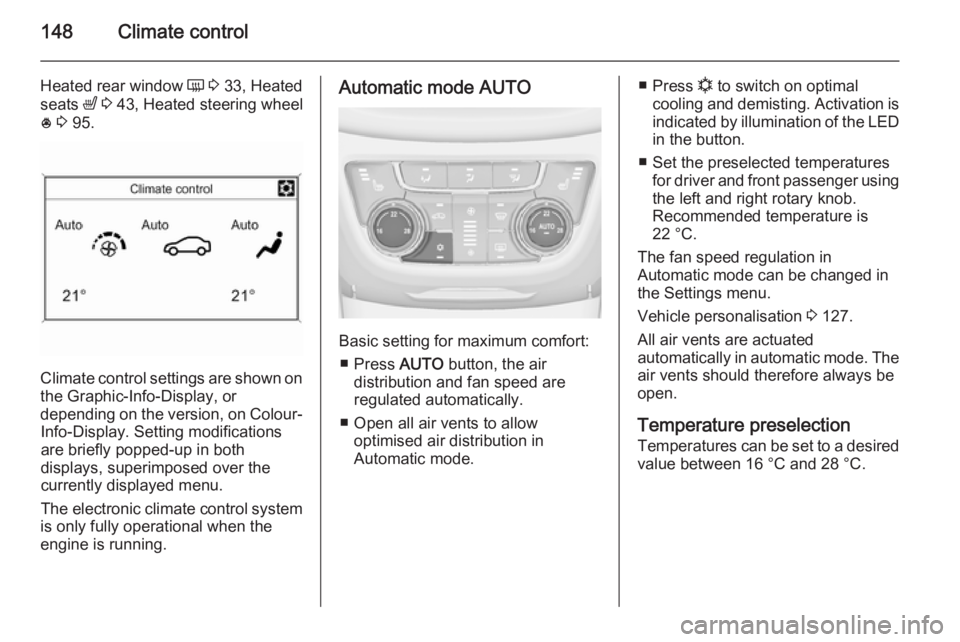
Automatic mode AUTO
Basic setting for maximum comfort:
■ Press AUTO button, the air
distribution and fan speed are
regulated automatically.
■ Open all air vents to allow optimised air distribution in
Automatic mode.
■ Press n to switch on optimal
cooling and demisting. Activation is indicated by illumination of the LED
in the button.
■ Set the preselected temperatures for driver and front passenger using
the left and right rotary knob.
Recommended temperature is
22 °C.
The fan speed regulation in
Automatic mode can be changed in
the Settings menu.
Vehicle personalisation 3 127.
All air vents are actuated
automatically in automatic mode. The
air vents should therefore always be
open.
Temperature preselection
Temperatures can be set to a desired
value between 16 °C and 28 °C.
Page 153 of 299
Climate control151
Press button 4 again to deactivate
recirculation mode.9 Warning
The exchange of fresh air is
reduced in air recirculation mode.
In operation without cooling the air humidity increases, so the
windows may mist up from inside.
The quality of the passenger
compartment air deteriorates,
which may cause the vehicle
occupants to feel drowsy.
In warm and very humid ambient air conditions, the windscreen may mist
up from outside, when cold air is
directed towards it. If windscreen
mists up from outside, activate
windscreen wiper and deactivate l.
Basic settings
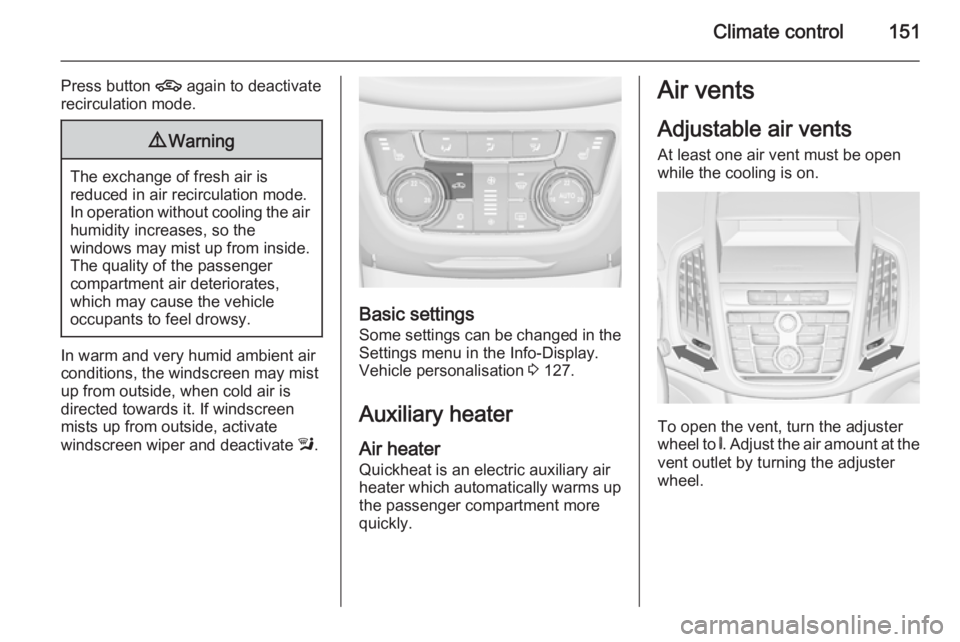
Some settings can be changed in the Settings menu in the Info-Display.
Vehicle personalisation 3 127.
Auxiliary heater Air heater
Quickheat is an electric auxiliary air
heater which automatically warms up the passenger compartment more
quickly.
Air vents
Adjustable air vents
At least one air vent must be open
while the cooling is on.
To open the vent, turn the adjuster
wheel to B. Adjust the air amount at the
vent outlet by turning the adjuster
wheel.
Page 166 of 299
164Driving and operating
8. Unscrew the hose from the fillerneck.
9. Mount the protective cap and turn
clockwise until it engages.
Note
Dispose of AdBlue canister and
hose according to environmental requirements.
Exchanging AdBlue
If less than 5 litres of AdBlue have
been refilled during the last 2 years,
the remaining fluid should be
exchanged since AdBlue has a
limited durability.Caution
Disregard could lead to damage to
the selective catalytic reduction
system.
Automatic transmission
The automatic transmission permits
automatic gearshifting (automatic
mode) or manual gearshifting
(manual mode).
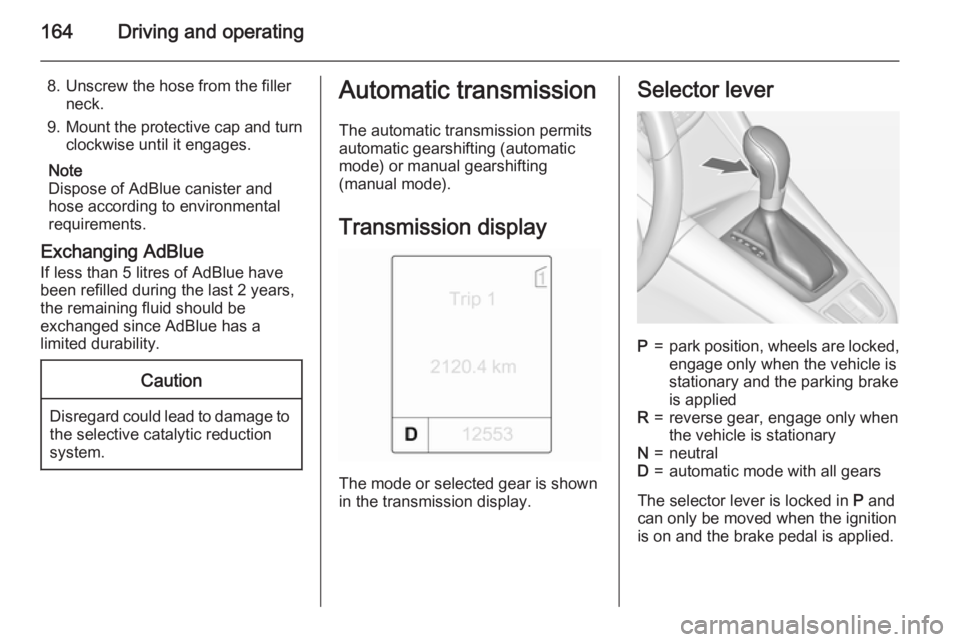
Transmission display
The mode or selected gear is shown
in the transmission display.
Selector leverP=park position, wheels are locked, engage only when the vehicle is
stationary and the parking brake
is appliedR=reverse gear, engage only when
the vehicle is stationaryN=neutralD=automatic mode with all gears
The selector lever is locked in P and
can only be moved when the ignition is on and the brake pedal is applied.