seats OPEL ZAFIRA TOURER 2017 Service Manual
[x] Cancel search | Manufacturer: OPEL, Model Year: 2017, Model line: ZAFIRA TOURER, Model: OPEL ZAFIRA TOURER 2017Pages: 307, PDF Size: 9.35 MB
Page 88 of 307

86Storage
● Fold the overlaying rear partunder the mat before closing the
tailgate.
Covering the load compartment
partially
Only possible with Flex cover interior
protection mat being folded at the
zipper to half size (double layer).
e.g. left outer backrest is not folded
down
Mat is expanded up to the second row
seats, as described in first section.
● Fold down the backrests that shall be covered.
● Open the zipper behind the raised up backrest.
● Pull out the mat until the first part
is flat on the load compartment floor.
● Raise up lengthways the part that
is opened by the zipper, and fold
it to the centre.● Expand the upper part of double layer mat over the folded
backrests.
● Fold the overlaying rear part under the mat before closing the
tailgate.
Proceed in the same way when one
outer backrest and the centre
backrest are not folded down.
e.g. only centre backrest is folded down
Mat is expanded up to the second row seats, as described in first section.
● Fold down centre backrest to be covered.
Page 92 of 307

90StorageInstallation of hooks in the rails
Insert the hook in the desired positionfirst in the upper groove of the rail and
then press in the lower groove. To
remove, first pull out of the upper
groove.
Partitioning net in front of tailgate
Install directly in front of the tailgate.
Before installation push in the four
end pieces of the net rod by rotating
each end piece anticlockwise.
To install, push the net rods together
and insert into the openings of the
tailgate frame. The longer rod must
be inserted at the top.
To remove, push the net rods
together and remove.
Safety net
The safety net can be installed behind the seats of the second row or the
front seats.
Passengers must not be transported
behind the safety net.
Installation behind second row
seats
● There are installation openings on both sides in the roof frame
above second row seats:
suspend and engage rod of net at
one side, compress rod and
suspend and engage at the other side.
Page 93 of 307

Storage91
●Attach hooks of safety net straps
to front lashing eyes on both
sides in the load compartment.
● Tension both straps by pulling at the loose end.
Installation behind front seats
● There are installation openings on both sides in the roof frame
above the front seats: suspend
and engage rod of net at one
side, compress rod and suspend and engage at the other side.
● Attach hooks of safety net straps
to the lashing eyes on both sides in the floor in front of the seats.
● Tension both straps by pulling at the loose end.
Page 112 of 307

110Instruments and controlsAVehicle detected ahead 3 116hDoor open 3 116
Turn signal
O illuminates or flashes green.
Illuminates briefly The parking lights are switched on.
Flashes
A turn signal or the hazard warning flashers are activated.
Rapid flashing: failure of a turn signal light or associated fuse, failure of turn
signal light on trailer.
Bulb replacement 3 232, Fuses
3 240.
Turn signals 3 145.
Seat belt reminder
Seat belt reminder on front seats X for driver's seat or for front
passenger seat illuminates or flashes
red.
Illuminates
After the ignition has been switched
on until the seat belt has been
fastened.
Flashes
After having started the engine, for a
maximum of 100 seconds until the
seat belt has been fastened.
Fastening the seat belt 3 51.
Seat belt status on rear seats
> or X in the Driver Information
Centre flashes or illuminates.
Illuminates
After having started the engine, for a
minimum of 35 seconds until the seat
belt has been fastened.
If an unfastened seat belt is fastened
whilst driving.
Flashes
After starting-off, when the seat belt is unfastened.
Fastening the seat belt 3 51.
Airbag and belt tensioners
v illuminates red.
When the ignition is switched on, the control indicator illuminates for
approx. four seconds. If it does not
illuminate, does not extinguish after
four seconds or illuminates whilst
driving, there is a fault in the airbag
system. Seek the assistance of a
workshop. The airbags and belt
pretensioners may fail to trigger in the event of an accident.
Deployment of the belt pretensioners
or airbags is indicated by continuous
illumination of v.
Page 143 of 307
Lighting141Headlight range adjustment
Manual headlight range
adjustment
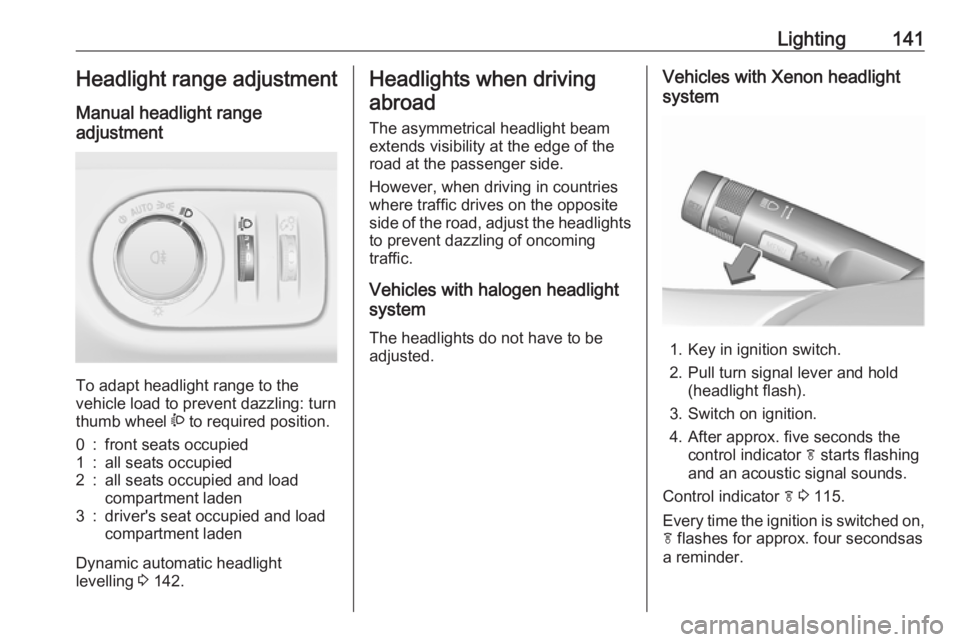
To adapt headlight range to the
vehicle load to prevent dazzling: turn
thumb wheel ? to required position.
0:front seats occupied1:all seats occupied2:all seats occupied and load
compartment laden3:driver's seat occupied and load
compartment laden
Dynamic automatic headlight
levelling 3 142.
Headlights when driving
abroad
The asymmetrical headlight beam
extends visibility at the edge of the
road at the passenger side.
However, when driving in countries
where traffic drives on the opposite
side of the road, adjust the headlights to prevent dazzling of oncoming
traffic.
Vehicles with halogen headlight
system
The headlights do not have to be adjusted.Vehicles with Xenon headlight
system
1. Key in ignition switch.
2. Pull turn signal lever and hold (headlight flash).
3. Switch on ignition.
4. After approx. five seconds the control indicator f starts flashing
and an acoustic signal sounds.
Control indicator f 3 115.
Every time the ignition is switched on,
f flashes for approx. four secondsas
a reminder.
Page 153 of 307
Climate control151Air conditioning system
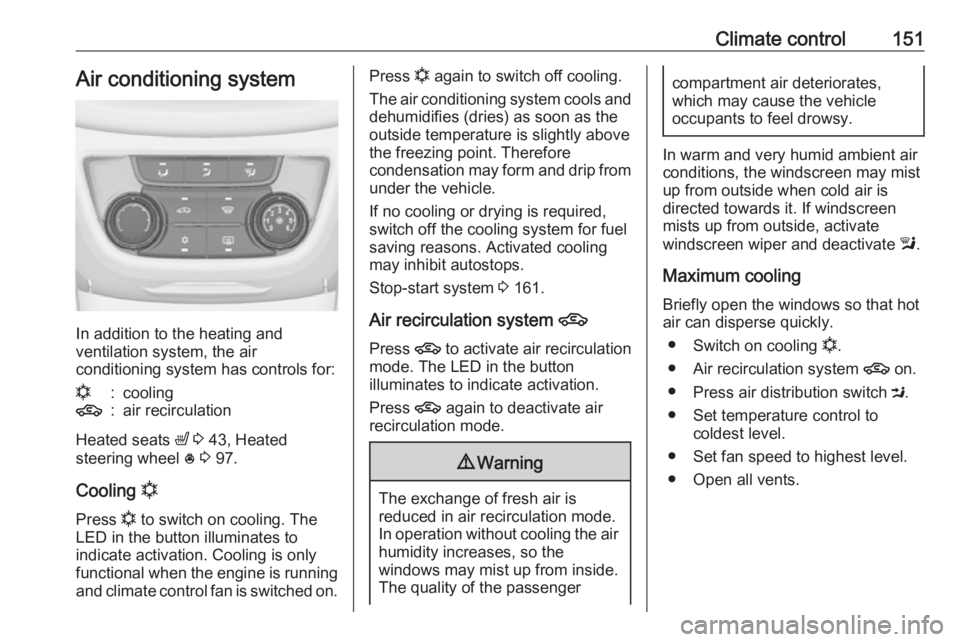
In addition to the heating and
ventilation system, the air
conditioning system has controls for:
n:cooling4:air recirculation
Heated seats ß 3 43, Heated
steering wheel * 3 97.
Cooling n
Press n to switch on cooling. The
LED in the button illuminates to
indicate activation. Cooling is only
functional when the engine is running and climate control fan is switched on.
Press n again to switch off cooling.
The air conditioning system cools and
dehumidifies (dries) as soon as the
outside temperature is slightly above
the freezing point. Therefore
condensation may form and drip from under the vehicle.
If no cooling or drying is required,
switch off the cooling system for fuel
saving reasons. Activated cooling
may inhibit autostops.
Stop-start system 3 161.
Air recirculation system 4
Press 4 to activate air recirculation
mode. The LED in the button
illuminates to indicate activation.
Press 4 again to deactivate air
recirculation mode.9 Warning
The exchange of fresh air is
reduced in air recirculation mode.
In operation without cooling the air humidity increases, so the
windows may mist up from inside.
The quality of the passenger
compartment air deteriorates,
which may cause the vehicle
occupants to feel drowsy.
In warm and very humid ambient air conditions, the windscreen may mist
up from outside when cold air is
directed towards it. If windscreen
mists up from outside, activate
windscreen wiper and deactivate l.
Maximum cooling
Briefly open the windows so that hot
air can disperse quickly.
● Switch on cooling n.
● Air recirculation system 4 on.
● Press air distribution switch M.
● Set temperature control to coldest level.
● Set fan speed to highest level.
● Open all vents.
Page 154 of 307
152Climate controlDemisting and defrosting the
windows V
●
Press V: fan automatically
switches to higher speed, the air
distribution is directed towards
the windscreen.
● Set temperature control to warmest level.
● Switch on heated rear window Ü.
● Open side air vents as required and direct them towards the door
windows.
Note
If V is pressed while the engine is
running, an Autostop will be inhibited
until V is pressed again.
If l is pressed with the fan switched
on and the engine running, an
Autostop will be inhibited until l is
pressed again or until the fan is
switched off.
If V is pressed while the engine is
in an Autostop, the engine will restart
automatically.
If l is pressed with the fan switched
on while the engine is in an
Autostop, the engine will restart
automatically.
Stop-start system 3 161.
Electronic climate control system
The dual zone climate control allows
different climatisation temperatures
for driver side and front passenger
side.
In automatic mode, temperature, fan
speed and air distribution are
regulated automatically.
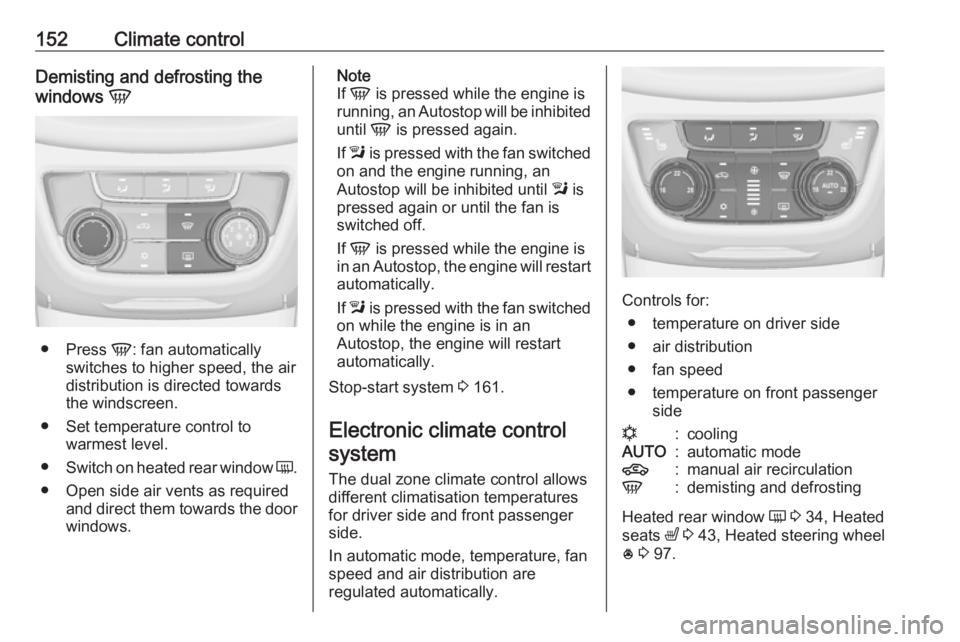
Controls for:
● temperature on driver side
● air distribution
● fan speed
● temperature on front passenger side
n:coolingAUTO:automatic mode4:manual air recirculationV:demisting and defrosting
Heated rear window Ü 3 34, Heated
seats ß 3 43, Heated steering wheel
* 3 97.
Page 159 of 307

Climate control157
Air vents for rear passenger are left
and right side behind the front seats.
9 Warning
Do not attach any objects to the
slats of the air vents. Risk of
damage and injury in case of an
accident.
Fixed air vents
Additional air vents are located
beneath the windscreen and door windows and in the foot wells.
Maintenance
Air intake
The air intake in front of the
windscreen in the engine
compartment must be kept clear to
allow air intake. Remove any leaves,
dirt or snow.
Pollen filter The pollen filter cleans dust, soot,
pollen and spores from the air
entering the vehicle through the air
intake.
Air conditioning regular
operation
In order to ensure continuously
efficient performance, cooling must
be operated for a few minutes once a
month, irrespective of the weather
and time of year. Operation with
cooling is not possible when the
outside temperature is too low.
Service For optimal cooling performance, it is recommended to annually check the
climate control system, starting
three years after initial vehicle
registration, including:
● functionality and pressure test
● heating functionality
● leakage check
● check of drive belts
● cleaning of condenser and evaporator drainage
● performance check
Page 248 of 307
246Vehicle careNo.Circuit16Interior mirror/Rear view
camera17Power outlet18–19Steering wheel heating20Sunblind21Heated front seats22–23–24Selective catalytic reduction
system25–26–27–28–29–30–No.Circuit31–32Active damping system/Lane
departure warningVehicle tools
Tools
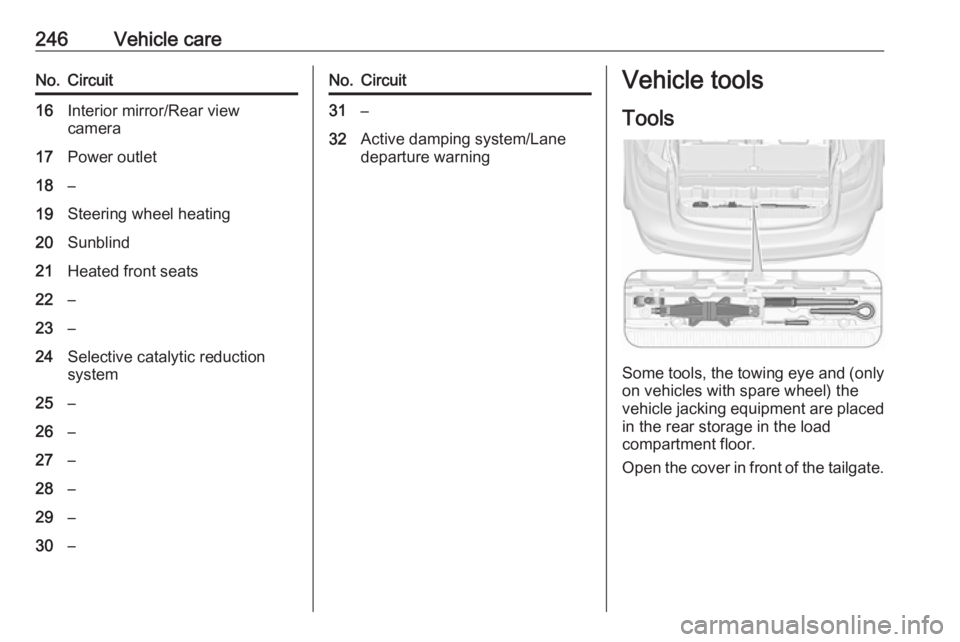
Some tools, the towing eye and (only on vehicles with spare wheel) the
vehicle jacking equipment are placed
in the rear storage in the load
compartment floor.
Open the cover in front of the tailgate.
Page 262 of 307
260Vehicle care
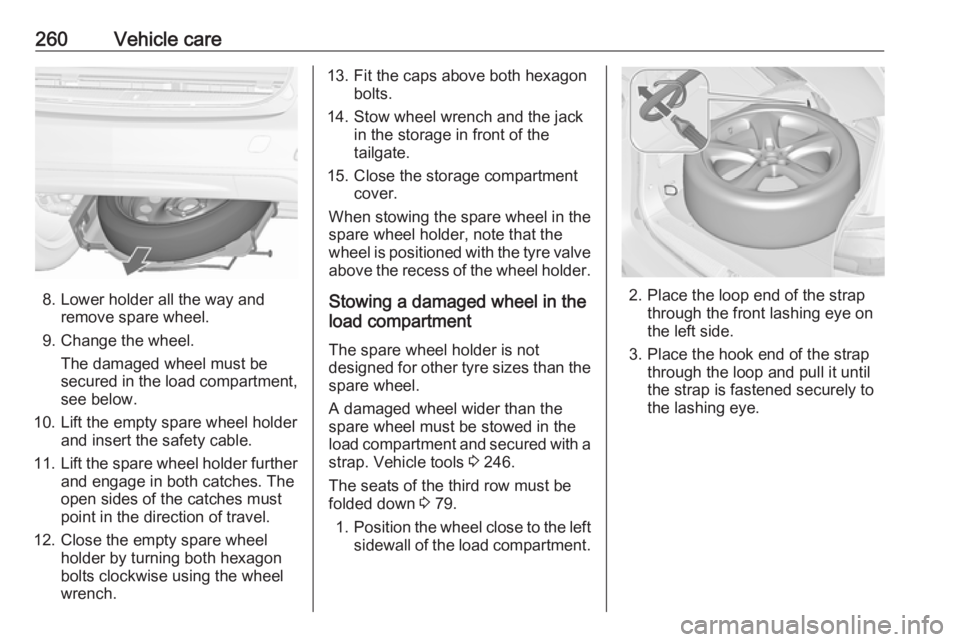
8. Lower holder all the way andremove spare wheel.
9. Change the wheel. The damaged wheel must be
secured in the load compartment,
see below.
10. Lift the empty spare wheel holder and insert the safety cable.
11. Lift the spare wheel holder further
and engage in both catches. The
open sides of the catches must
point in the direction of travel.
12. Close the empty spare wheel holder by turning both hexagon
bolts clockwise using the wheel
wrench.
13. Fit the caps above both hexagon bolts.
14. Stow wheel wrench and the jack in the storage in front of the
tailgate.
15. Close the storage compartment cover.
When stowing the spare wheel in the
spare wheel holder, note that the
wheel is positioned with the tyre valve
above the recess of the wheel holder.
Stowing a damaged wheel in the
load compartment
The spare wheel holder is not
designed for other tyre sizes than the
spare wheel.
A damaged wheel wider than the
spare wheel must be stowed in the
load compartment and secured with a strap. Vehicle tools 3 246.
The seats of the third row must be
folded down 3 79.
1. Position the wheel close to the left
sidewall of the load compartment.
2. Place the loop end of the strap through the front lashing eye on
the left side.
3. Place the hook end of the strap through the loop and pull it until
the strap is fastened securely to
the lashing eye.