window PEUGEOT 2008 2016 User Guide
[x] Cancel search | Manufacturer: PEUGEOT, Model Year: 2016, Model line: 2008, Model: PEUGEOT 2008 2016Pages: 450, PDF Size: 14.16 MB
Page 64 of 450
62
2008_en_Chap03_confort_ed01-2016
Ventilation
Air intake flow
The incoming air follows various paths
depending on the controls selected by the
driver:
-
d
irect arrival in the passenger
compartment (air intake),
-
p
assage through a heating circuit (heating),
-
p
assage through a cooling circuit (air
conditioning).
Control panel
The controls of this system are grouped
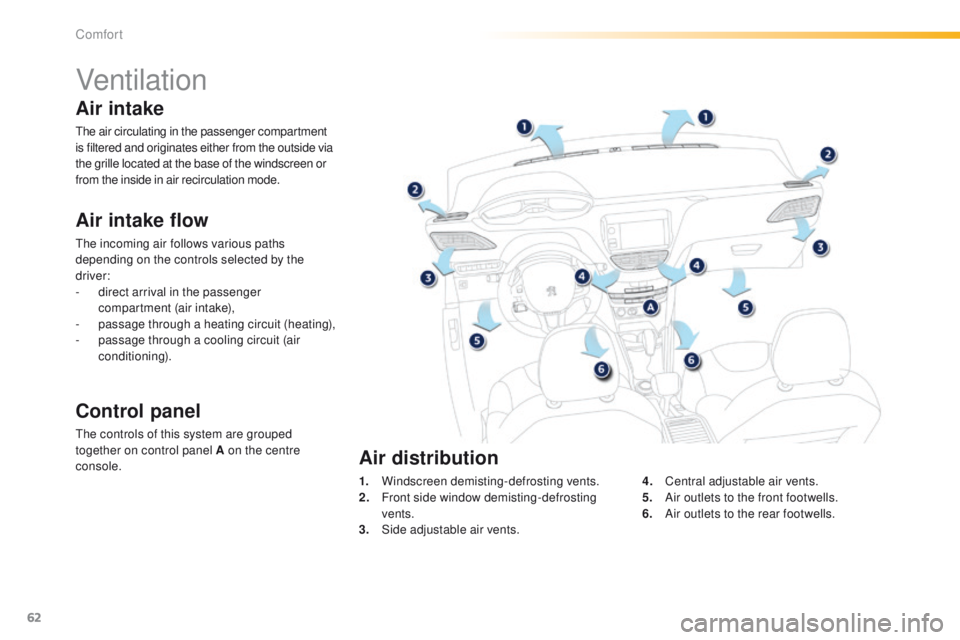
together on control panel A on the centre
console. 1.
W
indscreen demisting-defrosting vents.
2.
F
ront side window demisting-defrosting
vents.
3.
S
ide adjustable air vents.4.
C
entral adjustable air vents.
5.
A
ir outlets to the front footwells.
6.
A
ir outlets to the rear footwells.
Air distribution
Air intake
The air circulating in the passenger compartment
is filtered and originates either from the outside via
the grille located at the base of the windscreen or
from the inside in air recirculation mode.
Comfort
Page 68 of 450
66
2008_en_Chap03_confort_ed01-2016
Air conditioning On / Off
It enables you to:
- l ower the temperature, in summer,
-
i
ncrease the effectiveness of the demisting
in winter, above 3 °C.
Switching on
F Press the "A /C " button, the button's
indicator lamp comes on.
Switching off
F Press the "A /C " button again, the button's
indicator lamp goes off.
Switching off may affect comfort levels
(humidity, condensation). The air conditioning is designed to
operate effectively in all seasons,
with the windows closed.
The air conditioning does not operate
when the air flow adjustment control is
in position " 0".
To obtain cooled air more quickly, you can use
recirculation of interior air for a few moments.
Then return to fresh air intake.
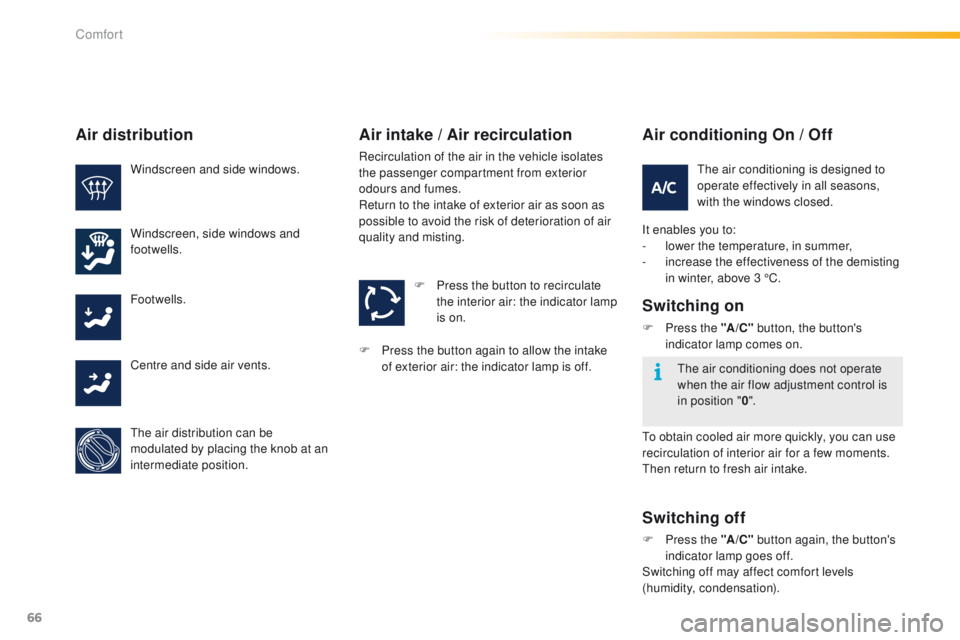
Air distribution
Windscreen and side windows.
Windscreen, side windows and
footwells.
Footwells.
Centre and side air vents.
The air distribution can be
modulated by placing the knob at an
intermediate position. F
P
ress the button to recirculate
the interior air: the indicator lamp
is on.
Air intake / Air recirculation
Recirculation of the air in the vehicle isolates
the passenger compartment from exterior
odours and fumes.
Return to the intake of exterior air as soon as
possible to avoid the risk of deterioration of air
quality and misting.
F
P
ress the button again to allow the intake
of exterior air: the indicator lamp is off.
Comfort
Page 69 of 450
67
2008_en_Chap03_confort_ed01-2016
Dual-zone digital air conditioning
AUTO mode
Automatic programme
When the engine is cold, the air flow will
only reach its optimum level gradually
to prevent too great a distribution of
c o l d a i r.
In cold weather, it favours the
distribution of warm air to the
windscreen, the side windows and the
footwells only.Offers the best compromise between
a comfortable temperature and quiet
operation. Provides soft and quiet operation by
limiting air flow.
Provides strong and effective air flow.
F
P
ress the "AUTO" button
repeatedly. The indicator lamp
comes on at the first press; the
mode activated appears in the
digital air conditioning screen:
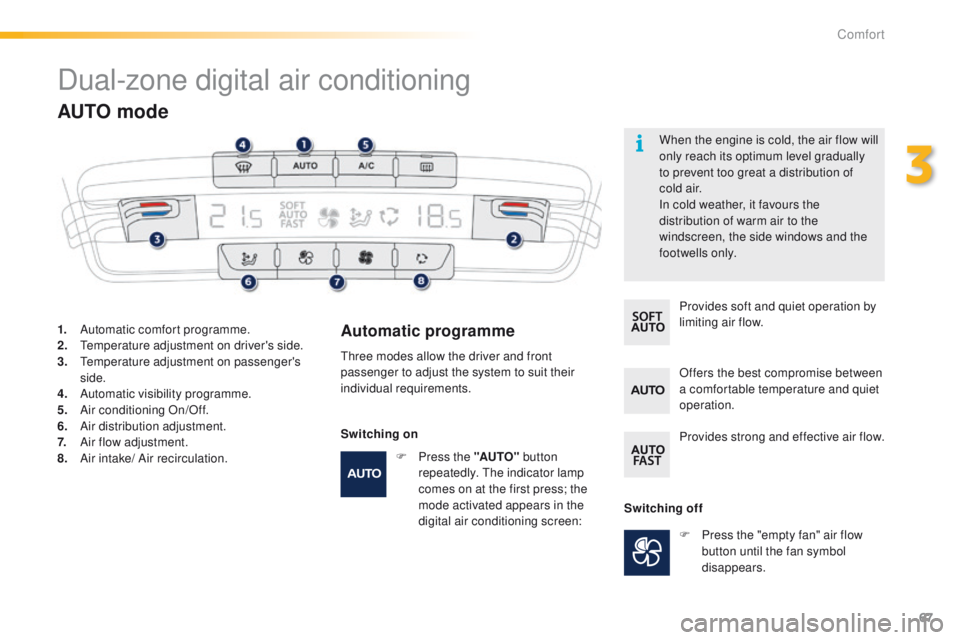
1.
A
utomatic comfort programme.
2.
T
emperature adjustment on driver's side.
3.
T
emperature adjustment on passenger's
side.
4.
A
utomatic visibility programme.
5.
A
ir conditioning On/Off.
6.
A
ir distribution adjustment.
7.
A
ir flow adjustment.
8.
A
ir intake/ Air recirculation. Three modes allow the driver and front
passenger to adjust the system to suit their
individual requirements.
Switching offF
P
ress the "empty fan" air flow
button until the fan symbol
disappears.
Switching on
3
Comfort
Page 70 of 450
68
2008_en_Chap03_confort_ed01-2016
A setting around 21 enables you to obtain an
optimum level of comfort. Depending on your
requirements, a setting between 18 and 24 is usual.
In addition, it is recommended that you avoid a left /
right setting difference of more than 3.
On entering the vehicle, if the interior
temperature is much colder or warmer
than the comfort value, there is no need
to alter the value displayed in order to
obtain the required level of comfort.
The system corrects the temperature
difference automatically and as quickly
as possible.
Auto - Visibility programme
Switching off may cause some
problems (humidity, misting).
F
P
ress the "visibility"
button for
faster demisting or defrosting
of the windscreen and side
windows.
F
P
ress the "
A/C" button, the
associated indicator lamp comes
on.
The air conditioning cannot operate when the
air flow is set to off.
F
P
ress the "AUTO"
button again
to return to the automatic comfort
programme.
Temperature
F Push the button down (blue) to reduce the value or up (red) to
increase it.
Adjustment
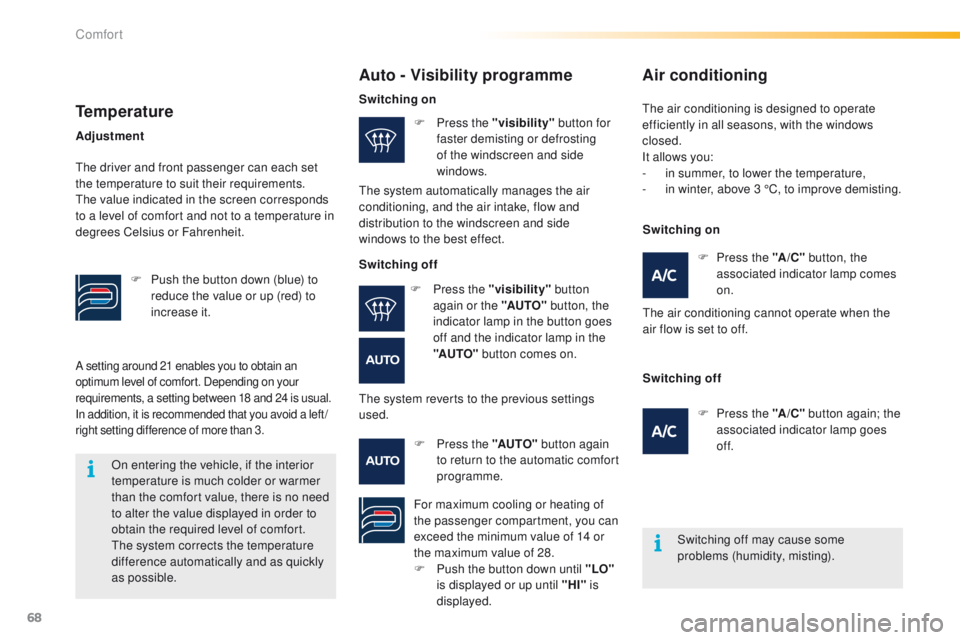
The driver and front passenger can each set
the temperature to suit their requirements.
The value indicated in the screen corresponds
to a level of comfort and not to a temperature in
degrees Celsius or Fahrenheit.
Switching on
The system automatically manages the air
conditioning, and the air intake, flow and
distribution to the windscreen and side
windows to the best effect.
Switching off
F P ress the "visibility" button
again or the "AUTO" button, the
indicator lamp in the button goes
off and the indicator lamp in the
"AUTO" button comes on.
The system reverts to the previous settings
used.
For maximum cooling or heating of
the passenger compartment, you can
exceed the minimum value of 14 or
the maximum value of 28.
F
P
ush the button down until "LO"
is displayed or up until "HI" is
displayed.
Air conditioning
The air conditioning is designed to operate
efficiently in all seasons, with the windows
closed.
It allows you:
-
i
n summer, to lower the temperature,
-
i
n winter, above 3 °C, to improve demisting.
Switching on
Switching off F
P
ress the "A /C " button again; the
associated indicator lamp goes
of f.
Comfort
Page 71 of 450
69
2008_en_Chap03_confort_ed01-2016
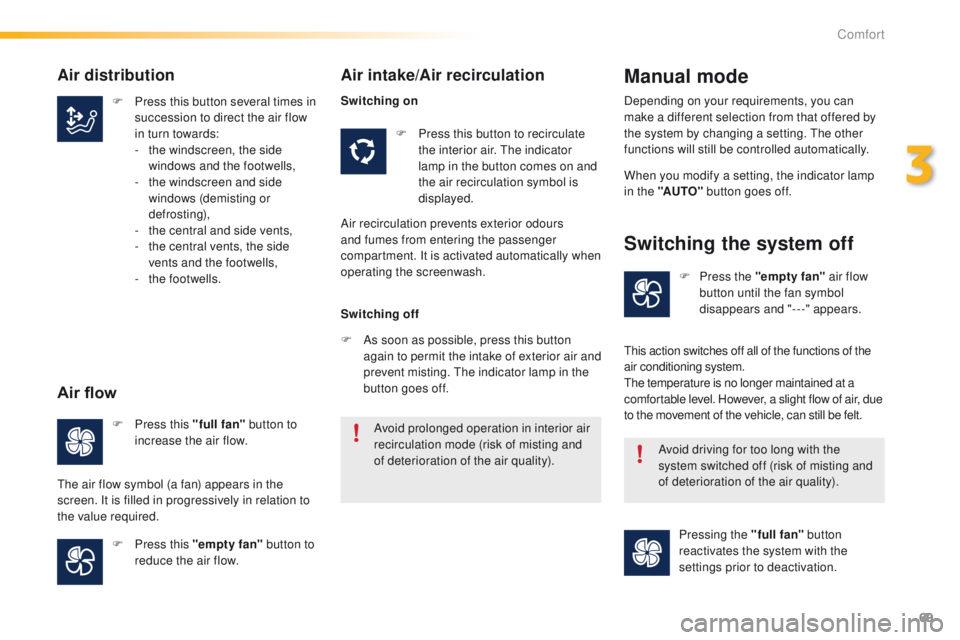
F Press this button several times in succession to direct the air flow
in turn towards:
-
t
he windscreen, the side
windows and the footwells,
-
t
he windscreen and side
windows (demisting or
def r o st ing),
-
t
he central and side vents,
-
t
he central vents, the side
vents and the footwells,
-
t
he footwells. F
P
ress this button to recirculate
the interior air. The indicator
lamp in the button comes on and
the air recirculation symbol is
displayed. When you modify a setting, the indicator lamp
in the "AUTO"
button goes off.
F
P
ress this "full fan" button to
increase the air flow.
F
P
ress this "empty fan" button to
reduce the air flow. Avoid prolonged operation in interior air
recirculation mode (risk of misting and
of deterioration of the air quality).
Avoid driving for too long with the
system switched off (risk of misting and
of deterioration of the air quality).
Air distribution
Air flow
The air flow symbol (a fan) appears in the
screen. It is filled in progressively in relation to
the value required.
Air intake/Air recirculation
Air recirculation prevents exterior odours
and fumes from entering the passenger
compartment. It is activated automatically when
operating the screenwash.
Manual mode
Switching the system off
Switching on
Switching off
F
A
s soon as possible, press this button
again to permit the intake of exterior air and
prevent misting. The indicator lamp in the
button goes off. Depending on your requirements, you can
make a different selection from that offered by
the system by changing a setting. The other
functions will still be controlled automatically.
F
P
ress the "empty fan" air flow
button until the fan symbol
disappears and "---" appears.
This action switches off all of the functions of the
air conditioning system.
The temperature is no longer maintained at a
comfortable level. However, a slight flow of air, due
to the movement of the vehicle, can still be felt.
Pressing the "full fan" button
reactivates the system with the
settings prior to deactivation.
3
Comfort
Page 72 of 450
70
2008_en_Chap03_confort_ed01-2016
F Switch off the demisting/defrosting of the rear screen and door mirrors
as soon as appropriate, as lower
current consumption results in
reduced fuel consumption.
Front demist - defrost Rear screen
demist
-
defrost
The control button is located on the
air conditioning system control panel.
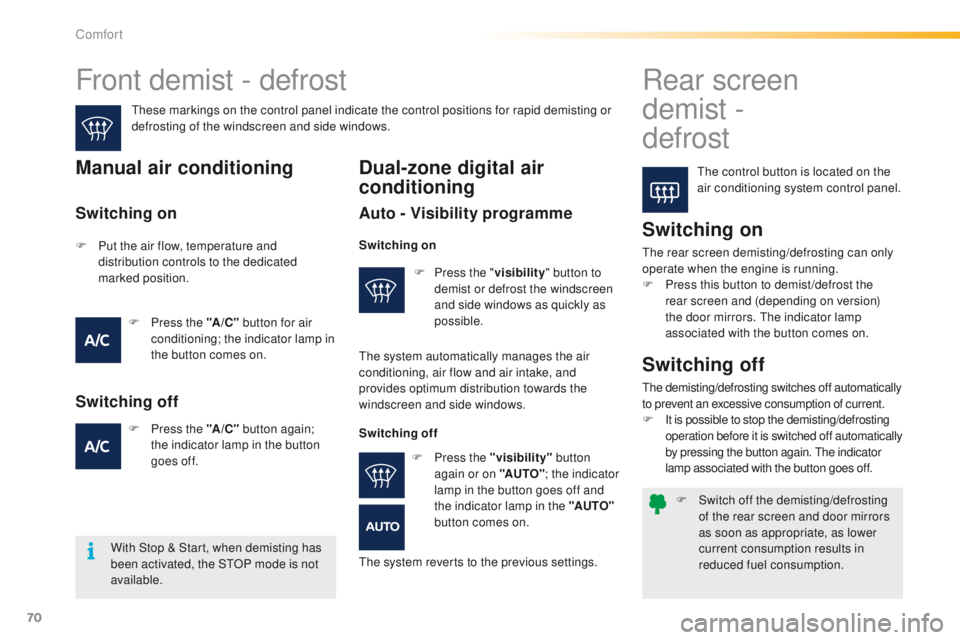
These markings on the control panel indicate the control positions for rapid demisting or
defrosting of the windscreen and side windows.Manual air conditioning
Switching on
The rear screen demisting/defrosting can only
operate when the engine is running.
F
P
ress this button to demist /defrost the
rear screen and (depending on version)
the door mirrors. The indicator lamp
associated with the button comes on.
With Stop & Start, when demisting has
been activated, the STOP mode is not
available.
Switching off
The demisting/defrosting switches off automatically
to prevent an excessive consumption of current.
F
I
t is possible to stop the demisting/defrosting
operation before it is switched off automatically
by pressing the button again. The indicator
lamp associated with the button goes off.
Dual-zone digital air
conditioning
Auto - Visibility programme
F Press the " visibility" button to
demist or defrost the windscreen
and side windows as quickly as
possible.
Switching on
F Put the air flow, temperature and distribution controls to the dedicated
marked position.
F
P
ress the "A /C " button for air
conditioning; the indicator lamp in
the button comes on.
F
P
ress the "A /C " button again;
the indicator lamp in the button
goes
off.
Switching off
Switching on
The system automatically manages the air
conditioning, air flow and air intake, and
provides optimum distribution towards the
windscreen and side windows.
Switching offF
P
ress the "visibility" button
again or on "AUTO" ; the indicator
lamp in the button goes off and
the indicator lamp in the "AUTO"
button comes on.
The system reverts to the previous settings.
Comfort
Page 156 of 450
154
2008_en_Chap07_securite_ed01-2016
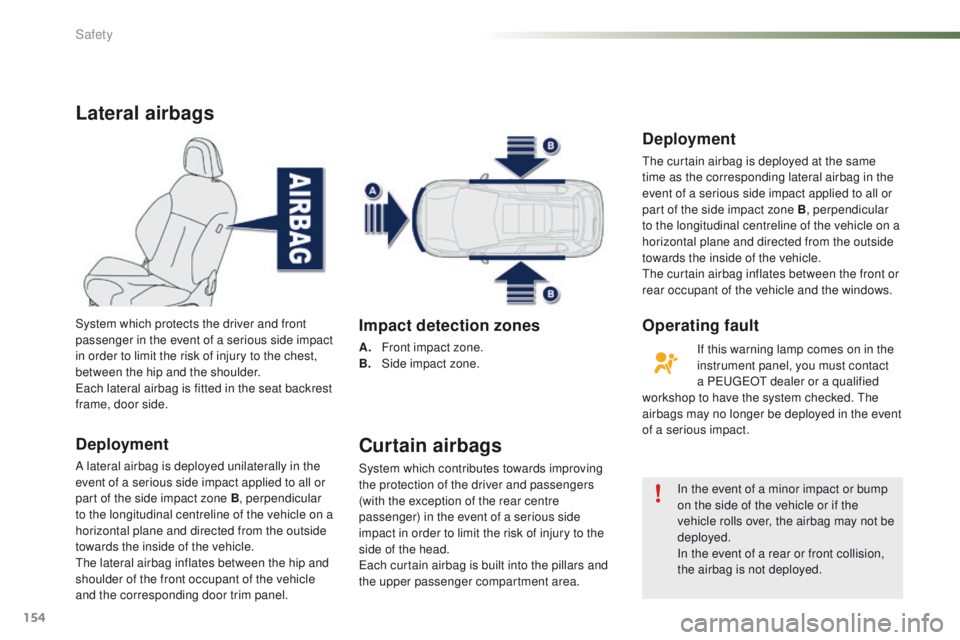
Lateral airbags
Deployment
A lateral airbag is deployed unilaterally in the
event of a serious side impact applied to all or
part of the side impact zone B, perpendicular
to the longitudinal centreline of the vehicle on a
horizontal plane and directed from the outside
towards the inside of the vehicle.
The lateral airbag inflates between the hip and
shoulder of the front occupant of the vehicle
and the corresponding door trim panel. System which protects the driver and front
passenger in the event of a serious side impact
in order to limit the risk of injury to the chest,
between the hip and the shoulder.
Each lateral airbag is fitted in the seat backrest
frame, door side.
Impact detection zones
A. Front impact zone.
B. Side impact zone.
Curtain airbags
System which contributes towards improving
the protection of the driver and passengers
(with the exception of the rear centre
passenger) in the event of a serious side
impact in order to limit the risk of injury to the
side of the head.
Each curtain airbag is built into the pillars and
the upper passenger compartment area. In the event of a minor impact or bump
on the side of the vehicle or if the
vehicle rolls over, the airbag may not be
deployed.
In the event of a rear or front collision,
the airbag is not deployed.
Deployment
The curtain airbag is deployed at the same
time as the corresponding lateral airbag in the
event of a serious side impact applied to all or
part of the side impact zone B, perpendicular
to the longitudinal centreline of the vehicle on a
horizontal plane and directed from the outside
towards the inside of the vehicle.
The curtain airbag inflates between the front or
rear occupant of the vehicle and the windows.
If this warning lamp comes on in the
instrument panel, you must contact
a PEUGEOT dealer or a qualified
workshop to have the system checked. The
airbags may no longer be deployed in the event
of a serious impact.
Operating fault
Safety
Page 166 of 450
164
2008_en_Chap08_securite-enfants_ed01-2016
The incorrect installation of a child seat in a
vehicle compromises the child's protection in
the event of an accident.
Ensure that there is no seat belt or seat belt
buckle under the child seat, as this could
destabilise it.
Remember to fasten the seat belts or the
child seat harnesses keeping the slack
relative to the child's body to a minimum,
even for short journeys.
When installing a child seat using the seat
belt, ensure that the seat belt is tightened
correctly on the child seat and that it secures
the child seat firmly on the seat of your
vehicle. If your passenger seat is adjustable,
move it for wards if necessary.
At rear seating positions, always leave
sufficient space between the front seat and:
-
a r
ear ward facing child seat,
-
t
he child's feet for a child seat fitted
forward facing.
To do this, move the front seat for wards
and, if necessary, move its backrest into the
upright position.
Advice
As a safety precaution, do not leave:
- a c hild or children alone and
unsupervised in a vehicle,
-
a c
hild or an animal in a vehicle which
is exposed to the sun, with the windows
closed,
-
t
he keys within reach of children inside
the vehicle.
To prevent accidental opening of the doors
and rear windows, use the child lock.
Take care not to open the rear windows by
more than one third.
To protect young children from the rays of
the sun, fit side blinds on the rear windows.
For optimum installation of the forward facing
child seat, ensure that the back of the child
seat is as close as possible to the backrest
of the vehicle's seat, in contact if possible.
You must remove the head restraint before
installing a child seat with backrest to a
passenger seat.
Ensure that the head restraint is stored or
attached securely to prevent it from being
thrown around the vehicle in the event of
sharp braking. Refit the head restraint when
the child seat is removed.Children at the front
The legislation on carrying children on the
front passenger seat is specific to each
country. Refer to the legislation in force in
your country.
Deactivate the passenger's front airbag
when a rear ward facing child seat is installed
on the front passenger seat.
Otherwise, the child risks being seriously
injured or killed if the airbag is deployed.
Installing a booster seat
The chest part of the seat belt must be
positioned on the child's shoulder without
touching the neck.
Ensure that the lap part of the seat belt
passes correctly over the child's thighs.
PEUGEOT recommends the use of a booster
seat which has a back, fitted with a seat belt
guide at shoulder level.
Child safety
Page 171 of 450
169
2008_en_Chap08_securite-enfants_ed01-2016
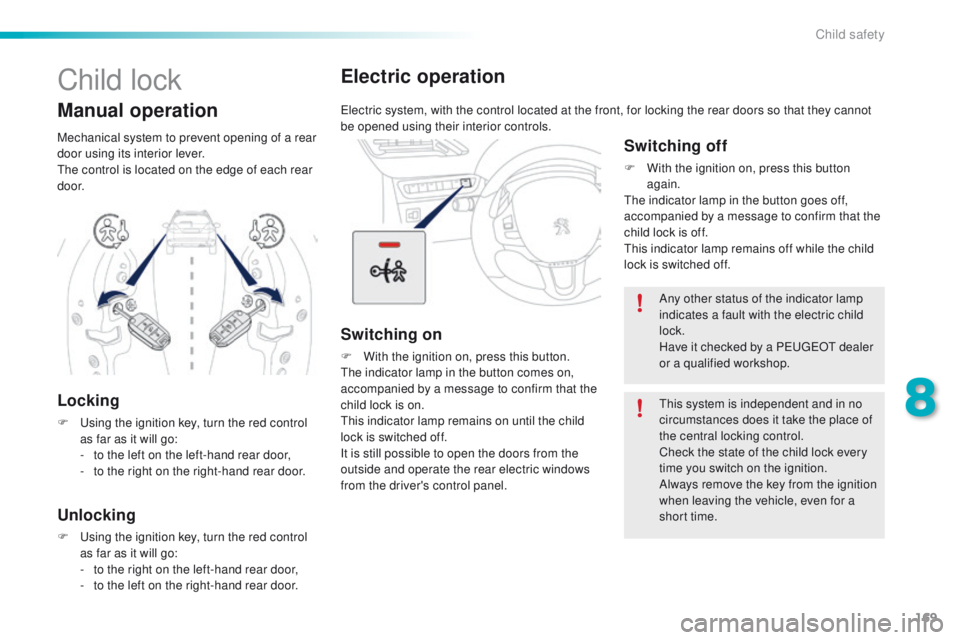
Electric operation
Electric system, with the control located at the front, for locking the rear doors so that they cannot
be opened using their interior controls.
Switching on
F With the ignition on, press this button.
The indicator lamp in the button comes on,
accompanied by a message to confirm that the
child lock is on.
This indicator lamp remains on until the child
lock is switched off.
It is still possible to open the doors from the
outside and operate the rear electric windows
from the driver's control panel.
Switching off
F With the ignition on, press this button again.
The indicator lamp in the button goes off,
accompanied by a message to confirm that the
child lock is off.
This indicator lamp remains off while the child
lock is switched off.
Any other status of the indicator lamp
indicates a fault with the electric child
lock.
Have it checked by a PEUGEOT dealer
or a qualified workshop.
This system is independent and in no
circumstances does it take the place of
the central locking control.
Check the state of the child lock every
time you switch on the ignition.
Always remove the key from the ignition
when leaving the vehicle, even for a
short time.
Child lock
Locking
F Using the ignition key, turn the red control as far as it will go:
-
t
o the left on the left-hand rear door,
-
t
o the right on the right-hand rear door.
Unlocking
F Using the ignition key, turn the red control as far as it will go:
-
t
o the right on the left-hand rear door,
-
t
o the left on the right-hand rear door.
Mechanical system to prevent opening of a rear
door using its interior lever.
The control is located on the edge of each rear
d o o r.
Manual operation
8
Child safety
Page 214 of 450
212
2008_en_Chap09_info-pratiques_ed01-2016
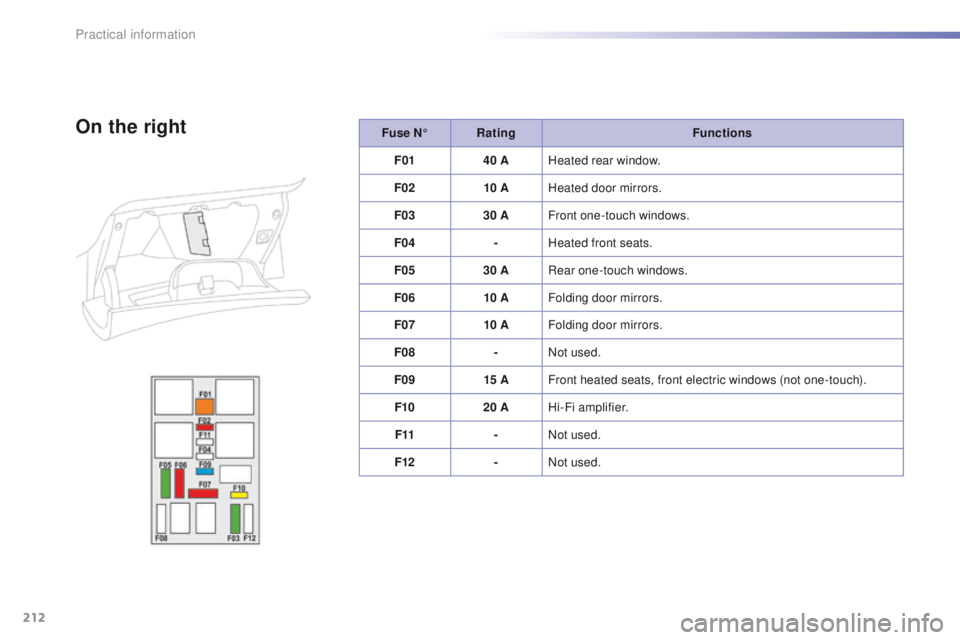
Fuse N°Rating Functions
F01 40 AHeated rear window.
F02 10 AHeated door mirrors.
F03 30 AFront one-touch windows.
F04 -Heated front seats.
F05 30 ARear one-touch windows.
F06 10 AFolding door mirrors.
F07 10 AFolding door mirrors.
F08 -Not used.
F09 15 AFront heated seats, front electric windows (not one-touch).
F10 20 AHi-Fi amplifier.
F11 -Not used.
F12 -Not used.On the right
Practical information