change language PEUGEOT 208 2021 Owners Manual
[x] Cancel search | Manufacturer: PEUGEOT, Model Year: 2021, Model line: 208, Model: PEUGEOT 208 2021Pages: 276, PDF Size: 8.02 MB
Page 13 of 276
11
Instruments
1• Information related to the gearbox and gear
shift indicator (Petrol or Diesel).
•
Information related to the drive selector
(Electric).
•
Fuel gauge (Petrol or Diesel).
•
Range (Petrol or Diesel).
•
Coolant temperature indicator (Petrol or
Diesel).
•
Charge level and range indicator (Electric).
•
Power indicator (Electric).
•
Driving mode.
–
in variable locations:
•
Digital speedometer
.
•
T
otal distance recorder.
•
Status or alert messages displayed
temporarily
.
Optional information
Depending on the selected display mode and
active features, additional information may be
displayed:
–
Rev counter (Petrol or Diesel).
–
T
rip computer.
–
Driving aid functions.
–
Speed limiter or cruise control.
–
Media currently playing.
–
Navigation instructions.
–
Analogue speedometer
.
–
Engine information (G-meters, Power-meters,
Boost,
Torque) in Sport mode.
–
Energy flows (Electric).
Customising the instrument
panel
Depending on version, the appearance of the
instrument panel may be customisable (colour
and/or display mode).
Display language and units
These depend on the touch screen
settings.
When travelling abroad, the speed must be
shown in the official units of the country you
are driving in (mph, miles or km/h, km).
As a safety measure, these adjustments must be carried out with the vehicle
stationary.
Choice of display colour (Petrol or
Diesel)
Depending on version, the instrument panel
display colour depends on the colour scheme
chosen in this system.
The settings are changed via the Settings touch screen menu.
Choosing the display mode
In each mode, specific types of information are
displayed on the instrument panel.
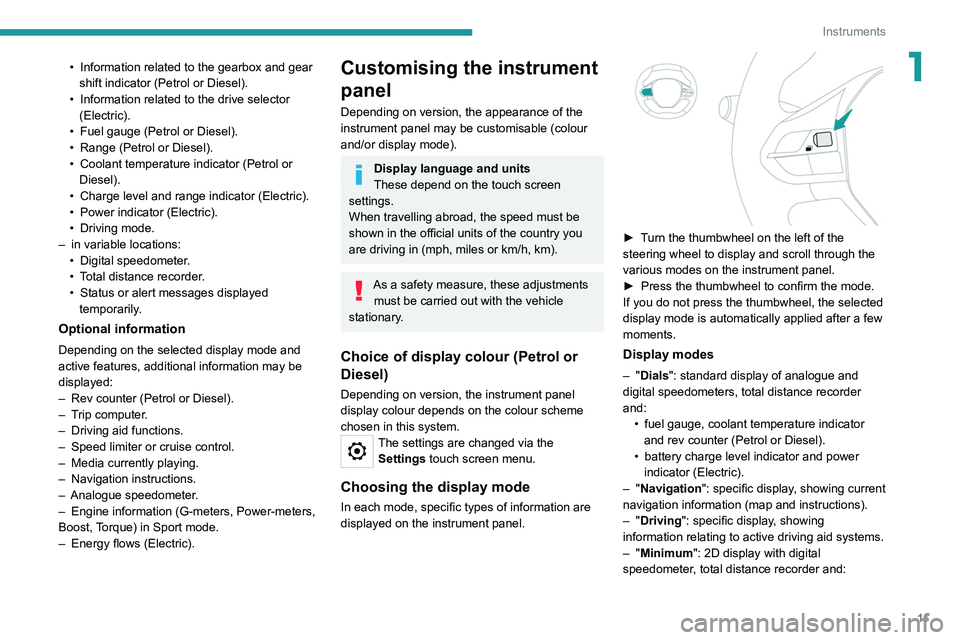
► Turn the thumbwheel on the left of the
steering wheel to display and scroll through the
various modes on the instrument panel.
►
Press the thumbwheel to confirm the mode.
If you do not press the thumbwheel, the selected
display mode is automatically applied after a few
moments.
Display modes
– "Dials": standard display of analogue and
digital speedometers, total distance recorder
and: •
fuel gauge, coolant temperature indicator
and rev counter (Petrol or Diesel).
•
battery charge level indicator and power
indicator (Electric).
–
"Navigation": specific display, showing current
navigation information (map and instructions).
–
"Driving": specific display, showing
information relating to active driving aid systems.
–
"Minimum": 2D display with digital
speedometer, total distance recorder and:
Page 30 of 276
28
Instruments
– Temperature pre-conditioning management.
– Consultation of statistics (where available).
– Consultation of the state of charge and range
of the vehicle.
Installation procedure
► Download the MYPEUGEOT APP app from
the appropriate online store for your smartphone.
► Create an account.
► Enter the vehicle’s VIN (code beginning with
"VF" on the vehicle registration document).
For more information on Identification
markings, refer to the corresponding section.
Network coverage
In order to be able to use the various
remotely operable features, ensure that your
vehicle is located in an area covered by the
mobile network.
A lack of network coverage may prevent
communication with the vehicle (for example,
if it is in an underground car park). In such
cases, the application will display a message
indicating that the connection with the vehicle
could not be established.
Upper banner of the 7" touch screen
– Time and outside temperature (a blue warning
lamp appears if there is a risk of ice).
–
Reminder of the air conditioning information,
and direct access to the corresponding menu.
–
Reminder of the information in the
Radio
Media and Telephone menus.
–
Notifications.
–
Access to the
Settings for the touch screen
and the digital instrument panel (date/time,
languages, units, etc.).
Side banners of the 10" touch screen
– Outside temperature (a blue warning lamp
appears if there is a risk of ice).
–
Access to the
Settings for the touch screen
and the digital instrument panel (date/time,
languages, units, etc.).
–
Notifications.
–
Reminder of the air conditioning information,
and direct access to the corresponding menu.
–
Time.
Energy menu
This menu is only available with PEUGEOT
Connect Nav .
Depending on version, this is accessible either:
– directly, by pressing the button near the
touch screen (with 10" touch screen).
– via the Applications menu.
Flow
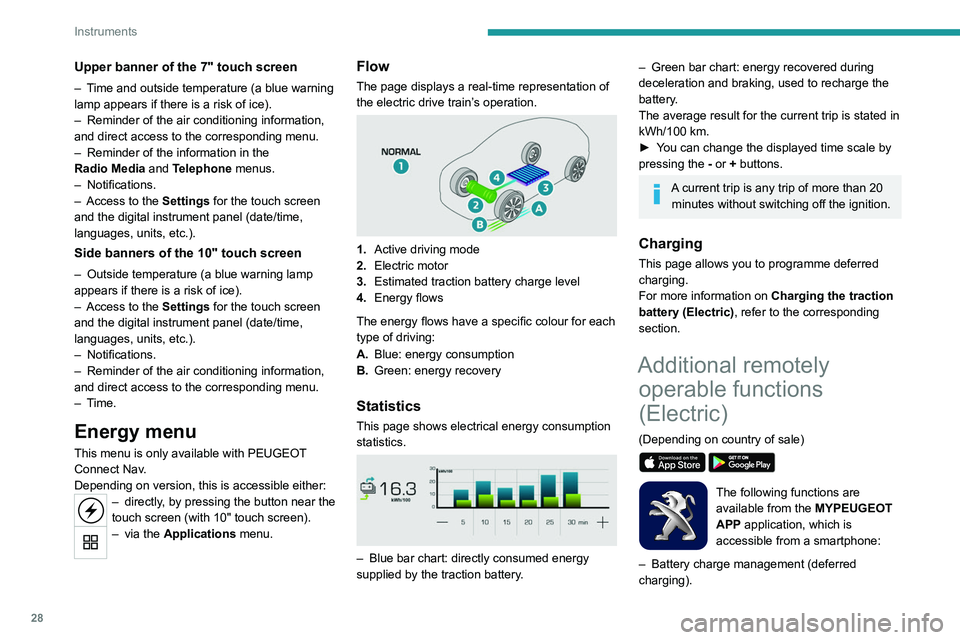
The page displays a real-time representation of
the electric drive train’s operation.
1.Active driving mode
2. Electric motor
3. Estimated traction battery charge level
4. Energy flows
The energy flows have a specific colour for each
type of driving:
A. Blue: energy consumption
B. Green: energy recovery
Statistics
This page shows electrical energy consumption
statistics.
– Blue bar chart: directly consumed energy
supplied by the traction battery .
– Green bar chart: energy recovered during
deceleration and braking, used to recharge the
battery
.
The average result for the current trip is stated in
kWh/100
km.
►
Y
ou can change the displayed time scale by
pressing the
-
or + buttons.
A current trip is any trip of more than 20 minutes without switching off the ignition.
Charging
This page allows you to programme deferred
charging.
For more information on Charging the traction
battery (Electric) , refer to the corresponding
section.
Additional remotely operable functions
(Electric)
(Depending on country of sale)
The following functions are
available from the MYPEUGEOT
APP application, which is
accessible from a smartphone:
–
Battery charge management (deferred
charging).
Page 196 of 276
194
Touch screen BLUETOOTH audio system
Some radio stations send other information
in place of their name (the title of the song for
example).
The system interprets these details as the station
name.
► Press the "Radio Settings " button then
select "Update list". The radio reception is
cut off while searching for available stations
(approximately 30 seconds).
Media
Playback of my USB memory stick starts only
after a very long wait (around 2 to 3 minutes).
Some files supplied with the memory stick may
greatly slow down access to reading the memory
stick (multiplication by 10 of the cataloguing
time).
► Delete the files supplied with the memory
stick and limit the number of sub-folders in the
file structure on the memory stick.
Some characters in information about the
currently playing media are not displayed
correctly.
The audio system is unable to process certain
types of character.
► Use standard characters to name tracks and
folders.
Playback of streaming files does not start.
The connected device does not automatically
launch playback.
► Start playback from the device.
Track names and playing times are not
displayed on the audio streaming screen.
Settings
Adjusting the brightness
Press "Settings".
Select "Display".
Press the buttons to adjust the
brightness of the screen and/or of
the instrument panel (depending on version).
Modifying system settings
Press "Settings".
Press "System ".
Press "Privacy" to access the privacy
settings.
Select "Units" to change the units of
distance, fuel consumption and
temperature.
Press "Factory settings" to return to the
initial settings.
Press "System Info" to check the system
version.
Privacy settings
Three data privacy options are available:"No data sharing (data, vehicle
position) "
"Only data sharing"
“Data and vehicle position sharing "
When data and vehicle position sharing
are enabled, this symbol is displayed in
the upper bar of the touch screen.
Selecting the language
Press "Settings".
Select "Languages" to change the
language.
Set date and time
Press "Settings".
Press "Date/Time".
Setting the date:
Press the arrows to set the day, month
and year.
Setting the time:
Press these buttons to set hours and
minutes.
Select or deselect the 24h format.
In 12h format, choose "AM" or "PM".
The system does not automatically manage the change between winter and
summer time.
Date format:
Select the display format of the date.
Frequently asked
questions
The following information groups together the answers to the most frequently asked questions
concerning the system.
Radio
The reception quality of the tuned radio
station gradually deteriorates or the station
presets are not working (no sound, 87.5 MHz
is displayed, etc.).
The vehicle is too far from the selected station’s
transmitter, or no transmitter is present in the
geographical area.
►
Activate the "RDS" function in the upper bar
to enable the system to check whether there is
a more powerful transmitter in the geographical
area.
The environment (hills, buildings, tunnels,
basement car parks, etc.) is blocking reception,
including in RDS mode.
This is a perfectly normal phenomenon, and is
not indicative of an audio system malfunction.
The aerial is missing or has been damaged
(for example while entering a car wash or
underground car park).
►
Have the aerial checked by a dealer
.
I cannot find some radio stations in the list of
received stations.
The name of the radio station changes.
The station is no longer received or its name has
changed in the list.
Page 208 of 276
206
PEUGEOT Connect Radio
Settings
Configuring profiles
Press Settings to display the main page.
Press "Profiles".
Select "Profile 1", "Profile 2", "Profile 3” or
"Common profile ".
Press this button to enter a name for the
profile using the virtual keypad.
Press "OK" to save.
Press the back arrow to confirm.
Press this button to activate the profile.
Press the back arrow again to confirm.
Press this button to reset the selected
profile.
Adjusting the brightness
Press Settings to display the main page.
Press Brightness.
Move the slider to adjust the brightness of
the screen and/or the instrument panel
(depending on version).
Press in the shaded area to confirm.
Modifying system settings
Press Settings to display the main page.
Press "Configuration" to access the
secondary page.
Press "System configuration".
Press the "Units" tab to change the units of
distance, fuel consumption and temperature.
Press the "Factory settings" tab to restore the
initial settings.
Returning the system to factory settings
activates the English language by default
(depending on version).
Press the "System info" tab to display the
versions of the various modules installed in the
system.
Press the "Privacy " tab,
or
Press Settings to display the main page.
Press "Privacy" to activate or deactivate
the private data mode.
Activate or deactivate:
–
"No sharing (data, vehicle position) ".
–
"Only data sharing ”
–
"Data and vehicle position sharing "
Press the back arrow to confirm.
Press Settings to display the main page.
Press "Configuration" to access the
secondary page.
Press "Screen configuration".
Press "Brightness".
Move the slider to adjust the brightness of
the screen and/or the instrument panel
(depending on version).
Press the back arrow to confirm.
Press "Animation".
Activate or deactivate: “Automatic scrolling ”.
Select "Animated transitions".
Press the back arrow to confirm.
Selecting the language
Press Settings to display the main page.
Press "Configuration" to access the
secondary page.
Select "Language" to change the
language.
Press the back arrow to confirm.
Setting the time
Press Settings to display the main page.
Press "Configuration" to access the
secondary page.
Press "Date and time".
Select "Time".
Press this button to set the time using the
virtual keypad.
Press "OK" to save the time.
Press this button to set the time zone.
Select the display format for the time
(12h/24h).
Activate or deactivate summer time (+1 hour).
Activate or deactivate GPS synchronisation (UTC).
Press the back arrow to save the settings.
The system may not automatically manage the change between winter and
summer time (depending on the country of
sale).
Setting the date
Press Settings to display the main page.
Press "Configuration" to access the
secondary page.
Press "Date and time".
Select "Date".
Page 218 of 276
216
PEUGEOT Connect Nav
an address from the "Contact" list or the
address "History".
If you do not confirm the number, the
navigation system will show one end of
the street.
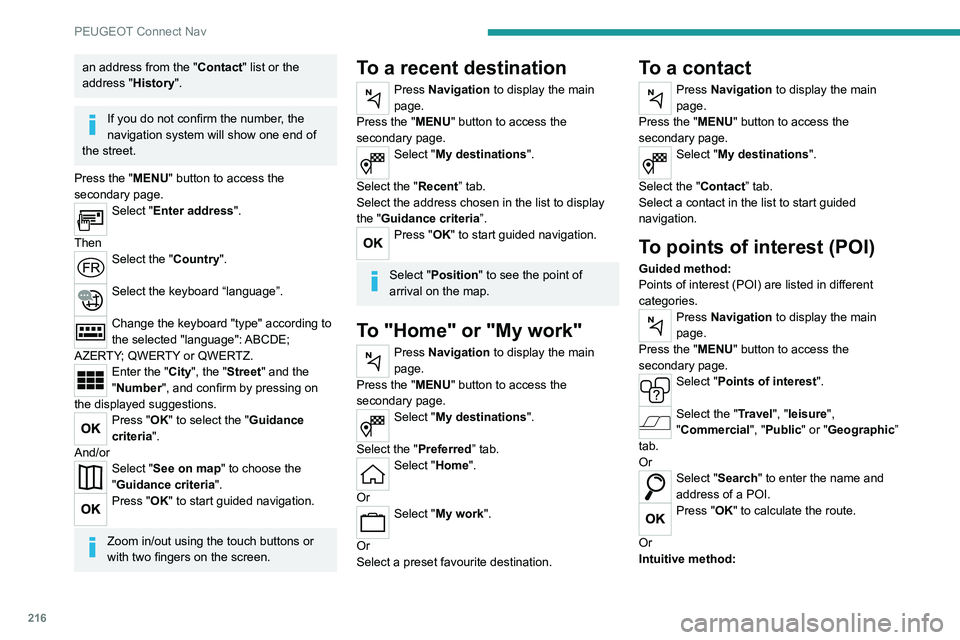
Press the "MENU" button to access the
secondary page.
Select "Enter address".
Then
Select the "Country".
Select the keyboard “language”.
Change the keyboard "type" according to
the selected "language": ABCDE;
AZERTY; QWERTY or QWERTZ.
Enter the "City", the "Street" and the
"Number", and confirm by pressing on
the displayed suggestions.
Press "OK" to select the "Guidance
criteria".
And/or
Select "See on map" to choose the
"Guidance criteria".
Press "OK" to start guided navigation.
Zoom in/out using the touch buttons or
with two fingers on the screen.
To a recent destination
Press Navigation to display the main
page.
Press the "MENU" button to access the
secondary page.
Select "My destinations".
Select the "Recent” tab.
Select the address chosen in the list to display
the "Guidance criteria”.
Press "OK" to start guided navigation.
Select "Position " to see the point of
arrival on the map.
To "Home" or "My work"
Press Navigation to display the main
page.
Press the "MENU" button to access the
secondary page.
Select "My destinations".
Select the "Preferred ” tab.
Select "Home".
Or
Select "My work".
Or
Select a preset favourite destination.
To a contact
Press Navigation to display the main
page.
Press the "MENU" button to access the
secondary page.
Select "My destinations".
Select the "Contact” tab.
Select a contact in the list to start guided
navigation.
To points of interest (POI)
Guided method:
Points of interest (POI) are listed in different
categories.
Press Navigation to display the main
page.
Press the "MENU" button to access the
secondary page.
Select "Points of interest".
Select the "Travel", "leisure",
"Commercial ", "Public" or "Geographic”
tab.
Or
Select "Search" to enter the name and
address of a POI.
Press "OK" to calculate the route.
Or
Intuitive method:
Page 231 of 276
229
PEUGEOT Connect Nav
12The "Position" settings (All passengers,
Driver and Front only) are common to all
sources.
Activate or deactivate "Touch tones ",
"Volume linked to speed " and "Auxiliary
input ".
Onboard audio: Arkamys Sound Staging©
optimises the sound distribution inside
the passenger compartment.
Configuring profiles
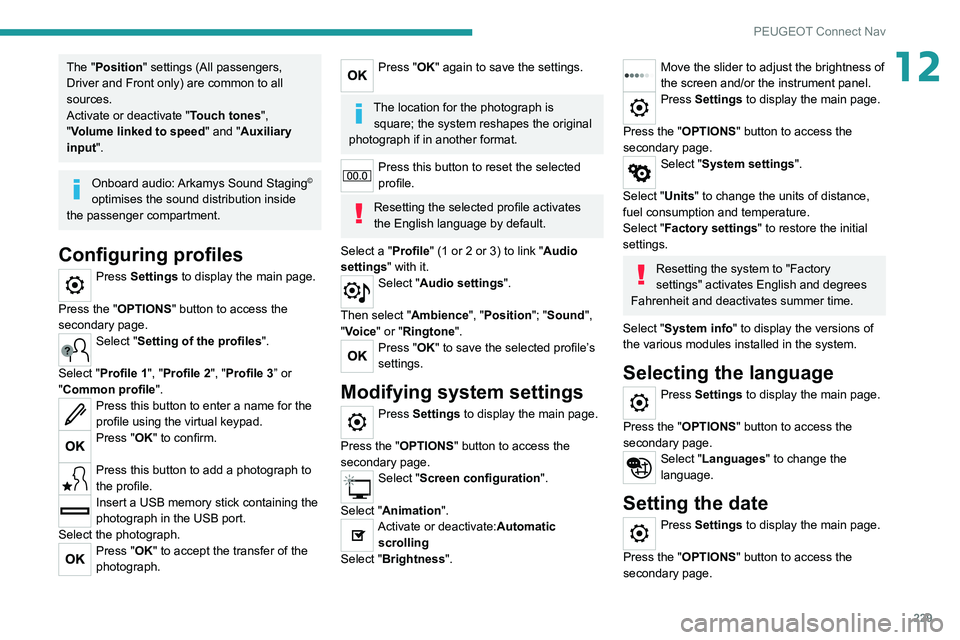
Press Settings to display the main page.
Press the "OPTIONS " button to access the
secondary page.
Select "Setting of the profiles".
Select "Profile 1", "Profile 2", "Profile 3” or
"Common profile ".
Press this button to enter a name for the
profile using the virtual keypad.
Press "OK" to confirm.
Press this button to add a photograph to
the profile.
Insert a USB memory stick containing the
photograph in the USB port.
Select the photograph.
Press "OK" to accept the transfer of the
photograph.
Press "OK" again to save the settings.
The location for the photograph is square; the system reshapes the original
photograph if in another format.
Press this button to reset the selected
profile.
Resetting the selected profile activates
the English language by default.
Select a "Profile" (1 or 2 or 3) to link "Audio
settings" with it.
Select "Audio settings".
Then select "Ambience", "Position"; "Sound ",
"Voice" or "Ringtone ".
Press "OK" to save the selected profile’s
settings.
Modifying system settings
Press Settings to display the main page.
Press the "OPTIONS " button to access the
secondary page.
Select "Screen configuration".
Select "Animation".
Activate or deactivate:Automatic scrolling
Select "Brightness".
Move the slider to adjust the brightness of
the screen and/or the instrument panel.
Press Settings to display the main page.
Press the "OPTIONS " button to access the
secondary page.
Select "System settings".
Select "Units" to change the units of distance,
fuel consumption and temperature.
Select "Factory settings" to restore the initial
settings.
Resetting the system to "Factory
settings" activates English and degrees
Fahrenheit and deactivates summer time.
Select "System info" to display the versions of
the various modules installed in the system.
Selecting the language
Press Settings to display the main page.
Press the "OPTIONS " button to access the
secondary page.
Select "Languages" to change the
language.
Setting the date
Press Settings to display the main page.
Press the "OPTIONS " button to access the
secondary page.