fuel pump PEUGEOT 208 2021 Owners Manual
[x] Cancel search | Manufacturer: PEUGEOT, Model Year: 2021, Model line: 208, Model: PEUGEOT 208 2021Pages: 276, PDF Size: 8.02 MB
Page 8 of 276
6
Overview
air conditioning and heating. Its charge level is
represented by an indicator and a reserve power
warning lamp on the instrument panel.
The 12 V accessory battery 3 powers the
vehicle’s conventional electrical system. It is
recharged automatically by the traction battery
via the on-board charger.
The heat pump
4 provides passenger
compartment heating and regulates traction
battery and on-board charger cooling.
The on-board charger 5 manages the domestic
charging
(mode 2) and accelerated charging
(mode 3) of the traction battery as well as the
recharging of the 12
V accessory battery.
The electric motor
6 provides propulsion in
accordance with the selected driving mode and
driving conditions. It recovers energy during
vehicle braking and deceleration
phases.
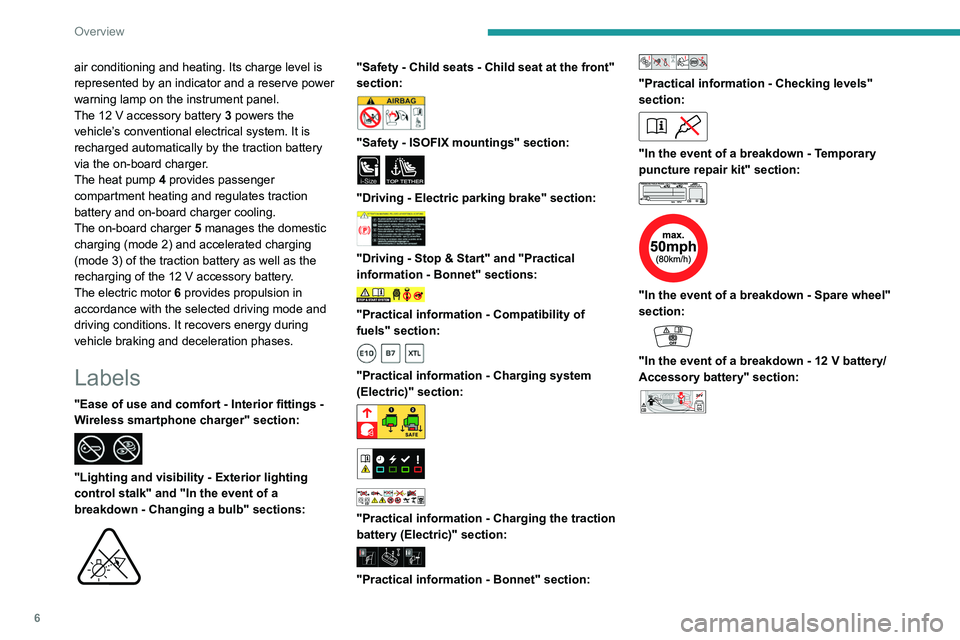
Labels
"Ease of use and comfort - Interior fittings -
Wireless smartphone charger" section:
"Lighting and visibility - Exterior lighting
control stalk" and "In the event of a
breakdown - Changing a bulb" sections:
"Safety - Child seats - Child seat at the front"
section:
"Safety - ISOFIX mountings" section:
i-SizeTOP TETHER
"Driving - Electric parking brake" section:
"Driving - Stop & Start" and "Practical
information - Bonnet" sections:
"Practical information - Compatibility of
fuels" section:
"Practical information - Charging system
(Electric)" section:
"Practical information - Charging the traction
battery (Electric)" section:
"Practical information - Bonnet" section:
"Practical information - Checking levels"
section:
"In the event of a breakdown - Temporary
puncture repair kit" section:
"In the event of a breakdown - Spare wheel"
section:
"In the event of a breakdown - 12 V battery/
Accessory battery" section:
24V12V-+
Page 139 of 276
137
Practical information
7
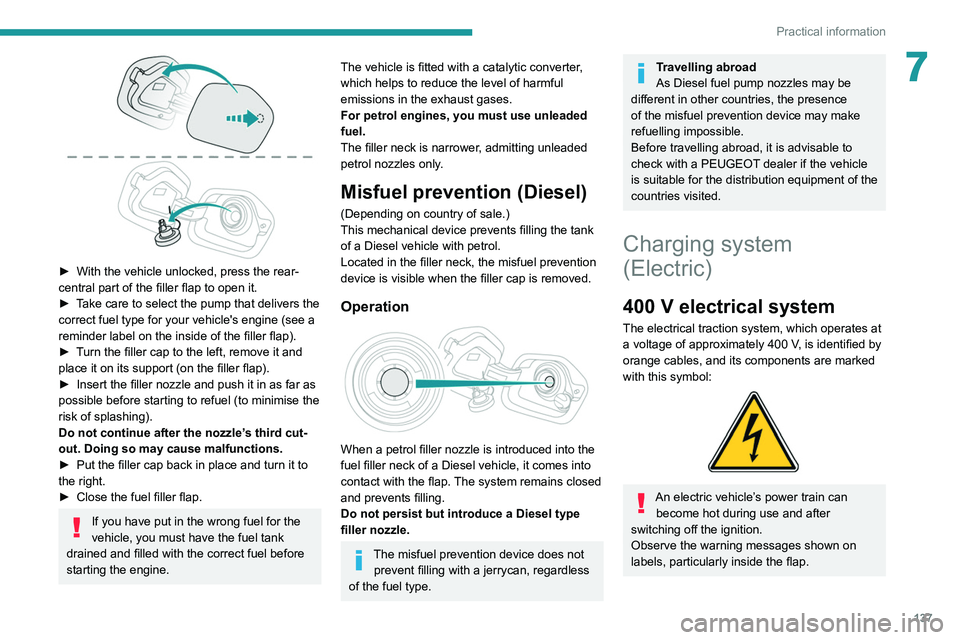
â–ş With the vehicle unlocked, press the rear-
central part of the filler flap to open it.
â–ş
T
ake care to select the pump that delivers the
correct fuel type for your vehicle's engine (see a
reminder label on the inside of the filler flap).
â–ş
T
urn the filler cap to the left, remove it and
place it on its support (on the filler
flap).
â–ş
Insert the filler nozzle and push it in as far as
possible before starting to refuel (to minimise the
risk of splashing).
Do not continue after the nozzle’
s third cut-
out. Doing so may cause malfunctions.
â–ş
Put the filler cap back in place and turn it to
the right.
â–ş
Close the fuel filler flap.
If you have put in the wrong fuel for the
vehicle, you must have the fuel tank
drained and filled with the correct fuel before
starting the engine.
The vehicle is fitted with a catalytic converter,
which helps to reduce the level of harmful
emissions in the exhaust gases.
For petrol engines, you must use unleaded
fuel.
The filler neck is narrower, admitting unleaded
petrol nozzles only.
Misfuel prevention (Diesel)
(Depending on country of sale.)
This mechanical device prevents filling the tank
of a Diesel vehicle with petrol.
Located in the filler neck, the misfuel prevention
device is visible when the filler cap is removed.
Operation
When a petrol filler nozzle is introduced into the
fuel filler neck of a Diesel vehicle, it comes into
contact with the flap. The system remains closed
and prevents filling.
Do not persist but introduce a Diesel type
filler nozzle.
The misfuel prevention device does not prevent filling with a jerrycan, regardless
of the fuel type.
Travelling abroad
As Diesel fuel pump nozzles may be
different in other countries, the presence
of the misfuel prevention device may make
refuelling impossible.
Before travelling abroad, it is advisable to
check with a PEUGEOT dealer if the vehicle
is suitable for the distribution equipment of the
countries visited.
Charging system
(Electric)
400 V electrical system
The electrical traction system, which operates at
a voltage of approximately 400 V, is identified by
orange cables, and its components are marked
with this symbol:
An electric vehicle’s power train can become hot during use and after
switching off the ignition.
Observe the warning messages shown on
labels, particularly inside the flap.
Page 156 of 276
154
Practical information
All work must be carried out only by a
PEUGEOT dealer or a qualified workshop
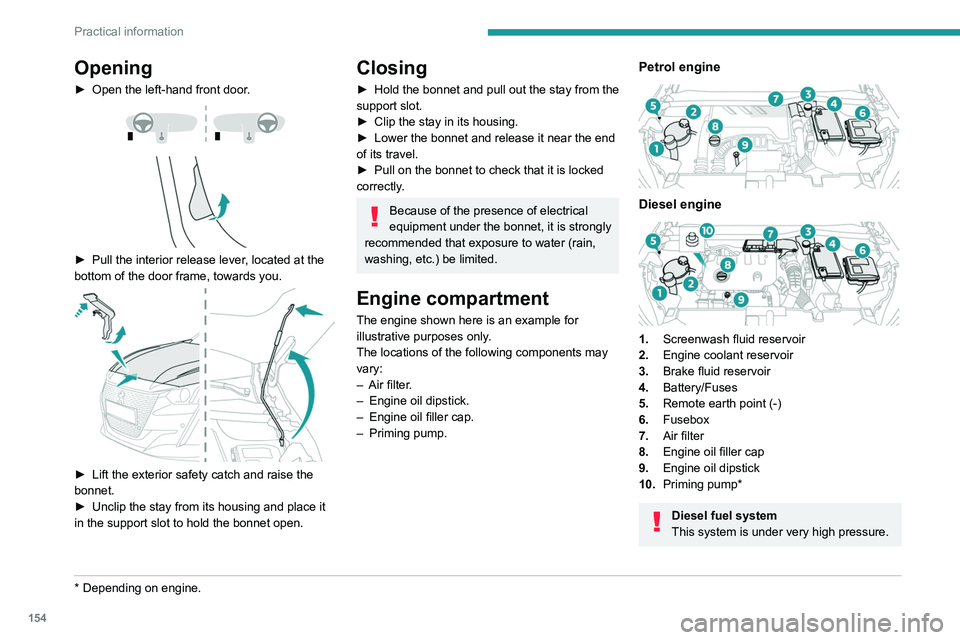
Electric motor
1.Screenwash fluid reservoir
2. Engine coolant reservoir (level only)
3. Brake fluid reservoir
4. Battery/Fuses
5. Remote earth point (-)
6. Fusebox
7. 400 V electrical circuit
8. Emergency circuit-breaker for emergency
services and maintenance technicians
For more information on the Charging system
(Electric), refer to the corresponding section.
Checking levels
Check all of the following levels regularly in
accordance with the manufacturer's service
schedule. Top them up if required, unless
otherwise indicated.
If a level drops significantly, have the
corresponding system checked by a PEUGEOT
dealer or a qualified workshop.
Opening
â–ş Open the left-hand front door .
â–ş Pull the interior release lever , located at the
bottom of the door frame, towards you.
â–ş Lift the exterior safety catch and raise the
bonnet.
â–ş
Unclip the stay from its housing and place it
in the support slot to hold the bonnet open.
* Depending on engine.
Closing
â–ş Hold the bonnet and pull out the stay from the
support slot.
â–ş
Clip the stay in its housing.
â–ş
Lower the bonnet and release it near the end
of its travel.
â–ş
Pull on the bonnet to check that it is locked
correctly
.
Because of the presence of electrical
equipment under the bonnet, it is strongly
recommended that exposure to water (rain,
washing, etc.) be limited.
Engine compartment
The engine shown here is an example for
illustrative purposes only.
The locations of the following components may
vary:
–
Air filter
.
–
Engine oil dipstick.
–
Engine oil filler cap.
–
Priming pump.
Petrol engine
Diesel engine
1. Screenwash fluid reservoir
2. Engine coolant reservoir
3. Brake fluid reservoir
4. Battery/Fuses
5. Remote earth point (-)
6. Fusebox
7. Air filter
8. Engine oil filler cap
9. Engine oil dipstick
10. Priming pump*
Diesel fuel system
This system is under very high pressure.
Page 161 of 276
159
Practical information
7Timing and accessory kits
The timing and accessory kits are used
from the time the engine is started until it
is switched off. It is normal for them to wear over
time.
A
faulty timing or accessory kit can damage
the engine, rendering it unusable. Observe the
recommended replacement frequency, stated in
distance travelled or time elapsed, whichever is
reached first.
AdBlue® (BlueHDi)
To respect the environment and ensure compliance with the Euro 6 standard, without
adversely affecting the performance or fuel
consumption of its Diesel engines, PEUGEOT
has taken the decision to equip its vehicles with
a system that combines SCR (Selective Catalytic
Reduction) with a Diesel Particle Filter (DPF) for
the treatment of exhaust gases.
SCR system
Using a liquid called AdBlue® that contains
urea, a catalytic converter turns up to 85% of
the nitrogen oxides (NOx) into nitrogen and
water, which are harmless to health and the
environment.
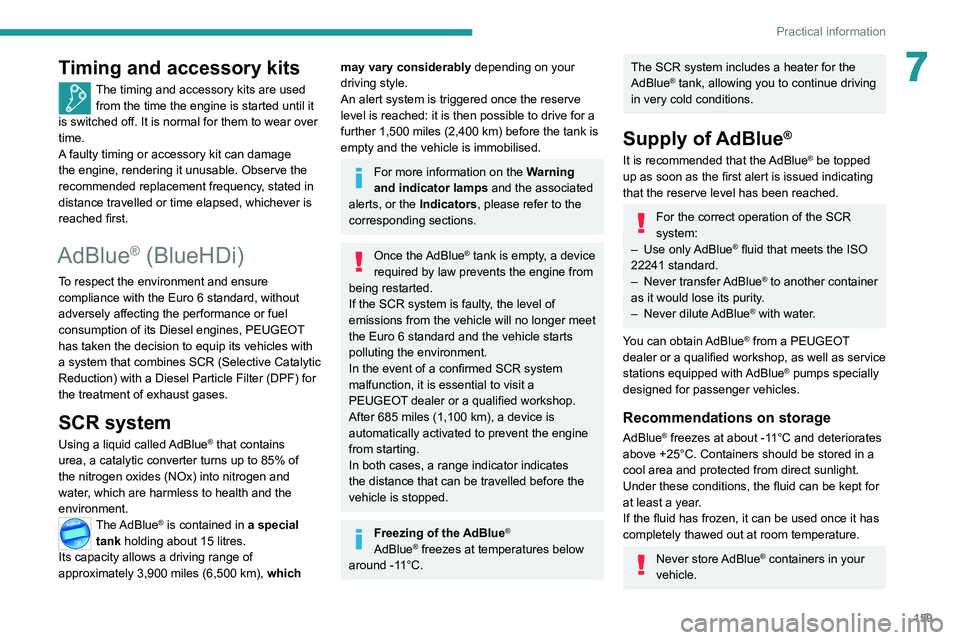
The AdBlue® is contained in a special
tank holding about 15 litres.
Its capacity allows a driving range of
approximately 3,900
miles (6,500 km),
which
may vary considerably depending on your
driving style.
An alert system is triggered once the reserve
level is reached: it is then possible to drive for a
further 1,500 miles (2,400
km) before the tank is
empty and the vehicle is immobilised.
For more information on the Warning
and indicator lamps and the associated
alerts, or the Indicators, please refer to the
corresponding sections.
Once the AdBlue® tank is empty, a device
required by law prevents the engine from
being restarted.
If the SCR system is faulty, the level of
emissions from the vehicle will no longer meet
the Euro 6 standard and the vehicle starts
polluting the environment.
In the event of a confirmed SCR system
malfunction, it is essential to visit a
PEUGEOT dealer or a qualified workshop.
After 685 miles (1,100 km), a device is
automatically activated to prevent the engine
from starting.
In both cases, a range indicator indicates
the distance that can be travelled before the
vehicle is stopped.
Freezing of the AdBlue®
AdBlue® freezes at temperatures below
around -11°C.
The SCR system includes a heater for the
AdBlue® tank, allowing you to continue driving
in very cold conditions.
Supply of AdBlue®
It is recommended that the AdBlue® be topped
up as soon as the first alert is issued indicating
that the reserve level has been reached.
For the correct operation of the SCR
system:
–
Use
only AdBlue
® fluid that meets the ISO
22241 standard.
–
Never
transfer AdBlue
® to another container
as it would lose its purity.
–
Never
dilute AdBlue
® with water.
You can obtain AdBlue
® from a PEUGEOT
dealer or a qualified workshop, as well as service
stations equipped with AdBlue
® pumps specially
designed for passenger vehicles.
Recommendations on storage
AdBlue® freezes at about -11°C and deteriorates
above +25°C. Containers should be stored in a
cool area and protected from direct sunlight.
Under these conditions, the fluid can be kept for
at least a year.
If the fluid has frozen, it can be used once it has
completely thawed out at room temperature.
Never store AdBlue® containers in your
vehicle.
Page 162 of 276
160
Practical information
Free-wheeling
In certain situations, it is necessary to put the
vehicle into free-wheeling mode (e.g. towing, on
a rolling road, automatic car wash (Wash mode),
rail or sea transport).
The procedure varies according to the type of
gearbox and parking brake.
With manual or EAT6
automatic gearbox and
electric parking brake
/
To release them
â–ş With the engine running and while depressing
the brake pedal, move the gear selector to the
neutral position.
â–ş While depressing the brake pedal, switch off
the ignition.
â–ş Release the brake pedal, then switch on the
ignition again.
â–ş While depressing the brake pedal, press the
control to release the parking brake.
â–ş Release the brake pedal, then switch off the
ignition.
Reverting to normal operation
â–ş While depressing the brake pedal, restart the
engine.
Precautions for use
AdBlue® is a urea-based solution. This fluid is
non-flammable, colourless and odourless (when
kept in a cool place).
In the event of contact with the skin, wash the
affected area with soap and running water. In the
event of contact with the eyes, immediately rinse
the eyes with large amounts of water or with an
eye wash solution for at least 15 minutes. Seek
medical attention if you feel a persistent burning
sensation or irritation.
If swallowed, immediately wash out the mouth
with clean water and then drink plenty of water.
In certain conditions (high temperature, for
example), the risk of release of ammonia cannot
be excluded: do not inhale the fluid. Ammonia
vapours have an irritant effect on mucous
membranes (eyes, nose and throat).
Store AdBlue® out of the reach of
children, in its original container.
Procedure
Before starting the top-up procedure, ensure that
the vehicle is parked on a flat and level surface.
In wintry conditions, ensure that the temperature
of the vehicle is above -11°C. Otherwise the
AdBlue
® may be frozen and so cannot be poured
into the tank. Park the vehicle in a warmer area
for a few hours to allow the top-up to be carried
out.
Never pour the AdBlue® into the Diesel
fuel tank.
If any AdBlue® is splashed, or if there are
any spillages on the bodywork, rinse
immediately with cold water or wipe with a
damp cloth.
If the fluid has crystallised, clean it off using a
sponge and hot water.
Important: in the event of a top-up after
a breakdown because of a lack of
AdBlue, it is essential to wait around 5
minutes before switching on the ignition,
without opening the driver’s door,
unlocking the vehicle, inserting the key
into the ignition switch, or bringing the
key for the "Keyless Entry and Starting"
system into the passenger compartment.
Switch on the ignition, then wait for 10
seconds before starting the engine.
â–ş
Switch off the ignition and remove the key
from the switch to switch off the engine.
or
â–ş
With Keyless Entry and Starting, press the
"
START/STOP" button to switch off the engine.
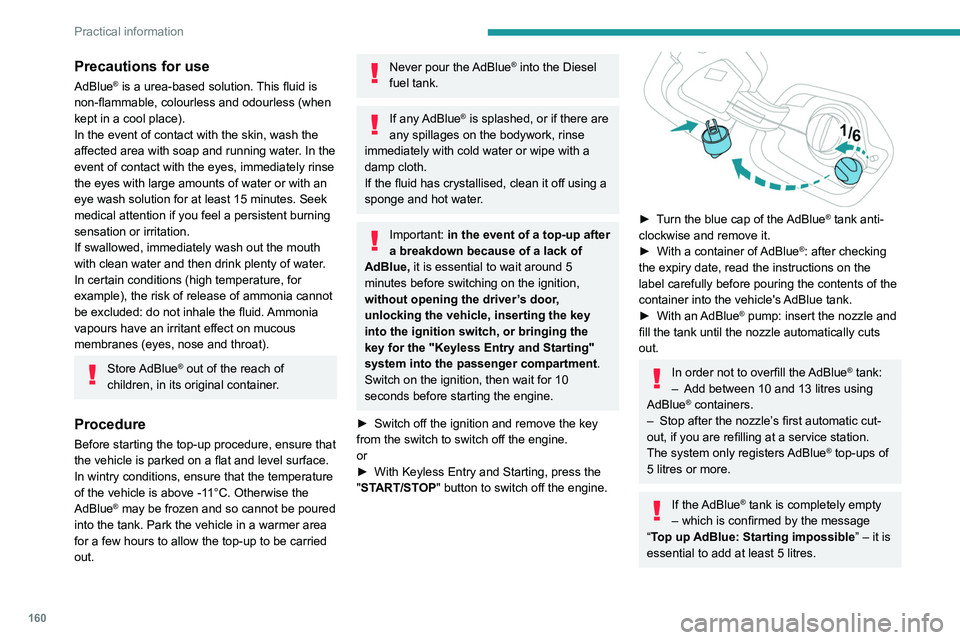
► Turn the blue cap of the AdBlue® tank anti-
clockwise and remove it.
â–ş
With a container of
AdBlue
®: after checking
the expiry date, read the instructions on the
label carefully before pouring the contents of the
container into the vehicle's AdBlue tank.
â–ş
With an
AdBlue® pump: insert the nozzle and
fill the tank until the nozzle automatically cuts
out.
In order not to overfill the AdBlue® tank:
–
Add between 10 and 13 litres using
AdBlue® containers.
–
Stop after the nozzle’ s first automatic cut-
out, if you are refilling at a service station.
The system only registers AdBlue
® top-ups of
5
litres or more.
If the AdBlue® tank is completely empty
– which is confirmed by the message
“Top up
AdBlue: Starting impossible ” – it is
essential to add at least 5 litres.
Page 166 of 276
164
In the event of a breakdown
Warning triangle
This reflective and dismantlable device is to be
installed on the side of the road when a vehicle
is broken down or damaged.
Before getting out of the vehicle
Turn on the hazard warning lamps, then
put on the safety vest to assemble and install
the triangle.
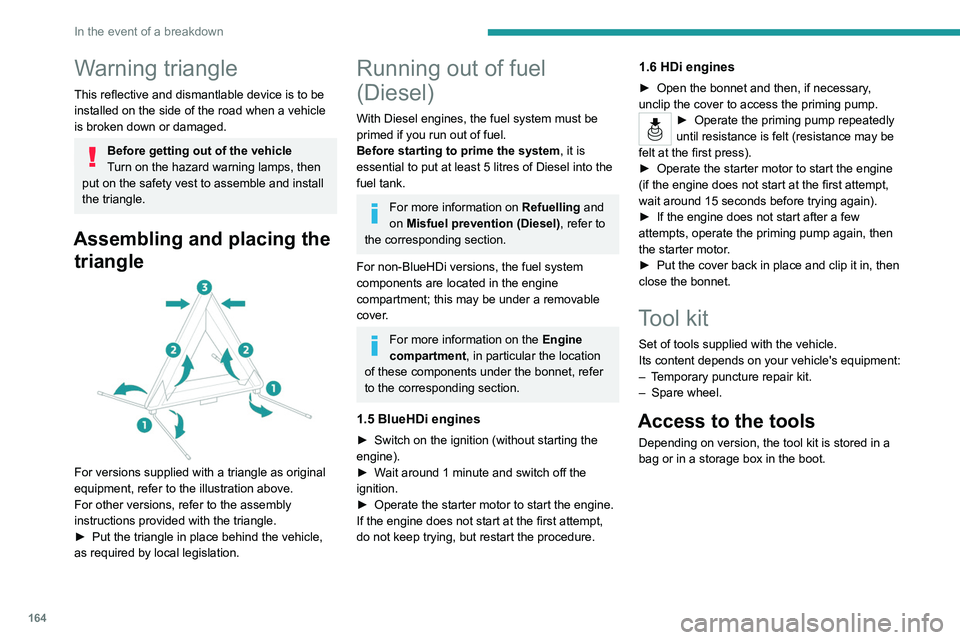
Assembling and placing the triangle
For versions supplied with a triangle as original
equipment, refer to the illustration above.
For other versions, refer to the assembly
instructions provided with the triangle.
â–ş
Put the triangle in place behind the vehicle,
as required by local legislation.
Running out of fuel
(Diesel)
With Diesel engines, the fuel system must be
primed if you run out of fuel.
Before starting to prime the system, it is
essential to put at least 5 litres of Diesel into the
fuel tank.
For more information on Refuelling and
on Misfuel prevention (Diesel), refer to
the corresponding section.
For non-BlueHDi versions, the fuel system
components are located in the engine
compartment; this may be under a removable
cover.
For more information on the Engine
compartment, in particular the location
of these components under the bonnet, refer
to the corresponding section.
1.5 BlueHDi engines
â–ş Switch on the ignition (without starting the
engine).
â–ş
W
ait around 1 minute and switch off the
ignition.
â–ş
Operate the starter motor to start the engine.
If the engine does not start at the first attempt,
do not keep trying, but restart the procedure.
1.6 HDi engines
â–ş Open the bonnet and then, if necessary ,
unclip the cover to access the priming pump.
â–ş Operate the priming pump repeatedly
until resistance is felt (resistance may be
felt at the first press).
â–ş
Operate the starter motor to start the engine
(if the engine does not start at the first attempt,
wait around 15 seconds before trying again).
â–ş
If the engine does not start after a few
attempts, operate the priming pump again, then
the starter motor
.
â–ş
Put the cover back in place and clip it in, then
close the bonnet.
Tool kit
Set of tools supplied with the vehicle.
Its content depends on your vehicle's equipment:
–
T
emporary puncture repair kit.
–
Spare wheel.
Access to the tools
Depending on version, the tool kit is stored in a
bag or in a storage box in the boot.
On the boot carpet
Under the boot carpet
â–ş Raise the boot carpet by pulling the strap to
access the tools.
With temporary puncture repair kit
Page 243 of 276
241
Alphabetical index
Park Assist 131
Parking brake
89, 158
Parking brake, electric
89–91, 158
Parking sensors, audible and visual
127
Parking sensors, front
128
Parking sensors, rear
127
Passenger compartment temperature pre-
conditioning (Electric)
28, 51
Pedestrian horn (Electric)
66, 85
Personalisation
11
Plates, identification
186
Player, Apple®
191, 202, 225
Player, USB
191, 201, 224
Port, USB
52, 191, 201, 203, 220, 224
Power
22
Power indicator (Electric)
8, 22
Pressures, tyres
158, 166, 168, 186
Pre-tensioning seat belts
71
Priming pump
164
Priming the fuel system
164
Profiles
206, 229
Protecting children
72, 74–81
Proximity Keyless Entry & Start
32
Public fast charging station
139, 144
Puncture
166, 168
R
Radar (warnings) 103
Radio
189–191, 199–200, 223
Radio, digital (Digital Audio Broadcasting -
DAB)
190, 201, 224
Range, AdBlue® 20, 157
RDS
190, 200, 223
Reading lamps
53–54
Rear screen, demisting
50
Recharging the battery
176–177
Recharging the traction battery
(Electric)
137, 140, 143, 145–146
Recirculation, air
49
Recovery
178–180
Recovery of the vehicle
178–179
Reduction of electrical load
153
Regeneration of the particle filter
157
Regenerative braking (deceleration
by engine braking)
97–98
Reinitialisation of the under-inflation
detection system
103
Reinitialising the remote control
36
Reminder, key in ignition
87
Reminder, lighting on
57
Remote control
30–34
Remotely operable functions
(Electric)
28, 51, 145
Removing a wheel
169–170
Removing the mat
53
Replacing bulbs
171–173
Replacing fuses
175
Replacing the air filter
157
Replacing the oil filter
157
Replacing the passenger compartment
filter
157
Reservoir, screenwash
156
Reset trip
24
Rev counter
10Reversing camera 104, 129–130
Reversing lamps
174
Roof bars
150
Running out of fuel (Diesel)
164
S
Safety, children 72, 74–81
Saturation of the particle filter (Diesel)
157
Screen menu map
203
Screens, very cold conditions
151
Screenwash
62
Screenwash, front
62
Screenwash, rear
62
SCR (Selective Catalytic Reduction)
21, 159
Seat angle
42
Seat belts
70–71, 76
Seat belts, rear
70
Seat, rear bench
45
Seats, electric
42
Seats, front
41–42
Seats, heated
43
Seats, rear
45–46, 75
Selector, gear
94–97
Sensors (warnings)
104
Serial number, vehicle
186
Service indicator
19, 23
Servicing
19, 157–159
Settings, equipment
27
Settings, system
194, 206, 229
Shield, snow
151
Sidelamps
58, 172, 174