Profile PEUGEOT 3008 2021 Owners Manual
[x] Cancel search | Manufacturer: PEUGEOT, Model Year: 2021, Model line: 3008, Model: PEUGEOT 3008 2021Pages: 292, PDF Size: 9.65 MB
Page 118 of 292
11 6
Driving
► Release the control.
► Depress and hold the brake pedal.
►
Pull the control in the application direction for
2
seconds.
This indicator lamp on the instrument panel comes on to confirm deactivation of
the automatic functions.
►
Release the control and the brake pedal.
From this point onwards, only the manual
functions, using the control, allow the parking
brake to be applied and released.
►
Follow this procedure again to reactivate
automatic operation (confirmed by the indicator
lamp on the instrument panel going out).
Emergency braking
If depressing the brake pedal fails to provide
effective braking or in exceptional circumstances
(e.g.
driver unwell, assisted driving), the vehicle
can be braked by sustained pulling on the
electric parking brake control. Braking continues
for as long as the control is kept pulled, and
ceases when the control is released.
The ABS and DSC systems stabilise the vehicle
during emergency braking.
If emergency braking malfunctions, the message
"Parking brake fault" will be displayed on the
instrument panel.
If the ABS and DSC systems
malfunction, indicated by lighting
one or both warning lamps on the instrument
panel, the vehicle’s stability is no longer ensured.
► In this case, ensure the vehicle's stability by
successive and repeated "pull-release" actions
on the electric parking brake control until the
vehicle comes to a complete stop.
6-speed manual gearbox
Engaging 5th or 6th gear
► Move the gear selector fully to the right to
engage 5th or 6th gear.
Failure to follow this instruction could
cause permanent damage to the gearbox
(inadvertent engagement of 3
rd or 4th gear).
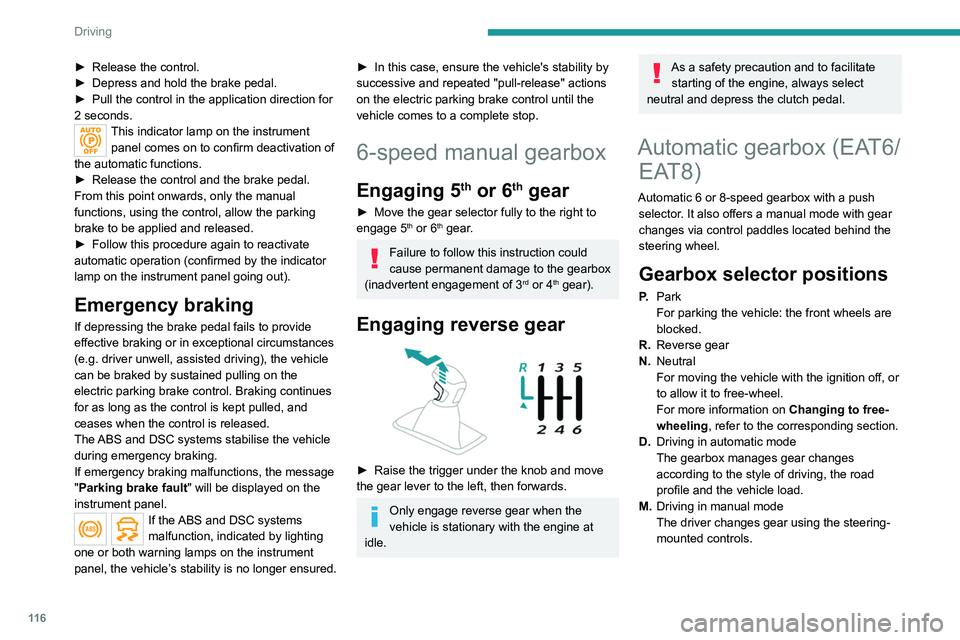
Engaging reverse gear
► Raise the trigger under the knob and move
the gear lever to the left, then forwards.
Only engage reverse gear when the
vehicle is stationary with the engine at
idle.
As a safety precaution and to facilitate starting of the engine, always select
neutral and depress the clutch pedal.
Automatic gearbox (EAT6/ EAT8)
Automatic 6 or 8-speed gearbox with a push
selector. It also offers a manual mode with gear
changes via control paddles located
behind the
steering wheel.
Gearbox selector positions
P. Park
For parking the vehicle: the front wheels are
blocked.
R. Reverse gear
N. Neutral
For moving the vehicle with the ignition off, or
to allow it to free-wheel.
For more information on Changing to free-
wheeling , refer to the corresponding section.
D. Driving in automatic mode
The gearbox manages gear changes
according to the style of driving, the road
profile and the vehicle load.
M. Driving in manual mode
The driver changes gear using the steering-
mounted controls.
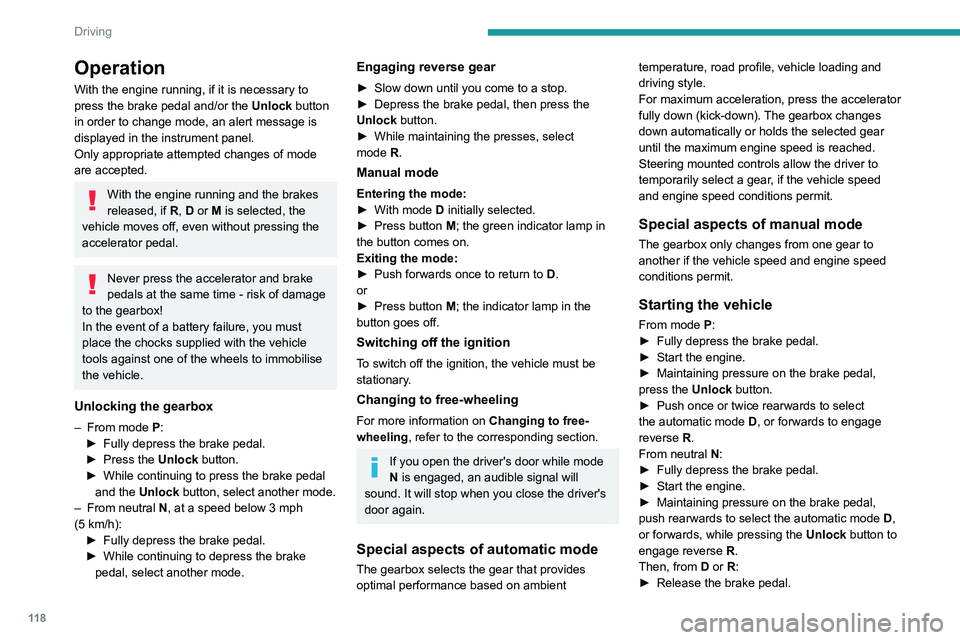
Push selector
A.Button P
To put the gearbox into Park mode.
B. Unlock button To unlock the gearbox and come out of P or
to change to R, with the foot on the brake
pedal.
Press and hold this button before pushing the
selector.
C. Button M
To change from mode D to permanent
manual mode.
D. Gearbox state indicator lamps (R, N, D)
Page 120 of 292
11 8
Driving
Operation
With the engine running, if it is necessary to
press the brake pedal and/or the Unlock button
in order to change mode, an alert message is
displayed in the instrument panel.
Only appropriate attempted changes of mode
are accepted.
With the engine running and the brakes
released, if R, D or M is selected, the
vehicle moves off, even without pressing the
accelerator pedal.
Never press the accelerator and brake
pedals at the same time - risk of damage
to the gearbox!
In the event of a battery failure, you must
place the chocks supplied with the vehicle
tools against one of the wheels to immobilise
the vehicle.
Unlocking the gearbox
– From mode P:
► Fully depress the brake pedal.
►
Press the
Unlock button.
►
While continuing to press the brake pedal
and the
Unlock button, select another mode.
–
From neutral
N, at a speed below 3 mph
(5
km/h):
►
Fully depress the brake pedal.
►
While continuing to depress the brake
pedal, select another mode.
Engaging reverse gear
► Slow down until you come to a stop.
► Depress the brake pedal, then press the
Unlock
button.
►
While maintaining the presses, select
mode
R.
Manual mode
Entering the mode:
► With mode D initially selected.
►
Press button
M; the green indicator lamp in
the button comes on.
Exiting the mode:
►
Push forwards once to return to
D.
or
►
Press button
M; the indicator lamp in the
button goes off.
Switching off the ignition
To switch off the ignition, the vehicle must be
stationary.
Changing to free-wheeling
For more information on Changing to free-
wheeling , refer to the corresponding section.
If you open the driver's door while mode
N is engaged, an audible signal will
sound. It will stop when you close the driver's
door again.
Special aspects of automatic mode
The gearbox selects the gear that provides
optimal performance based on ambient temperature, road profile, vehicle loading and
driving style.
For maximum acceleration, press the accelerator
fully down (kick-down). The gearbox changes
down automatically or holds the selected gear
until the maximum engine speed is reached.
Steering mounted controls allow the driver to
temporarily select a gear, if the vehicle speed
and engine speed conditions permit.
Special aspects of manual mode
The gearbox only changes from one gear to
another if the vehicle speed and engine speed
conditions permit.
Starting the vehicle
From mode P:
►
Fully depress the brake pedal.
►
Start the engine.
►
Maintaining pressure on the brake pedal,
press the
Unlock button.
►
Push once or twice rearwards to select
the automatic mode
D, or forwards to engage
reverse
R.
From neutral
N:
►
Fully depress the brake pedal.
►
Start the engine.
►
Maintaining pressure on the brake pedal,
push rearwards to select the automatic mode
D
,
or forwards, while pressing the Unlock
button to
engage reverse
R
.
Then, from
D or R:
►
Release the brake pedal.
► Accelerate gradually to automatically release
the electric parking brake.
The vehicle moves off immediately.
Automatic gearbox
Never try to start the engine by pushing
the vehicle.
Switching the vehicle off
Regardless of the current gearbox mode, mode
P is immediately engaged automatically when
the ignition is switched off.
However, in mode N, mode P will be engaged
after a delay of 5 seconds (time to enable free-
wheeling mode).
Check that mode P has been engaged and
that the electric parking brake was applied
automatically; if not, apply it manually.
The corresponding indicator lamps on the gear selector and the electric parking
brake control must be on, as well as the
indicator lamps on the instrument panel.
Gearbox malfunction
This warning lamp comes on, accompanied by an audible signal and the
display of a message.
Go to a PEUGEOT dealer or a qualified
workshop.
Do not drive faster than 62 mph (100 km/h),
keeping to the speed limit.
Page 122 of 292
120
Driving
D/B.Automatic forward gear ( D) or automatic
forward gear with regenerative braking
(B)
The gearbox manages gear changes
according to the style of driving, the road
profile and the vehicle load. With the
regenerative braking function activated,
the gearbox also controls braking when
the accelerator pedal is released.
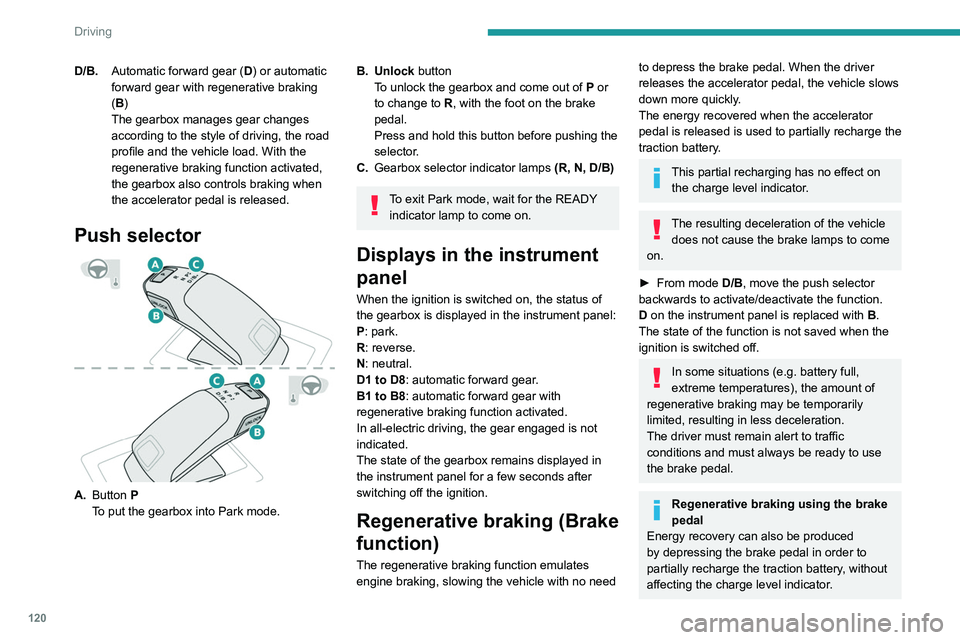
Push selector
A. Button P
To put the gearbox into Park mode.
B. Unlock button To unlock the gearbox and come out of P or
to change to
R, with the foot on the brake
pedal.
Press and hold this button before pushing the
selector.
C. Gearbox selector indicator lamps (R, N, D/B)
To exit Park mode, wait for the READY
indicator lamp to come on.
Displays in the instrument
panel
When the ignition is switched on, the status of
the gearbox is displayed in the instrument panel:
P: park.
R: reverse.
N: neutral.
D1 to D8: automatic forward gear.
B1 to B8: automatic forward gear with
regenerative braking function activated.
In all-electric driving, the gear engaged is not
indicated.
The state of the gearbox remains displayed in
the instrument panel for a few seconds after
switching off the ignition.
Regenerative braking (Brake
function)
The regenerative braking function emulates
engine braking, slowing the vehicle with no need
to depress the brake pedal. When the driver
releases the accelerator pedal, the vehicle slows
down more quickly.
The energy recovered when the accelerator
pedal is released is used to partially recharge the
traction battery.
This partial recharging has no effect on the charge level indicator.
The resulting deceleration of the vehicle does not cause the brake lamps to come
on.
►
From mode
D/B, move the push selector
backwards to activate/deactivate the function.
D on the instrument panel is replaced with B.
The state of the function is not saved when the
ignition is switched off.
In some situations (e.g. battery full,
extreme temperatures), the amount of
regenerative braking may be temporarily
limited, resulting in less deceleration.
The driver must remain alert to traffic
conditions and must always be ready to use
the brake pedal.
Regenerative braking using the brake
pedal
Energy recovery can also be produced
by depressing the brake pedal in order to
partially recharge the traction battery, without
affecting the charge level indicator.
Hill start assist
This system keeps the vehicle briefly stationary
(for approximately 2 seconds) when making a hill
start, while you transfer your foot from the brake
pedal to the accelerator pedal.
The system is only active when:
– The vehicle is completely stationary, with your
foot on the brake pedal.
– Certain slope conditions are met.
– The driver’s door is closed.
Do not leave the vehicle while it is being
held temporarily by hill start assist.
If someone needs to get out of the vehicle
with the engine running, apply the parking
brake manually. Then check that the parking
brake indicator lamp and the P indicator lamp
in the electric parking brake control are on
fixed.
The hill start assist function cannot be deactivated. However, using the parking
brake to immobilise the vehicle interrupts its
operation.
Page 178 of 292
176
Practical information
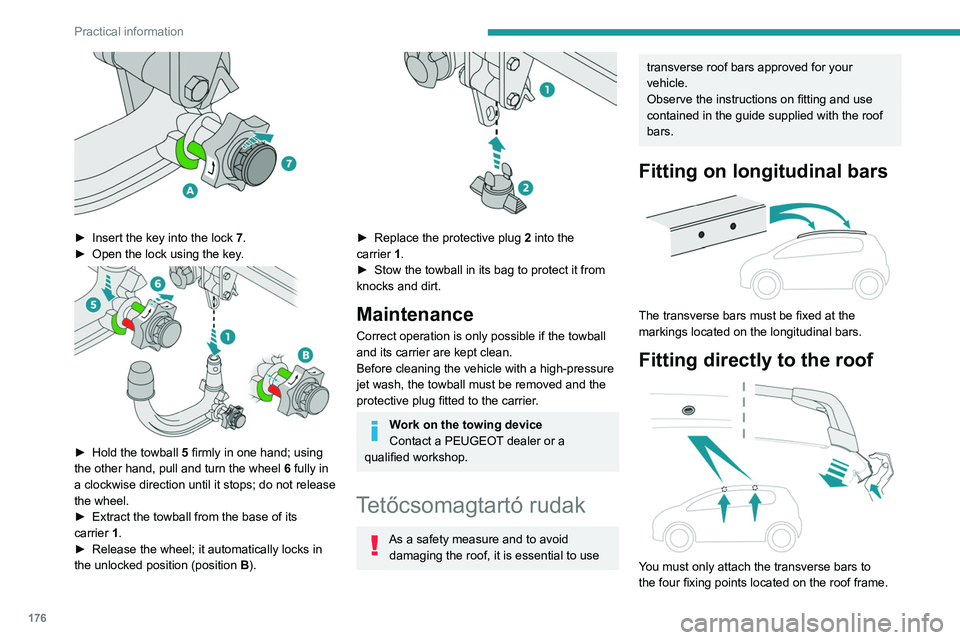
► Insert the key into the lock 7.
► Open the lock using the key .
► Hold the towball 5 firmly in one hand; using
the other hand, pull and turn the wheel 6 fully in
a clockwise direction until it stops; do not release
the wheel.
►
Extract the towball from the base of its
carrier
1.
►
Release the wheel; it automatically locks in
the unlocked position (position B
).
► Replace the protective plug 2 into the
carrier 1.
►
Stow the towball in its bag to protect it from
knocks and dirt.
Maintenance
Correct operation is only possible if the towball
and its carrier are kept clean.
Before cleaning the vehicle with a high-pressure
jet wash, the towball must be removed and the
protective plug fitted to the carrier.
Work on the towing device
Contact a PEUGEOT dealer or a
qualified workshop.
Tetőcsomagtartó rudak
As a safety measure and to avoid damaging the roof, it is essential to use
transverse roof bars approved for your
vehicle.
Observe the instructions on fitting and use
contained in the guide supplied with the roof
bars.
Fitting on longitudinal bars
The transverse bars must be fixed at the
markings located on the longitudinal bars.
Fitting directly to the roof
You must only attach the transverse bars to
the four fixing points located on the roof frame.
These points are concealed by the vehicle doors
when the doors are closed.
The roof bar fixings have a stud which must be
inserted into the opening of each fixing point.
Maximum load distributed over the
transverse roof bars, for a loading height
not exceeding 40 cm (except bicycle carrier):
80 kg.
As this value may change, please verify the
maximum load quoted in the guide supplied
with the roof bars.
If the height exceeds 40 cm, adapt the speed
of the vehicle to the profile of the road to
avoid damaging the roof bars and the fixings
on the vehicle.
Be sure to refer to national legislation in order
to comply with the regulations for transporting
objects that are longer than the vehicle.
Recommendations
Distribute the load uniformly, taking care
to avoid overloading one of the sides.
Arrange the heaviest part of the load as close
as possible to the roof.
Secure the load firmly.
Drive gently: the vehicle will be more
susceptible to the effects of side winds and its
stability may be affected.
Regularly check the security and tight
fastening of the roof bars, at least before each
trip.
Page 179 of 292
177
Practical information
7These points are concealed by the vehicle doors
when the doors are closed.
The roof bar fixings have a stud which must be
inserted into the opening of each fixing point.
Maximum load distributed over the
transverse roof bars, for a loading height
not exceeding 40 cm (except bicycle carrier):
80
kg.
As this value may change, please verify the
maximum load quoted in the guide supplied
with the roof bars.
If the height exceeds 40 cm, adapt the speed
of the vehicle to the profile of the road to
avoid damaging the roof bars and the fixings
on the vehicle.
Be sure to refer to national legislation in order
to comply with the regulations for transporting
objects that are longer than the vehicle.
Recommendations
Distribute the load uniformly, taking care
to avoid overloading one of the sides.
Arrange the heaviest part of the load as close
as possible to the roof.
Secure the load firmly.
Drive gently: the vehicle will be more
susceptible to the effects of side winds and its
stability may be affected.
Regularly check the security and tight
fastening of the roof bars, at least before each
trip.
Remove the roof bars once they are no longer
needed.
Sunroof
Check that the load does not pass below
the roof bars so that it does not impede the
movements of the sunroof - risk of major
damage!
Snow chains
In wintry conditions, snow chains improve
traction as well as the behaviour of the vehicle
when braking.
Snow chains must be fitted only to the
front wheels. They must never be fitted to
"space-saver" type spare wheels.
Observe the legislation in force in your
country relating to the use of snow
chains and maximum authorised speeds.
Use only chains designed to be fitted to the type
of wheel fitted to the vehicle:
Original tyre size Maximum link size 215/65 R17 9 mm
225/55 R18 9 mm
205/55 R19 9 mm
Original tyre size Maximum link size
235/50 R19 Not suitable for
chains
For more information on snow chains, contact a
PEUGEOT dealer or a qualified workshop.
Installation tips
► To fit the snow chains during a journey, stop
the vehicle on a flat surface at the side of the
road.
►
Apply the parking brake and position any
wheel chocks under the wheels to prevent
movement of the vehicle.
►
Fit the snow chains following the instructions
provided by the manufacturer
.
►
Move off gently and drive for a few moments,
without exceeding 31
mph (50 km/h).
►
Stop the vehicle and check that the snow
chains are correctly tightened.
It is strongly recommended that you
practise fitting the snow chains on a level
and dry surface before setting off.
Avoid driving with snow chains on roads that have been cleared of snow to avoid
damaging the vehicle's tyres and the road
surface. If the vehicle is fitted with alloy
wheels, check that no part of the chain or its
fixings is in contact with the wheel rim.
Page 226 of 292
224
PEUGEOT Connect Radio
Telephone (long press): reject an incoming call,
end call; when no call is in progress, access
telephone menu.
Radio (rotate): automatic search for the
previous/next station.
Media (rotate): previous/next track, move in a
list.
Short press: confirm a selection; if nothing
selected, access to presets.
Radio: display the list of stations.
Media: display the list of tracks.
Radio (press and hold): update the list of
stations received.
Menus
Applications
Access configurable equipment.
– Access to the touch screen and digital
instrument panel settings.
Audio source selection (depending on
equipment):
–
FM/DAB/AM radio stations (depending on
equipment).
–
T
elephone connected via Bluetooth and
Bluetooth multimedia broadcast (streaming).
–
USB Memory stick.
–
Media player connected via the auxiliary
socket (depending on equipment).
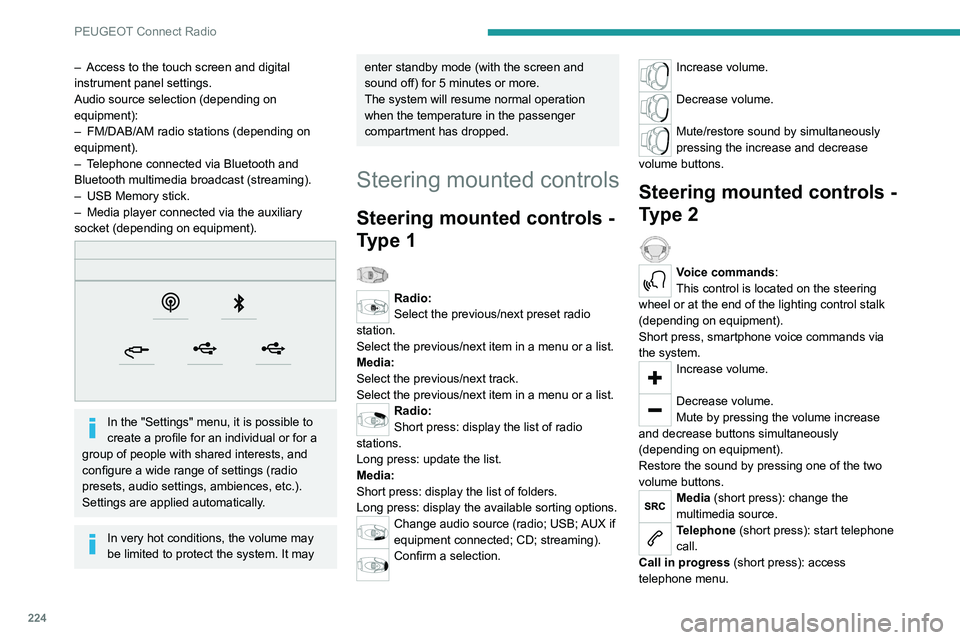
In the "Settings" menu, it is possible to
create a profile for an individual or for a
group of people with shared interests, and
configure a wide range of settings (radio
presets, audio settings, ambiences, etc.).
Settings are applied automatically.
In very hot conditions, the volume may
be limited to protect the system. It may
enter standby mode (with the screen and
sound off) for 5 minutes or more.
The system will resume normal operation
when the temperature in the passenger
compartment has dropped.
Steering mounted controls
Steering mounted controls -
Type 1
Radio:
Select the previous/next preset radio
station.
Select the previous/next item in a menu or a list.
Media:
Select the previous/next track.
Select the previous/next item in a menu or a list.
Radio:
Short press: display the list of radio
stations.
Long press: update the list.
Media:
Short press: display the list of folders.
Long press: display the available sorting options.
Change audio source (radio; USB; AUX if
equipment connected; CD; streaming).
Confirm a selection.
Increase volume.
Decrease volume.
Mute/restore sound by simultaneously
pressing the increase and decrease
volume buttons.
Steering mounted controls -
Type 2
Voice commands:
This control is located on the steering
wheel or at the end of the lighting control stalk
(depending on equipment).
Short press, smartphone voice commands via
the system.
Increase volume.
Decrease volume.
Mute by pressing the volume increase
and decrease buttons simultaneously
(depending on equipment).
Restore the sound by pressing one of the two
volume buttons.
Media (short press): change the
multimedia source.
Telephone (short press): start telephone
call.
Call in progress (short press): access
telephone menu.
Page 227 of 292
225
PEUGEOT Connect Radio
10Telephone (long press): reject an incoming call,
end call; when no call is in progress, access
telephone menu.
Radio (rotate): automatic search for the
previous/next station.
Media (rotate): previous/next track, move in a
list.
Short press: confirm a selection; if nothing
selected, access to presets.
Radio: display the list of stations.
Media: display the list of tracks.
Radio (press and hold): update the list of
stations received.
Menus
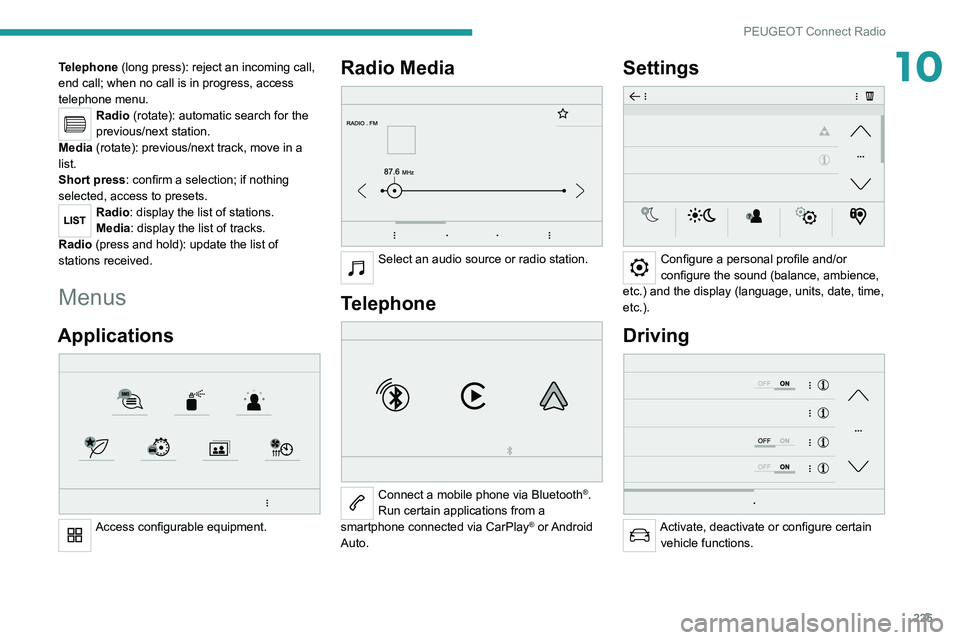
Applications
Access configurable equipment.
Radio Media
Select an audio source or radio station.
Telephone
Connect a mobile phone via Bluetooth®.
Run certain applications from a
smartphone connected via CarPlay
® or Android
Auto.
Settings
Configure a personal profile and/or
configure the sound (balance, ambience,
etc.) and the display (language, units, date, time,
etc.).
Driving
Activate, deactivate or configure certain vehicle functions.
Page 230 of 292
228
PEUGEOT Connect Radio
Playlists are updated whenever the ignition
is switched off or a USB memory stick is
connected. The audio system memorises these
lists, which will subsequently load faster if they
have not been changed.
Auxiliary (AUX) jack socket
Depending on equipmentConnect a portable device (MP3 player,
etc.) to the auxiliary jack socket using an
audio cable (not supplied).
This source is only available if "Auxiliary input"
has been selected in the audio settings.
First adjust the volume on the portable device
(to a high level). Then adjust the volume of the
audio system.
Controls are managed via the portable device.
Selecting the source
Press Radio Media to display the main
page.
Press the "SOURCES" button.
Select the source.
Bluetooth Streaming®
Streaming allows you to listen to the audio feed
from your smartphone.
The Bluetooth profile must be activated.
First adjust the volume on the portable device
(to a high level). Then adjust the volume of the
system.
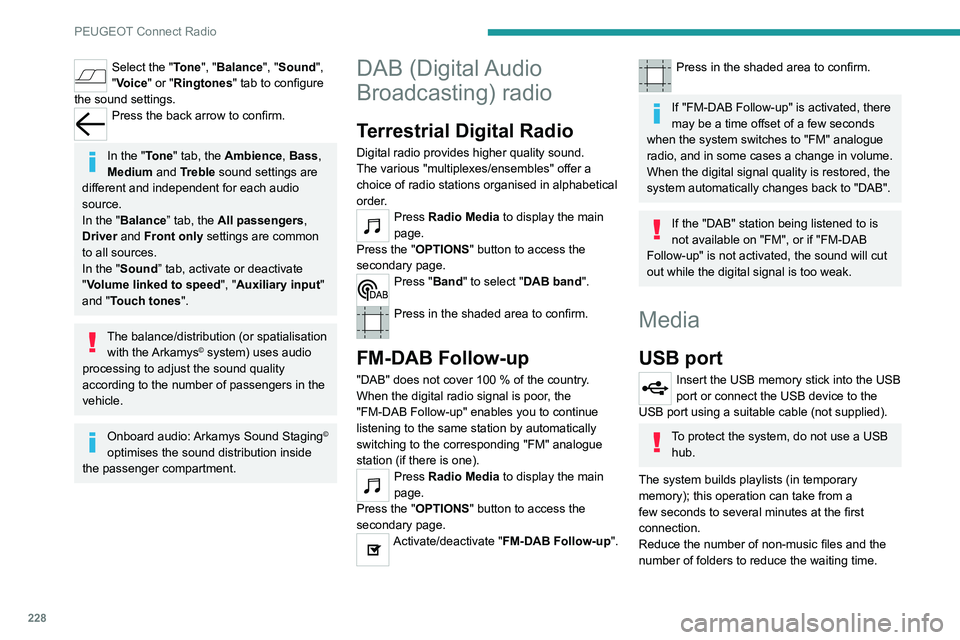
Select the "Tone", "Balance", "Sound ",
"Voice" or "Ringtones" tab to configure
the sound settings.
Press the back arrow to confirm.
In the "Tone" tab, the Ambience, Bass ,
Medium and Treble sound settings are
different and independent for each audio
source.
In the "Balance” tab, the All passengers,
Driver and Front only settings are common
to all sources.
In the "Sound ” tab, activate or deactivate
"Volume linked to speed ", "Auxiliary input"
and "Touch tones ".
The balance/distribution (or spatialisation
with the Arkamys© system) uses audio
processing to adjust the sound quality
according to the number of passengers in the
vehicle.
Onboard audio: Arkamys Sound Staging©
optimises the sound distribution inside
the passenger compartment.
DAB (Digital Audio
Broadcasting) radio
Terrestrial Digital Radio
Digital radio provides higher quality sound.
The various "multiplexes/ensembles" offer a
choice of radio stations organised in alphabetical
order.
Press Radio Media to display the main
page.
Press the "OPTIONS " button to access the
secondary page.
Press "Band" to select "DAB band".
Press in the shaded area to confirm.
FM-DAB Follow-up
"DAB" does not cover 100 % of the country.
When the digital radio signal is poor , the
"FM-DAB Follow-up" enables you to continue
listening to the same station by automatically
switching to the corresponding "FM" analogue
station (if there is one).
Press Radio Media to display the main
page.
Press the "OPTIONS " button to access the
secondary page.
Activate/deactivate "FM-DAB Follow-up ".
Press in the shaded area to confirm.
If "FM-DAB Follow-up" is activated, there
may be a time offset of a few seconds
when the system switches to "FM" analogue
radio, and in some cases a change in volume.
When the digital signal quality is restored, the
system automatically changes back to "DAB".
If the "DAB" station being listened to is
not available on "FM", or if "FM-DAB
Follow-up" is not activated, the sound will cut
out while the digital signal is too weak.
Media
USB port
Insert the USB memory stick into the USB
port or connect the USB device to the
USB port using a suitable cable (not supplied).
To protect the system, do not use a USB hub.
The system builds playlists (in temporary
memory); this operation can take from a
few seconds to several minutes at the first
connection.
Reduce the number of non-music files and the
number of folders to reduce the waiting time.
Page 231 of 292
229
PEUGEOT Connect Radio
10Playlists are updated whenever the ignition
is switched off or a USB memory stick is
connected. The audio system memorises these
lists, which will subsequently load faster if they
have not been changed.
Auxiliary (AUX) jack socket
Depending on equipmentConnect a portable device (MP3 player,
etc.) to the auxiliary jack socket using an
audio cable (not supplied).
This source is only available if "Auxiliary input"
has been selected in the audio settings.
First adjust the volume on the portable device
(to a high level). Then adjust the volume of the
audio system.
Controls are managed via the portable device.
Selecting the source
Press Radio Media to display the main
page.
Press the "SOURCES" button.
Select the source.
Bluetooth Streaming®
Streaming allows you to listen to the audio feed
from your smartphone.
The Bluetooth profile must be activated.
First adjust the volume on the portable device
(to a high level). Then adjust the volume of the
system.
If play does not start automatically, it may be
necessary to start the audio playback from the
smartphone.
Control is from the portable device or by using
the system's touch buttons.
Once connected in Streaming mode, the
smartphone is considered to be a media
source.
Connecting Apple® players
Connect the Apple® player to the USB socket
using a suitable cable (not supplied).
Play starts automatically.
Control is via the audio system.
The classifications available are those of the portable device connected (artists/
albums/genres/playlists/audio books/
podcasts). It is also possible to use a
classification structured in the form of a
library.
The default classification used is by artist. To
modify the classification used, return to the
first level of the menu then select the desired
classification (playlists for example) and
confirm to go down through the menu to the
desired track.
The version of software in the audio system may
not be compatible with the generation of the
Apple
® player.
Information and advice
The system supports USB mass storage
devices, BlackBerry® devices or Apple® players
via the USB ports. The adapter cable is not
supplied.
Devices are managed using the audio system
controls.
Other devices, not recognised on connection,
must be connected to the auxiliary socket using
a jack cable (not supplied) or via Bluetooth
streaming, if compatible.
To protect the system, do not use a USB hub.
The audio system will only play audio files with
".wav", ".wma", ".aac", ".ogg" and ".mp3" file
extensions, at bit rates between 32 Kbps and
320 Kbps.
It also supports VBR (Variable Bit Rate) mode.
No other file types (".mp4", etc.) can be read.
All ".wma" files must be standard WMA 9 files.
The supported sampling rates are 11, 22, 44 and
48 KHz.
To avoid reading and display problems, we
recommend choosing file names less than 20
characters long that do not contain any special
characters (e.g. “ ? .
; ù).
Use only USB memory sticks in FAT32 format
(File Allocation Table).
We recommend using the original USB
cable for the portable device.
Page 233 of 292
231
PEUGEOT Connect Radio
10Press the "PHONE" button to display the
secondary page.
Press "Android Auto" to start the
application in the system.
Access to the different audio sources remains
available in the margin of the Android Auto
display, using the touch buttons located in the
upper bar.
Access to the menus for the system is possible
at any time using the dedicated buttons.
There may be a pause before applications become available,
depending on the quality of the network.
Pairing a Bluetooth®
telephone
The services available depend on the
network, the SIM card and the
compatibility of the Bluetooth devices used.
Consult the telephone user guide and the
service provider to check which services are
available.
The Bluetooth function must be activated and the telephone configured as "Visible
to all” (in the telphone settings).
To complete the pairing, whichever procedure is
used (from the telephone or from the system),
ensure that the code is the same in the system
and in the telephone.
If the pairing procedure fails, we
recommend deactivating and then
reactivating the Bluetooth function on the
telephone.
Procedure from the telephone
Select the name of the system in the list
of detected devices.
In the system, accept the connection request
from the telephone.
Procedure from the system
Press Telephone to display the main
page.
Press "Bluetooth search".
The list of detected telephones is
displayed.
Select the name of the chosen telephone
in the list.
Connection sharing
The system offers to connect the telephone with
3 profiles:
–
"Telephone" (hands-free kit, telephone only),
–
“Streaming" (streaming: wireless playing of
audio files on the telephone),
–
"Mobile internet data ".
Select one or more profiles.
Press "OK" to confirm.
Depending on the type of telephone, you may by
prompted to accept the transfer of contacts and
messages.
The ability of the system to connect just
one profile depends on the telephone.
All three profiles may connect by default.
The profiles compatible with the system are: HFP, OPP, PBAP, A2DP, AVRCP,
MAP and PAN.
Visit the Brand's website for more information
(compatibility, additional help, etc.).
Automatic reconnection
On returning to the vehicle, if the last telephone
connected is present again, it is automatically
recognised and within about 30 seconds
after switching on the ignition, the pairing is
established automatically (Bluetooth activated).
To modify the connection profile:
Press Telephone to display the main
page.
Press the "PHONE" button to access the
secondary page.
Press "Bluetooth connection" to
display the list of paired devices.
Press the "Details" button for a paired
device.
Select one or more profiles.