light PEUGEOT 301 2022 Owners Manual
[x] Cancel search | Manufacturer: PEUGEOT, Model Year: 2022, Model line: 301, Model: PEUGEOT 301 2022Pages: 148, PDF Size: 4.74 MB
Page 4 of 148
2
Contents
■
Overview
■
Eco-driving
1Dashboard instrumentsInstrument panel 7
Warning and indicator lamps 7
Indicators 10
Distance recorders 11
Setting the date and time 12
Trip computer 12
2AccessRemote control / Key 15
Central locking 16
Back-up procedures 17
Doors 18
Boot 18
Alarm 19
Electric windows 20
3Ease of use and comfortFront seats 21
Rear bench seat 22
Steering wheel adjustment 23
Mirrors 23
Heating and Ventilation 24
Air conditioning, manual (without
display screen)
25
Electronic air conditioning (with
display screen)
26
Front demisting - defrosting 27
Demisting/de-icing the rear screen and/or
the door mirrors 28
Interior fittings 28
Courtesy lamps 30
4Lighting and visibilityExterior lighting control stalk 31
Direction indicators 32
Headlamp beam height adjustment 33
Wiper control stalk 33
Changing a wiper blade 34
5SafetyGeneral safety recommendations 35
Hazard warning lamps 35
Horn 36
Electronic stability control (ESC) 36
Seat belts 37
Airbags 39
Child seats 41
Deactivating the front passenger airbag 43
ISOFIX child seats 45
Child lock 48
6DrivingDriving recommendations 49
Starting-switching off the engine 51
Parking brake 52
Hill start assist 52
5-speed manual gearbox 53
6-speed manual gearbox 53
6-speed automatic gearbox 54
Gear shift indicator 56
Stop & Start 56
Tyre under-inflation detection 58
Driving and manoeuvring aids - General
recommendations
60
Speed limiter 61
Cruise control - Specific recommendations 62
Cruise control 63
Rear parking sensors 64
Reversing Camera 65
7Practical informationCompatibility of fuels 67
Refuelling 67
Misfuel prevention (Diesel) 68
Snow chains 68
Energy economy mode 69
Towing device 69
Very cold climate screen 70
Roof bars 70
Bonnet 71
Engine compartment 72
Checking levels 73
Checks 74
Free-wheeling 76
Advice on care and maintenance 76
8In the event of a breakdownWarning triangle 79
Running out of fuel (Diesel) 79
Tool kit 79
Spare wheel 80
Changing a bulb 83
Fuses 87
12 V battery 88
Page 6 of 148
4
Overview
Presentation
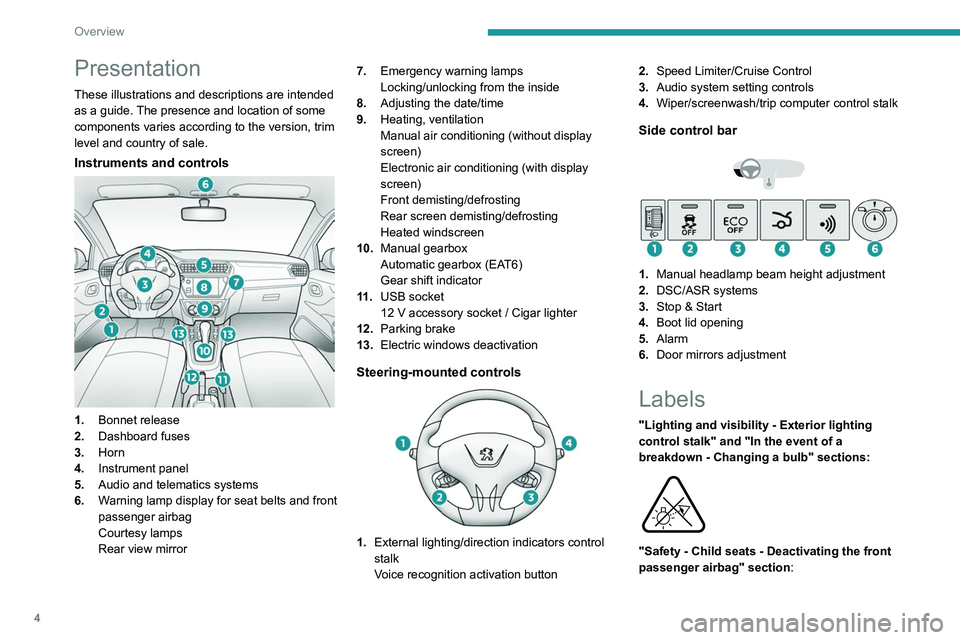
These illustrations and descriptions are intended
as a guide. The presence and location of some
components varies according to the version, trim
level and country of sale.
Instruments and controls
1.Bonnet release
2. Dashboard fuses
3. Horn
4. Instrument panel
5. Audio and telematics systems
6. Warning lamp display for seat belts and front
passenger airbag
Courtesy lamps
Rear view mirror 7.
Emergency warning lamps
Locking/unlocking from the inside
8. Adjusting the date/time
9. Heating, ventilation
Manual air conditioning (without display
screen)
Electronic air conditioning (with display
screen)
Front demisting/defrosting
Rear screen demisting/defrosting
Heated windscreen
10. Manual gearbox
Automatic gearbox (EAT6)
Gear shift indicator
11 . USB socket
12 V accessory socket / Cigar lighter
12. Parking brake
13. Electric windows deactivation
Steering-mounted controls
1.External lighting/direction indicators control
stalk
Voice recognition activation button 2.
Speed Limiter/Cruise Control
3. Audio system setting controls
4. Wiper/screenwash/trip computer control stalk
Side control bar
1.Manual headlamp beam height adjustment
2. DSC/ASR systems
3. Stop & Start
4. Boot lid opening
5. Alarm
6. Door mirrors adjustment
Labels
"Lighting and visibility - Exterior lighting
control stalk" and "In the event of a
breakdown - Changing a bulb" sections:
"Safety - Child seats - Deactivating the front
passenger airbag" section:
Page 9 of 148
7
Dashboard instruments
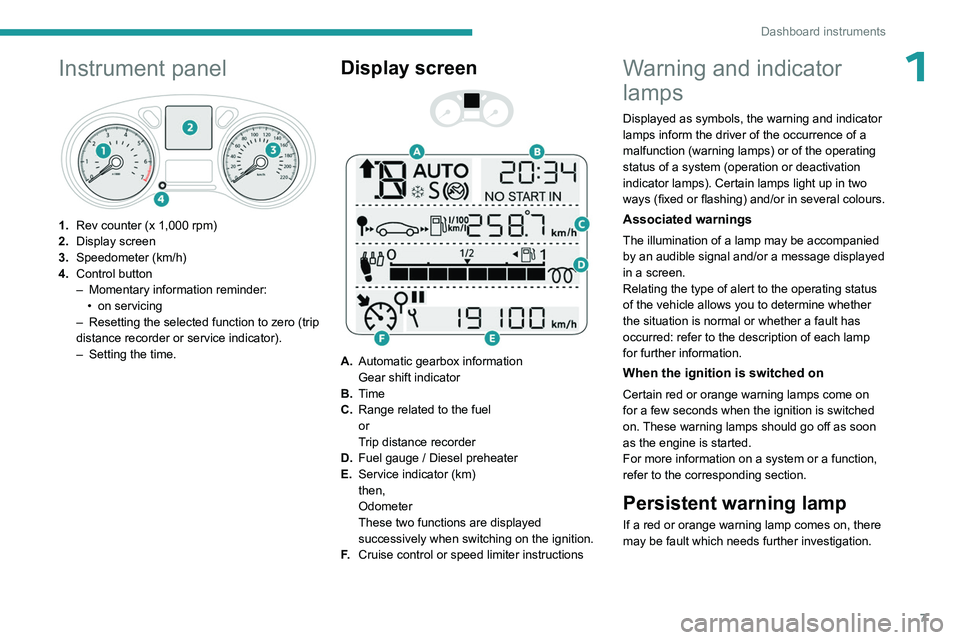
1Instrument panel
1.Rev counter (x 1,000 rpm)
2. Display screen
3. Speedometer (km/h)
4. Control button
–
Momentary information reminder:
•
on servicing
–
Resetting the selected function to zero (trip
distance recorder or service indicator).
–
Setting the time.
Display screen
A. Automatic gearbox information
Gear shift indicator
B. Time
C. Range related to the fuel
or
Trip distance recorder
D. Fuel gauge / Diesel preheater
E. Service indicator (km)
then,
Odometer
These two functions are displayed
successively when switching on the ignition.
F. Cruise control or speed limiter instructions
Warning and indicator
lamps
Displayed as symbols, the warning and indicator
lamps inform the driver of the occurrence of a
malfunction (warning lamps) or of the operating
status of a system (operation or deactivation
indicator lamps). Certain lamps light up in two
ways (fixed or flashing) and/or in several colours.
Associated warnings
The illumination of a lamp may be accompanied
by an audible signal and/or a message displayed
in a screen.
Relating the type of alert to the operating status
of the vehicle allows you to determine whether
the situation is normal or whether a fault has
occurred: refer to the description of each lamp
for further information.
When the ignition is switched on
Certain red or orange warning lamps come on
for a few seconds when the ignition is switched
on. These warning lamps should go off as soon
as the engine is started.
For more information on a system or a function,
refer to the corresponding section.
Persistent warning lamp
If a red or orange warning lamp comes on, there
may be fault which needs further investigation.
Page 17 of 148
15
Access
2Remote control / Key
Remote control function
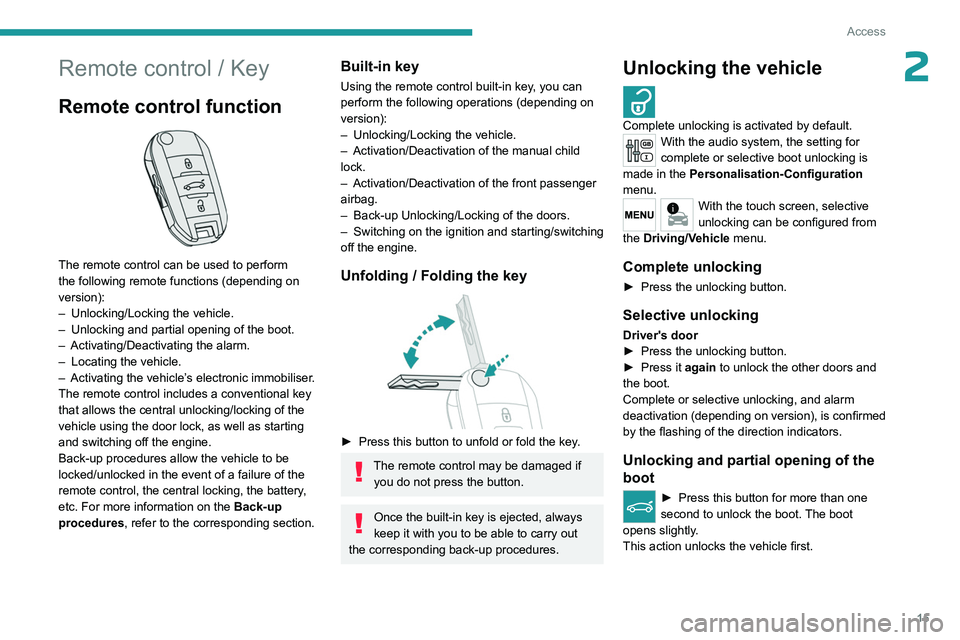
The remote control can be used to perform
the following remote functions (depending on
version):
–
Unlocking/Locking the vehicle.
–
Unlocking and partial opening of the boot.
–
Activating/Deactivating the alarm.
–
Locating the vehicle.
–
Activating the vehicle’
s electronic immobiliser.
The remote control includes a conventional key
that allows the central unlocking/locking of the
vehicle using the door lock, as well as starting
and switching off the engine.
Back-up procedures allow the vehicle to be
locked/unlocked in the event of a failure of the
remote control, the central locking, the battery,
etc. For more information on the Back-up
procedures, refer to the corresponding section.
Built-in key
Using the remote control built-in key, you can
perform the following operations (depending on
version):
–
Unlocking/Locking the vehicle.
–
Activation/Deactivation of the manual child
lock.
–
Activation/Deactivation of the front passenger
airbag.
–
Back-up Unlocking/Locking of the doors.
–
Switching on the ignition and starting/switching
off the engine.
Unfolding / Folding the key
► Press this button to unfold or fold the key .
The remote control may be damaged if
you do not press the button.
Once the built-in key is ejected, always
keep it with you to be able to carry out
the corresponding back-up procedures.
Unlocking the vehicle
Complete unlocking is activated by default.With the audio system, the setting for
complete or selective boot unlocking is
made in the Personalisation-Configuration
menu.
With the touch screen, selective
unlocking can be configured from
the Driving/Vehicle menu.
Complete unlocking
► Press the unlocking button.
Selective unlocking
Driver's door
► Press the unlocking button.
►
Press it
again to unlock the other doors and
the boot.
Complete or selective unlocking, and alarm
deactivation (depending on version), is confirmed
by the flashing of the direction indicators.
Unlocking and partial opening of the
boot
► Press this button for more than one
second to unlock the boot. The boot
opens slightly.
This action unlocks the vehicle first.
Page 18 of 148
16
Access
Locking the vehicle
Normal locking
► Press the locking button.
The locking, and the activation of the alarm
depending on version, is confirmed by the
lighting of the direction indicators.
An access (door or boot) that is not properly closed prevents locking of the
vehicle. However, if the vehicle is fitted with
an alarm, it will be activated after 45
seconds.
If the vehicle is unlocked but the doors or boot
are not subsequently opened, the vehicle
will automatically lock itself again after about
30
seconds. If the vehicle is fitted with an
alarm, it will be reactivated automatically.
Locating your vehicle
This function allows you to identify your vehicle
from a distance, particularly in poor light. Your
vehicle must be locked.
► Press the closed padlock button on
the remote control.
This will switch on the courtesy lights and the
direction indicators will flash for a few seconds.
Advice
Remote control
The remote control is a sensitive, high-
frequency device; avoid handling it in your
pocket, due to the risk of unintentionally
unlocking the vehicle.
Avoid pressing the remote control buttons
while out of range of the vehicle, due to
the risk of rendering the remote control
inoperative. It would then be necessary to
reset it.
The remote control does not work
when the
key is in the ignition switch, even when the
ignition is switched off.
Anti-theft protection
Do not modify the electronic vehicle
immobiliser, as this might result in
malfunctions.
Locking the vehicle
Driving with the doors locked could make
it more difficult for the emergency services
to enter the passenger compartment in an
emergency.
As a safety precaution, remove the key from
the ignition when leaving the vehicle, even for
a short time.
Purchasing a second-hand vehicle
Have the key codes memorised by a
PEUGEOT dealer, to ensure that the keys
in your possession are the only ones able to
start the vehicle.
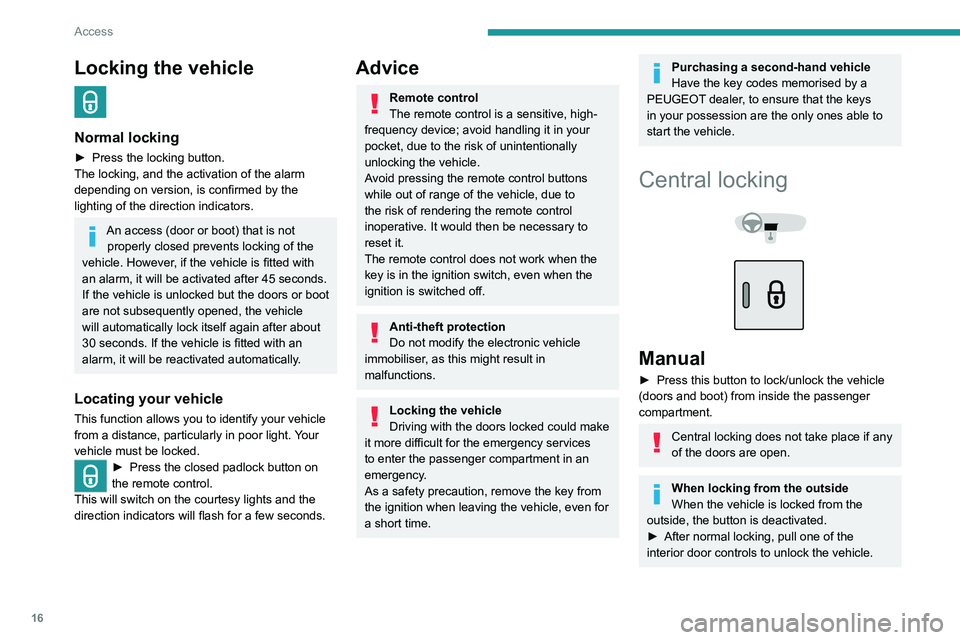
Central locking
Manual
► Press this button to lock/unlock the vehicle
(doors and boot) from inside the passenger
compartment.
Central locking does not take place if any
of the doors are open.
When locking from the outside
When the vehicle is locked from the
outside, the button is deactivated.
►
After normal locking, pull one of the
interior door controls to unlock the vehicle.
Page 21 of 148
19
Access
2► Press the boot opening button located on the
left of the dashboard.
The boot lid is released and opens slightly
.
Opening the boot
► Raise the boot lid to its fully open position.
Closing
► Lower the boot lid using one of the interior
grab handles.
►
Then press the boot to close it.
In the event of a malfunction or if you
experience difficulty opening or closing
the tailgate, have it checked by a PEUGEOT
dealer or a qualified workshop without delay,
to avoid the issue deteriorating and prevent
any risk of the tailgate dropping, potentially
causing serious injury.
Back-up release
System for mechanically unlocking the boot in
the event of a battery or central locking fault.
Unlocking
► Fold the rear seats to gain access to the lock
from inside the boot.
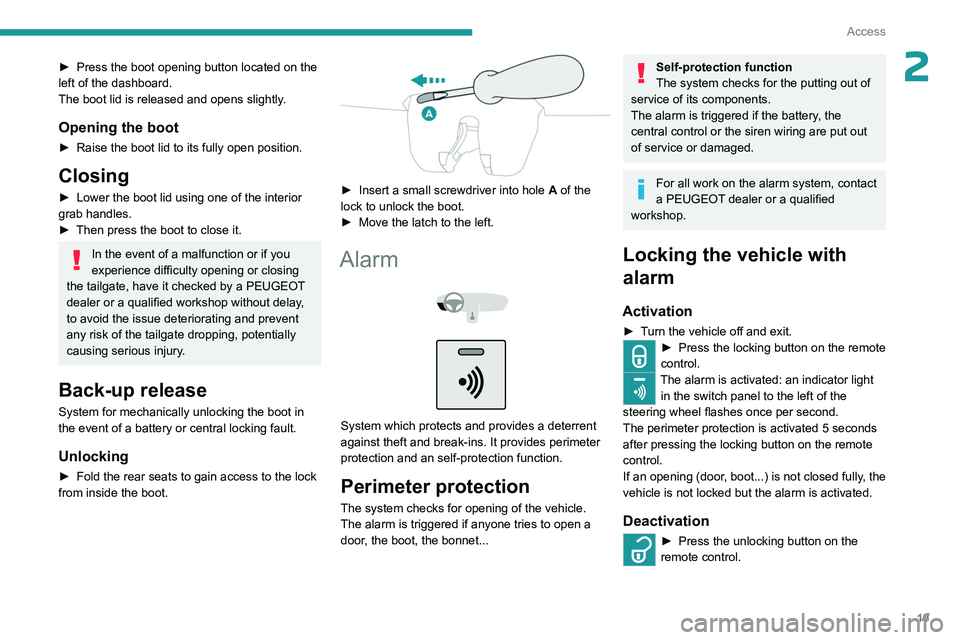
► Insert a small screwdriver into hole A of the
lock to unlock the boot.
►
Move the latch to the left.
Alarm
System which protects and provides a deterrent
against theft and break-ins. It provides perimeter
protection and an self-protection function.
Perimeter protection
The system checks for opening of the vehicle.
The alarm is triggered if anyone tries to open a
door, the boot, the bonnet...
Self-protection function
The system checks for the putting out of
service of its components.
The alarm is triggered if the battery, the
central control or the siren wiring are put out
of service or damaged.
For all work on the alarm system, contact
a PEUGEOT dealer or a qualified
workshop.
Locking the vehicle with
alarm
Activation
► Turn the vehicle off and exit.► Press the locking button on the remote
control.
The alarm is activated: an indicator light in the switch panel to the left of the
steering wheel flashes once per second.
The perimeter protection is activated 5 seconds
after pressing the locking button on the remote
control.
If an opening (door, boot...) is not closed fully, the
vehicle is not locked but the alarm is activated.
Deactivation
► Press the unlocking button on the
remote control.
Page 22 of 148
20
Access
The alarm is deactivated: the indicator lamp goes off.
Triggering of the alarm
This is indicated by sounding of the siren and
flashing of the direction indicators for thirty
seconds.
When the vehicle is unlocked using the
remote control, rapid flashing of the
indicator lamp informs you that the alarm was
triggered during your absence. Upon ignition,
this flashing stops immediately.
Locking the vehicle without
activating the alarm
► Lock the vehicle using the key .
Failure of the remote control
To deactivate the monitoring functions:
►
Unlock the vehicle using the key .
►
Open the door; this sets off the alarm.
►
Switch on the ignition; this stops the alarm.
Malfunction
When the ignition is switched on, the fixed
lighting of the red indicator lamp in the button
indicates a system malfunction.
Have it checked by a PEUGEOT dealer or a
qualified workshop.
Electric windows
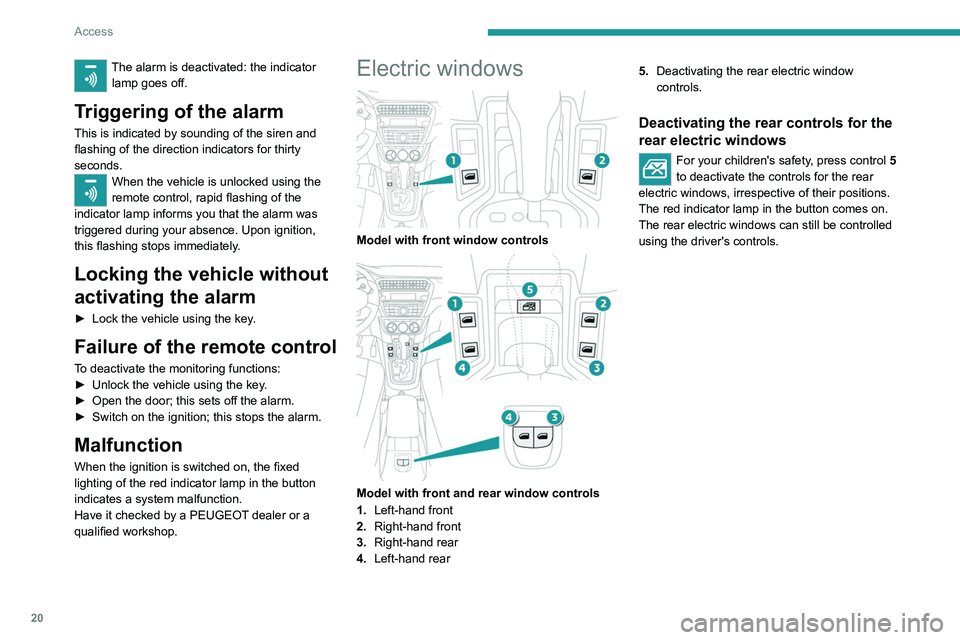
Model with front window controls
Model with front and rear window controls
1. Left-hand front
2. Right-hand front
3. Right-hand rear
4. Left-hand rear 5.
Deactivating the rear electric window
controls.
Deactivating the rear controls for the
rear electric windows
For your children's safety, press control 5
to deactivate the controls for the rear
electric windows, irrespective of their positions.
The red indicator lamp in the button comes on.
The rear electric windows can still be controlled
using the driver's controls.
Page 27 of 148
25
Ease of use and comfort
3water underneath the vehicle. This is perfectly
normal.
Servicing the ventilation and air
conditioning system
►
Ensure that the passenger compartment
filter is in good condition and have the filter
elements replaced regularly
.
We recommend using a composite passenger
compartment filter. Its specific active additive
helps protect against polluting gases and bad
smells.
►
T
o ensure correct operation of the
air conditioning system, have it checked
according to the recommendations in the
Manufacturer’s service schedule.
Stop & Start
The heating and air conditioning systems
only operate when the engine is running.
Temporarily deactivate the Stop & Start
system to maintain a comfortable temperature
in the passenger compartment.
For more information on the Stop &
Start
system, refer to the corresponding
section.
Air conditioning, manual (without display screen)
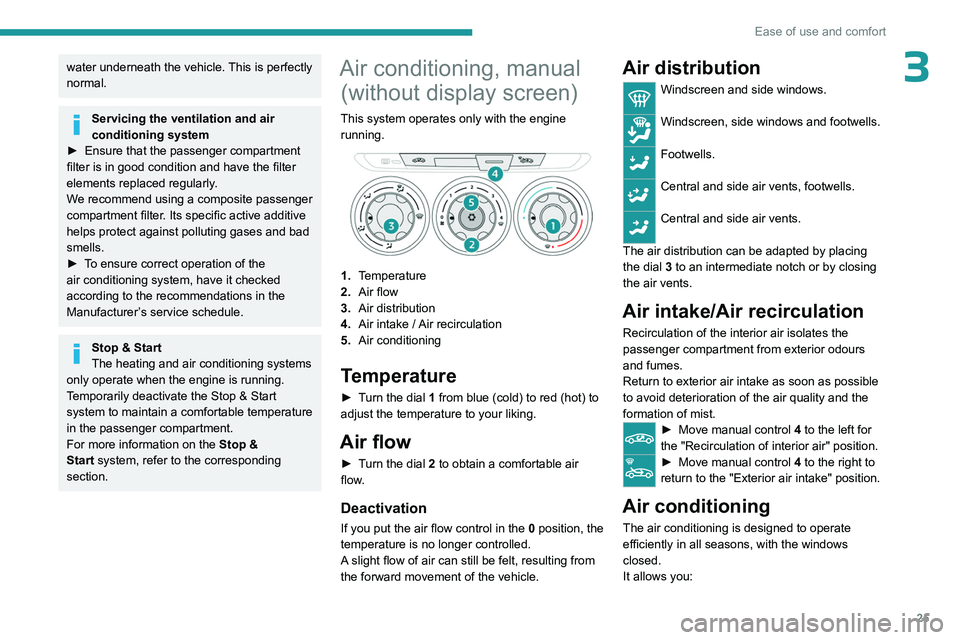
This system operates only with the engine
running.
1. Temperature
2. Air flow
3. Air distribution
4. Air intake
/ Air recirculation
5. Air conditioning
Temperature
► Turn the dial 1 from blue (cold) to red (hot) to
adjust the temperature to your liking.
Air flow
► Turn the dial 2 to obtain a comfortable air
flow.
Deactivation
If you put the air flow control in the 0 position, the
temperature is no longer controlled.
A slight flow of air can still be felt, resulting from
the forward movement of the vehicle.
Air distribution
Windscreen and side windows.
Windscreen, side windows and footwells.
Footwells.
Central and side air vents, footwells.
Central and side air vents.
The air distribution can be adapted by placing
the dial 3 to an intermediate notch or by closing
the air vents.
Air intake/Air recirculation
Recirculation of the interior air isolates the
passenger compartment from exterior odours
and fumes.
Return to exterior air intake as soon as possible
to avoid deterioration of the air quality and the
formation of mist.
► Move manual co ntrol 4 to the left for
the "Recirculation of interior air" position.
► Move manual co ntrol 4 to the right to
return to the "Exterior air intake" position.
Air conditioning
The air conditioning is designed to operate
efficiently in all seasons, with the windows
closed.
It allows you:
Page 28 of 148
26
Ease of use and comfort
– in summer, to lower the temperature,
– increase the effectiveness of the demisting in
winter
, above 3°C.
Switching on
► Press button 5 to activate/deactivate the air
conditioning.
The control lights up when the system is
activated.
The air conditioning does not operate when the air flow adjustment dial is in
position " 0".
Faster cool air
When the air conditioning is activated, to obtain
cool air more quickly, you can use recirculation
of the interior air for a few moments.
► Move manual co ntrol 4 to the left for
the "Recirculation of interior air" position.
► Then, move manual control 4 to the
right to return to the "Exterior air intake"
position.
Switching off
► Press button 5 again, the associated indicator
lamp goes off.
Switching the system off could result in
discomfort (humidity, misting).
Electronic air conditioning
(with display screen)
This system only operates with the engine
running.
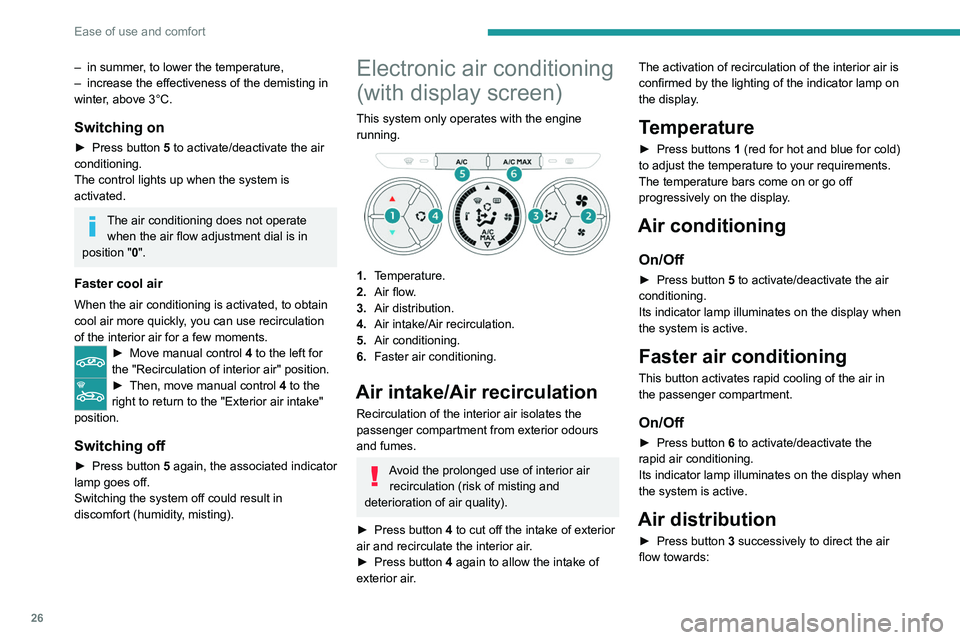
1. Temperature.
2. Air flow.
3. Air distribution.
4. Air intake/Air recirculation.
5. Air conditioning.
6. Faster air conditioning.
Air intake/Air recirculation
Recirculation of the interior air isolates the
passenger compartment from exterior odours
and fumes.
Avoid the prolonged use of interior air
recirculation (risk of misting and
deterioration of air quality).
►
Press button
4 to cut off the intake of exterior
air and recirculate the interior air.
►
Press button
4 again to allow the intake of
exterior air. The activation of recirculation of the interior air is
confirmed by the lighting of the indicator lamp on
the display.
Temperature
► Press buttons
1 (red for hot and blue for cold)
to adjust the temperature to your requirements.
The temperature bars come on or go off
progressively on the display.
Air conditioning
On/Off
► Press button 5 to activate/deactivate the air
conditioning.
Its indicator lamp illuminates on the display when
the system is active.
Faster air conditioning
This button activates rapid cooling of the air in
the passenger compartment.
On/Off
► Press button 6 to activate/deactivate the
rapid air conditioning.
Its indicator lamp illuminates on the display when
the system is active.
Air distribution
► Press button 3 successively to direct the air
flow towards:
Page 29 of 148
27
Ease of use and comfort
3• windscreen and side windows (demisting or
defrosting),
•
the windscreen, side windows and air vents,
•
the windscreen, side windows, air vents and
footwells,
•
the windscreen, side windows and footwells,
•
the footwells,
•
the air vents and footwells,
•
the air vents.
Air flow
► Press one of the buttons 2 to increase/
decrease the air flow.
The air flow bars light up/go off gradually.
Deactivating the system
► Press the "small fan" button 2 until all the
bars in the display are off.
This action deactivates all functions of the air
conditioning system.
Temperature is no longer regulated. A slight flow
of air can still be felt, resulting from the forward
movement of the vehicle.
Pressing the "small fan" button 2 again
reactivates the system.
Avoid driving for long periods with the system deactivated (risk of misting and
deterioration of air quality).
Front demist - defrost
These markings on the control panel indicate the control positions for rapid
demisting or defrosting of the windscreen and
side windows.
With the manual air
conditioning system
(without screen)
► Put the temperature and air flow
controls to the dedicated marked position.
► Put the air intake control to the
"Exterior air intake" position (manual
control moved to the right).
► Put the air distribution control to the
"Windscreen" position.
► Switch on the air conditioning by
pressing the appropriate button; the
lighting of the associated control comes on.
With the electronic air
conditioning system (with
screen)
► Press this button to activate/deactivate
the system.
The lighting of the indicator lamp in the button
indicates that the system is activated.
With Stop & Start, when demisting has
been activated, STOP mode is not
available.
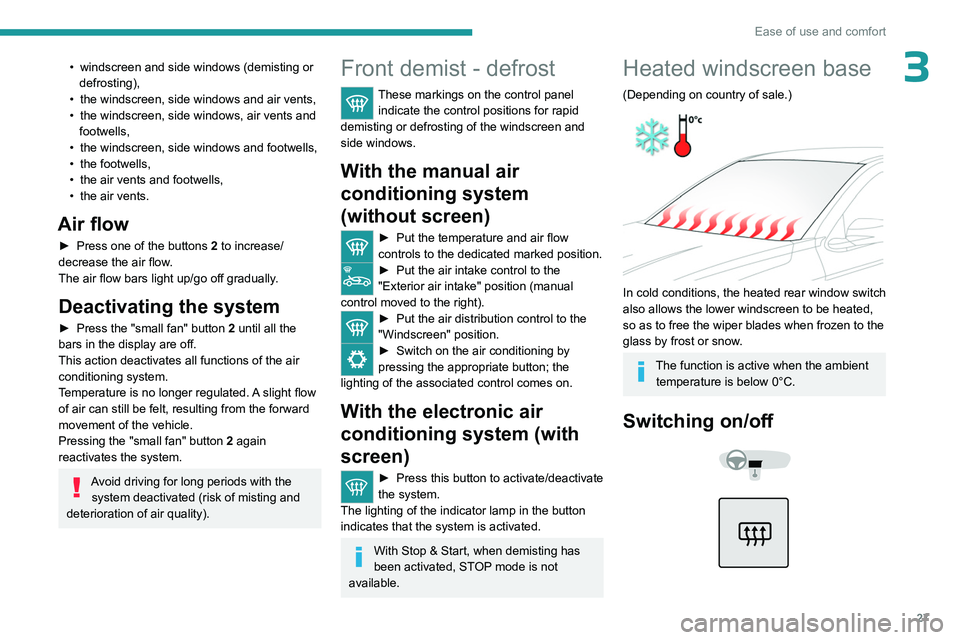
Heated windscreen base
(Depending on country of sale.)
In cold conditions, the heated rear window switch
also allows the lower windscreen to be heated,
so as to free the wiper blades when frozen to the
glass by frost or snow.
The function is active when the ambient temperature is below 0°C.
Switching on/off