audio Peugeot 308 2015.5 Owner's Manual - RHD (UK, Australia)
[x] Cancel search | Manufacturer: PEUGEOT, Model Year: 2015.5, Model line: 308, Model: Peugeot 308 2015.5Pages: 396, PDF Size: 10.06 MB
Page 5 of 396
Driving recommendations 146
Starting-switching off the engine
1
48
Manual parking brake
1
54
el
ectric parking brake
1
55
Hill start assist
1
62
5-speed manual gearbox
1
63
6-speed manual gearbox
1
63
ge
ar shift indicator
1
64
Automatic gearbox
1
65
Dynamic pack
1
69
Stop & Start
1
70
Memorising speeds
1
73
Speed limiter
1
74
Cruise control
1
77
Active cruise control
1
80
Display of inter-vehicle time
1
87
em
ergency collision alert system,
emergency collision braking system
1
90
Blind spot sensors
1
95
Parking sensors
1
98
Reversing camera
2
00
Park Assist
2
01
Under-inflation detection
20
9Fuel tank
2 13
Diesel misfuel prevention
2
14
Snow chains
2
16
Very cold climate screen
2
17
to
wing a trailer
2
18
en
ergy economy mode
2
19
Accessories
2
20
Changing a wiper blade
2
22
Fitting roof bars
2
23
Bonnet
226
Petrol engine
2
27
Diesel engine
2
28
Checking levels
2
29
Checks
233
AdBlue
® additive and SCR system
(
BlueHDi Diesel)
23
5
Warning triangle (stowing)
2
43
te
mporary puncture repair kit
2
44
Changing a wheel
2
50
Changing a bulb
2
56
Changing a fuse
2
66
12 V battery
2
72
to
w i n g
2 7 5
Running out of fuel (Diesel)
2
77Petrol engines
2
78
Petrol weights
2
81
Diesel engines
2
84
Diesel weights
2
88
Dimensions
2
92
Identification markings
2
95
Driving
Practical information
In the event of a breakdownte chnical data
.
Audio equipment and telematics 296
D
eN
ON equipment
2
98
7-inch touch screen
2
99
Peuge
O
t Connect Sound (RD5)
3
63
Audio equipment and telematics
Alphabetical index
Contents
Page 10 of 396
8
Hazard warning lamps 119
Locking/unlocking from inside
6
4
Lighting
108-114
Direction indicators
1
11 Instrument panel
1
2
Warning lamps
1
3-27
Indicators
2
8-32
ge
ar shift indicator
1
64
P
e
uge
Ot
i- Cockpit
7
1
Steering wheel adjustment
7
1
H or n
120Headlamp beam adjustment
1
14
Memorising speeds
1
73
Speed limiter
1
74-176
C r u i s e c o nt r o l
17
7-179
Active cruise control
1
80 -186 W i p e r s
115 -118
tr
ip computer
3
4-36
Instruments and controls (cont.)
trip computer
3 4, 36tr
ip computer (to uch screen) 3 5, 36
Setting the date/time (
to
uch screen)
4
4
Setting the date/time (screens C, A, A without audio
system)
45 - 47
Reversing camera
2
00
Display of inter-vehicle time
18
7-189
Collision risk alert
1
90 -194
Automatic emergency braking
193 -19 4 Stop & Start
1
70 -172
Alarm
65-68
Over view
Page 40 of 396
38
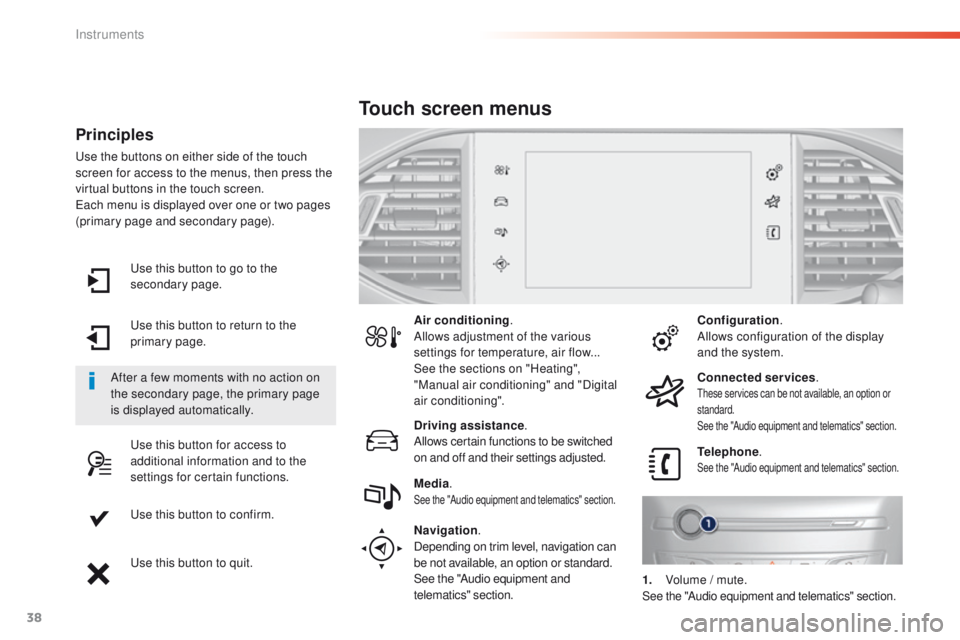
use this button to go to the
secondary page.
us
e this button to return to the
primary page.
us
e this button for access to
additional information and to the
settings for certain functions.
us
e this button to confirm.
us
e this button to quit.
Principles
use the buttons on either side of the touch
screen for access to the menus, then press the
virtual buttons in the touch screen.
ea
ch menu is displayed over one or two pages
(primary page and secondary page).
After a few moments with no action on
the secondary page, the primary page
is displayed automatically. Air conditioning
.
Allows adjustment of the various
settings for temperature, air flow...
See the sections on "Heating",
"Manual air conditioning" and "Digital
air conditioning".
Touch screen menus
Driving assistance .
Allows certain functions to be switched
on and off and their settings adjusted. Telephone
.
See the "Audio equipment and telematics" section.Media.See the "Audio equipment and telematics" section.
Navigation .
Depending on trim level, navigation can
be not available, an option or standard.
See the "Audio equipment and
telematics" section. Configuration
.
Allows configuration of the display
and the system.
Connected services .
these services can be not available, an option or
standard.
See the "Audio equipment and telematics" section.
1. Volume / mute.See the "Audio equipment and telematics" section.
Instruments
Page 44 of 396
42
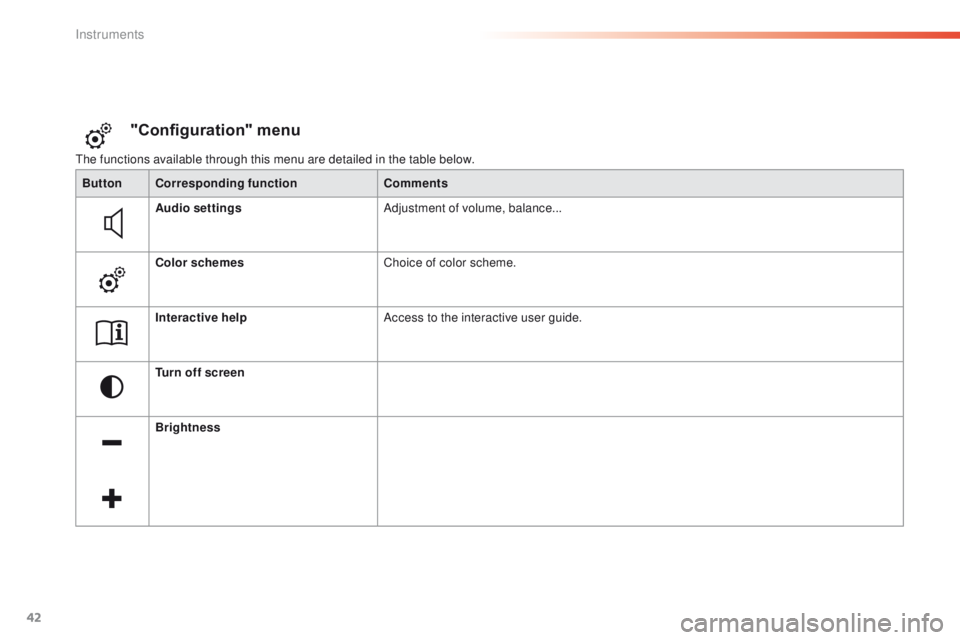
the functions available through this menu are detailed in the table below.
"Configuration" menu
ButtonCorresponding function Comments
Audio settings Adjustment of volume, balance...
Color schemes Choice of color scheme.
Interactive help Access to the interactive user guide.
Turn off screen
Brightness
Instruments
Page 47 of 396
45
For more information on the
Multimedia menu, refer to the "Audio
and telematics" section.
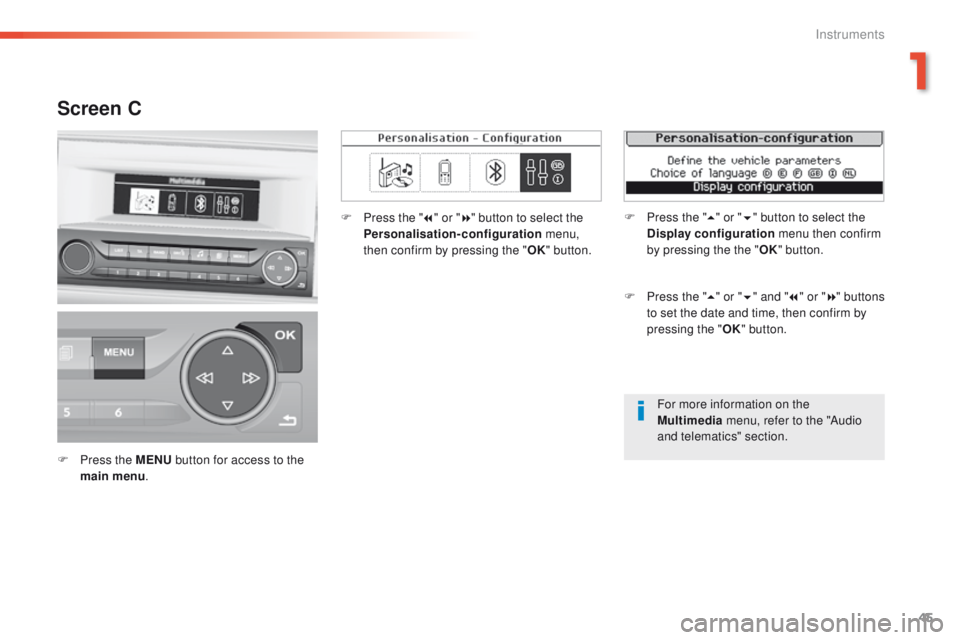
Screen C
F Press the MENU button for access to the
main menu . F
P
ress the "
7" or " 8" button to select the
Personalisation-configuration menu,
then confirm by pressing the " OK" button.
F
P
ress the "
5" or " 6" and " 7" or " 8" buttons
to set the date and time, then confirm by
pressing the " OK" button.
F
P
ress the "
5" or " 6" button to select the
Display configuration menu then confirm
by pressing the the " OK" button.
1
Instruments
Page 49 of 396
47
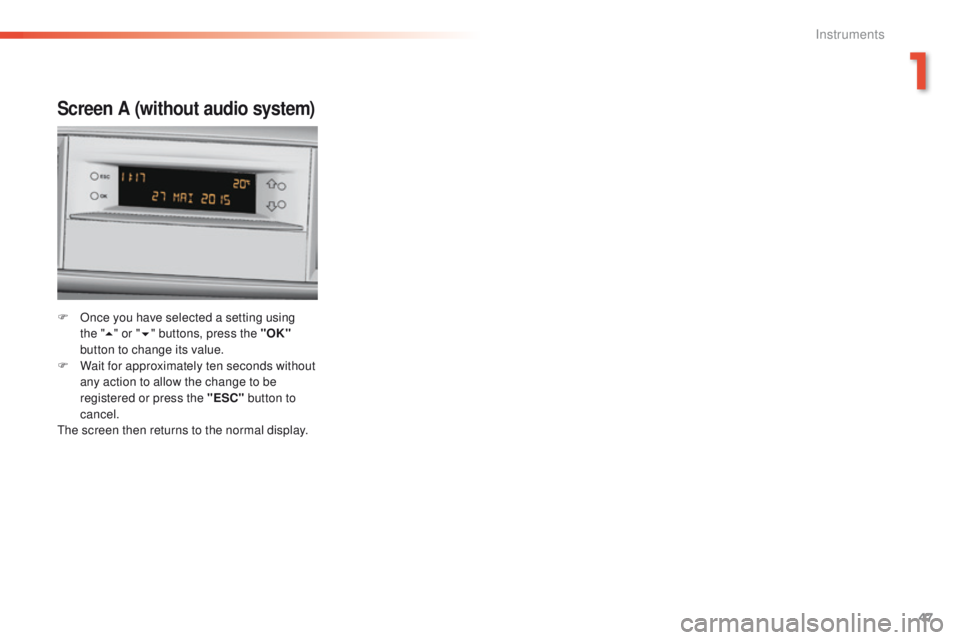
Screen A (without audio system)
F Once you have selected a setting using the "5 " or " 6" buttons, press the "OK"
button to change its value.
F
W
ait for approximately ten seconds without
any action to allow the change to be
registered or press the "ESC" button to
cancel.
th
e screen then returns to the normal display.
1
Instruments
Page 85 of 396
83
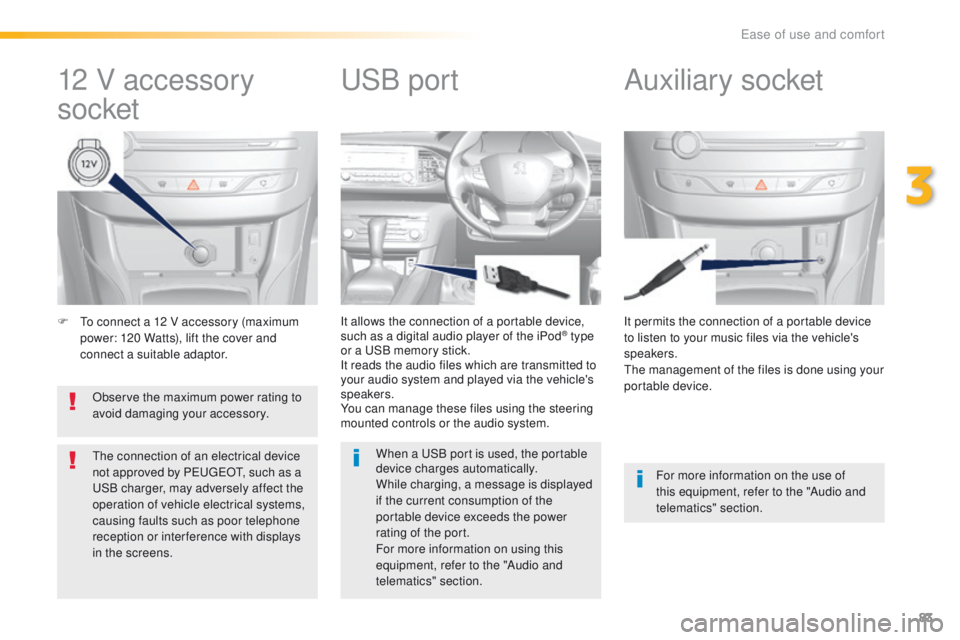
F to connect a 12 V accessory (maximum power: 120 Watts), lift the cover and
connect a suitable adaptor. It permits the connection of a portable device
to listen to your music files via the vehicle's
speakers.
th
e management of the files is done using your
portable device.
It allows the connection of a portable device,
such as a digital audio player of the iPod® type
or a
uS
B memory stick.
It reads the audio files which are transmitted to
your audio system and played via the vehicle's
speakers.
You can manage these files using the steering
mounted controls or the audio system.
12 V accessory
socket Auxiliary socketuSB p
ort
For more information on the use of
this equipment, refer to the "Audio and
telematics" section.
When a
u
S
B port is used, the portable
device charges automatically.
While charging, a message is displayed
if the current consumption of the
portable device exceeds the power
rating of the port.
For more information on using this
equipment, refer to the "Audio and
telematics" section.
Observe the maximum power rating to
avoid damaging your accessory.
th
e connection of an electrical device
not approved by Pe
ugeOt, s
uch as a uS
B charger, may adversely affect the
operation of vehicle electrical systems,
causing faults such as poor telephone
reception or inter ference with displays
in the screens.
3
ease of use and comfort
Page 121 of 396
119
Automatic operation of
hazard warning lamps
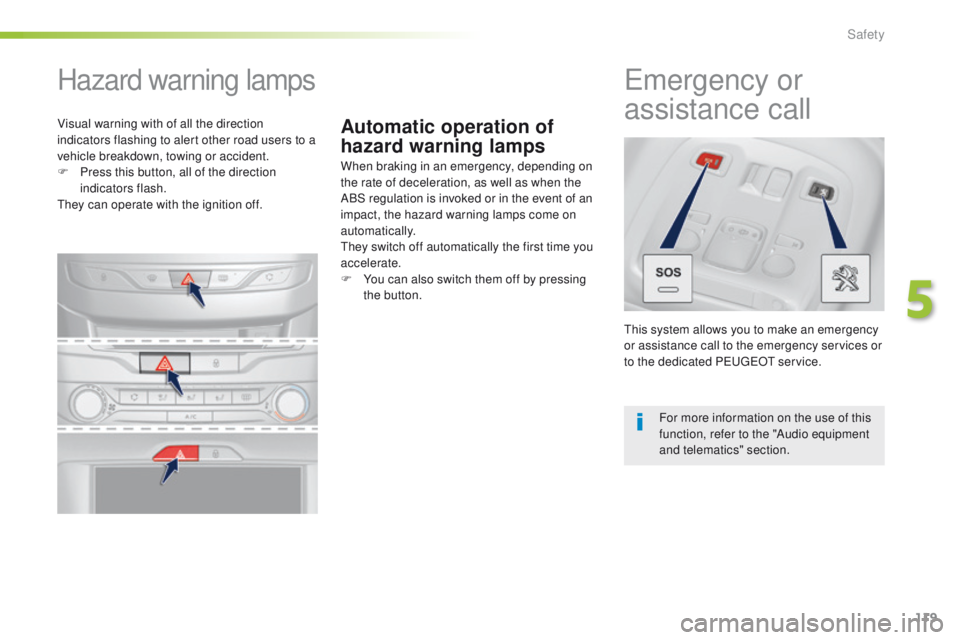
Hazard warning lamps
When braking in an emergency, depending on
the rate of deceleration, as well as when the
ABS regulation is invoked or in the event of an
impact, the hazard warning lamps come on
automatically.
th
ey switch off automatically the first time you
accelerate.
F
Y
ou can also switch them off by pressing
the button.
emergency or
assistance call
this system allows you to make an emergency
or assistance call to the emergency services or
to the dedicated P
e
uge
Ot
service.
For more information on the use of this
function, refer to the "Audio equipment
and telematics" section.
Visual warning with of all the direction
indicators flashing to alert other road users to a
vehicle breakdown, towing or accident.
F
P
ress this button, all of the direction
indicators flash.
th
ey can operate with the ignition off.
5
Safety
Page 214 of 396
212
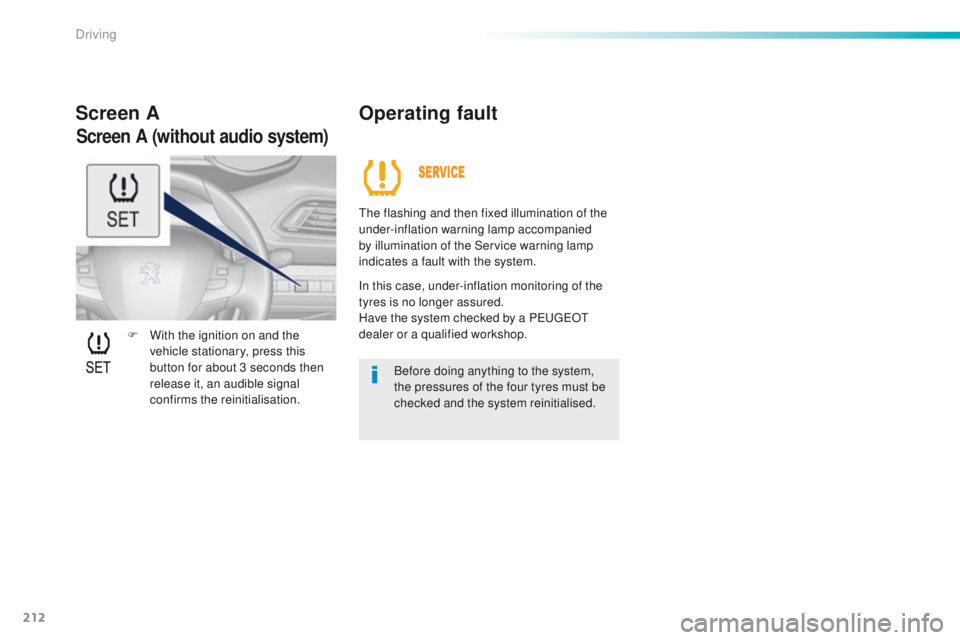
F With the ignition on and the vehicle stationary, press this
button for about 3 seconds then
release it, an audible signal
confirms the reinitialisation.
Screen A Operating fault
the flashing and then fixed illumination of the
under-inflation warning lamp accompanied
by illumination of the Service warning lamp
indicates a fault with the system.
In this case, under-inflation monitoring of the
tyres is no longer assured.
Have the system checked by a P
e
uge
Ot
dealer or a qualified workshop.
Before doing anything to the system,
the pressures of the four tyres must be
checked and the system reinitialised.
Screen A (without audio system)
Driving
Page 221 of 396
219
System which manages the duration of use of certain functions to conserve a sufficient level of
charge in the battery.
After the engine has stopped, you can still use functions such as the audio and telematics
system, windscreen wipers, dipped beam headlamps, courtesy lamps, etc. for a maximum
combined duration of about forty minutes.
energy economy mode
Switching to economy mode
A message then appears in the instrument
panel screen indicating that the vehicle has
switched to economy mode and the active
functions are put on standby.
If a telephone call is being made at this time, it
will be maintained for around 10 minutes with
the Bluetooth hands-free system of your audio
system.
Exiting economy mode
these functions are reactivated automatically
next time the vehicle is driven.
In order to restore the use of these functions
immediately, start the engine and let it run:
-
f
or less than ten minutes, to use the
equipment for approximately five minutes,
-
f
or more than ten minutes, to use the
equipment for up to approximately
thirty
minutes.
Let the engine run for the duration specified to
ensure that the battery charge is sufficient.
Do not repeatedly and continuously restart the
engine in order to charge the battery.
A flat battery prevents the engine from starting.
For more information on the battery, refer to the
corresponding section.
Load reduction mode
System which manages the use of certain
functions according to the level of charge
remaining in the battery.
When the vehicle is being driven, the load
reduction function temporarily deactivates
certain functions, such as the air conditioning,
the heated rear screen...
th
e deactivated functions are reactivated
automatically as soon as conditions permit.
7
Practical information