instrument panel Peugeot 308 2015 Repair Manual
[x] Cancel search | Manufacturer: PEUGEOT, Model Year: 2015, Model line: 308, Model: Peugeot 308 2015Pages: 416, PDF Size: 11.81 MB
Page 212 of 416
210
308_en_Chap06_securite_ed01-2015
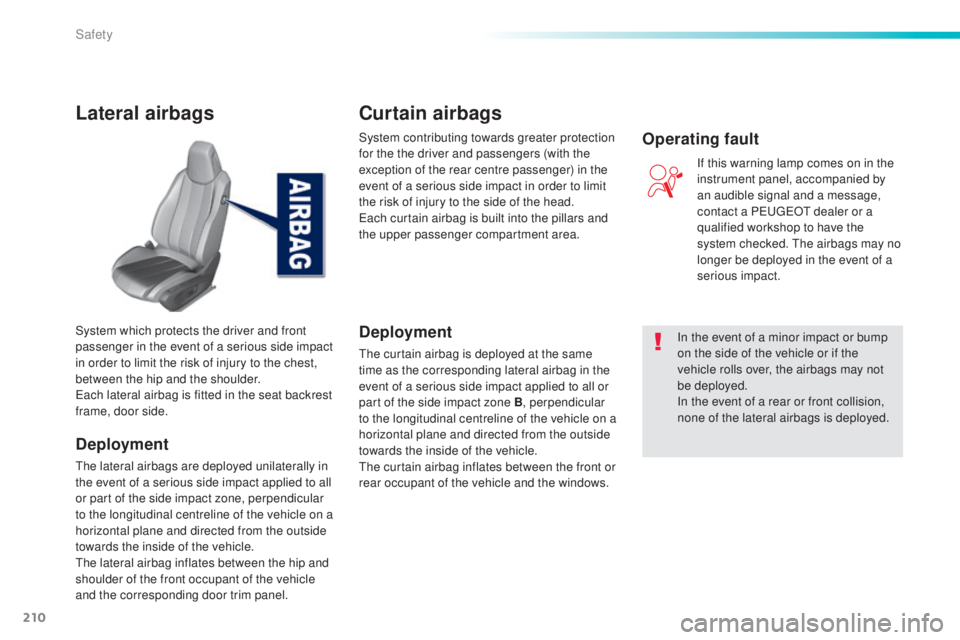
Lateral airbags
Deployment
the lateral airbags are deployed unilaterally in
the event of a serious side impact applied to all
or part of the side impact zone, perpendicular
to the longitudinal centreline of the vehicle on a
horizontal plane and directed from the outside
towards the inside of the vehicle.
th
e lateral airbag inflates between the hip and
shoulder of the front occupant of the vehicle
and the corresponding door trim panel. System which protects the driver and front
passenger in the event of a serious side impact
in order to limit the risk of injury to the chest,
between the hip and the shoulder.
ea
ch lateral airbag is fitted in the seat backrest
frame, door side. System contributing towards greater protection
for the the driver and passengers (with the
exception of the rear centre passenger) in the
event of a serious side impact in order to limit
the risk of injury to the side of the head.
ea
ch curtain airbag is built into the pillars and
the upper passenger compartment area.
Deployment
the curtain airbag is deployed at the same
time as the corresponding lateral airbag in the
event of a serious side impact applied to all or
part of the side impact zone B, perpendicular
to the longitudinal centreline of the vehicle on a
horizontal plane and directed from the outside
towards the inside of the vehicle.
th
e curtain airbag inflates between the front or
rear occupant of the vehicle and the windows. In the event of a minor impact or bump
on the side of the vehicle or if the
vehicle rolls over, the airbags may not
be deployed.
In the event of a rear or front collision,
none of the lateral airbags is deployed.If this warning lamp comes on in the
instrument panel, accompanied by
an audible signal and a message,
contact a P
e
uge
Ot
dealer or a
qualified workshop to have the
system checked. t
h
e airbags may no
longer be deployed in the event of a
serious impact.
Operating fault
Curtain airbags
Safety
Page 265 of 416
263
308_en_Chap07_info-pratiques_ed01-2015
System which manages the duration of use of certain functions to conserve a sufficient level of
charge in the battery.
After the engine has stopped, you can still use functions such as the audio and telematics
system, windscreen wipers, dipped beam headlamps, courtesy lamps, etc. for a maximum
combined duration of about forty minutes.
energy economy mode
Switching to economy
mode
A message then appears in the instrument
panel screen indicating that the vehicle has
switched to economy mode and the active
functions are put on standby.
If a telephone call is being made at this time,
it
will be maintained for around 10 minutes with
the Bluetooth hands-free system of your audio
system.
Exiting economy mode
these functions are reactivated automatically
next time the vehicle is driven.
In order to restore the use of these functions
immediately, start the engine and let it run:
-
f
or less than ten minutes, to use the
equipment for approximately five minutes,
-
f
or more than ten minutes, to use the
equipment for up to approximately
thirty
minutes.
Let the engine run for the duration specified to
ensure that the battery charge is sufficient.
Do not repeatedly and continuously restart the
engine in order to charge the battery.
A flat battery prevents the engine from starting
(refer to the "Battery" section).
Load reduction mode
System which manages the use of certain
functions according to the level of charge
remaining in the battery.
When the vehicle is being driven, the load
reduction function temporarily deactivates
certain functions, such as the air conditioning,
the heated rear screen...
th
e deactivated functions are reactivated
automatically as soon as conditions permit.
7
Practical information
Page 282 of 416
280
308_en_Chap08_verifications_ed01-2015
Range indicators
When switching on the ignition, an indicator
gives an estimate of the distance that can
be travelled with your vehicle before engine
starting is automatically prevented, once the
vehicle starts using the reserve of AdBlue
® or
after a fault is detected with the SCR system.
In the event of simultaneous system fault and
low AdBlue
® level, the shortest range is the one
displayed.
In the event of the risk of non-starting related to a lack of AdBlue®
the engine start prevention system
required by regulations is activated
automatically once the AdBlue
® tank is
e m pt y.
Remaining range greater than 1 500 miles (2 400 km )
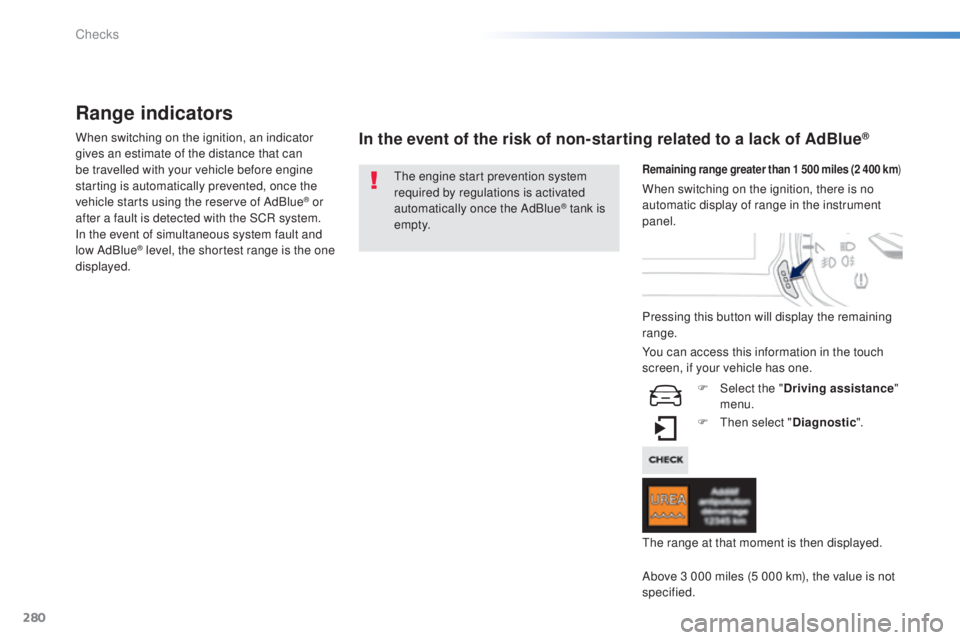
Pressing this button will display the remaining
range.
F
t
hen
select "Diagnostic ".
Above 3 000 miles (5 000 km), the value is not
specified. When switching on the ignition, there is no
automatic display of range in the instrument
panel.
th
e range at that moment is then displayed.
You can access this information in the touch
screen, if your vehicle has one.
F
Sel
ect the "Driving assistance "
menu.
Checks
Page 290 of 416
288
308_en_Chap08_verifications_ed01-2015
Checking levels
take care when working under the bonnet, as certain areas of the engine may be extremely
hot (risk of burns) and the cooling fan could start at any time (even with the ignition off).
Oil level
the check is carried out either when the
ignition is switched on using the oil level
indicator in the instrument panel (depending
on version), or using the dipstick.Engine oil change
Refer to the manufacturer's service schedule
for details of the interval for this operation.
In order to maintain the reliability of the engine
and emission control system, never use
additives in the engine oil.
Oil specification
the oil must be the correct grade for your
engine and conform to the manufacturer's
recommendations.
Check all of these levels regularly, in line with the manufacturer's service schedule.
t
o
p them up if necessary, unless other wise indicated.
If a level drops significantly, have the corresponding system checked by a P
e
uge
Ot
dealer or a qualified workshop.
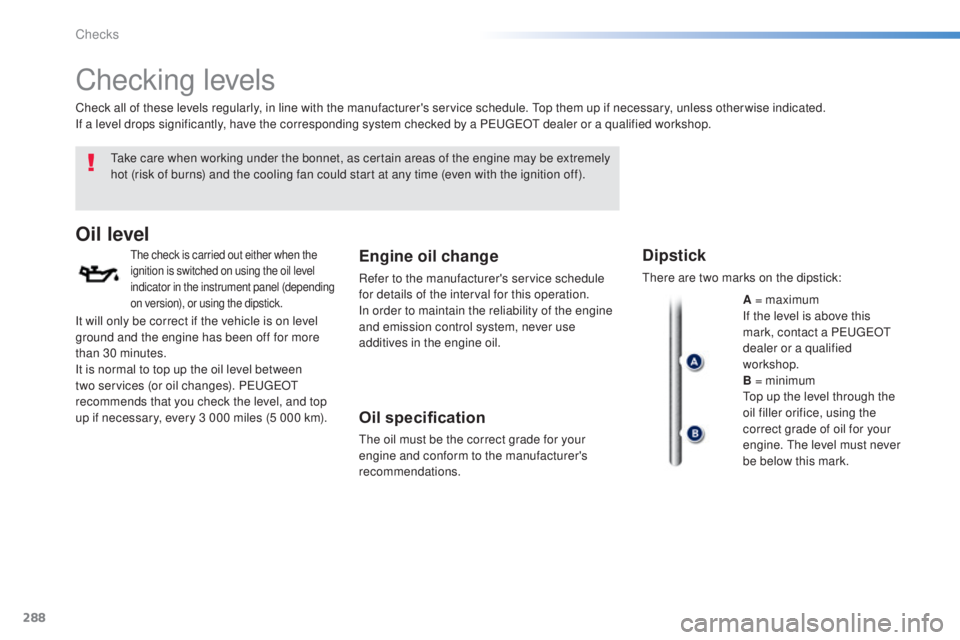
Dipstick
there are two marks on the dipstick:
A = maximum
If the level is above this
mark, contact a P
e
uge
Ot
dealer or a qualified
workshop.
B = minimum
to
p up the level through the
oil filler orifice, using the
correct grade of oil for your
engine.
t
h
e level must never
be below this mark.
It will only be correct if the vehicle is on level
ground and the engine has been off for more
than 30 minutes.
It is normal to top up the oil level between
two services (or oil changes). P
e
uge
Ot
recommends that you check the level, and top
up if necessary, every 3 000 miles (5 000 km).
Checks
Page 292 of 416
290
308_en_Chap08_verifications_ed01-2015
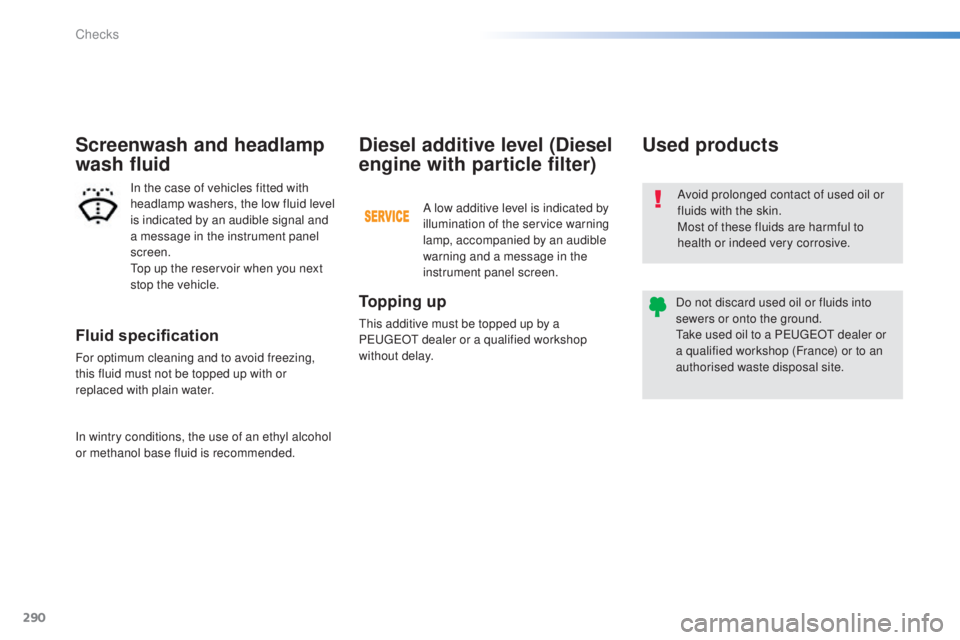
Fluid specification
For optimum cleaning and to avoid freezing,
this fluid must not be topped up with or
replaced with plain water.
Screenwash and headlamp
wash fluid
In the case of vehicles fitted with
headlamp washers, the low fluid level
is indicated by an audible signal and
a message in the instrument panel
screen.
to
p up the reservoir when you next
stop the vehicle. Avoid prolonged contact of used oil or
fluids with the skin.
Most of these fluids are harmful to
health or indeed very corrosive.
Do not discard used oil or fluids into
sewers or onto the ground.
ta
ke used oil to a P
e
uge
Ot
dealer or
a qualified workshop (France) or to an
authorised waste disposal site.
Used products
To p p i n g u p
this additive must be topped up by a
Pe ugeOt dealer or a qualified workshop
without delay.
Diesel additive level (Diesel
engine with particle filter)
A low additive level is indicated by
illumination of the service warning
lamp, accompanied by an audible
warning and a message in the
instrument panel screen.
In wintry conditions, the use of an ethyl alcohol
or methanol base fluid is recommended.
Checks
Page 399 of 416
397
Ignition on...................................................... 117
Indicators, direction .....................195, 243, 250
Indicator lamps, status
.............................. 15
, 20
Inflating accessories (using the kit)
..............234
Inflating tyres
.......................................... 10, 29 6
Inputs for audio system
...91, 318, 322, 382, 384
Instrument panel
...............................
..............12
Instrument panel screen
................... 1
2, 35, 130
Intelligent
t
ra
ction Control
............................ 2
02
Interactive help
................................................ 44
Interior fittings
................................................. 88
Interior mood lighting
.................................... 19 4
Inter-vehicle time
........................................... 15
4
ISOFIX mountings ................................. 221, 222
Keeping children safe
............ 20
6, 208, 212-228
Key
............................................................ 50- 67
Key in ignition warning
..................................115Keyless
en try and
Starting ....................................5 9 - 6 4 , 11 6 , 11 9
Key with remote control
.....................5 2 - 5 4 , 11 9
Jack
........
....................................................... 235
Jack cable
..................................................... 322
JACK socket
..................... 88, 91, 322, 382, 384
Jukebox (playing)
.......................................... 323Labels, identification
.....................................
29
6
Lamps, warning and indicator
..................................................13 -27
L
e
D
daytime running
lamps
......................... 1
85, 243, 244, 246, 247
L
eD
s - light-emitting
diodes
........................................243, 248, 250
Level, AdBlue
® additive ................................. 279
Level, brake fluid ........................................... 28
9
Level, headlamp wash
.......................... 191, 29 0
Levels and checks
................ 276, 277, 288 -290
Light-emitting diodes - L
e
Ds
.......................................... 2
43, 248, 250
Lighting
................
.......................................... 19 4
Lighting bulbs (replacement)
...................................... 243-252
Lighting control stalk
..................................... 181
Lighting dimmer
..............................
................34
Lighting, guide-me home
...................... 185, 18 6
Lighting, interior
.................................... 193, 19 4
Lighting on reminder
..................................... 18 4
Loading
................................................... 10, 270
Load reduction mode
.................................... 263
Load space cover
...............................
.............96
Locating your vehicle
................................ 5
4, 58
Long objects, transporting
.............................. 93
L
ow fuel level
............................................ 22, 77
Lumbar adjustment
................................... 8
0, 84
J
K
L
Main beam ............................ 181, 243, 245, 247
Maintenance ................................................... 10
Map reading lamps
....................................... 193
Markings, identification
.................................296
Massage function
........................................... 84
Mat
.................................................................. 89
Memorising a speed
..................................... 13 9
Menu
........................... 306, 308, 310, 324, 326,
328, 344, 356, 358
Menu, main
................................................... 376
Menus (
tou
ch screen)
.................................. 3
02
Mini fuel level
.................................................. 22
Mirror, rear view
............................................ 180
Mirrors, door .......................................... 16 3 , 178
Mountings for ISOFIX seats
.................221, 222
MP3 CD
................................................. 318, 379
M
Navigation ..................................................... 324
Number plate lamps ...................................... 2
52
N
Oil filter .......................................................... 291
Oil level .................................................... 32, 288
Opening the bonnet
...................................... 2
75
Opening the boot
.......................... 5
7, 59, 61, 62
Opening the doors
.............................. 5
1, 57, 59
Operation indicator lamps
........................13 -27O
.
Alphabetical index
Page 400 of 416
398
Seat adjustment ........................................80, 81
Seat belts ...................................... 20
4-206, 218
Seats, electric
................................................. 81
Seats, rear
................................................. 85, 86
Serial number, vehicle
......................................................... 296
Service indicator
............................................. 29
Servicing
...............................
..........................10
Setting the clock
...........................46, 47, 48, 49
Sidelamps
.................................... 181, 243, 244,
246 -248, 250
Side repeater
..............................
..................247
Ski flap
..............................
..............................93
Snow chains
.................................................. 2
42
Spare wheel
...............................
..........235, 236
Speed limiter
......................................... 13 9, 14 0
Spotlamps, side
.................................... 187, 247
Starting the engine
........................113 , 11 6 , 118
Starting using another battery
...................... 2
61
Steering mounted controls, audio
................................................... 305, 375
Stop & Start
........................ 24, 38, 76, 110, 136,
137, 259, 275, 291
Storage
.......................................... 88, 90, 93 -95
Storage wells
............................................ 94, 95
Storing driving positions ........................................................ 82
Stowing rings
............................................ 94, 95
Switching off the engine
................ 11
5 , 117, 118
Synchronising the remote control
..................................................... 5
6, 66
Synthesiser, voice ............................................................ 343
System settings
............................................. 352
Paint colour code
..........................................
296
Panoramic glass sunroof
................................ 75
Park Assist
............................................. 170 -17 7
Parking brake, electric
............. 20, 121-127, 292
Parking brake manual
..................... 1
5, 120, 292
Parking sensors, front
................................... 167
Parking sensors, rear .................................... 166
Particle filter
.......................................... 290, 291
Passenger compartment filter
...................... 291
P
e
uge
Ot C
ONN
eCt A
PPS
....................... 35
5
Peuge
O
t Connect Assistance
................... 298
Peuge
O
t Connect SOS
............................. 29
8
Peuge
O
t Connect Sound (RD5)
................ 37
3
Player, CD MP3
..................................... 318, 379
Port,
u
S
B
......................... 8
8, 91, 318, 382, 384
Priming the fuel system
................................ 278
Protecting children
................ 206, 208, 212-228
Puncture
........................................................ 229
Radio
..................................................... 312, 37 7
RDS
....................................................... 315, 377
Rear foglamp .................183, 248, 249, 250, 251
Rear screen (demisting)
................................ 111
Recharging the battery
................................. 2
62
Reduction of electrical load
.......................... 263
Refilling AdBlue ..................................... 284-287
Regeneration of the particle filter
................. 2
91
Reinitialising the remote control
............... 5
6, 66
Remote control
.......................................... 5
0- 67
Removable screen (snow shield).......... 267, 268Safety for children
................. 206, 208, 212-228
Screen, instrument panel
.................. 12, 35, 130
Screen menu map
....... 306, 308, 310, 324, 326,
328, 344, 356, 358, 388 -390
Screen, multifunction (with audio equipment)
........... 4
7, 48, 376, 388
Screen, without audio equipment
................... 49
Screenwash
.................................................. 19 0
Screenwash fluid level
.......................... 191, 29 0
Screenwash reservoir
................................... 290
SCR (Selective Catalytic Reduction)
............ 279
P
RS
Removing a wheel ........................................ 23 8
Removing the mat ........................................... 89
Repair kit, puncture
....................................... 229
Replacing bulbs
.................................... 243-252
Replacing fuses
..............................
......253-258
Replacing the air filter
...................................291
Replacing the oil filter
................................... 2
91
Replacing the passenger compartment filter
...................................... 291
Replacing wiper blades .........................192, 26 4
Resetting the service indicator
.......................31
Resetting the trip recorder
..............................33
Reversing camera
......................................... 169
Reversing lamp
..................................... 2
48, 250
Risk areas (update)
....................................... 333
Roof bars
............................................... 2
70, 271
Roof blind
........................................................ 75
Routine checks
..................................... 291, 292
Running out of fuel (Diesel)
..........................2
78
Alphabetical index
Page 414 of 416
4
Safety
308GTi_en_Chap06_securite_ed01-2015
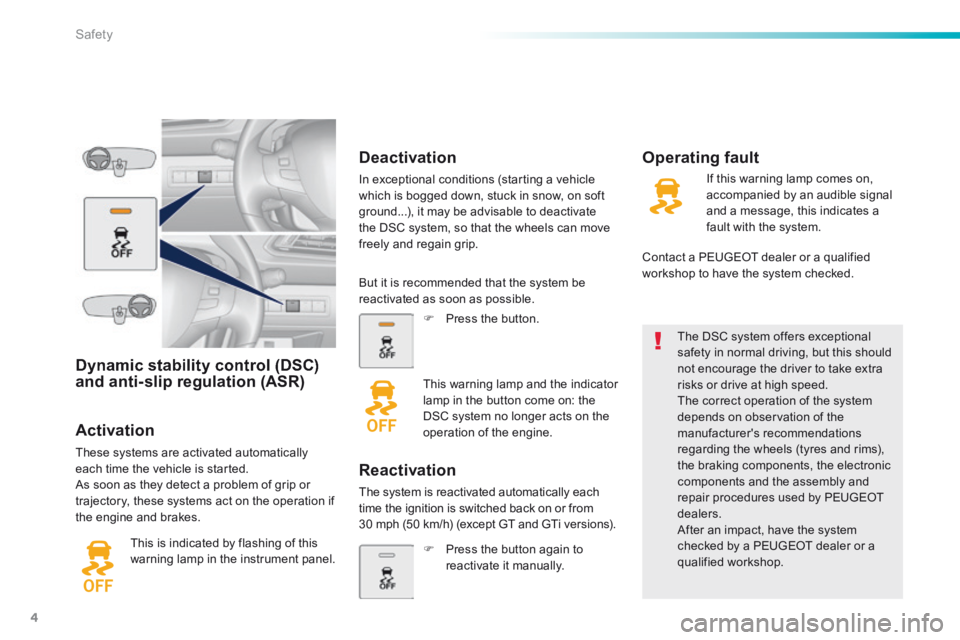
Dynamic stability control (DSC) and anti-slip regulation (ASR)
Activation
These systems are activated automatically each time the vehicle is started. As soon as they detect a problem of grip or trajectory, these systems act on the operation if the engine and brakes.
This is indicated by flashing of this warning lamp in the instrument panel.
The DSC system offers exceptional safety in normal driving, but this should not encourage the driver to take extra risks or drive at high speed. The correct operation of the system depends on observation of the manufacturer's recommendations regarding the wheels (tyres and rims), the braking components, the electronic components and the assembly and repair procedures used by PEUGEOT dealers. After an impact, have the system checked by a PEUGEOT dealer or a qualified workshop.
Deactivation
In exceptional conditions (starting a vehicle which is bogged down, stuck in snow, on soft ground...), it may be advisable to deactivate the DSC system, so that the wheels can move freely and regain grip.
Operating fault
But it is recommended that the system be reactivated as soon as possible.
Press the button.
This warning lamp and the indicator lamp in the button come on: the DSC system no longer acts on the operation of the engine.
Reactivation
The system is reactivated automatically each time the ignition is switched back on or from 30 mph (50 km/h) (except GT and GTi versions).
Press the button again to reactivate it manually.
If this warning lamp comes on, accompanied by an audible signal and a message, this indicates a
fault with the system.
Contact a PEUGEOT dealer or a qualified workshop to have the system checked.
Page 416 of 416
155
6
Driving
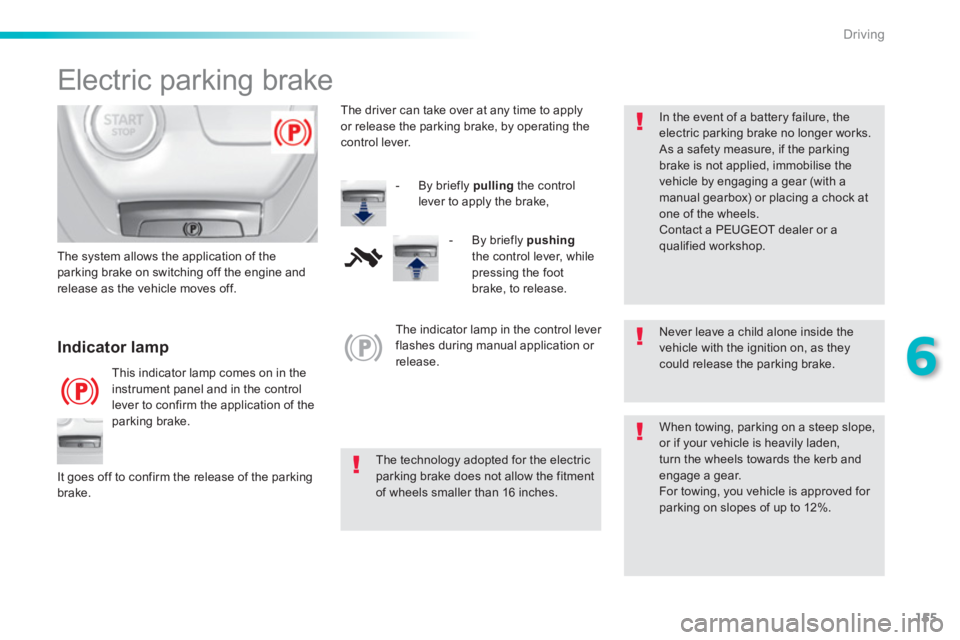
Electric parking brake
Never leave a child alone inside the
vehicle with the ignition on, as they
could release the parking brake.
The technology adopted for the electric
parking brake does not allow the fitment
of wheels smaller than 16 inches.
Indicator lamp
This indicator lamp comes on in the
instrument panel and in the control
lever to confirm the application of the
parking brake.
The system allows the application of the
parking brake on switching off the engine and
release as the vehicle moves off.
When towing, parking on a steep slope,
or if your vehicle is heavily laden,
turn the wheels towards the kerb and
engage a gear.
For towing, you vehicle is approved for
parking on slopes of up to 12%.
It goes off to confirm the release of the parking
brake.
The indicator lamp in the control lever
flashes during manual application or
release.
In the event of a battery failure, the
electric parking brake no longer works.
As a safety measure, if the parking
brake is not applied, immobilise the
vehicle by engaging a gear (with a
manual gearbox) or placing a chock at
one of the wheels.
Contact a PEUGEOT dealer or a
qualified workshop.
The driver can take over at any time to apply
or release the parking brake, by operating the
control lever.
- By briefly pulling
the control
lever to apply the brake,
- By briefly pushing
the control lever, while
pressing the foot
brake, to release.