ESP Peugeot 308 2016 - RHD (UK, Australia) Service Manual
[x] Cancel search | Manufacturer: PEUGEOT, Model Year: 2016, Model line: 308, Model: Peugeot 308 2016Pages: 398, PDF Size: 10.3 MB
Page 182 of 398
180
Active cruise control
this systems allows the vehicle's speed to be
maintained at a value set by the driver.
In addition it allows (when circumstances
permit) an inter-vehicle time that you have
selected to be maintained between your vehicle
and the one in front.Principles of operation
using a radar with a range of about 100 metres,
located at the front of the vehicle, this system
detects a vehicle running in front of your
vehicle.
It automatically adapts the speed of your
vehicle to that of the vehicle in front.
If the vehicle in front is running more slowly,
the system progressively reduces the speed of
your vehicle using just engine braking (as if the
driver had pressed the "-" b ut to n).
If your vehicle is too close to, or approaching
too quickly the vehicle in front, the cruise
control is automatically deactivated.
t
h
e
driver is then alerted by an audible signal,
accompanied by a message.
If the vehicle in front accelerates or changes
lane, the active cruise control progressively
accelerates your vehicle to return to the
programmed speed.
If the driver operates a direction indicator to
overtake a slower vehicle, the active cruise
control allows your vehicle to temporarily
approach the vehicle in front to assist the
overtaking manoeuvre, though never exceeding
the programmed speed.
Switching between the
types of cruise control
the choice between the "active" and "standard"
cruise control is made in the " Driving
assistance " menu.
th
e cruise control selection thumb wheel must
be in the "CR
uI
S
e" p
osition, other wise the
choice will not be taken into account.
For more information on the
"standard" cruise control, refer to the
corresponding section.
th
e state of the system is memorised on
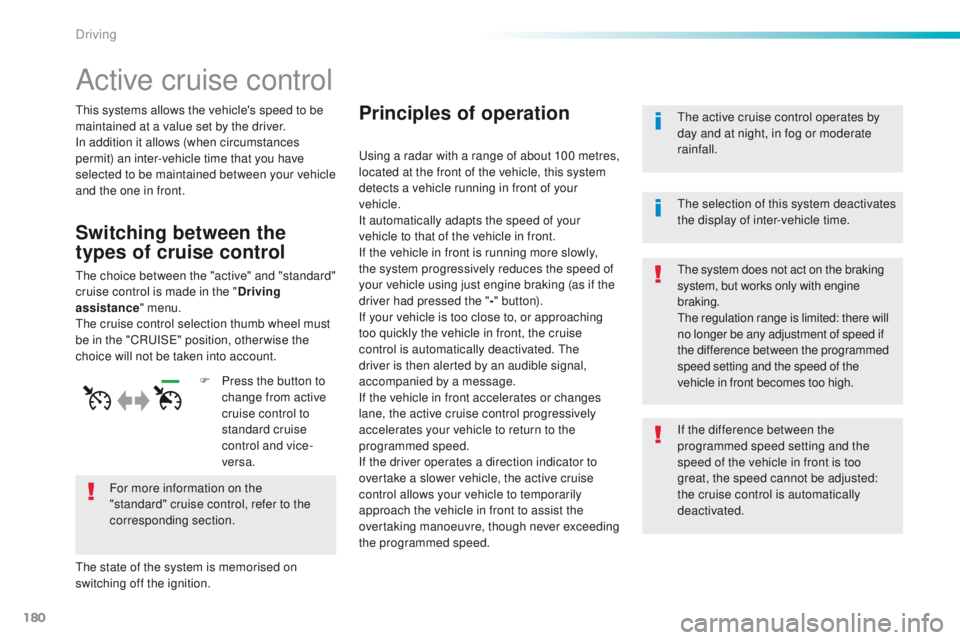
switching off the ignition. F
P
ress the button to
change from active
cruise control to
standard cruise
control and vice-
versa.
th
e active cruise control operates by
day and at night, in fog or moderate
rainfall.th e system does not act on the braking
system, but works only with engine
braking.
th
e regulation range is limited: there will
no longer be any adjustment of speed if
the difference between the programmed
speed setting and the speed of the
vehicle in front becomes too high.
th
e selection of this system deactivates
the display of inter-vehicle time.
If the difference between the
programmed speed setting and the
speed of the vehicle in front is too
great, the speed cannot be adjusted:
the cruise control is automatically
deactivated.
Driving
Page 183 of 398
181
the active cruise control is switched on manually,
it requires that the speed of the vehicle be between
25 mph (40 km/h) and 90 mph (150 km/h).
General points
the active cruise control can be paused
manually with the control, or automatically:
-
b
y pressing the brake or clutch pedal,
-
i
n the event of operation of the e SC, for
safety reasons,
-
i
n the event of an action of the electric
parking brake control,
-
w
hen an inter-vehicle time threshold is
reached (calculated according to the
relative speeds of your vehicle and the
vehicle in front and the inter-vehicle time
setting chosen),
-
w
hen the distance between your vehicle
and the one in front becomes to small,
-
w
hen the speed of the vehicle in front is
to
low,
-
w
hen the speed of your vehicle becomes
too low.
th
e active cruise control cannot in any
circumstances replace the observation
of speed limits, nor the need for the
vigilance on the part of the driver.
It is recommended that you always keep
your feet close to the pedals.
the
inter-vehicle time setting is
memorised when switching off the
ignition.
With a manual gearbox, third or fourth gear
(depending on engine) or higher must be
engaged.
With an automatic gearbox, second gear or
higher must be engaged.
If the cruise speed setting is above 90 mph
(150 km/h), the active cruise control switches to
normal cruise control mode (without automatic
adjustment of the safety inter-vehicle distance).
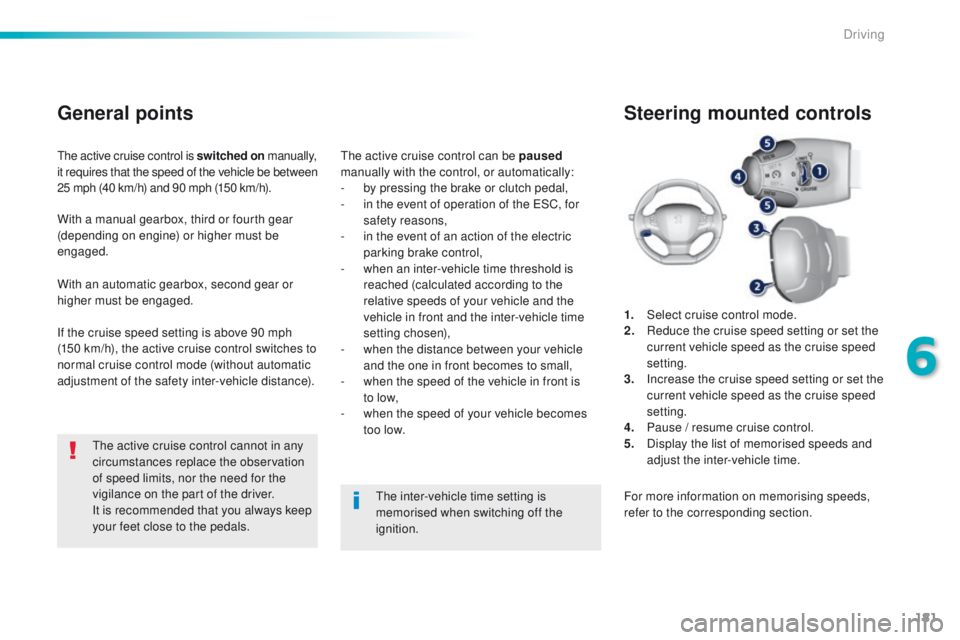
1.
Sel
ect cruise control mode.
2.
R
educe the cruise speed setting or set the
current vehicle speed as the cruise speed
setting.
3.
I
ncrease the cruise speed setting or set the
current vehicle speed as the cruise speed
setting.
4.
P
ause / resume cruise control.
5.
D
isplay the list of memorised speeds and
adjust the inter-vehicle time.
Steering mounted controls
For more information on memorising speeds,
refer to the corresponding section.
6
Driving
Page 197 of 398
195
Blind spot sensors
Operation
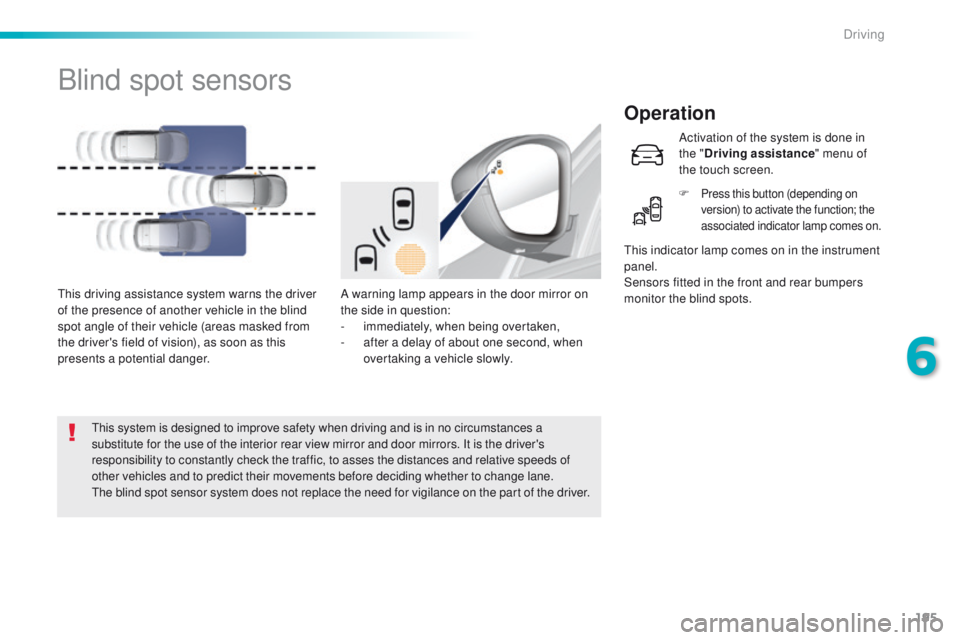
A warning lamp appears in the door mirror on
the side in question:
-
i
mmediately, when being overtaken,
-
a
fter a delay of about one second, when
overtaking a vehicle slowly.th
is driving assistance system warns the driver
of the presence of another vehicle in the blind
spot angle of their vehicle (areas masked from
the driver's field of vision), as soon as this
presents a potential danger.
th
is indicator lamp comes on in the instrument
panel.
Sensors fitted in the front and rear bumpers
monitor the blind spots.
th
is system is designed to improve safety when driving and is in no circumstances a
substitute for the use of the interior rear view mirror and door mirrors. It is the driver's
responsibility to constantly check the traffic, to asses the distances and relative speeds of
other vehicles and to predict their movements before deciding whether to change lane.
th
e blind spot sensor system does not replace the need for vigilance on the part of the driver. Activation of the system is done in
the "
Driving assistance " menu of
the touch screen.
F
Press this button (depending on
version) to activate the function; the
associated indicator lamp comes on.
6
Driving
Page 201 of 398
199
the system will be deactivated
automatically if a trailer is being
towed or a bicycle carrier is fitted on
a towbar (vehicle fitted with a towbar
installed in line with the manufacturer's
recommendations).
Deactivation / Activation of
the front and rear parking
sensors
the system is deactivated in the
"Driving assistance " menu of the
touch screen.
F
P
ress this button. t
h
e indicator
lamp in the button comes on.
Pressing this button again reactivates the function.
th
e indicator lamp in the button goes off.
the
parking sensors are deactivated
while the Park Assist system is
measuring a space.
For more information on Park Assist,
refer to the corresponding section. High pressure jet wash
When washing your vehicle, do not
direct the lance within 30 cm of the
sensors.
Operating fault
- this warning lamp comes on in
the instrument panel and/or a
message appears, accompanied
by an audible signal,
-
this symbol changes to alert mode,
its warning lamp flashes for a few
moments then stays on and a
message appears, accompanied by
an audible signal.
Contact a Pe ugeOt dealer or a qualified
workshop. In bad weather or in winter, ensure
that the sensors are not covered with
mud, ice or snow. When reverse gear is
engaged, an audible signal (long beep)
indicates that the sensors may be dirty.
Certain sound sources (motorcycle,
lorry, pneumatic drill, etc.) may trigger
the audible signals of the parking
sensor system.
Depending on version and when engaging
reverse:
6
Driving
Page 202 of 398
200
Reversing camera
Opening the tailgate causes the display
to disappear.
the
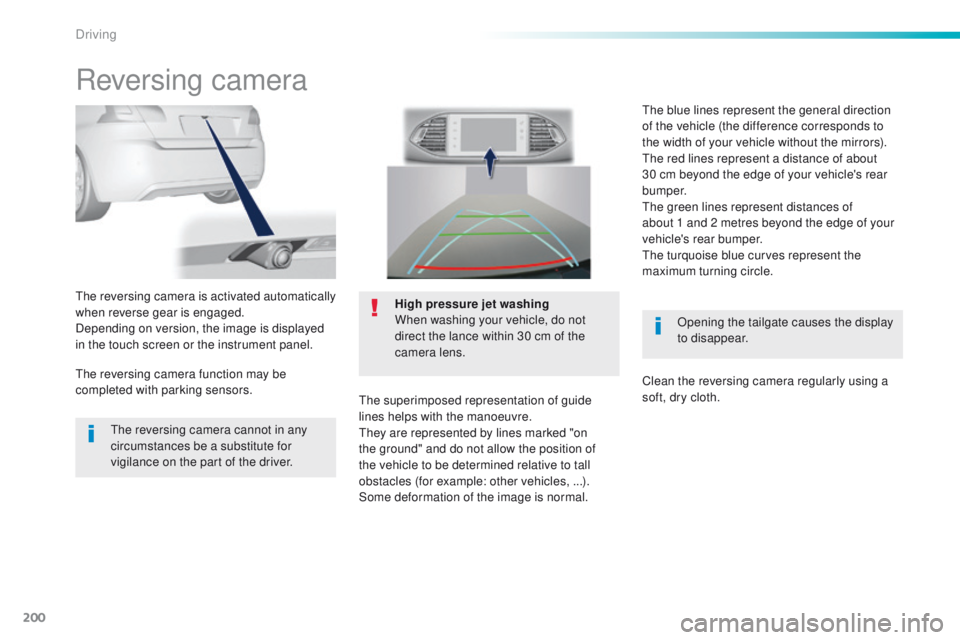
reversing camera is activated automatically
when reverse gear is engaged.
Depending on version, the image is displayed
in the touch screen or the instrument panel. High pressure jet washing
When washing your vehicle, do not
direct the lance within 30 cm of the
camera lens.
the
superimposed representation of guide
lines helps with the manoeuvre.
th
ey are represented by lines marked "on
the ground" and do not allow the position of
the vehicle to be determined relative to tall
obstacles (for example: other vehicles, ...).
Some deformation of the image is normal.
th
e reversing camera cannot in any
circumstances be a substitute for
vigilance on the part of the driver.
th
e reversing camera function may be
completed with parking sensors.
th
e blue lines represent the general direction
of the vehicle (the difference corresponds to
the width of your vehicle without the mirrors).
th
e red lines represent a distance of about
30 cm beyond the edge of your vehicle's rear
b u m p e r.
th
e green lines represent distances of
about
1 and 2 metres beyond the edge of your
vehicle's rear bumper.
the
turquoise blue curves represent the
maximum turning circle.
Clean the reversing camera regularly using a
soft, dry cloth.
Driving
Page 209 of 398
207
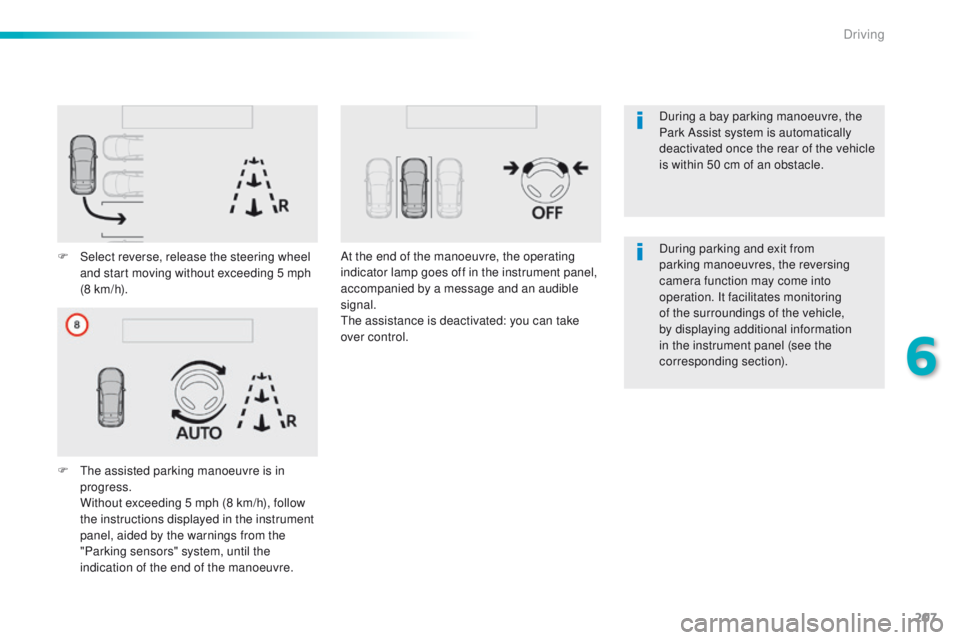
F Select reverse, release the steering wheel and start moving without exceeding 5 mph
(8 km/h).
F
t
h
e assisted parking manoeuvre is in
progress.
W
ithout exceeding 5 mph (8 km/h), follow
the instructions displayed in the instrument
panel, aided by the warnings from the
"Parking sensors" system, until the
indication of the end of the manoeuvre. At the end of the manoeuvre, the operating
indicator lamp goes off in the instrument panel,
accompanied by a message and an audible
signal.
th
e assistance is deactivated: you can take
over control. During parking and exit from
parking manoeuvres, the reversing
camera function may come into
operation. It facilitates monitoring
of the surroundings of the vehicle,
by displaying additional information
in the instrument panel (see the
corresponding section). During a bay parking manoeuvre, the
Park Assist system is automatically
deactivated once the rear of the vehicle
is within 50 cm of an obstacle.
6
Driving
Page 211 of 398
209
Under-inflation detection
the system monitors the pressures in the
four tyres, once the vehicle is moving.
It compares the information given by the four
wheel speed sensors with reference values,
which must be reinitialised ever y time the
tyre pressures are adjusted or a wheel
changed .
th
e system triggers an alert as soon as it
detects a drop in the inflation pressure of one
or more tyres.th e under-inflation detection system
does not replace the need for vigilance
on the part of the driver.
th
is system does not avoid the need to
check the tyre pressures (including the
spare wheel) every month as well as
before a long journey.
Driving with under-inflated tyres impairs
road holding, extends braking distances
and causes premature tyre wear,
particularly under arduous condition
(high loading, high speed, long journey).
System which automatically checks the pressures of the tyres while driving.th
e inflation pressures defined for
your vehicle can be found on the tyre
pressure label.
For more information on the
identification markings, refer to the
corresponding section.
ty
re pressures should be checked
when the tyres are "cold" (vehicle
stopped for 1 hour or after a journey of
less than 6 miles (10 km) at moderate
speeds).
Other wise (when hot), add 0.3 bar to
the pressures shown on the label.
Driving with under-inflated tyres
increases fuel consumption.
Snow chains
the system does not have to be
reinitialised after fitting or removing
snow chains.
6
Driving
Page 220 of 398
218
towing a trailer
We recommend the use of genuine
PeugeOt towbars and their harnesses
that have been tested and approved
from the design stage of your vehicle,
and that the fitting of the towbar is
entrusted to a P
e
uge
Ot
dealer or a
qualified workshop.
If the towbar is not fitted by a
P
e
uge
Ot
dealer, it must still be
fitted in accordance with the vehicle
manufacturer's instructions.
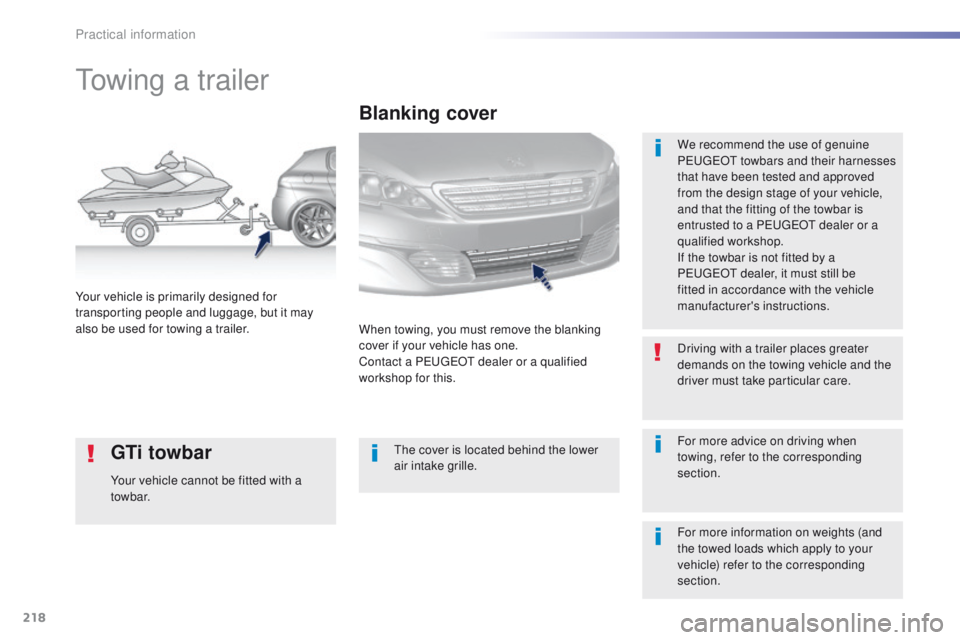
Your vehicle is primarily designed for
transporting people and luggage, but it may
also be used for towing a trailer.
Blanking cover
When towing, you must remove the blanking
cover if your vehicle has one.
Contact a P
e
uge
Ot
dealer or a qualified
workshop for this. Driving with a trailer places greater
demands on the towing vehicle and the
driver must take particular care.
th
e cover is located behind the lower
air intake grille.
For more information on weights (and
the towed loads which apply to your
vehicle) refer to the corresponding
section.
GTi towbar
Your vehicle cannot be fitted with a
towbar. For more advice on driving when
towing, refer to the corresponding
section.
Practical information
Page 221 of 398
219
System which manages the duration of use of certain functions to conserve a sufficient level of
charge in the battery.
After the engine has stopped, you can still use functions such as the audio and telematics
system, windscreen wipers, dipped beam headlamps, courtesy lamps, etc. for a maximum
combined duration of about forty minutes.
energy economy mode
Switching to economy mode
A message then appears in the instrument
panel screen indicating that the vehicle has
switched to economy mode and the active
functions are put on standby.
If a telephone call is being made at this time, it
will be maintained for around 10 minutes with
the Bluetooth hands-free system of your audio
system.
Exiting economy mode
these functions are reactivated automatically
next time the vehicle is driven.
In order to restore the use of these functions
immediately, start the engine and let it run:
-
f
or less than ten minutes, to use the
equipment for approximately five minutes,
-
f
or more than ten minutes, to use the
equipment for up to approximately
thirty
minutes.
Let the engine run for the duration specified to
ensure that the battery charge is sufficient.
Do not repeatedly and continuously restart the
engine in order to charge the battery.
A flat battery prevents the engine from starting.
For more information on the battery, refer to the
corresponding section.
Load reduction mode
System which manages the use of certain
functions according to the level of charge
remaining in the battery.
When the vehicle is being driven, the load
reduction function temporarily deactivates
certain functions, such as the air conditioning,
the heated rear screen...
th
e deactivated functions are reactivated
automatically as soon as conditions permit.
7
Practical information
Page 224 of 398
222
Changing a wiper blade
Before removing a front
wiper blade
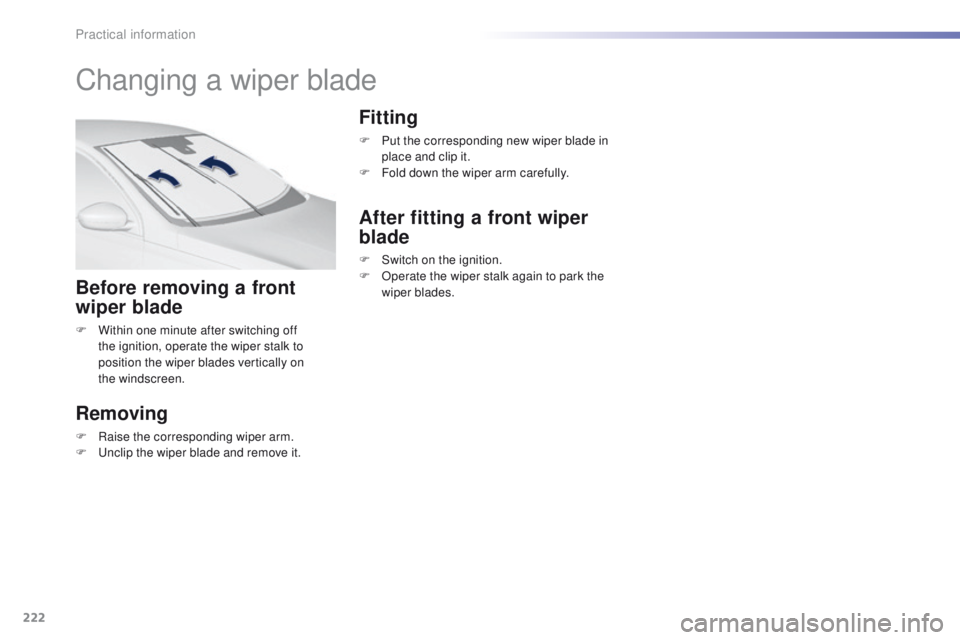
F Within one minute after switching off the ignition, operate the wiper stalk to
position the wiper blades vertically on
the
windscreen.
Removing
F Raise the corresponding wiper arm.
F un clip the wiper blade and remove it.
Fitting
F Put the corresponding new wiper blade in place and clip it.
F
F
old down the wiper arm carefully.
After fitting a front wiper
blade
F Switch on the ignition.
F O perate the wiper stalk again to park the
wiper blades.
Practical information