turn signal Peugeot 308 2016 Owner's Manual
[x] Cancel search | Manufacturer: PEUGEOT, Model Year: 2016, Model line: 308, Model: Peugeot 308 2016Pages: 398, PDF Size: 9.38 MB
Page 25 of 398
23
308_en_Chap01_instruments-de-bord_ed02-2015
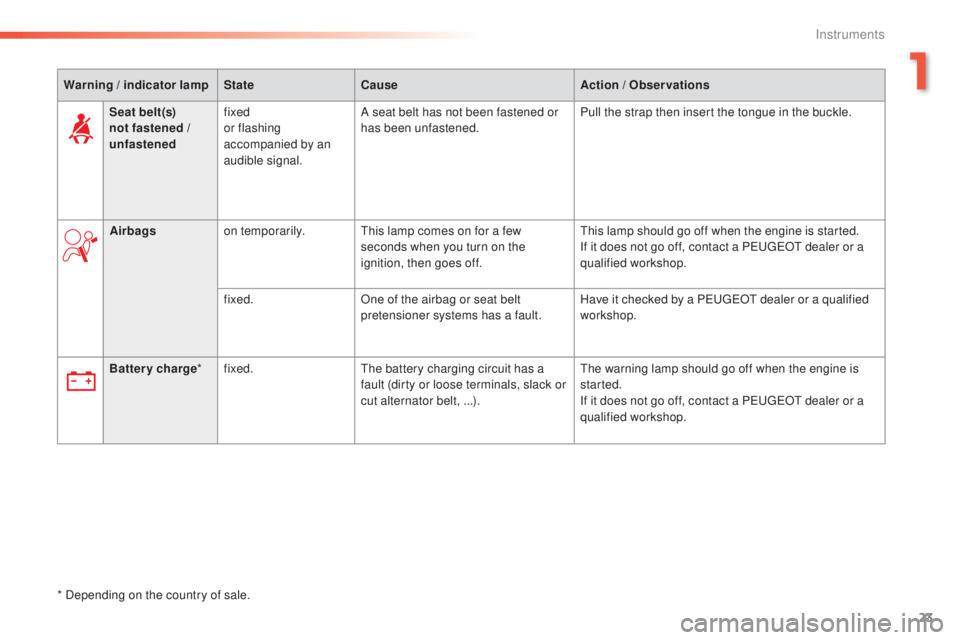
Warning / indicator lampStateCause Action / Observations
Battery charge *fixed.
the
battery charging circuit has a
fault (dirty or loose terminals, slack or
cut alternator belt, ...).
the w
arning lamp should go off when the engine is
started.
If it does not go off, contact a P
eu
ge
Ot d
ealer or a
qualified workshop.
*
D
epending on the country of sale. Seat belt(s)
not fastened
/
un
fastened fixed
or flashing
accompanied by an
audible signal. A seat belt has not been fastened or
has been unfastened.
Pull the strap then insert the tongue in the buckle.
Airbags on temporarily.
thi
s lamp comes on for a few
seconds when you turn on the
ignition, then goes off.
thi
s lamp should go off when the engine is started.
If it does not go off, contact a P
eu
ge
Ot d
ealer or a
qualified workshop.
fixed. One of the airbag or seat belt
pretensioner systems has a fault. Have it checked by a P
eu
ge
Ot d
ealer or a qualified
workshop.
1
Instruments
Page 29 of 398
27
308_en_Chap01_instruments-de-bord_ed02-2015
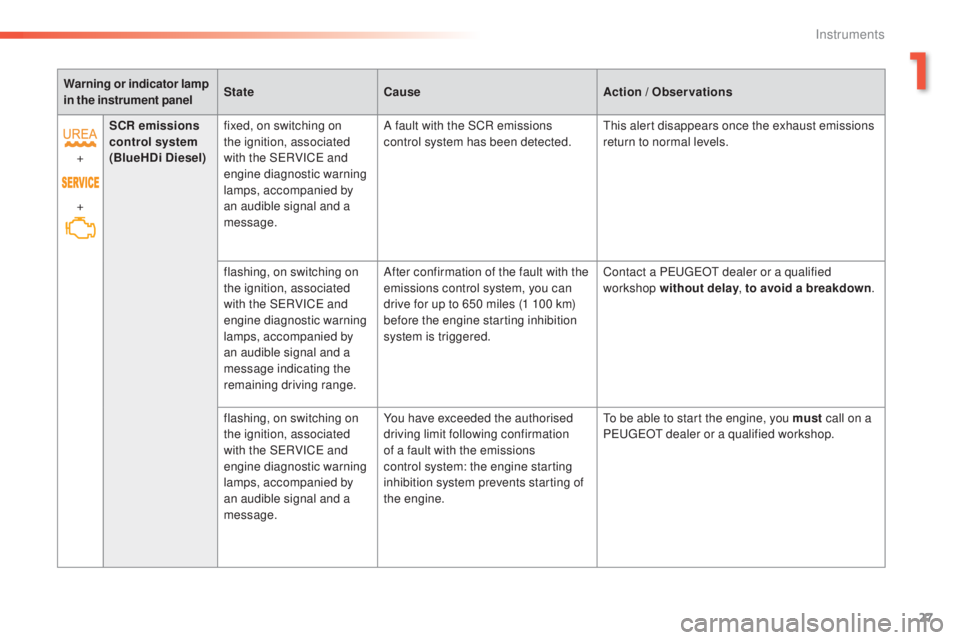
Warning or indicator lamp
in the instrument panelState
Cause Action /
Observations
+
+ SCR emissions
control system
(BlueHDi Diesel) fixed, on switching on
the ignition, associated
with the S
eRV
IC
e a
nd
engine diagnostic warning
lamps, accompanied by
an audible signal and a
message. A fault with the SCR emissions
control system has been detected.
thi
s alert disappears once the exhaust emissions
return to normal levels.
flashing, on switching on
the ignition, associated
with the S
eRV
IC
e a
nd
engine diagnostic warning
lamps, accompanied by
an audible signal and a
message indicating the
remaining driving range. After confirmation of the fault with the
emissions control system, you can
drive for up to 650 miles (1 100 km)
before the engine starting inhibition
system is triggered.
Contact a P
eu
ge
Ot d
ealer or a qualified
workshop without delay , to avoid a breakdown.
flashing, on switching on
the ignition, associated
with the S
eRV
IC
e a
nd
engine diagnostic warning
lamps, accompanied by
an audible signal and a
message. You have exceeded the authorised
driving limit following confirmation
of a fault with the emissions
control system: the engine starting
inhibition system prevents starting of
the
eng
ine.
to be a
ble to start the engine, you must call on a
P
eu
ge
Ot d
ealer or a qualified workshop.
1
Instruments
Page 63 of 398
61
308_en_Chap02_ouvertures_ed02-2015
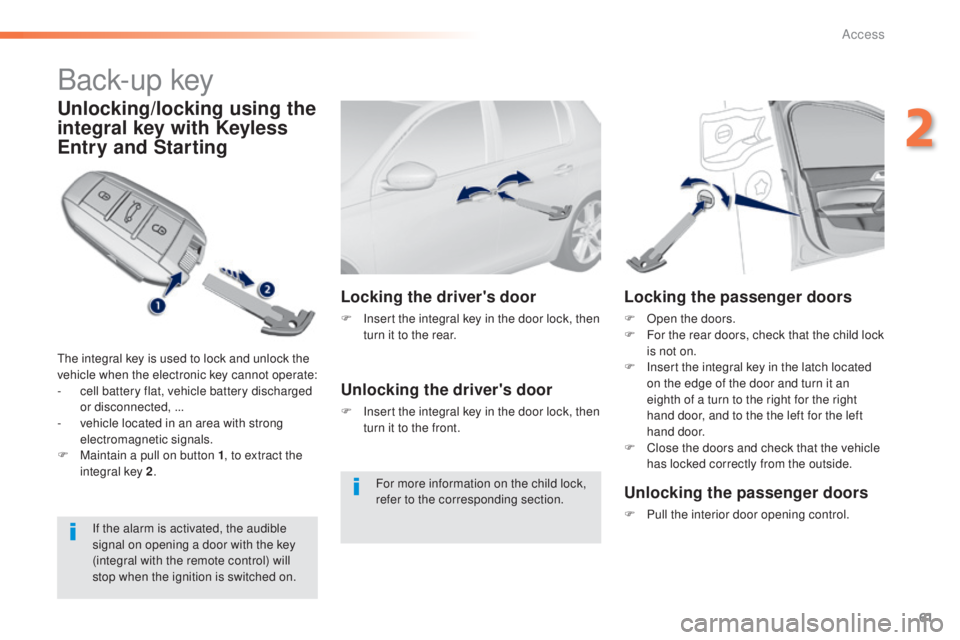
Back-up key
Unlocking/locking using the
integral key with Keyless
Entry and Starting
the integral key is used to lock and unlock the
v ehicle when the electronic key cannot operate:
-
ce
ll battery flat, vehicle battery discharged
or disconnected, ...
-
ve
hicle located in an area with strong
electromagnetic signals.
F
Ma
intain a pull on button 1 , to extract the
integral key 2 .
Locking the driver's door
F Insert the integral key in the door lock, then
t
urn it to the rear.
Unlocking the driver's door
F Insert the integral key in the door lock, then
turn it to the front.
Locking the passenger doors
F Open the doors.
F Fo r the rear doors, check that the child lock
is not on.
F
In
sert the integral key in the latch located
on the edge of the door and turn it an
eighth of a turn to the right for the right
hand door, and to the the left for the left
hand door.
F
Cl
ose the doors and check that the vehicle
has locked correctly from the outside.
If the alarm is activated, the audible
signal on opening a door with the key
(integral with the remote control) will
stop when the ignition is switched on.
Unlocking the passenger doors
F Pull the interior door opening control.
F
or more information on the child lock,
refer to the corresponding section.
2
Access
Page 114 of 398
112
308_en_Chap04_eclairage-et-visibilite_ed02-2015
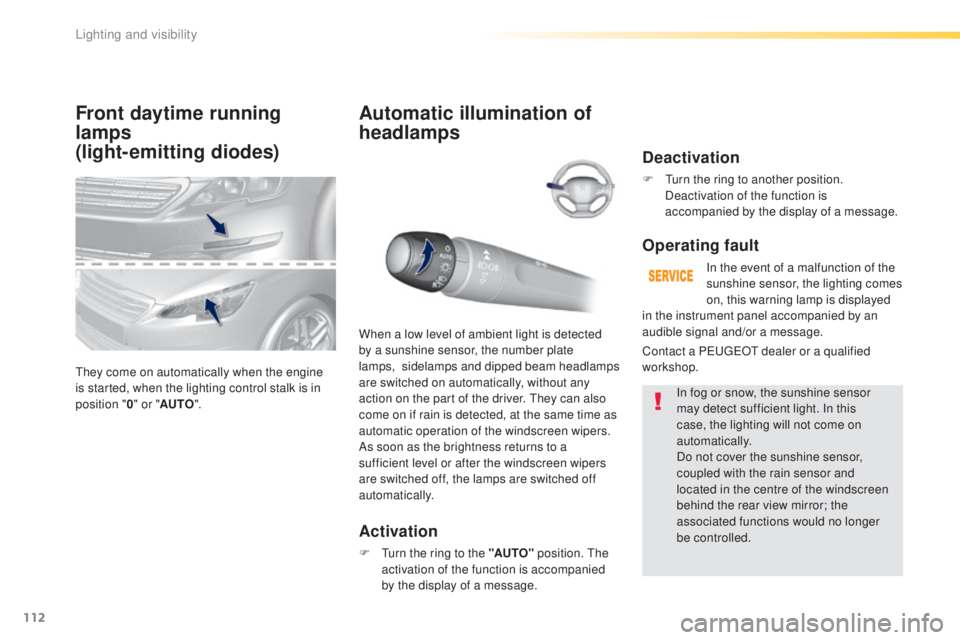
Front daytime running
lamps
(light-emitting diodes)
they come on automatically when the engine
i s started, when the lighting control stalk is in
position " 0" or " AUTO ".
Automatic illumination of
headlamps
Activation
F turn the ring to the "AUTO" p osition. the
a ctivation of the function is accompanied
by the display of a message.
When a low level of ambient light is detected
by a sunshine sensor, the number plate
lamps,
si
delamps and dipped beam headlamps
are switched on automatically, without any
action on the part of the driver.
the
y can also
come on if rain is detected, at the same time as
automatic operation of the windscreen wipers.
As soon as the brightness returns to a
sufficient level or after the windscreen wipers
are switched off, the lamps are switched off
automatically.
Deactivation
F turn the ring to another position.
D eactivation of the function is
accompanied by the display of a message.
Operating fault
In the event of a malfunction of the
sunshine sensor, the lighting comes
on, this warning lamp is displayed
In fog or snow, the sunshine sensor
may detect sufficient light. In this
case, the lighting will not come on
automatically.
Do not cover the sunshine sensor,
coupled with the rain sensor and
located in the centre of the windscreen
behind the rear view mirror; the
associated functions would no longer
be controlled.
Contact a P
eu
ge
Ot d
ealer or a qualified
workshop. in the instrument panel accompanied by an
audible signal and/or a message.
Lighting and visibility
Page 129 of 398
127
308_en_Chap05_securite_ed02-2015
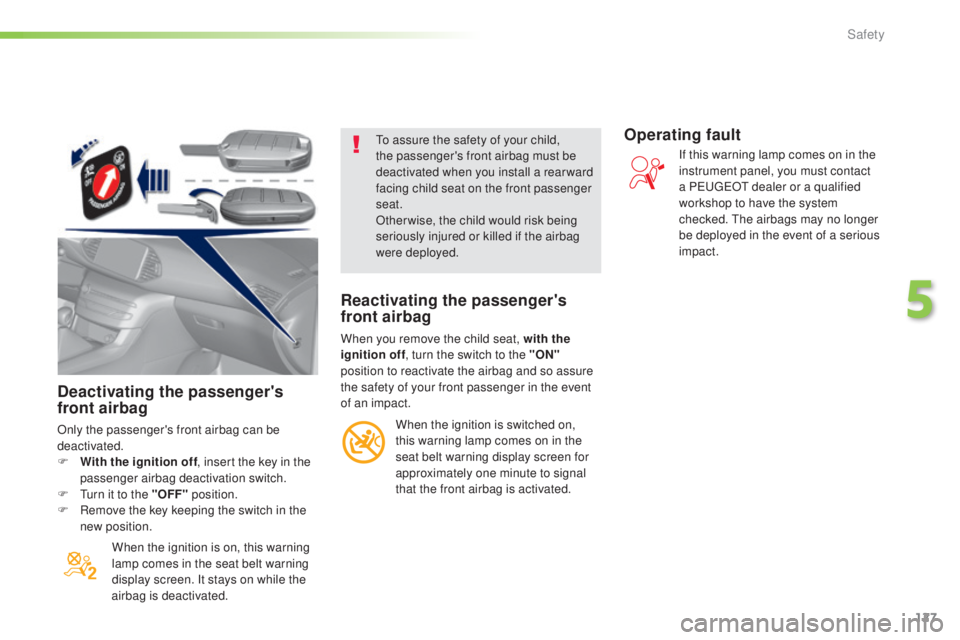
Deactivating the passenger's
front airbag
Only the passenger's front airbag can be
deactivated.
F
Wi
th the ignition off , insert the key in the
passenger airbag deactivation switch.
F
t
ur
n it to the "OFF" position.
F
Re
move the key keeping the switch in the
new position.
When the ignition is on, this warning
lamp comes in the seat belt warning
display screen. It stays on while the
airbag is deactivated.
to as
sure the safety of your child,
the passenger's front airbag must be
deactivated when you install a rear ward
facing child seat on the front passenger
seat.
Otherwise, the child would risk being
seriously injured or killed if the airbag
were deployed.
Reactivating the passenger's
front airbag
When you remove the child seat, with the
ignition off , turn the switch to the "ON"
position to reactivate the airbag and so assure
the safety of your front passenger in the event
of an impact.
When the ignition is switched on,
this warning lamp comes on in the
seat belt warning display screen for
approximately one minute to signal
that the front airbag is activated.
Operating fault
If this warning lamp comes on in the
instrument panel, you must contact
a P
eu
ge
Ot d
ealer or a qualified
workshop to have the system
checked.
the a
irbags may no longer
be deployed in the event of a serious
impact.
5
Safety
Page 168 of 398
166
308_en_Chap06_conduite_ed02-2015
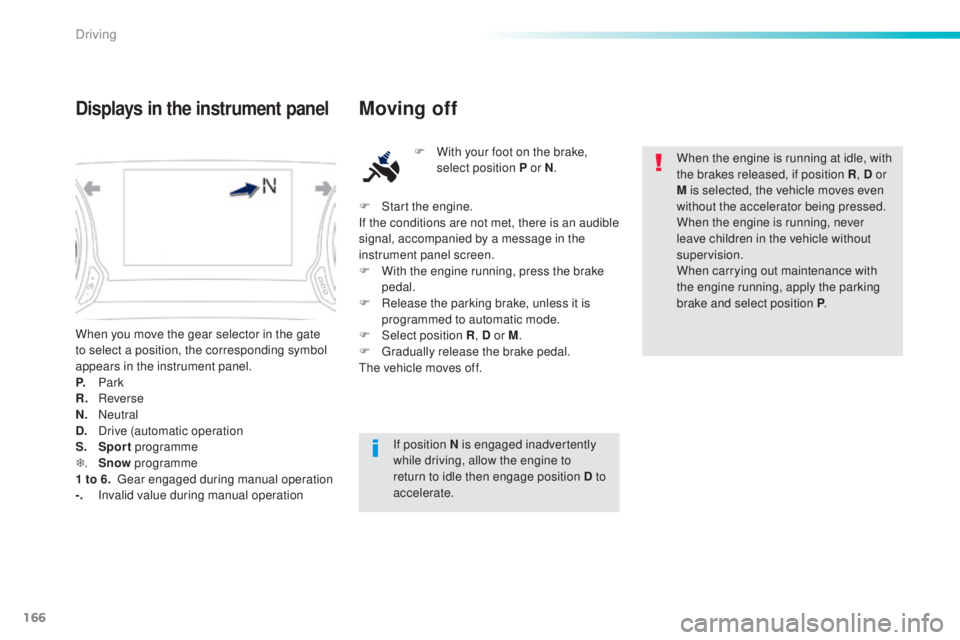
When you move the gear selector in the gate
to select a position, the corresponding symbol
appears in the instrument panel.
P.
Pa
rk
R.
Re
verse
N.
Ne
utral
D.
Dr
ive (automatic operation
S.
Sp
ort programme
T .
Sn
ow programme
1 to 6.
g
ear
engaged during manual operation
-.
In
valid value during manual operation
Displays in the instrument panelMoving off
F With your foot on the brake,
select position P or N .
If position N is engaged inadvertently
while driving, allow the engine to
return to idle then engage position D to
accelerate. When the engine is running at idle, with
the brakes released, if position R
, D or
M is selected, the vehicle moves even
without the accelerator being pressed.
When the engine is running, never
leave children in the vehicle without
supervision.
When carrying out maintenance with
the engine running, apply the parking
brake and select position P .
F
St
art the engine.
If the conditions are not met, there is an audible
signal, accompanied by a message in the
instrument panel screen.
F
Wi
th the engine running, press the brake
pedal.
F
Re
lease the parking brake, unless it is
programmed to automatic mode.
F
Selec
t position R , D or M.
F
g
rad
ually release the brake pedal.
the v
ehicle moves off.
Driving
Page 170 of 398
168
308_en_Chap06_conduite_ed02-2015
F Select position M for sequential c hanging
of the six gears.
F
Pu
ll towards the + sign and release to
change up a gear.
F
Pu
sh towards the - sign and release to
change down a gear.
It is only possible to change from one gear to
another if the vehicle speed and engine speed
permit; otherwise, the gearbox will operate
temporarily in automatic mode.
D disappears and the gears
engaged appear in succession in the
instrument panel.
If the engine speed is too low or too high, the
gear selected flashes for a few seconds, then
the actual gear engaged is displayed.
It is possible to change from position D
(automatic) to position M (manual) at any time.
When the vehicle is stationary or moving
very slowly, the gearbox selects gear M1
automatically.
the s
port and snow programmes do not
operate in manual mode.
Manual operation
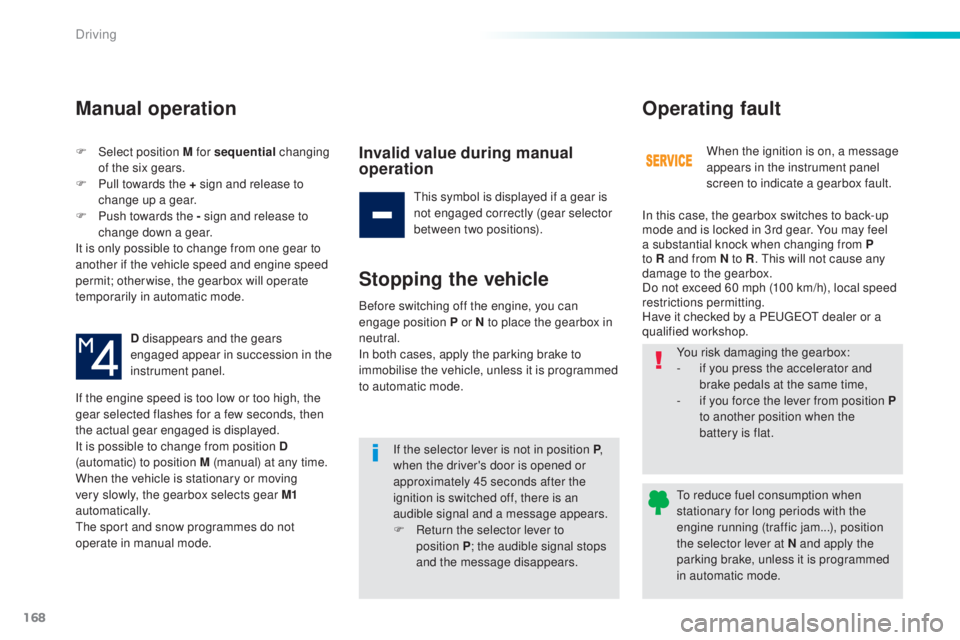
Invalid value during manual
operation
this symbol is displayed if a gear is
n ot engaged correctly (gear selector
between two positions).
Stopping the vehicle
If the selector lever is not in position P ,
when the driver's door is opened or
approximately 45 seconds after the
ignition is switched off, there is an
audible signal and a message appears.
F
Re
turn the selector lever to
position
P ; t
he audible signal stops
and the message disappears. When the ignition is on, a message
appears in the instrument panel
screen to indicate a gearbox fault.
Operating fault
In this case, the gearbox switches to back-up
mode and is locked in 3rd gear. You may feel
a substantial knock when changing from P
to R and from N to R
.
thi
s will not cause any
damage to the gearbox.
Do not exceed 60 mph (100 km/h), local speed
restrictions permitting.
Have it checked by a P
eu
ge
Ot d
ealer or a
qualified workshop.
Before switching off the engine, you can
engage position P or N to place the gearbox in
neutral.
In both cases, apply the parking brake to
immobilise the vehicle, unless it is programmed
to automatic mode. You risk damaging the gearbox:
-
if y
ou press the accelerator and
brake pedals at the same time,
-
if y
ou force the lever from position
P
to another position when the
battery is flat.
to re
duce fuel consumption when
stationary for long periods with the
engine running (traffic jam...), position
the selector lever at N and apply the
parking brake, unless it is programmed
in automatic mode.
Driving
Page 178 of 398
176
308_en_Chap06_conduite_ed02-2015
On sharp acceleration, as when
descending a steep hill, the speed
limiter will not be able to prevent
the vehicle from exceeding the
programmed speed.
the l
imiter is temporarily deactivated
and the displayed programmed speed
flashes.
An audible signal accompanies the
flashing of the programmed speed
when exceeding the speed is not due to
an action by the driver.
the u
se of mats not approved by
P
eu
ge
Ot m
ay inter fere with the
operation of the speed limiter.
to av
oid any risk of jamming of the
pedals:
-
en
sure that the mat is secured
c o r r e c t l y,
-
do n
ot fit one mat on top of another.
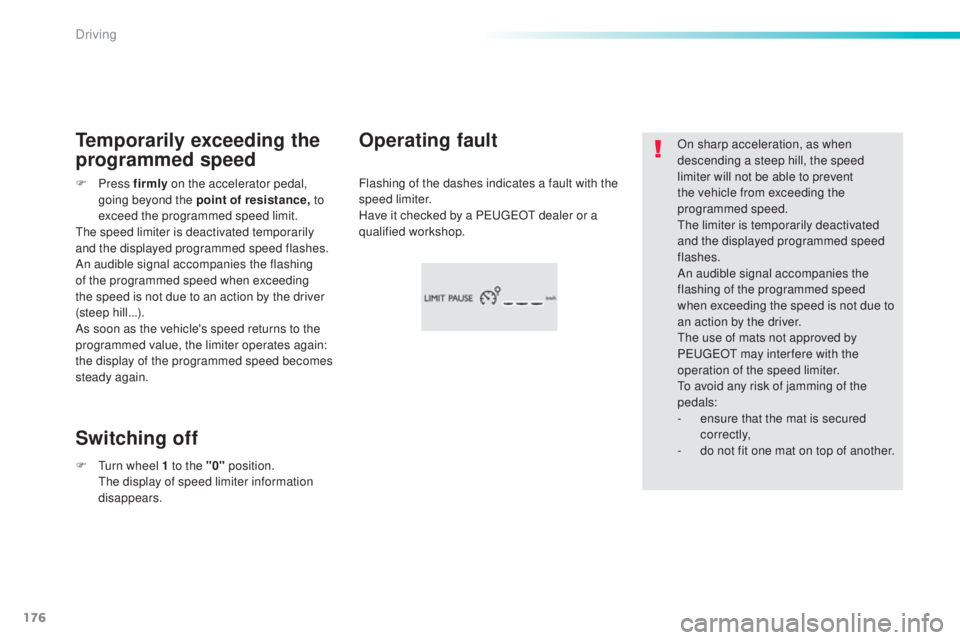
Flashing of the dashes indicates a fault with the
speed limiter.
Have it checked by a P
eu
ge
Ot d
ealer or a
qualified workshop.Operating fault
Temporarily exceeding the
programmed speed
Switching off
F Press fir mly on the accelerator pedal,
going beyond the point of resistance, t o
exceed the programmed speed limit.
the s
peed limiter is deactivated temporarily
and the displayed programmed speed flashes.
An audible signal accompanies the flashing
of the programmed speed when exceeding
the speed is not due to an action by the driver
(steep hill...).
As soon as the vehicle's speed returns to the
programmed value, the limiter operates again:
the display of the programmed speed becomes
steady again.
F
t
ur
n wheel 1 to the "0" position.
the
display of speed limiter information
disappears.
Driving
Page 182 of 398
180
308_en_Chap06_conduite_ed02-2015
Active cruise control
this systems allows the vehicle's speed to be
m aintained at a value set by the driver.
In addition it allows (when circumstances
permit) an inter-vehicle time that you have
selected to be maintained between your vehicle
and the one in front.Principles of
operation
using a radar with a range of about 100 metres,
l ocated at the front of the vehicle, this system
detects a vehicle running in front of your
vehicle.
It automatically adapts the speed of your
vehicle to that of the vehicle in front.
If the vehicle in front is running more slowly,
the system progressively reduces the speed of
your vehicle using just engine braking (as if the
driver had pressed the " -" b ut to n).
If your vehicle is too close to, or approaching
too quickly the vehicle in front, the cruise
control is automatically deactivated.
the
d
river is then alerted by an audible signal,
accompanied by a message.
If the vehicle in front accelerates or changes
lane, the active cruise control progressively
accelerates your vehicle to return to the
programmed speed.
If the driver operates a direction indicator to
overtake a slower vehicle, the active cruise
control allows your vehicle to temporarily
approach the vehicle in front to assist the
overtaking manoeuvre, though never exceeding
the programmed speed.
Switching between the
types of cruise control
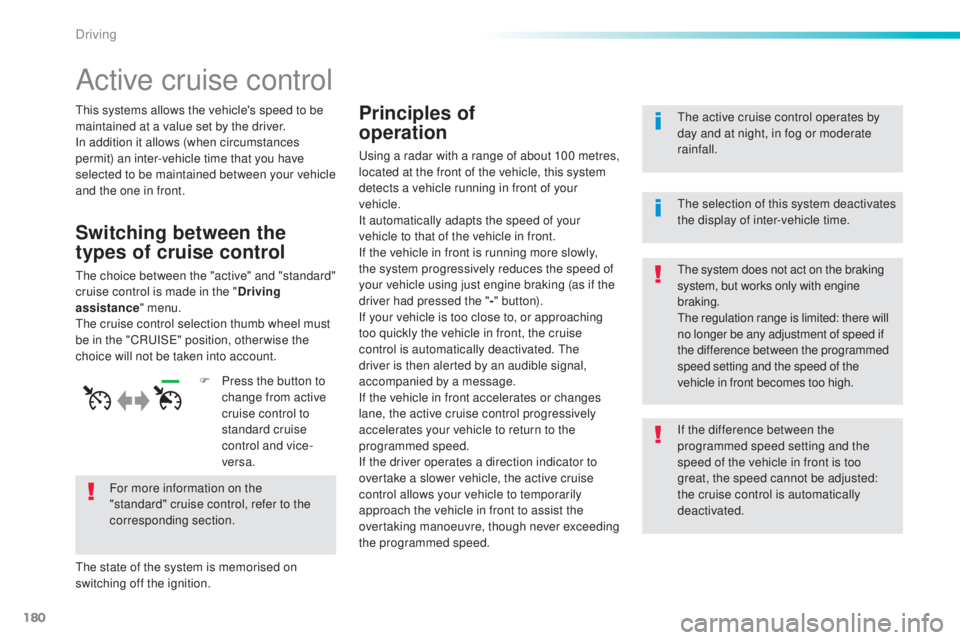
the choice between the "active" and "standard"
c ruise control is made in the " Driving
assistance " menu.
the c
ruise control selection thumb wheel must
be in the "CR
uISe" po
sition, other wise the
choice will not be taken into account.
For more information on the
"standard" cruise control, refer to the
corresponding section.
the s
tate of the system is memorised on
switching off the ignition. F
Pr
ess the button to
change from active
cruise control to
standard cruise
control and vice-
versa.
the a
ctive cruise control operates by
day and at night, in fog or moderate
rainfall.the sy stem does not act on the braking
system, but works only with engine
braking.
the r
egulation range is limited: there will
no longer be any adjustment of speed if
the difference between the programmed
speed setting and the speed of the
vehicle in front becomes too high.
the s
election of this system deactivates
the display of inter-vehicle time.
If the difference between the
programmed speed setting and the
speed of the vehicle in front is too
great, the speed cannot be adjusted:
the cruise control is automatically
deactivated.
Driving
Page 233 of 398
231
308_en_Chap07_info-pratiques_ed02-2015
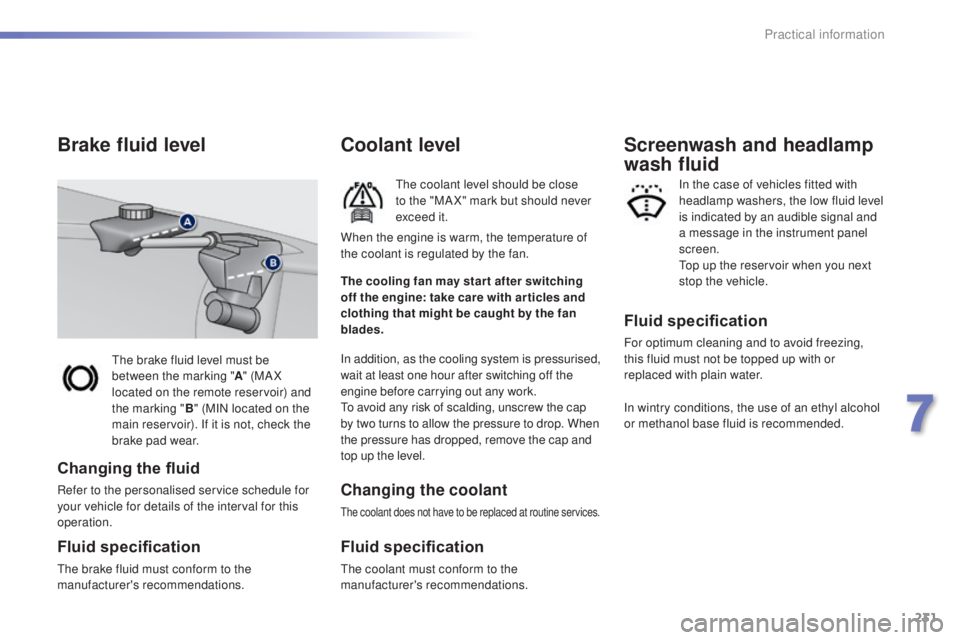
the brake fluid level must be
b etween the marking " A" (MA X
located on the remote reservoir) and
the marking " B" (MIN located on the
main reservoir). If it is not, check the
brake pad wear.
Brake fluid level
Changing the fluid
Refer to the personalised service schedule for
your vehicle for details of the interval for this
operation.
Fluid specification
the brake fluid must conform to the
ma nufacturer's recommendations.
Coolant level
the coolant level should be close
t o the "MA X" mark but should never
exceed it.
In addition, as the cooling system is pressurised,
wait at least one hour after switching off the
engine before carrying out any work.
to av
oid any risk of scalding, unscrew the cap
by two turns to allow the pressure to drop. When
the pressure has dropped, remove the cap and
top up the level.
Changing the coolant
the coolant does not have to be replaced at routine services.
Fluid specification
the coolant must conform to the
ma nufacturer's recommendations.
The cooling fan may star t after switching
off the engine: take care with ar ticles and
clothing that might be caught by the fan
blades. When the engine is warm, the temperature of
the coolant is regulated by the fan.
Fluid specification
For optimum cleaning and to avoid freezing,
this fluid must not be topped up with or
replaced with plain water.
Screenwash and headlamp
wash fluid
In the case of vehicles fitted with
headlamp washers, the low fluid level
is indicated by an audible signal and
a message in the instrument panel
screen.
top u
p the reservoir when you next
stop the vehicle.
In wintry conditions, the use of an ethyl alcohol
or methanol base fluid is recommended.
7
Practical information