window Peugeot 308 2016 Owner's Manual
[x] Cancel search | Manufacturer: PEUGEOT, Model Year: 2016, Model line: 308, Model: Peugeot 308 2016Pages: 398, PDF Size: 9.38 MB
Page 4 of 398
.
.
308_en_Chap00a_sommaire_ed02-2015
Over view
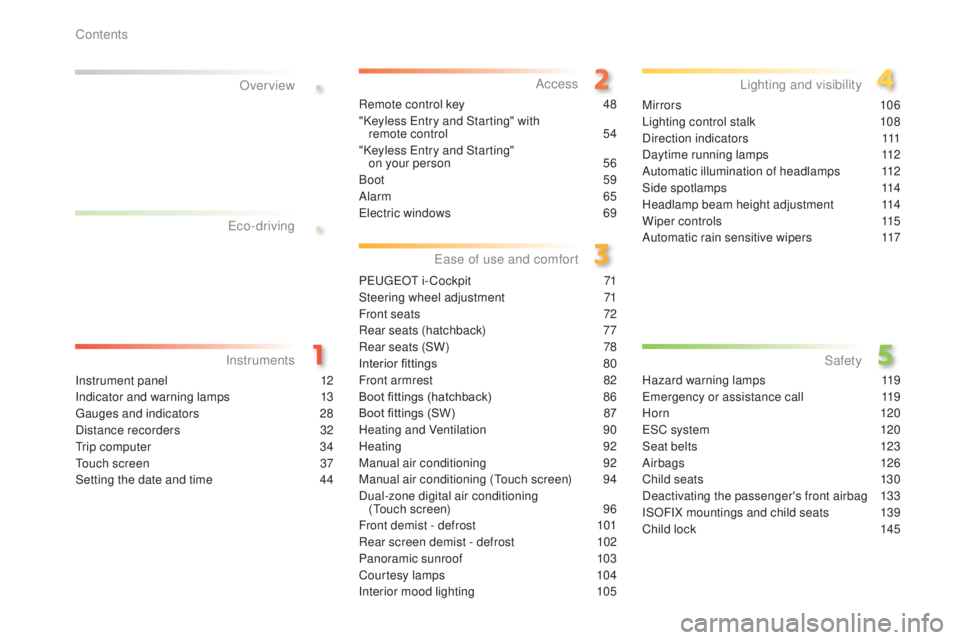
Instrument panel 12
I ndicator and warning lamps
13
gau
ges and indicators
28
D
istance recorders
32
tri
p computer
34
tou
ch screen
37
S
etting the date and time
44 R
emote control key
48
"
Keyless
ent
ry and Starting" with
remote
c
ontrol
54
"
Keyless
ent
ry and Starting"
on your person
56
Boo
t
59
A
larm
6
5
ele
ctric windows
69
P
eu
ge
Ot i
- Cockpit
71
S
teering wheel adjustment
71
F
ront seats
72
R
ear seats (hatchback)
77
R
ear seats (SW)
78
I
nterior fittings
80
F
ront armrest 82
B oot fittings (hatchback)
86
B
oot fittings (SW)
87
Hea
ting and Ventilation
90
H
eating
92
M
anual air conditioning
92
M
anual air conditioning (
touc
h screen)
94
D
ual-zone digital air conditioning (
tou
ch screen)
96
F
ront demist - defrost
10
1
Rear screen demist - defrost
10
2
Panoramic sunroof
10
3
Courtesy lamps
10
4
Interior mood lighting
10
5Mirrors
10
6
Lighting control stalk
10
8
Direction indicators
11
1
Daytime running lamps
11
2
Automatic illumination of headlamps
11
2
Side spotlamps
11
4
Headlamp beam height adjustment
11
4
Wiper controls
11
5
Automatic rain sensitive wipers
11
7
Hazard warning lamps 11 9
eme
rgency or assistance call
11
9
H or n
120
eS
C system
12
0
Seat belts
123
A
irbags
12
6
Child seats
13
0
Deactivating the passenger's front airbag
13
3
ISOFIX mountings and child seats
13
9
Child lock
14
5
eco-driving
Ins truments Access
eas
e of use and comfort Lighting and visibility
Safety
Contents
Page 6 of 398
4
308_en_Chap00b_vue-ensemble_ed02-2015
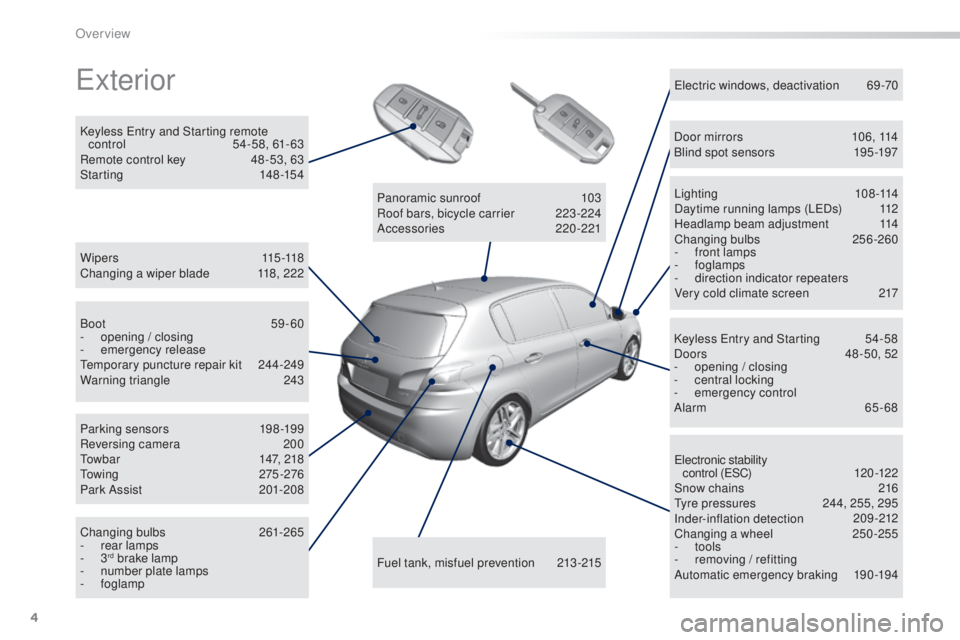
exterior
W i p e r s 115 -118
Changing a wiper blade 11 8, 222
Keyless
ent
ry and Starting remote
control
54
-58, 61- 63
Remote control key
48
-53, 63
Starting
14
8-154
elec
tronic stability
control (
eS
C)
120
-12 2
Snow chains
21
6
tyr
e pressures
24
4, 255, 295
Inder-inflation detection
209
-212
Changing a wheel
25
0-255
-
t
ools
-
re
moving / refitting
Automatic emergency braking
19
0-194
Lighting
1
08-114
Daytime running lamps (L
eDs
)
11
2
Headlamp beam adjustment
11
4
Changing bulbs
25
6-260
- fr ont lamps
- fo glamps
-
di
rection indicator repeaters
Very cold climate screen
21
7
ele
ctric windows, deactivation
69
-70
Keyless
ent
ry and Starting
54
-58
Doors
48
-50, 52
-
open
ing / closing
-
ce
ntral locking
-
emer
gency control
Alarm
6
5-68
Fuel tank, misfuel prevention
21
3-215
Panoramic sunroof
10
3
Roof bars, bicycle carrier
22
3 -224
Accessories
22
0-221
Boot
5
9-60
-
open
ing / closing
-
emer
gency release
tem
porary puncture repair kit
24
4-249
Warning triangle
24
3
Parking sensors
19
8-199
Reversing camera
20
0
tow
bar
14
7, 218
tow
ing
27
5 -276
Park Assist
20
1-208
Changing bulbs
26
1-265
-
re
ar lamps
-
3rd brake lamp
- nu mber plate lamps
-
fo
glamp Door mirrors
10
6, 114
Blind spot sensors
19
5 -197
Over view
Page 12 of 398
10
308_en_Chap00c_eco-conduite_ed02-2015
Optimise the use of your gearbox
With a manual gearbox, move off gently and change up without waiting.
During acceleration change up early.
With an automatic or electronic gearbox, give preference to automatic
mode and avoid pressing the accelerator pedal heavily or suddenly.
Control the use of your electrical
equipment
Before moving off, if the passenger compartment is too warm, ventilate it
by opening the windows and air vents before using the air conditioning.
Above 30 mph (50 km/h), close the windows and leave the air vents
open.
Remember to make use of equipment that can help keep the
temperature in the passenger compartment down (sunroof and window
blinds...).
Switch off the air conditioning, unless it has automatic regulation, as
soon as the desired temperature is attained.
Switch off the demisting and defrosting controls, if not automatic.
Switch off the heated seat as soon as possible.
Switch off the headlamps and front foglamps when the level of light
does not require their use.
Avoid running the engine before moving off, particularly in winter; your
vehicle will warm up much faster while driving.
As a passenger, if you avoid connecting your multimedia devices
(film, music, video game...), you will contribute towards limiting the
consumption of electrical energy, and so of fuel.
Disconnect your portable devices before leaving the vehicle.
eco-driving
eco-driving is a range of everyday practices that allow the motorist to optimise their fuel consumption and CO2 emissions.
Drive smoothly
Maintain a safe distance between vehicles, use engine braking rather
than the brake pedal, and press the accelerator progressively. these
practices contribute towards a reduction in fuel consumption and
CO
2 emissions and also helps reduce the background traffic noise.
If y
our vehicle has cruise control, make use of the system at speeds
above 25 mph (40 km/h) when the traffic is flowing well.
the g
ear shift indicator invites you engage the most suitable gear: as
soon as the indication is displayed in the instrument panel, follow it
straight away.
For vehicles fitted with an electronic or automatic gearbox, this
indicator appears only in manual mode.
eco-driving
Page 37 of 398
35
308_en_Chap01_instruments-de-bord_ed02-2015
tr i p c o m p u t e r
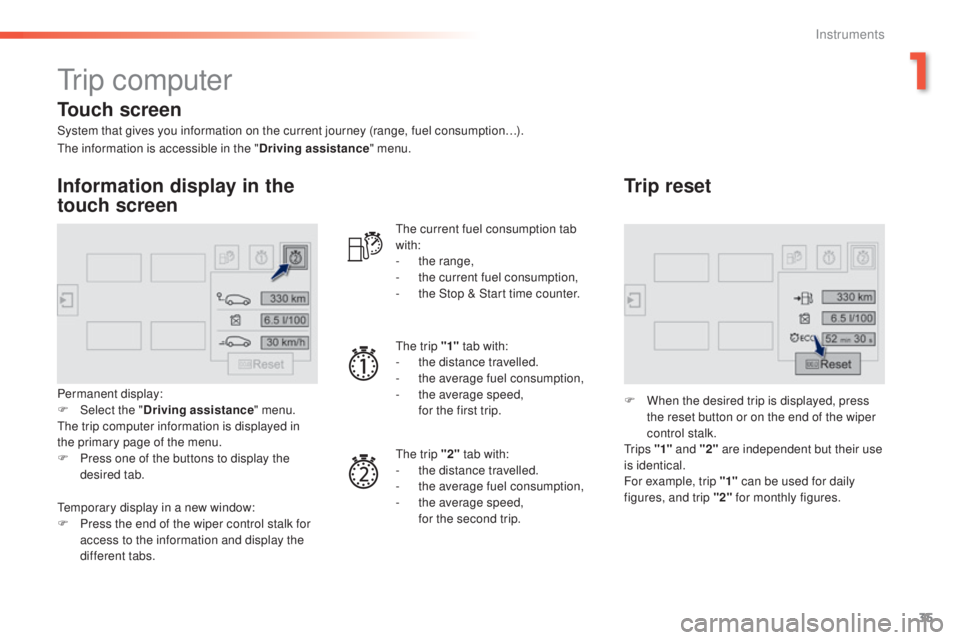
System that gives you information on the current journey (range, fuel consumption…).
Information display in the
touch screen
Permanent display:
F Select the "Driving assistance " menu.
the t
rip computer information is displayed in
the primary page of the menu.
F
Pr
ess one of the buttons to display the
desired tab.
the c
urrent fuel consumption tab
with:
-
th
e range,
-
th
e current fuel consumption,
-
th
e Stop & Start time counter.
the t
rip "1"
tab with:
-
th
e distance travelled.
- th e average fuel consumption,
- th e average speed,
fo
r the first trip.
the t
rip "2" tab with:
-
th
e distance travelled.
-
th
e average fuel consumption,
-
th
e average speed,
fo
r the second trip.
Trip reset
F When the desired trip is displayed, press
the reset button or on the end of the wiper
control stalk.
tr
i p s "1" and "2" are independent but their use
is identical.
For example, trip "1" can be used for daily
figures, and trip "2" for monthly figures.
the i
nformation is accessible in the "
Driving assistance" menu.
tem
porary display in a new window:
F
Pr
ess the end of the wiper control stalk for
access to the information and display the
different tabs.
Touch screen
1
Instruments
Page 51 of 398
49
308_en_Chap02_ouvertures_ed02-2015
Selective unlocking
F to unlock the driver's door only,
p ress the open padlock once.
Using the remote control
Complete unlocking is activated by default.this is set in the " Driving assistance " menu,
then " Vehicle settings " and "Vehicle access ".
unl
ocking is confirmed by rapid
flashing of the direction indicators for
approximately two seconds.
According to version, the door mirrors
unfold at the same time as the first
unlocking action.
F
t
o un
lock the other doors and the boot,
press the open padlock again.
use t
his button for access to
additional information. Locking is confirmed by fixed
lighting of the direction indicators for
approximately two seconds.
According to version, the door mirrors
fold at the same time.
Driving with the doors locked may
render access for the emergency
services difficult in an emergency.
As a safety measure (children on
board), never leave the vehicle without
taking your key, even for a short period.
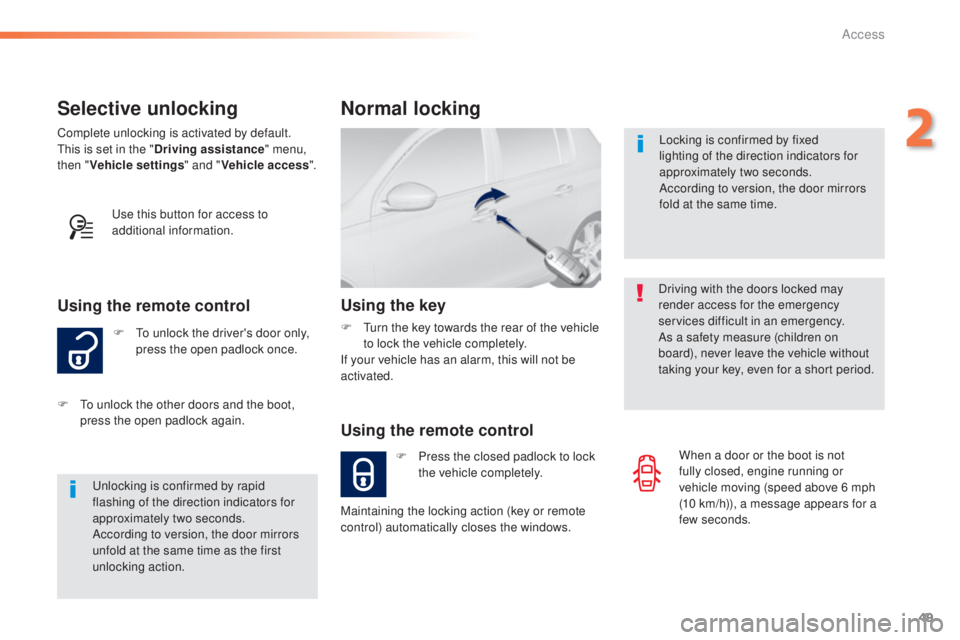
Normal locking
Using the remote control
F Press the closed padlock to lock
t he vehicle completely.
Using the key
F turn the key towards the rear of the vehicle
t o lock the vehicle completely.
If your vehicle has an alarm, this will not be
activated.
Maintaining the locking action (key or remote
control) automatically closes the windows. When a door or the boot is not
fully closed, engine running or
vehicle moving (speed above 6 mph
(10
k
m/h)), a message appears for a
few seconds.
2
Access
Page 56 of 398
54
308_en_Chap02_ouvertures_ed02-2015
"Keyless entry and Starting" with remote
control
Complete unlocking Selective unlocking
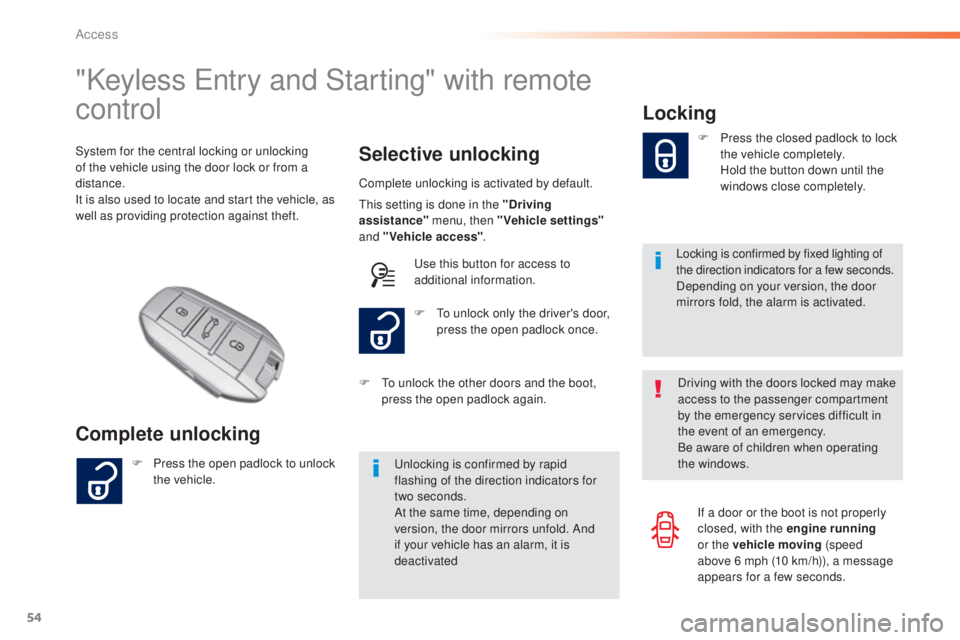
System for the central locking or unlocking
of the vehicle using the door lock or from a
distance.
It is also used to locate and start the vehicle, as
well as providing protection against theft.
Complete unlocking is activated by default.
unl
ocking is confirmed by rapid
flashing of the direction indicators for
two
se
conds.
At the same time, depending on
version, the door mirrors unfold. And
if your vehicle has an alarm, it is
deactivated F
t
o un
lock only the driver's door,
press the open padlock once.
F
Pr
ess the open padlock to unlock
the vehicle. F
t
o un
lock the other doors and the boot,
press the open padlock again.
thi
s setting is done in the "Driving
assistance" menu, then "Vehicle settings"
and "Vehicle access" .
use t
his button for access to
additional information.
Locking
Locking is confirmed by fixed lighting of
the direction indicators for a few s econds.
Depending on your version, the door
mirrors fold, the alarm is activated. F
Pr
ess the closed padlock to lock
the vehicle completely.
Ho
ld the button down until the
windows close completely.
Driving with the doors locked may make
access to the passenger compartment
by the emergency services difficult in
the event of an emergency.
Be aware of children when operating
the windows. If a door or the boot is not properly
closed, with the engine running
or the vehicle moving (speed
above 6
m
ph (10 km/h)), a message
appears for a few seconds.
Access
Page 59 of 398
57
308_en_Chap02_ouvertures_ed02-2015
Locking
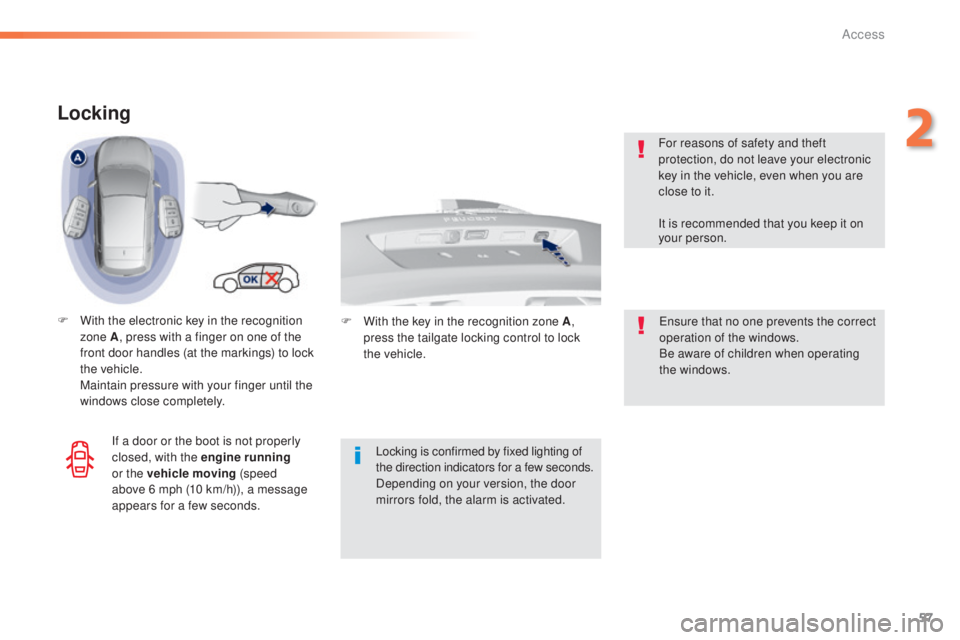
F With the electronic key in the recognition
zone A , press with a finger on one of the
front door handles (at the markings) to lock
the vehicle.
Ma
intain pressure with your finger until the
windows close completely.
Locking is confirmed by fixed lighting of
the direction indicators for a few
s
econds.
Depending on your version, the door
mirrors fold, the alarm is activated.ens ure that no one prevents the correct
operation of the windows.
Be aware of children when operating
the windows.
For reasons of safety and theft
protection, do not leave your electronic
key in the vehicle, even when you are
close to it.
It is recommended that you keep it on
your person.
If a door or the boot is not properly
closed, with the engine running
or the vehicle moving (speed
above 6
m
ph (10 km/h)), a message
appears for a few seconds. F Wi
th the key in the recognition zone A,
press the tailgate locking control to lock
the
v
ehicle.
2
Access
Page 60 of 398
58
308_en_Chap02_ouvertures_ed02-2015
Deadlocking
Deadlocking renders the exterior and
interior door controls inoperative.
It also deactivates the manual central
control button.
the
refore, never leave anyone inside
the vehicle when it is deadlocked.
Using the remote control
F Press the closed padlock to lock
t he vehicle completely.
Ma
intain pressure with your
finger for more than two seconds
to close the windows.
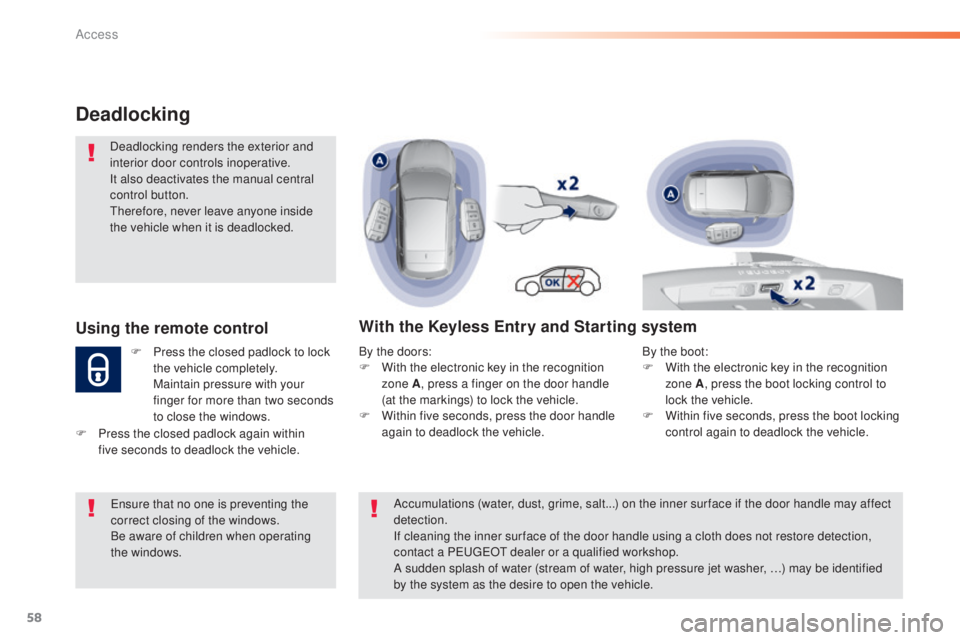
With the Keyless Entry and Starting system
By the doors:
F Wi th the electronic key in the recognition
zone A , press a finger on the door handle
(at the markings) to lock the vehicle.
F
Wi
thin five seconds, press the door handle
again to deadlock the vehicle.
ens
ure that no one is preventing the
correct closing of the windows.
Be aware of children when operating
the windows.
F
Pr
ess the closed padlock again within
five
se
conds to deadlock the vehicle. Accumulations (water, dust, grime, salt...) on the inner sur face if the door handle may affect
detection.
If cleaning the inner sur face of the door handle using a cloth does not restore detection,
contact a P
eu
ge
Ot d
ealer or a qualified workshop.
A sudden splash of water (stream of water, high pressure jet washer, …) may be identified
by the system as the desire to open the vehicle. By the boot:
F Wi
th the electronic key in the recognition
zone A , press the boot locking control to
lock the vehicle.
F
Wi
thin five seconds, press the boot locking
control again to deadlock the vehicle.
Access
Page 67 of 398
65
308_en_Chap02_ouvertures_ed02-2015
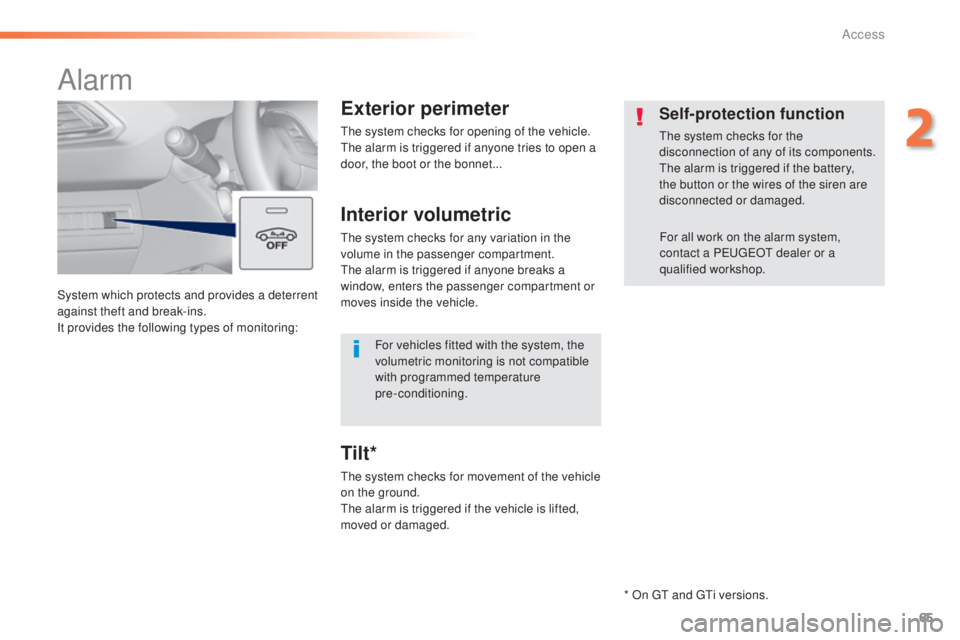
System which protects and provides a deterrent
against theft and break-ins.
It provides the following types of monitoring:
Alarm
Exterior perimeter
the system checks for opening of the vehicle.the alarm is triggered if anyone tries to open a
door, the boot or the bonnet...
Self-protection function
the system checks for the
d isconnection of any of its components.
the a
larm is triggered if the battery,
the button or the wires of the siren are
disconnected or damaged.
For all work on the alarm system,
contact a P
eu
ge
Ot d
ealer or a
qualified workshop.
Interior volumetric
the system checks for any variation in the
v olume in the passenger compartment.
the a
larm is triggered if anyone breaks a
window, enters the passenger compartment or
moves inside the vehicle.
the s
ystem checks for movement of the vehicle
on the ground.
the a
larm is triggered if the vehicle is lifted,
moved or damaged.
Tilt*
For vehicles fitted with the system, the
volumetric monitoring is not compatible
with programmed temperature
pre-conditioning.
* On
g
t
a
nd
g
t
i ve
rsions.
2
Access
Page 68 of 398
66
308_en_Chap02_ouvertures_ed02-2015
Deactivation
F Lock the vehicle using the "Keyless entry
and starting" system. F
Pr
ess this unlocking button on
the remote control.
or
F unl ock the vehicle using the "Keyless ent ry
and Starting" system.
If the vehicle self-locks automatically
(occurs after 30 seconds if a door or
the boot is not opened), the monitoring
system is not reactivated automatically.
to re
activate the system, it is necessary
to unlock and then lock the vehicle
again, using the remote control or the
"Keyless
ent
ry and starting" system.
the m
onitoring system is deactivated: the
indicator lamp in the button is off and the
direction indicators flash for about 2 seconds.
Total protection
Activation
F Lock the vehicle using the
r emote control.
or
the m
onitoring system is active: the indicator
lamp in the button flashes once per second and
the the direction indicators come on for about
2 seconds.
After an instruction to lock the vehicle using
the remote control or the Keyless
ent
ry
and Starting system, the exterior perimeter
monitoring is activated after a delay of
5
s
econds, the interior volumetric monitoring
after 45 seconds.
If an opening (door, boot, bonnet...) is not
closed fully, the vehicle is not locked but
monitoring will be activated after a delay of
45
se
conds.
F
Switch off the ignition and get out of the vehicle.
Protection - exterior
perimeter monitoring only
Deactivate the interior volumetric monitoring
(and tilt monitoring if your vehicle has it) to
avoid unwanted triggering of the alarm in
certain cases such as:
-
oc
cupant(s) present in the vehicle,
-
le
aving a window partially open,
-
was
hing your vehicle,
-
chan
ging a wheel,
-
to
wing your vehicle,
-
tr
ansport on a ferry.
Access