tyre pressure Peugeot 308 2017 Owner's Manual - RHD (UK, Australia)
[x] Cancel search | Manufacturer: PEUGEOT, Model Year: 2017, Model line: 308, Model: Peugeot 308 2017Pages: 392, PDF Size: 10.13 MB
Page 13 of 392
11
Limit the causes of excess consumption
Spread loads throughout the vehicle; place the heaviest items in the
bottom of the boot, as close as possible to the rear seats.
Limit the loads carried in the vehicle and reduce wind resistance (roof
bars, roof rack, bicycle carrier, trailer...). u
s
e a roof box in preference.
Remove roof bars and roof racks after use.
At the end of winter, remove snow tyres and refit your summer tyres.
Observe the recommendations on
maintenance
Check the tyre pressures regularly, when cold, referring to the label in
the door aperture, driver's side.
Carry out this check in particular:
-
b
efore a long journey,
-
a
t each change of season,
-
a
fter a long period out of use.
Don't forget the spare wheel and the tyres on any trailer or caravan.
Have your vehicle serviced regularly (engine oil, oil filter, air filter,
passenger compartment filter...) and observe the schedule of
operations recommended in the manufacturer's service schedule.
With a BlueHDi Diesel engine, if the SCR system is faulty your vehicle
becomes polluting; go to a P
e
uge
Ot
dealer or a qualified workshop
without delay to have the emissions of nitrogen oxides brought back to
the legal level.
When refuelling, do not continue after the third cut-off of the nozzle to
avoid any over flow.
At the wheel of your new vehicle, it is only after the first 1 800 miles
(3
000 kilometres) that you will see the fuel consumption settle down to
a consistent average.
.
Eco-driving
Page 26 of 392
24
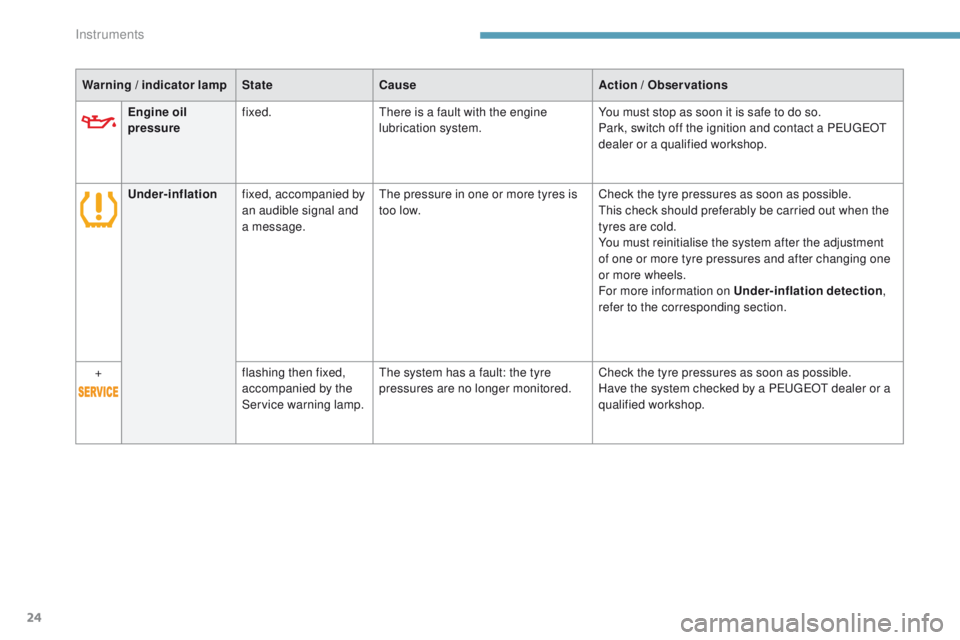
Engine oil
pressurefixed.th
ere is a fault with the engine
lubrication system. You must stop as soon it is safe to do so.
Park, switch off the ignition and contact a Pe
ugeOt
dealer or a qualified workshop.
Under-inflation fixed, accompanied by
an audible signal and
a message.
th
e pressure in one or more tyres is
too low. Check the tyre pressures as soon as possible.
th
is check should preferably be carried out when the
tyres are cold.
You must reinitialise the system after the adjustment
of one or more tyre pressures and after changing one
or more wheels.
For more information on Under-inflation detection ,
refer to the corresponding section.
+ flashing then fixed,
accompanied by the
Service warning lamp.
th
e system has a fault: the tyre
pressures are no longer monitored. Check the tyre pressures as soon as possible.
Have the system checked by a P
e
uge
Ot
dealer or a
qualified workshop.
Warning
/ indicator lamp
State Cause Action
/ Observations
Instruments
Page 124 of 392
122
Anti-lock braking system
(ABS) and electronic brake
force distribution (EBFD)
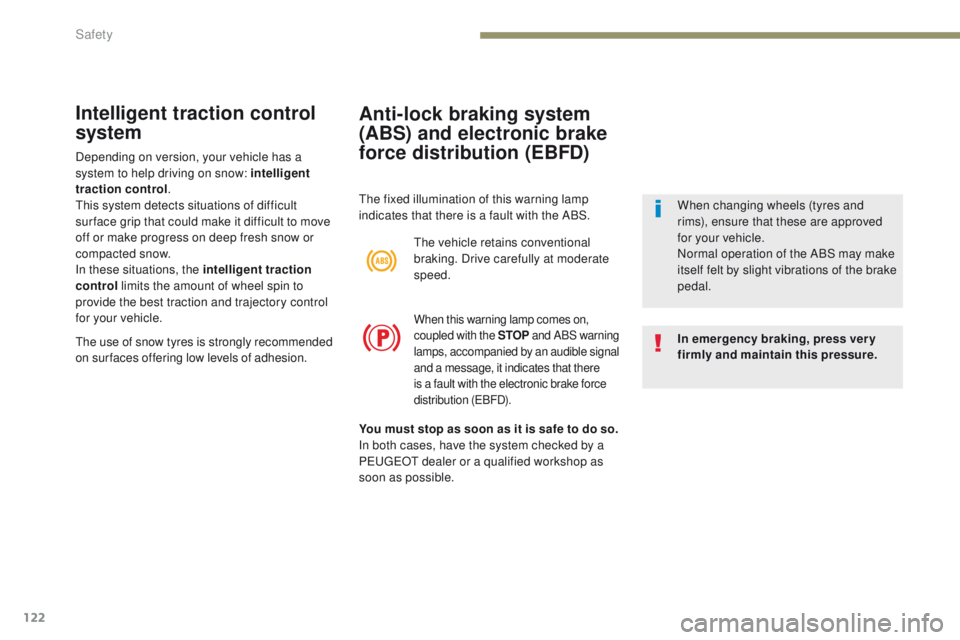
the fixed illumination of this warning lamp
indicates that there is a fault with the ABS.In emergency braking, press ver y
firmly and maintain this pressure. When changing wheels (tyres and
rims), ensure that these are approved
for your vehicle.
Normal operation of the ABS may make
itself felt by slight vibrations of the brake
pedal.
th
e vehicle retains conventional
braking. Drive carefully at moderate
speed.
When this warning lamp comes on,
coupled with the STOP and ABS warning
lamps, accompanied by an audible signal
and a message, it indicates that there
is a fault with the electronic brake force
distribution (
eB
FD).
Intelligent traction control
system
the use of snow tyres is strongly recommended
on sur faces offering low levels of adhesion. You must stop as soon as it is safe to do so.
In both cases, have the system checked by a
P
e
uge
Ot
dealer or a qualified workshop as
soon as possible.
Depending on version, your vehicle has a
system to help driving on snow: intelligent
traction control
.
th
is system detects situations of difficult
sur face grip that could make it difficult to move
off or make progress on deep fresh snow or
compacted snow.
In these situations, the intelligent traction
control limits the amount of wheel spin to
provide the best traction and trajectory control
for your vehicle.
Safety
Page 149 of 392
147
When towing
Distribution of loads
F Distribute the load in the trailer so that the
heaviest items are as close as possible to
the axle and the nose weight approaches
the maximum permitted without exceeding it.
Air density decreases with altitude, thus
reducing engine performance. Above
1 000 metres, the maximum towed load must
be reduced by 10
% for every 1 000 metres of
altitude.
Side wind
F take into account the increased sensitivity to side wind.
Cooling
towing a trailer on a slope increases the
temperature of the coolant.
As the fan is electrically controlled, its cooling
capacity is not dependent on the engine speed.
F
t
o l
ower the engine speed, reduce your
speed.
th
e maximum towed load on a long incline
depends on the gradient and the ambient
temperature.
In all cases, keep a check on the coolant
temperature.
F
I
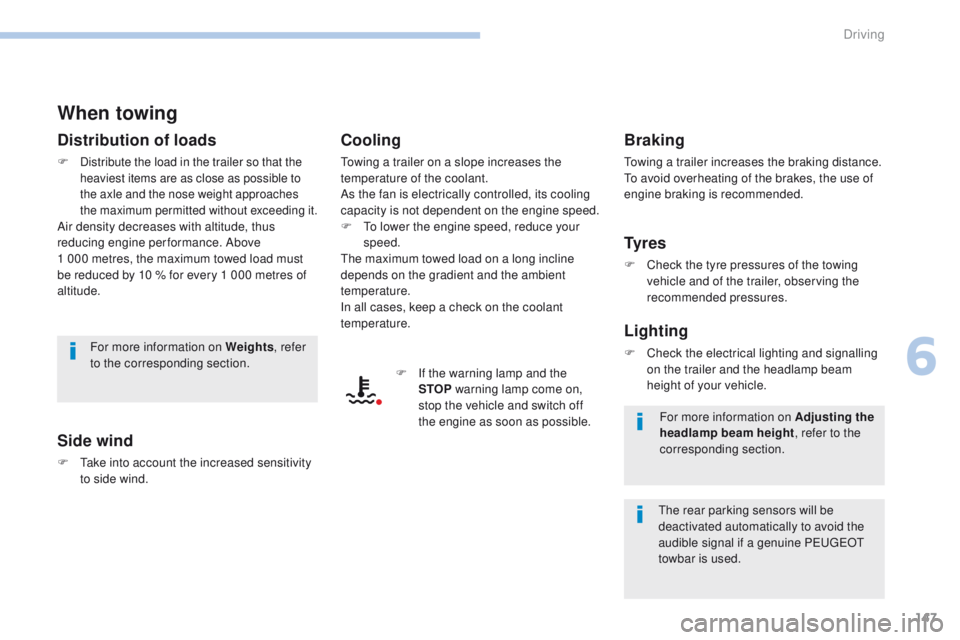
f the warning lamp and the
STOP warning lamp come on,
stop the vehicle and switch off
the engine as soon as possible.
Braking
towing a trailer increases the braking distance.to a void overheating of the brakes, the use of
engine braking is recommended.
Ty r e s
F Check the tyre pressures of the towing vehicle and of the trailer, observing the
recommended pressures.
Lighting
F Check the electrical lighting and signalling on the trailer and the headlamp beam
height of your vehicle.
For more information on Weights
, refer
to the corresponding section.
th
e rear parking sensors will be
deactivated automatically to avoid the
audible signal if a genuine P
e
uge
Ot
towbar is used. For more information on Adjusting the
headlamp beam height
, refer to the
corresponding section.
6
Driving
Page 211 of 392
209
Under-inflation detection
the system monitors the pressures in the four
tyres, once the vehicle is moving.
It compares the information given by the four
wheel speed sensors with reference values,
which must be reinitialised ever y time the
tyre pressures are adjusted or a wheel
changed.
th
e system triggers an alert as soon as it
detects a drop in the inflation pressure of one
or more tyres.th e under-inflation detection system
does not replace the need for vigilance
on the part of the driver.
th
is system does not avoid the need to
check the tyre pressures (including the
spare wheel) every month as well as
before a long journey.
Driving with under-inflated tyres impairs
road holding, extends braking distances
and causes premature tyre wear,
particularly under arduous conditions
(high loading, high speed, long journey).
System which automatically checks the pressures of the tyres while driving.th
e inflation pressures defined for
your vehicle can be found on the tyre
pressure label.
For more information on the
Identification markings , refer to the
corresponding section.
ty
re pressures should be checked
when the tyres are "cold" (vehicle
stopped for 1 hour or after a journey of
less than 6 miles (10 km) at moderate
speeds).
Other wise (when hot), add 0.3 bar to
the pressures shown on the label.
Driving with under-inflated tyres
increases fuel consumption.
Snow chains
the system does not have to be
reinitialised after fitting or removing
snow chains.
6
Driving
Page 212 of 392
210
Under-inflation alertReinitialisation
Before reinitialising the system, ensure
that the pressures of the four tyres are
correct for the use of the vehicle and in
line with the recommendations on the
tyre pressure label.
th
e under-inflation alert can only
be relied on if the reinitialisation of
the system has been done with the
pressures in the four tyres correctly
adjusted.
th
e under-inflation detection system
does not give a warning if a pressure is
incorrect at the time of reinitialisation.
th
is is given by fixed illumination of
this warning lamp, accompanied by
an audible signal and, depending on
equipment, the display of a message. It is necessary to reinitialise the system every
time one or more tyre pressures are adjusted,
and after changing one or more wheels.
F
R
educe speed immediately, avoid
excessive steering movements and sudden
braking.
F
S
top the vehicle as soon as it is safe to
do
so. F
I
n the event of a puncture, use the
temporary puncture repair kit or the spare
wheel (depending on equipment),
or
F
i
f you have a compressor, such as the one
in the temporary puncture repair kit, check
the pressures of the four tyres when cold,
or
F
i
f it is not possible to make this check
immediately, drive carefully at reduced
speed.
th
e loss of pressure detected does not
always cause visible bulging of the tyre.
Do not satisfy yourself with just a visual
check.
th
e alert is maintained until the system
is reinitialised.
Driving
Page 214 of 392
212
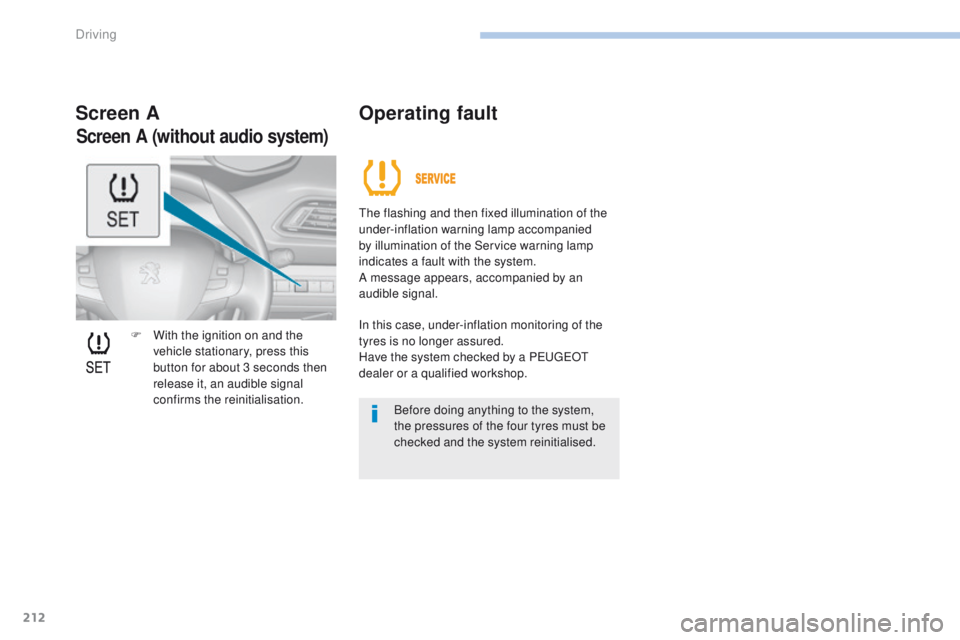
F With the ignition on and the vehicle stationary, press this
button for about 3 seconds then
release it, an audible signal
confirms the reinitialisation.
Screen A Operating fault
the flashing and then fixed illumination of the
under-inflation warning lamp accompanied
by illumination of the Service warning lamp
indicates a fault with the system.
A message appears, accompanied by an
audible signal.
In this case, under-inflation monitoring of the
tyres is no longer assured.
Have the system checked by a P
e
uge
Ot
dealer or a qualified workshop.
Before doing anything to the system,
the pressures of the four tyres must be
checked and the system reinitialised.
Screen A (without audio system)
Driving
Page 241 of 392
239
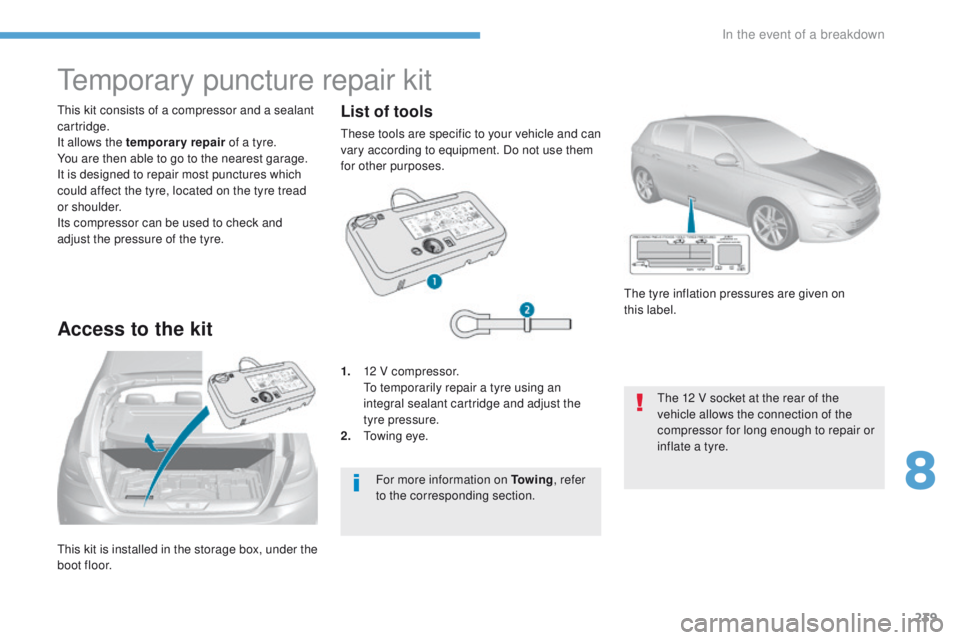
this kit is installed in the storage box, under the
boot floor.
th
is kit consists of a compressor and a sealant
cartridge.
It allows the temporary repair of a tyre.
You are then able to go to the nearest garage.
It is designed to repair most punctures which
could affect the tyre, located on the tyre tread
or shoulder.
Its compressor can be used to check and
adjust the pressure of the tyre.
temporary puncture repair kit
Access to the kit
1. 12 V compressor. to t emporarily repair a tyre using an
integral sealant cartridge and adjust the
tyre pressure.
2.
t
o
wing eye.
th
e tyre inflation pressures are given on
this
label.
th
e 12 V socket at the rear of the
vehicle allows the connection of the
compressor for long enough to repair or
inflate a tyre.
For more information on To w i n g , refer
to the corresponding section.
List of tools
these tools are specific to your vehicle and can
vary according to equipment. Do not use them
for other purposes.
8
In the event of a breakdown
Page 244 of 392
242
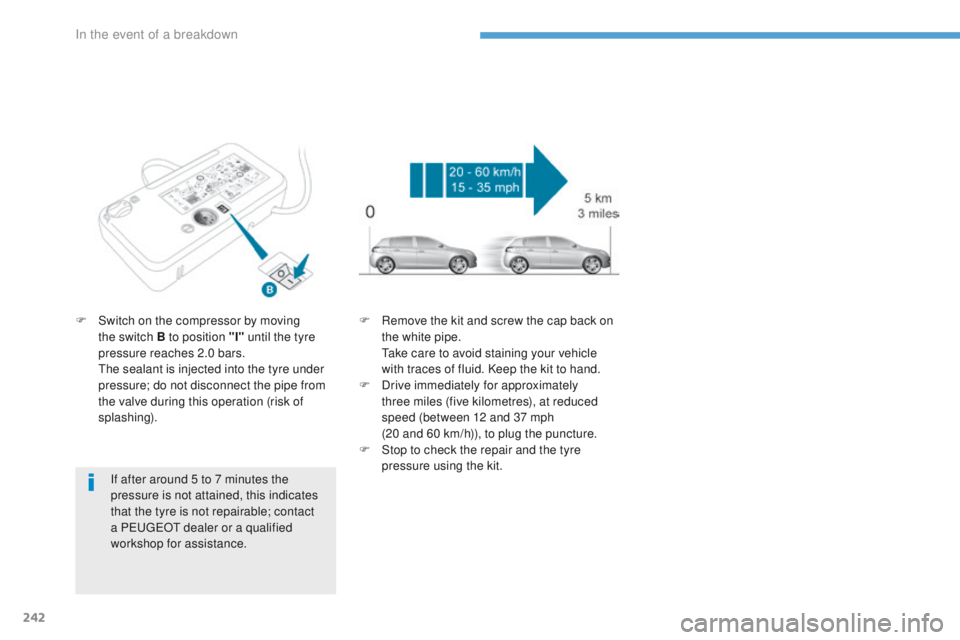
If after around 5 to 7 minutes the
pressure is not attained, this indicates
that the tyre is not repairable; contact
a P
e
uge
Ot
dealer or a qualified
workshop for assistance.
F
S
witch on the compressor by moving
the switch B to position "I" until the tyre
pressure reaches 2.0 bars.
t
h
e sealant is injected into the tyre under
pressure; do not disconnect the pipe from
the valve during this operation (risk of
splashing). F
R
emove the kit and screw the cap back on
the white pipe.
t
a
ke care to avoid staining your vehicle
with traces of fluid. Keep the kit to hand.
F
D
rive immediately for approximately
three miles (five kilometres), at reduced
speed (between 12 and 37 mph
(20 and 60 km/h)), to plug the puncture.
F
S
top to check the repair and the tyre
pressure using the kit.
In the event of a breakdown
Page 245 of 392
243
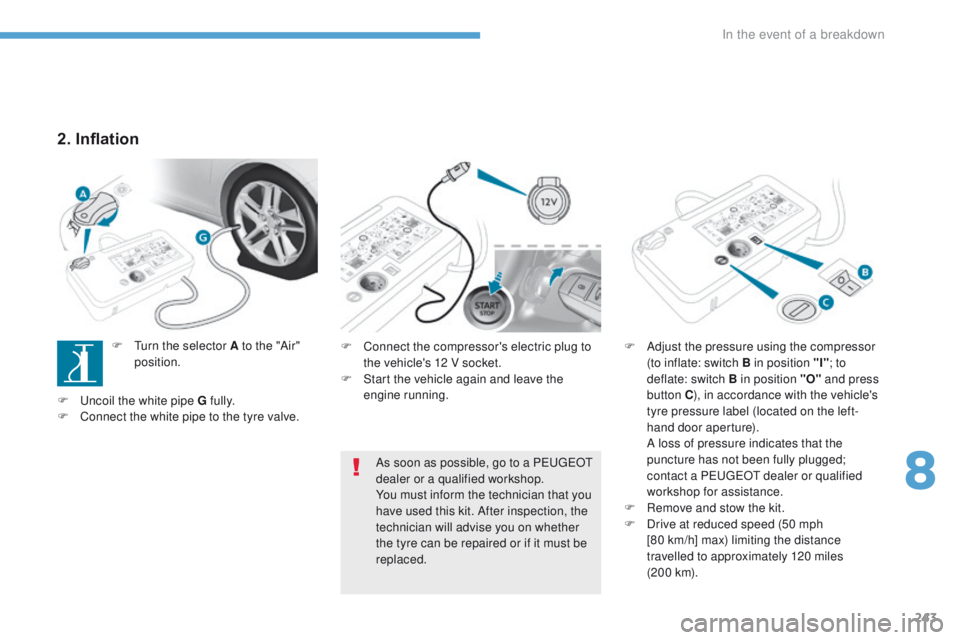
F Connect the compressor's electric plug to the vehicle's 12 V socket.
F
S
tart the vehicle again and leave the
engine running. F
A djust the pressure using the compressor
(to inflate: switch B in position "I" ; to
deflate: switch B in position "O" and press
button C ), in accordance with the vehicle's
tyre pressure label (located on the left-
hand door aperture).
A l
oss of pressure indicates that the
puncture has not been fully plugged;
contact a P
e
uge
Ot
dealer or qualified
workshop for assistance.
F
R
emove and stow the kit.
F
D
rive at reduced speed (50 mph
[80
km/h] max) limiting the distance
travelled to approximately 120 miles
(2 0 0
k m).
As soon as possible, go to a P
e
uge
Ot
dealer or a qualified workshop.
You must inform the technician that you
have used this kit. After inspection, the
technician will advise you on whether
the tyre can be repaired or if it must be
replaced.
2. Inflation
F turn the selector A to the "Air" position.
F
u
n
coil the white pipe G fully.
F
C
onnect the white pipe to the tyre valve.
8
In the event of a breakdown