lock PEUGEOT 308 2018 Owner's Guide
[x] Cancel search | Manufacturer: PEUGEOT, Model Year: 2018, Model line: 308, Model: Peugeot 308 2018Pages: 360, PDF Size: 12.38 MB
Page 79 of 360
77
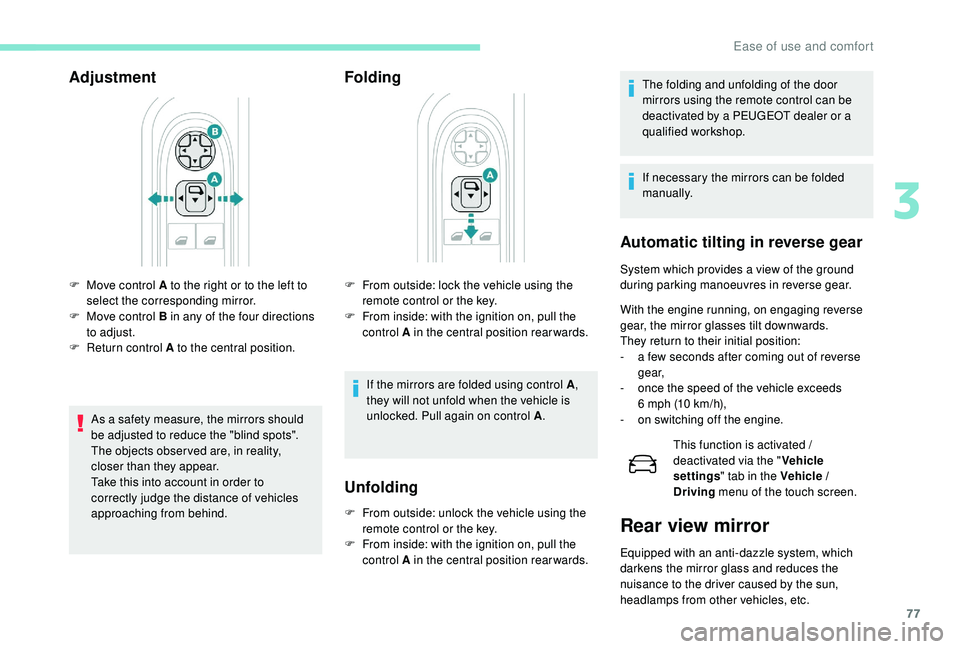
Adjustment
As a safety measure, the mirrors should
be adjusted to reduce the "blind spots".
The objects obser ved are, in reality,
closer than they appear.
Take this into account in order to
correctly judge the distance of vehicles
approaching from behind.
Folding
Unfolding
F Move control A to the right or to the left to select the corresponding mirror.
F
M
ove control B in any of the four directions
to adjust.
F
R
eturn control A to the central position. F
F rom outside: lock the vehicle using the
remote control or the key.
F
F
rom inside: with the ignition on, pull the
control A in the central position rearwards.
If the mirrors are folded using control A ,
they will not unfold when the vehicle is
unlocked. Pull again on control A .
F
F
rom outside: unlock the vehicle using the
remote control or the key.
F
F
rom inside: with the ignition on, pull the
control A in the central position rearwards. The folding and unfolding of the door
mirrors using the remote control can be
deactivated by a PEUGEOT dealer or a
qualified workshop.
If necessary the mirrors can be folded
manually.
Automatic tilting in reverse gear
System which provides a view of the ground
during parking manoeuvres in reverse gear.
With the engine running, on engaging reverse
gear, the mirror glasses tilt downwards.
They return to their initial position:
-
a f
ew seconds after coming out of reverse
g e a r,
-
o
nce the speed of the vehicle exceeds
6
mph (10 km/h),
-
o
n switching off the engine. This function is activated /
deactivated via the " Vehicle
settings " tab in the Vehicle /
Driving menu of the touch screen.
Rear view mirror
Equipped with an anti-dazzle system, which
darkens the mirror glass and reduces the
nuisance to the driver caused by the sun,
headlamps from other vehicles, etc.
3
Ease of use and comfort
Page 82 of 360
80
Please note: an incorrectly latched
backrest compromises the safety of
passengers in the event of sudden
braking or an impact.
The contents of the boot may be thrown
forward – Risk of serious injury!
i-Cockpit Amplify function
This function allows the driving ambiences to
be managed.
Specific system settings are offered for each
ambience.
These ambiences can be personalised in the
touch screen.
Content of an ambience
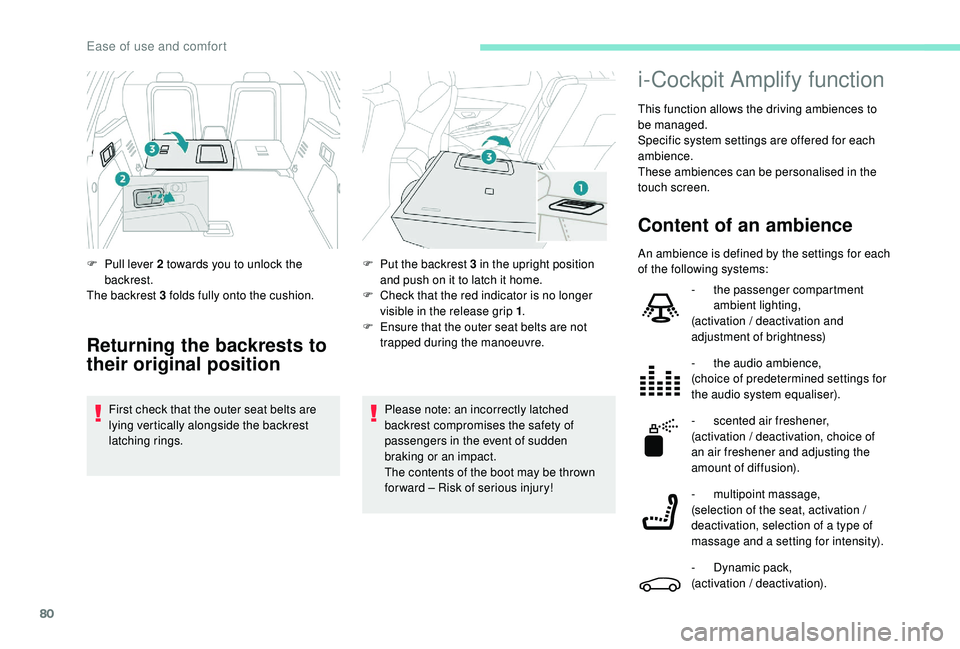
F Pull lever 2 towards you to unlock the backrest.
The backrest 3 folds fully onto the cushion.
Returning the backrests to
their original position
First check that the outer seat belts are
lying vertically alongside the backrest
latching rings. F
P
ut the backrest 3 in the upright position
and push on it to latch it home.
F
C
heck that the red indicator is no longer
visible in the release grip 1 .
F
E
nsure that the outer seat belts are not
trapped during the manoeuvre. An ambience is defined by the settings for each
of the following systems:
-
t
he passenger compartment
ambient lighting,
(activation / deactivation and
adjustment of brightness)
-
t
he audio ambience,
(choice of predetermined settings for
the audio system equaliser).
- s cented air freshener,
(activation / deactivation, choice of
an air freshener and adjusting the
amount of diffusion).
-
m
ultipoint massage,
(selection of the seat, activation /
deactivation, selection of a type of
massage and a setting for intensity).
-
D
ynamic pack,
(activation / deactivation).
Ease of use and comfort
Page 95 of 360
93
Operating indicator lampFunction display
The passenger compartment temperature
information is only available when the
engine is off.
Setting the time
F Set the time with the buttons 1
.
F P ress simultaneously on buttons 4 and 5 to
save it.
on red: deferred switching on programmed.
flashing red: heating on.
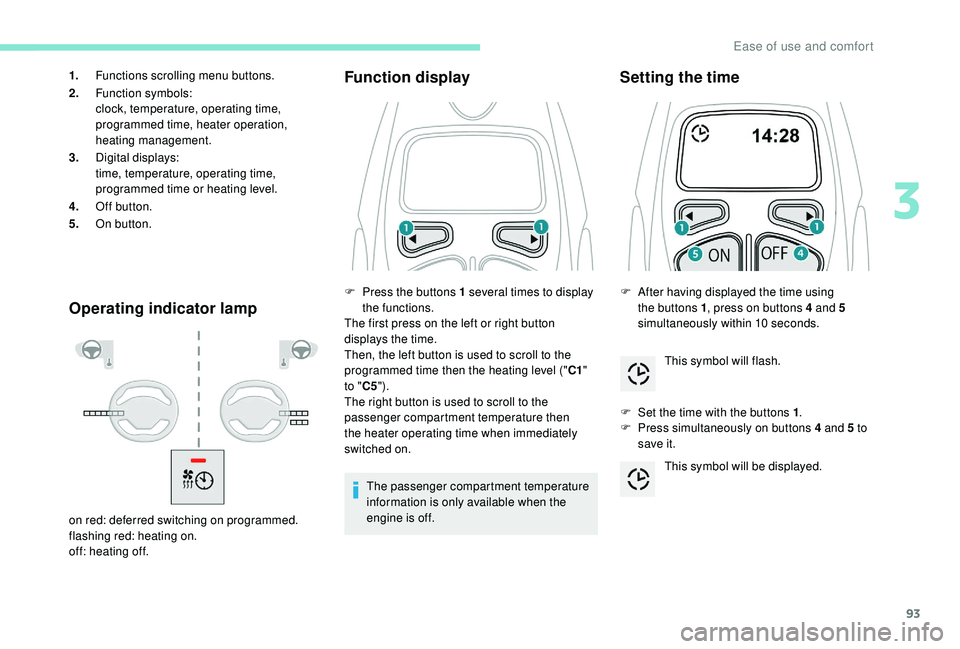
off: heating off. 1. Functions scrolling menu buttons.
2. Function symbols:
clock, temperature, operating time,
programmed time, heater operation,
heating management.
3. Digital displays:
time, temperature, operating time,
programmed time or heating level.
4. Off button.
5. On button.
F
P
ress the buttons 1 several times to display
the functions.
The first press on the left or right button
displays the time.
Then, the left button is used to scroll to the
programmed time then the heating level (" C1"
to " C5").
The right button is used to scroll to the
passenger compartment temperature then
the heater operating time when immediately
switched on. F
A
fter having displayed the time using
the buttons 1 , press on buttons 4 and 5
simultaneously within 10
seconds.
This symbol will flash.
This symbol will be displayed.
3
Ease of use and comfort
Page 104 of 360
102
Refitting
To refit the mat on the driver's side:
F p osition the mat correctly,
F
r
eattach the fixings by pressing,
F
c
heck that the mat is secured correctly.
To avoid any risk of jamming of the pedals:
-
o
nly use mats which are suited to the
fixings already present in the vehicle;
these fixings must be used,
-
n
ever place one mat on top of another.
The use of mats not approved by
PEUGEOT may inter fere with access to
the pedals and hinder the operation of the
cruise control / speed limiter.
The mats approved by PEUGEOT have
two fixings located below the seat.
Courtesy lampsFront and rear courtesy lamps
In this position, the courtesy
lamp comes on gradually:
When fitting the mat for the first time, on the
driver's side use only the fixings provided in the
wallet attached.
The other mats are simply placed on the carpet.
Removing
To remove the mat on the driver's side:
F
m ove the seat as far back as possible,
F
un
clip the fixings,
F
r
emove the mat.
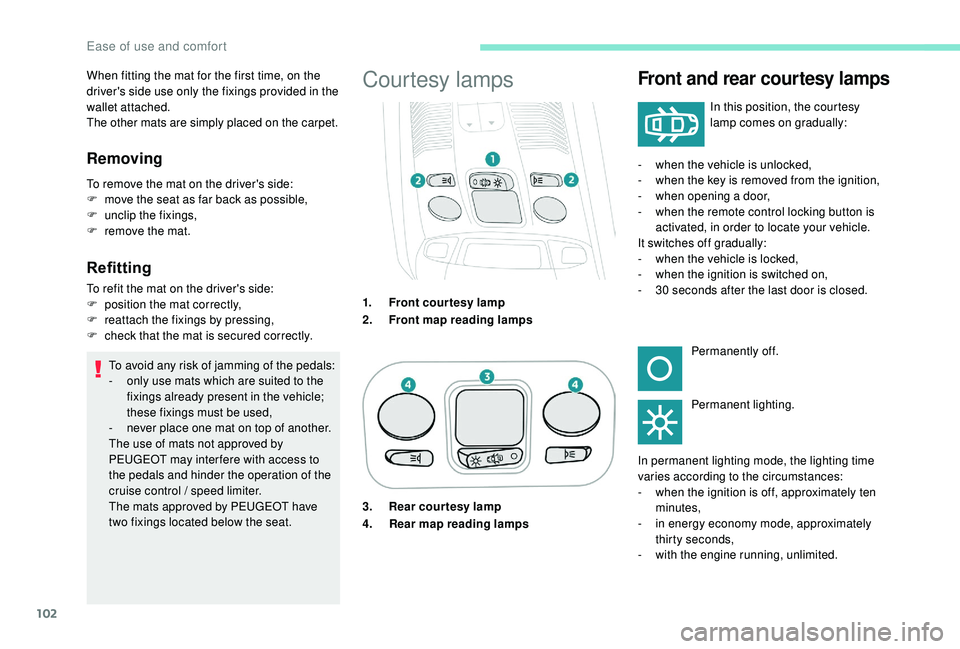
1.Front courtesy lamp
2. Front map reading lamps -
w
hen the vehicle is unlocked,
- w hen the key is removed from the ignition,
- w hen opening a door,
-
w
hen the remote control locking button is
activated, in order to locate your vehicle.
It switches off gradually:
-
w
hen the vehicle is locked,
-
w
hen the ignition is switched on,
-
3
0 seconds after the last door is closed.Permanently off.
Permanent lighting.
In permanent lighting mode, the lighting time
varies according to the circumstances:
-
w
hen the ignition is off, approximately ten
minutes,
-
i
n energy economy mode, approximately
thirty seconds,
-
w
ith the engine running, unlimited.
3. Rear courtesy lamp
4.
Rear map reading lamps
Ease of use and comfort
Page 115 of 360
113
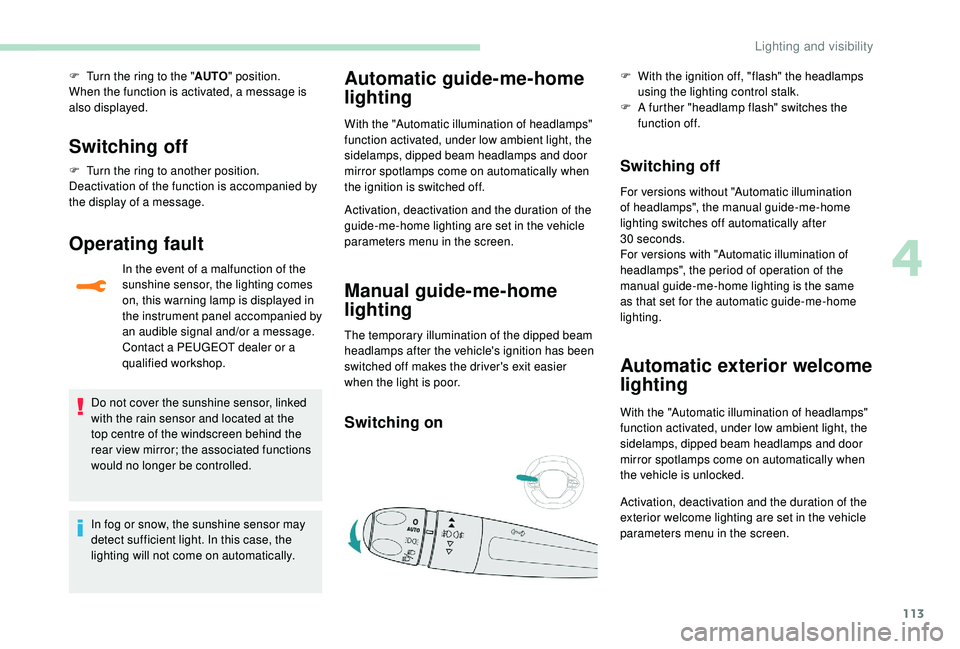
F Turn the ring to the "AUTO" position.
When the function is activated, a message is
also displayed.
Switching off
F Turn the ring to another position.
Deactivation of the function is accompanied by
the display of a message.
Operating fault
In the event of a malfunction of the
sunshine sensor, the lighting comes
on, this warning lamp is displayed in
the instrument panel accompanied by
an audible signal and/or a message.
Contact a PEUGEOT dealer or a
qualified workshop.
Do not cover the sunshine sensor, linked
with the rain sensor and located at the
top centre of the windscreen behind the
rear view mirror; the associated functions
would no longer be controlled.
In fog or snow, the sunshine sensor may
detect sufficient light. In this case, the
lighting will not come on automatically.
Automatic guide-me-home
lighting
With the "Automatic illumination of headlamps"
function activated, under low ambient light, the
sidelamps, dipped beam headlamps and door
mirror spotlamps come on automatically when
the ignition is switched off.
Activation, deactivation and the duration of the
guide-me-home lighting are set in the vehicle
parameters menu in the screen.
Manual guide-me-home
lighting
The temporary illumination of the dipped beam
headlamps after the vehicle's ignition has been
switched off makes the driver's exit easier
when the light is poor.
Switching on
F With the ignition off, "flash" the headlamps using the lighting control stalk.
F
A f
urther "headlamp flash" switches the
function off.
Switching off
For versions without "Automatic illumination
of headlamps", the manual guide-me-home
lighting switches off automatically after
30
seconds.
For versions with "Automatic illumination of
headlamps", the period of operation of the
manual guide-me-home lighting is the same
as that set for the automatic guide-me-home
lighting.
Automatic exterior welcome
lighting
With the "Automatic illumination of headlamps"
function activated, under low ambient light, the
sidelamps, dipped beam headlamps and door
mirror spotlamps come on automatically when
the vehicle is unlocked.
Activation, deactivation and the duration of the
exterior welcome lighting are set in the vehicle
parameters menu in the screen.
4
Lighting and visibility
Page 116 of 360
114
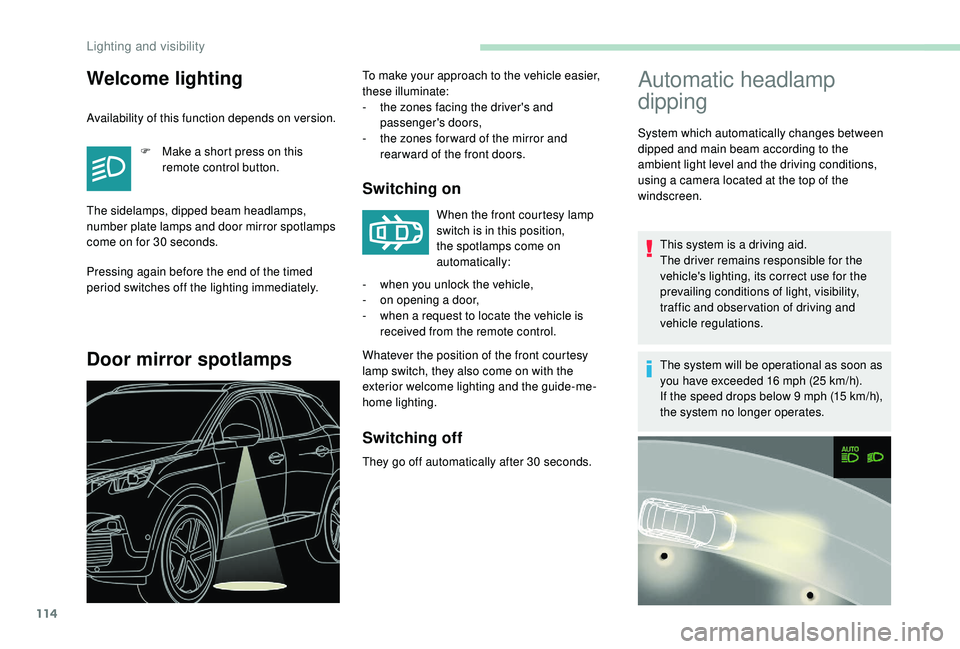
Automatic headlamp
dipping
System which automatically changes between
dipped and main beam according to the
ambient light level and the driving conditions,
using a camera located at the top of the
windscreen.This system is a driving aid.
The driver remains responsible for the
vehicle's lighting, its correct use for the
prevailing conditions of light, visibility,
traffic and obser vation of driving and
vehicle regulations.
The system will be operational as soon as
you have exceeded 16
mph (25 km/h).
If the speed drops below 9
mph (15 km/h),
the system no longer operates.
Welcome lighting
Availability of this function depends on version.
F
M
ake a short press on this
remote control button.
The sidelamps, dipped beam headlamps,
number plate lamps and door mirror spotlamps
come on for 30
seconds.
Pressing again before the end of the timed
period switches off the lighting immediately.
Door mirror spotlamps
To make your approach to the vehicle easier,
these illuminate:
-
t
he zones facing the driver's and
passenger's doors,
-
t
he zones for ward of the mirror and
rear ward of the front doors.
Switching on
When the front courtesy lamp
switch is in this position,
the spotlamps come on
automatically:
Whatever the position of the front courtesy
lamp switch, they also come on with the
exterior welcome lighting and the guide-me-
home lighting. -
w
hen you unlock the vehicle,
-
o
n opening a door,
-
w
hen a request to locate the vehicle is
received from the remote control.
Switching off
They go off automatically after 30 seconds.
Lighting and visibility
Page 126 of 360
124
Electronic stability control
(ESC)
A set of the following Electronic Stability
systems:
-
a
nti-lock braking system (ABS) and
electronic brake force distribution (EBFD),
-
em
ergency braking assistance (EBA),
-
w
heel anti-slip regulation (ASR) or traction
control,
-
d
ynamic stability control (DSC).
-
t
railer stability assist (TSA).
Definitions
Anti-lock braking system (ABS)
and electronic brake force
distribution (EBFD)
The ABS prevents wheel lock in the event of
emergency braking.
The electronic brake force distribution system
manages the braking pressure wheel by wheel.
Emergency braking assistance
In an emergency, this system enables you to
reach the optimum braking pressure more
quickly and therefore reduce the stopping
distance.
It is triggered in relation to the speed at which
the brake pedal is pressed. This is felt by a
reduction in the resistance of the pedal and an
increase in braking efficiency.
Anti-slip regulation (ASR)
This system optimises traction in order to
avoid wheel slip by acting on the brakes of
the driving wheels and on the engine. It also
improves the directional stability of the vehicle
on acceleration.
Dynamic stability control (DSC)
If there is a difference between the path
followed by the vehicle and that required by the
driver, this system monitors each wheel and
automatically acts on the brake of one or more
wheels and on the engine to return the vehicle
to the required path, within the limits of the laws
of physics.
Trailer stability assist (TSA)
This system allows control of the vehicle to be
retained when towing a trailer, so as to avoid
the risk of snaking.
Anti-lock braking system
(ABS) and electronic brake
force distribution (EBFD)
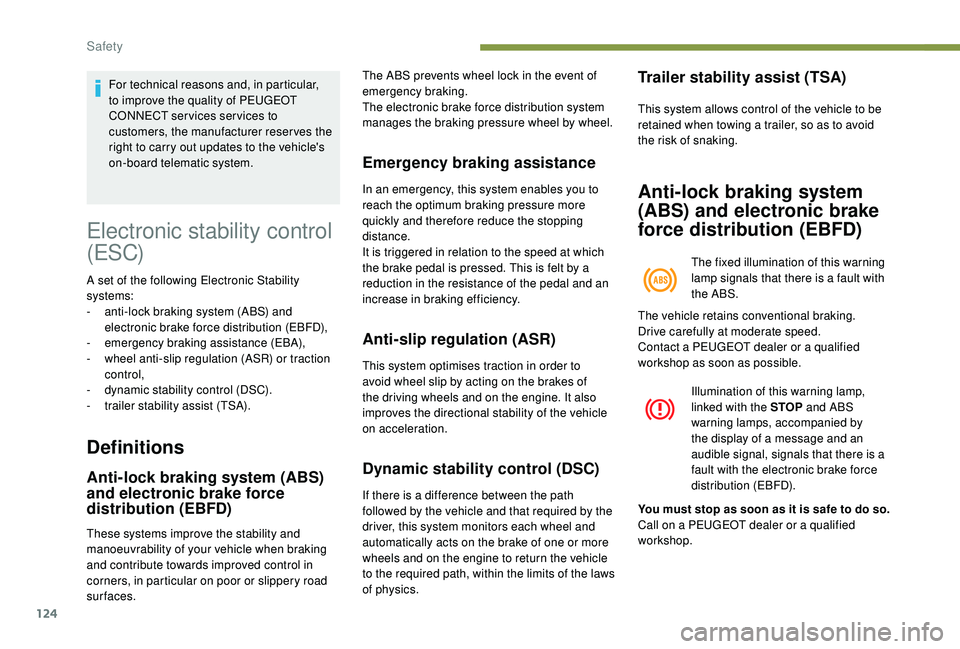
The fixed illumination of this warning
lamp signals that there is a fault with
the ABS.
Illumination of this warning lamp,
linked with the STOP and ABS
warning lamps, accompanied by
the display of a message and an
audible signal, signals that there is a
fault with the electronic brake force
distribution (EBFD).
For technical reasons and, in particular,
to improve the quality of PEUGEOT
CONNECT ser vices ser vices to
customers, the manufacturer reserves the
right to carry out updates to the vehicle's
on-board telematic system.
These systems improve the stability and
manoeuvrability of your vehicle when braking
and contribute towards improved control in
corners, in particular on poor or slippery road
surfaces. The vehicle retains conventional braking.
Drive carefully at moderate speed.
Contact a PEUGEOT dealer or a qualified
workshop as soon as possible.
You must stop as soon as it is safe to do so.
Call on a PEUGEOT dealer or a qualified
workshop.
Safety
Page 134 of 360
132
Advice
The driver must ensure that passengers
use the seat belts correctly and that they
are all fastened before setting off.
Wherever you are seated in the vehicle,
always fasten your seat belt, even for short
journeys.
Do not interchange the seat belt buckles as
they will not fulfil their role fully.
The seat belts are fitted with an inertia reel
permitting automatic adjustment of the
length of the strap to your size. The seat
belt is stowed automatically when not in
use.
Before and after use, ensure that the seat
belt is reeled in correctly.
The lower part of the strap must be
positioned as low as possible on the pelvis.
The upper part must be positioned in the
hollow of the shoulder.
The inertia reels have an automatic locking
device at the time of a collision, during
sudden braking or if the vehicle turns over.
You can release the device by pulling the
strap firmly and then releasing it so that it
reels in slightly.In order to be effective, a seat belt must:
-
b e tightened as close to the body as
possible,
-
b
e pulled in front of you with a smooth
movement, checking that it does not twist,
-
b
e used to restrain only one person,
-
n
ot show any signs of cuts or fraying,
-
n
ot be converted or modified to avoid
affecting its performance.
In accordance with current safety regulations,
for all repairs on your vehicle's seat belts, go
to a qualified workshop with the skills and
equipment needed, which a PEUGEOT dealer
is able to provide.
Have your seat belts checked regularly by a
PEUGEOT dealer or a qualified workshop,
particularly if the straps show signs of
damage.
Clean the seat belt straps with soapy water or
a textile cleaning product, sold by PEUGEOT
dealers.
After folding or moving a seat or rear bench
seat, ensure that the seat belt is positioned
and reeled in correctly. Recommendations for children
Use a suitable child seat if the passenger is
less than 12
years old or shorter than one and
a half metres.
Never use the same seat belt to secure more
than one person.
Never allow a child to travel on your lap.
For more information on Child seats , refer to
the corresponding section.
In the event of an impact
Depending on the nature and seriousness
of the impact , the pyrotechnic device may
be deployed before and independently of the
airbags. Deployment of the pretensioners is
accompanied by a slight discharge of harmless
smoke and a noise, due to the activation of
the pyrotechnic cartridge incorporated in the
system.
In all cases, the airbag warning lamp comes
on.
Following an impact, have the seat belts
system checked and, if necessary, replaced, by
a PEUGEOT dealer or a qualified workshop.
Safety
Page 150 of 360
148
Advice
The incorrect installation of a child seat in a
vehicle compromises the child's protection
in the event of an accident.
Ensure that there is no seat belt or seat
belt buckle under the child seat, as this
could destabilise it.
Remember to fasten the seat belts or the
child seat harnesses keeping the slack
relative to the child's body to a minimum,
even for short journeys.
When installing a child seat using the seat
belt, ensure that the seat belt is tightened
correctly on the child seat and that it
secures the child seat firmly on the seat
of your vehicle. If your passenger seat is
adjustable, move it forwards if necessary.
At rear seating positions, always leave
sufficient space between the front seat
and:
-
a r
ear ward facing child seat,
-
t
he child's feet for a child seat fitted
forward facing.
To do this, move the front seat for wards
and, if necessary, move its backrest into
the upright position.
For optimal installation of the forward
facing child seat, verify that its backrest is
as close as possible to the backrest of the
vehicle seat, if possible in contact with it. The head restraint must be removed before
installing a child seat with a backrest on a
passenger seat.
Ensure that the head restraint is stored or
attached securely to prevent it from being
thrown around the vehicle in the event of
sharp braking. Refit the head restraint when
the child seat is removed.
Children in front
The legislation on carrying children on the
front passenger seat is specific to each
country. Refer to the legislation in force in
your country.
Deactivate the front passenger airbag when
a
rear ward facing child seat is installed on
the front passenger seat.
Otherwise, the child would risk being seriously
injured or killed if the airbag were deployed.
Installing a booster seat
The chest part of the seat belt must be
positioned on the child's shoulder without
touching the neck.
Ensure that the lap part of the seat belt
passes correctly over the child's thighs.
PEUGEOT recommends using a booster seat
with a backrest equipped with a belt guide at
shoulder level. As a safety precaution, do not leave:
-
a c hild or children alone and unattended in
a vehicle,
-
a c
hild or an animal in a vehicle which
is exposed to the sun, with the windows
closed,
-
t
he keys within reach of children inside the
vehicle.
To prevent accidental opening of the doors
and rear windows, use the child lock.
Take care not to open the rear windows by
more than one third.
To protect young children from the rays of the
sun, fit side blinds on the rear windows.
Safety
Page 151 of 360
149
Manual child lock
Mechanical system to prevent opening of a rear
door using its interior control.
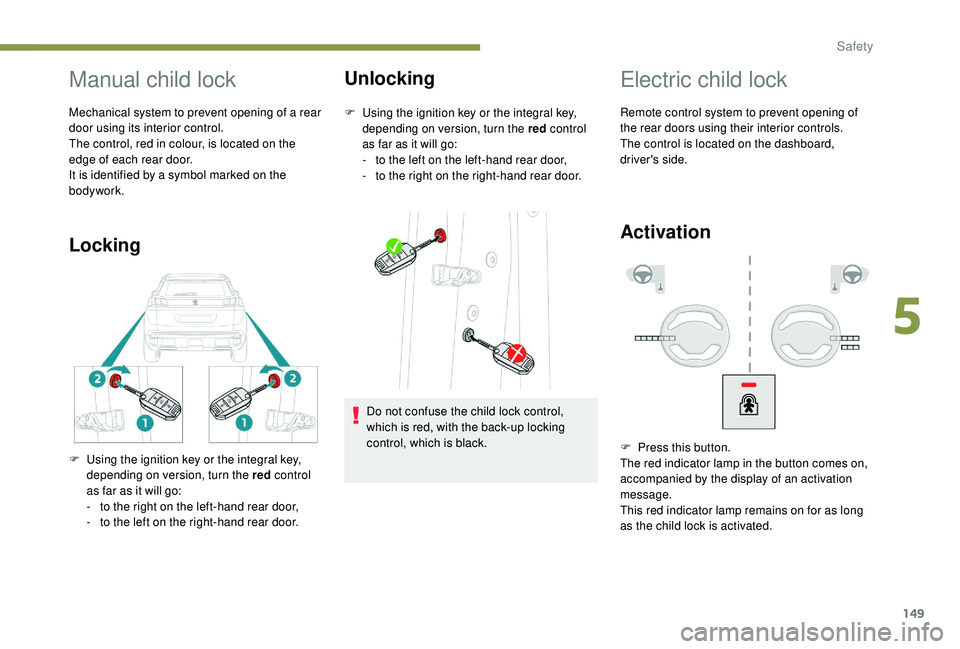
The control, red in colour, is located on the
edge of each rear door.
It is identified by a symbol marked on the
bodywork.
LockingUnlocking
F Using the ignition key or the integral key,
depending on version, turn the red control
as far as it will go:
-
t
o the left on the left-hand rear door,
-
t
o the right on the right-hand rear door.
F
U
sing the ignition key or the integral key,
depending on version, turn the red control
as far as it will go:
-
t
o the right on the left-hand rear door,
-
t
o the left on the right-hand rear door. Do not confuse the child lock control,
which is red, with the back-up locking
control, which is black.
Electric child lock
Remote control system to prevent opening of
the rear doors using their interior controls.
The control is located on the dashboard,
driver's side.
Activation
F Press this button.
The red indicator lamp in the button comes on,
accompanied by the display of an activation
message.
This red indicator lamp remains on for as long
as the child lock is activated.
5
Safety