change wheel PEUGEOT 308 2018 Owners Manual
[x] Cancel search | Manufacturer: PEUGEOT, Model Year: 2018, Model line: 308, Model: Peugeot 308 2018Pages: 360, PDF Size: 12.38 MB
Page 9 of 360
7
Limit the causes of excess
consumption
Spread loads throughout the vehicle; place
the heaviest items in the bottom of the boot,
as close as possible to the rear seats.
Limit the loads carried in the vehicle and
reduce wind resistance (roof bars, roof rack,
bicycle carrier, trailer, etc.). Preferably, use a
roof box.
Remove roof bars and roof racks after use.
At the end of winter, remove snow tyres and
refit your summer tyres.
Observe the recommendations
on maintenance
Check the tyre pressures regularly, when cold,
referring to the label in the door aperture,
driver's side.
Carry out this check in particular:
-
b
efore a long journey,
-
a
t each change of season,
-
a
fter a long period out of use.
Do not forget the spare wheel and the tyres on
any trailer or caravan. Have your vehicle ser viced regularly (engine
oil, oil filter, air filter, cabin filter, etc.) and
obser ve the schedule of operations in the
manufacturer's service schedule.
When filling the tank, do not continue after the
3
rd cut-off of the nozzle to avoid over flow.
At the wheel of your new vehicle, it is only
after the first 1,900
miles (3,000 kilometres)
that you will see the fuel consumption settle
down to a consistent average. With a BlueHDi Diesel engine, if the SCR
system is faulty, your vehicle becomes
polluting. As soon as possible, visit a
PEUGEOT dealer or a qualified workshop to
make your vehicle's level of nitrogen oxides
emissions compliant to the standard.
.
Eco-driving
Page 78 of 360
76
Multipoint massage
System with a choice of type of massage and
adjustment of its intensity.
This system operates with the engine running,
as well as in STOP mode of Stop & Start.
Activation / Settings
The massage settings are adjusted in the touch
screen.
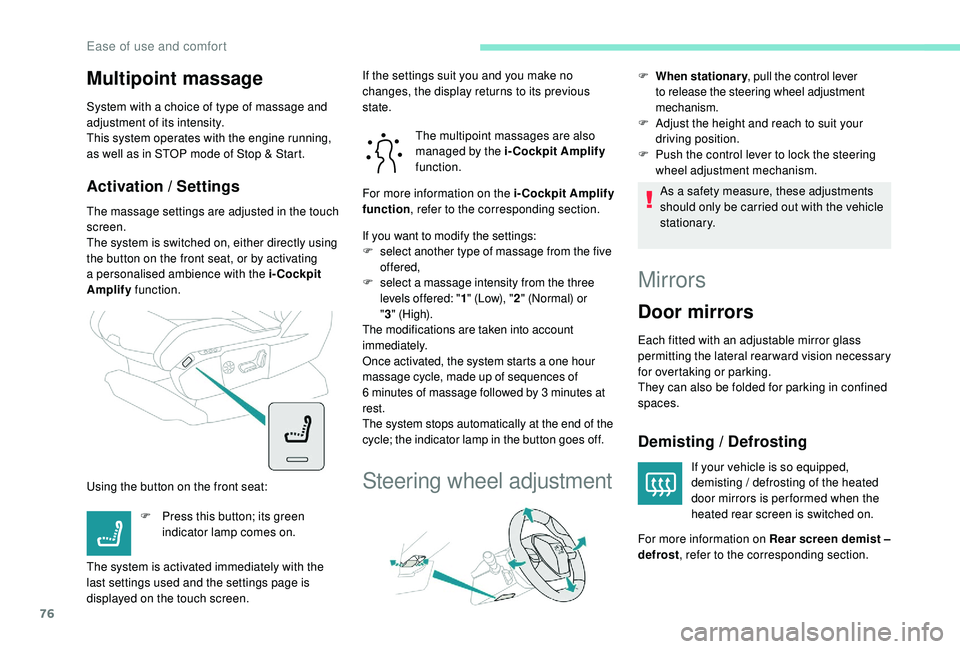
The system is switched on, either directly using
the button on the front seat, or by activating
a personalised ambience with the i-Cockpit
Amplify function.
Using the button on the front seat: The multipoint massages are also
managed by the i-Cockpit Amplify
function.
If you want to modify the settings:
F s elect another type of massage from the five
offered,
F
s
elect a massage intensity from the three
levels offered: " 1" (Low), " 2" (Normal) or
" 3 "
(High).
The modifications are taken into account
immediately.
Once activated, the system starts a one hour
massage cycle, made up of sequences of
6
minutes of massage followed by 3 minutes at
rest.
The system stops automatically at the end of the
cycle; the indicator lamp in the button goes off.
Steering wheel adjustment
F When stationary , pull the control lever
to release the steering wheel adjustment
mechanism.
F Adjust the height and reach to suit your driving position.
F
P
ush the control lever to lock the steering
wheel adjustment mechanism.
As a safety measure, these adjustments
should only be carried out with the vehicle
stationary.
Mirrors
Door mirrors
Each fitted with an adjustable mirror glass
permitting the lateral rearward vision necessary
for overtaking or parking.
They can also be folded for parking in confined
spaces.
Demisting / Defrosting
If your vehicle is so equipped,
demisting / defrosting of the heated
door mirrors is per formed when the
heated rear screen is switched on.
F
P
ress this button; its green
indicator lamp comes on.
The system is activated immediately with the
last settings used and the settings page is
displayed on the touch screen. If the settings suit you and you make no
changes, the display returns to its previous
state.
For more information on the i-Cockpit Amplify
function
, refer to the corresponding section.
For more information on Rear screen demist –
defrost , refer to the corresponding section.
Ease of use and comfort
Page 110 of 360
108
On certain versions, the adjustable boot
floor cannot be fitted in the low position.
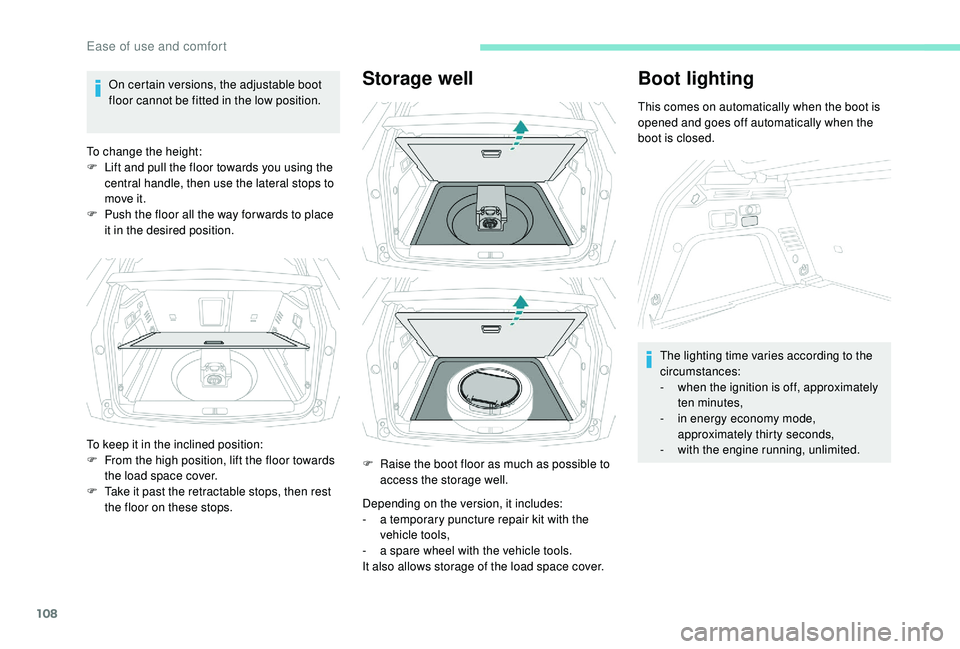
To change the height:
F
L
ift and pull the floor towards you using the
central handle, then use the lateral stops to
move it.
F
P
ush the floor all the way for wards to place
it in the desired position.Storage well
Depending on the version, it includes:
- a t emporary puncture repair kit with the
vehicle tools,
-
a s
pare wheel with the vehicle tools.
It also allows storage of the load space cover.
Boot lighting
This comes on automatically when the boot is
opened and goes off automatically when the
boot is closed.
The lighting time varies according to the
circumstances:
-
w
hen the ignition is off, approximately
ten minutes,
-
i
n energy economy mode,
approximately thirty seconds,
-
w
ith the engine running, unlimited.
To keep it in the inclined position:
F
F
rom the high position, lift the floor towards
the load space cover.
F
T
ake it past the retractable stops, then rest
the floor on these stops. F
R
aise the boot floor as much as possible to
access the storage well.
Ease of use and comfort
Page 163 of 360

161
F Raise the trigger under the knob and move the gear lever to the left then for wards.
Only engage reverse gear when the
vehicle is stationary with the engine at
idle.
As a safety precaution and to facilitate
starting of the engine, always select
neutral and depress the clutch pedal.
Engaging 5th or 6th gear
F Move the lever fully to the right to engage 5th
or 6th g e a r.
Failure to follow this advice may cause
permanent damage to the gearbox
(engagement of 3
rd or 4th gear by mistake).
Automatic gearbox
( E AT 6 / E AT 8)
Six or eight-speed automatic gearbox with push
selector. It also offers a manual mode with gear
changes via steering mounted paddles, located
behind the steering wheel.
Gearbox selector positions
N. Neutral.
For moving the vehicle with the ignition
off: in certain car washing machines,
when towing the vehicle, etc.
D. Automatic mode.
The gearbox manages gear changes
according to the style of driving, the road
profile and the vehicle load.
M. Manual mode.
The driver changes gear using the
controls at the steering wheel.
P. Park.
For parking the vehicle: the front wheels
are blocked.
R. Reverse.
Push selector
A.Button P .
To set the gearbox to P .
6
Driving
Page 165 of 360
163
SPORT
Dynamic pack
The orange indicator lamp in the
button is on while the Dynamic pack
is activated.
Displays in the instrument
panel
If the driver's door is opened with the
ignition on, a message is displayed asking
you to put the gearbox into mode P .
The state of the gearbox is displayed in
the instrument panel for a few moments
after switching off the ignition.
Operation
You can activate or deactivate the function:
- b y pressing this button,
or
-
v
ia the i-Cockpit Amplify function, by
modifying the setting for an ambience in the
touch screen.
For more information on the Dynamic Pack
and the i-Cockpit Amplify function, refer to
the corresponding section.
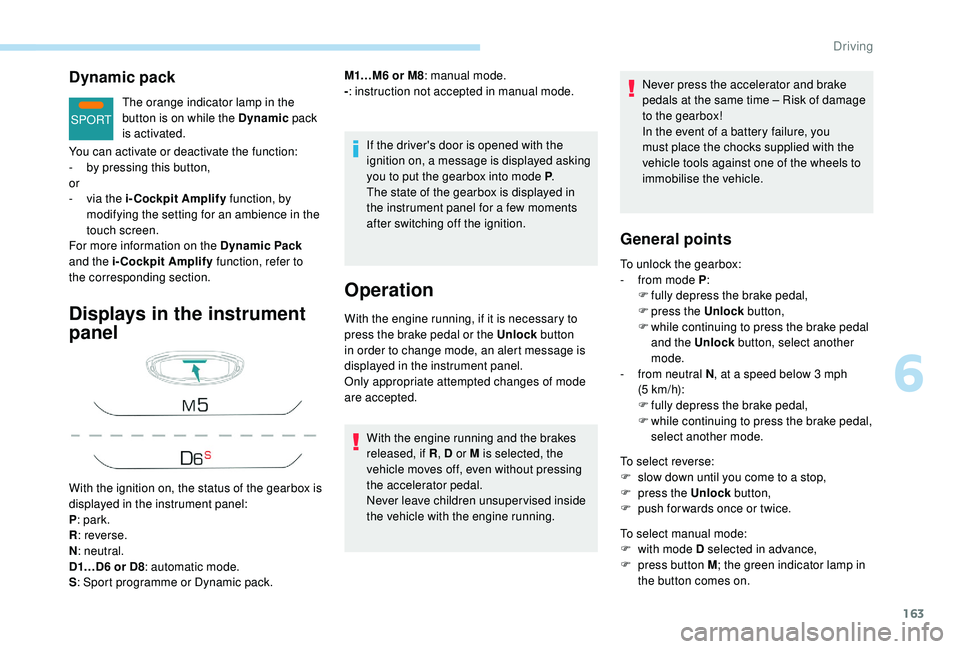
With the ignition on, the status of the gearbox is
displayed in the instrument panel:
P : park.
R : reverse.
N : neutral.
D1…D6 or D8 : automatic mode.
S : Sport programme or Dynamic pack. M1…M6 or M8
: manual mode.
- : instruction not accepted in manual mode.
With the engine running, if it is necessary to
press the brake pedal or the Unlock button
in order to change mode, an alert message is
displayed in the instrument panel.
Only appropriate attempted changes of mode
are accepted.
With the engine running and the brakes
released, if R , D or M is selected, the
vehicle moves off, even without pressing
the accelerator pedal.
Never leave children unsuper vised inside
the vehicle with the engine running. Never press the accelerator and brake
pedals at the same time
– Risk of damage
to the gearbox!
In the event of a battery failure, you
must place the chocks supplied with the
vehicle tools against one of the wheels to
immobilise the vehicle.
General points
To unlock the gearbox:
- f rom mode P :
F
f
ully depress the brake pedal,
F
press the Unlock button,
F
w
hile continuing to press the brake pedal
and the Unlock button, select another
mode.
-
f
rom neutral N , at a speed below 3
mph
(5
km/h):
F
f
ully depress the brake pedal,
F
w
hile continuing to press the brake pedal,
select another mode.
To select reverse:
F
s
low down until you come to a stop,
F
p
ress the Unlock button,
F
p
ush forwards once or twice.
To select manual mode:
F
w
ith mode D selected in advance,
F
p
ress button M ; the green indicator lamp in
the button comes on.
6
Driving
Page 166 of 360
164
To switch off the ignition, the vehicle must be
stationary.
To put the vehicle in free-wheeling mode,
engine off:
F
w
ith the vehicle stationary, engine running,
select N ,
F
s
witch off the engine,
F
w
ithin five seconds, switch the ignition on
again,
F
w
ith your foot on the brake pedal, push the
selector for wards or backwards once to
confirm N and manually release the electric
parking brake,
F
s
witch off the ignition.
If you exceed the time limit of five seconds,
the gearbox engages mode P ; you must then
restart the procedure.
If you open the driver's door when mode
N is engaged, an audible signal will
sound. It will stop when you close the
driver's door again.
Special aspects of automatic
mode
The gearbox selects the gear that offers
optimum per formance, taking account of the
exterior temperature, the profile of the road, the
load on the vehicle and the style of driving.
For maximum acceleration without touching
the selector, press the accelerator fully down
(kick-down). The gearbox changes down
automatically or holds the gear selected until
the maximum engine speed is reached.
When braking, the gearbox changes down
automatically to provide effective engine
braking.
The steering mounted controls allow the driver
to temporarily select a gear, if the road and
engine speed permit.
Special aspects of manual mode
The change from one gear to another takes
place only if the road speed and engine speed
permit.
If the engine speed is too high or too low, the
gear selected flashes for a few seconds, then
the gear actually engaged is displayed.
Moving off
From mode P :
F P ress the brake pedal firmly.
F
S
tart the engine.
F
M
aintaining pressure on the brake pedal,
press the Unlock button.
F
P
ush once or twice rear ward to select the
automatic mode D , or for ward to engage
reverse R .
From neutral N :
F
P
ress the brake pedal firmly.
F
S
tart the engine.
F
M
aintaining pressure on the brake pedal,
push rear ward to select the automatic
mode
D, or for ward, while pressing the
Unlock
button to engage reverse R .
Then, from P or N :
F
R
elease the brake pedal.
F
A
ccelerate progressively to automatically
release the electric parking brake.
F
W
ith the parking brake released, the vehicle
then moves off.
To quit manual mode:
F
p
ush for wards once to go back to D
.
or
F
p
ress button M ; the indicator lamp in the
button goes off.
Driving
Page 167 of 360
165
In severe wintry conditions (temperature
below -23°C), it is recommended that the
engine be allowed to run for a few minutes
before moving off, to ensure the correct
operation and durability of the engine and
gearbox.
Stopping the vehicle
Whatever the state of the gearbox when the
ignition is switched off, mode P is engaged
automatically, with the exception of N, in
which case mode P
will be engaged after a
delay of 5
seconds (allowing the change to
free-wheel).
Check that mode P has been engaged and
that the electric parking brake was applied
automatically; if not, apply it manually.
The corresponding indicator lamps
for the selector panel and the
electric parking brake control lever
must be on, as well as the ones in
the instrument panel.
Operating faults
Malfunction of the gearbox
This is signalled by the illumination
of this warning lamp, accompanied
by the display of a message and an
audible signal, when the ignition is
switched on.
Malfunction of the selector
In the event of a minor fault In the event of a serious fault
Stop as soon as it is safe to do so, away
from the traffic, and call a PEUGEOT
dealer or a qualified workshop.
When the ignition is switched off, the
gearbox goes into mode P automatically.
The gearbox switches to back-up mode: drive
mode
D is locked in third gear, the steering-
mounted control paddles are inoperative,
mode M is no longer available. You may feel a
pronounced jolt when engaging reverse. This
does not present any risk for the gearbox.
Do not drive faster than 62 mph (100 km/h),
keeping to the speed limit.
Go to a PEUGEOT dealer or a qualified
workshop.
You are alerted by this warning
lamp lighting up, accompanied by
the display of a message and an
audible signal.
In certain cases, the selector lamps may not
come on, but the state of the gearbox is still
displayed in the instrument panel. You are alerted by the illumination of
this warning lamp.
Hill start assist
System which keeps your vehicle immobilised
temporarily (approximately 2
seconds) when
starting on a gradient, the time it takes to
move your foot from the brake pedal to the
accelerator pedal.
This system only operates when:
-
t
he vehicle has been brought to a complete
stop, with your foot on the brake pedal,
-
c
ertain slope conditions are met,
-
w
ith the driver's door closed.
Drive cautiously and go to a PEUGEOT or a
qualified workshop.
6
Driving
Page 172 of 360
170
The Stop & Start system requires a
12 V battery of specific technology and
specification.
All work on this type of battery must be
carried out only by a PEUGEOT dealer or
a qualified workshop.
For more information on the 12
V batter y,
refer to the corresponding section.
Under-inflation detection
System which automatically checks the
pressures of the tyres while driving.
The system monitors the pressures in the four
tyres, once the vehicle is moving.
It compares the information given by the wheel
speed sensors with reference values, which
must be reinitialised ever y time the tyre
pressures are adjusted or a wheel changed .
The system triggers an alert as soon as it
detects a drop in the inflation pressure of one
or more tyres. The under-inflation detection system does
not replace the need for vigilance on the
part of the driver.
This system does not avoid the need to
check the tyre pressures (including the
spare wheel) every month as well as
before a long journey.
Driving with under-inflated tyres worsens
road-holding, lengthens braking distances,
causes premature wear of the tyres,
particularly in adverse conditions (heavy
loads, high speeds, long journeys).
Driving with under-inflated tyres
increases fuel consumption.
The inflation pressures defined for your
vehicle can be found on the tyre pressure
label.
For more information on the
Identification markings , refer to the
corresponding section. Checking tyre pressures
This check should be done when the tyres
are "cold" (vehicle stopped for 1
hour or
after a journey of less than 6 miles (10 km)
at moderate speeds).
Other wise, add 0.3 bar to the pressures
shown on the label.
Snow chains
The system does not have to be
reinitialised after fitting or removing snow
chains.
Under-inflation alert
This warning is indicated by
continuous illumination of this lamp,
an audible signal and, depending on
the equipment installed, a message
displayed on the screen.
F
R
educe speed immediately, avoid excessive
steering movements and sudden braking.
F
S
top the vehicle as soon as it is safe to do
so.
The loss of pressure detected does not
always cause visible bulging of the tyre.
Do not satisfy yourself with just a visual
check.
Driving
Page 181 of 360
179
Switching on
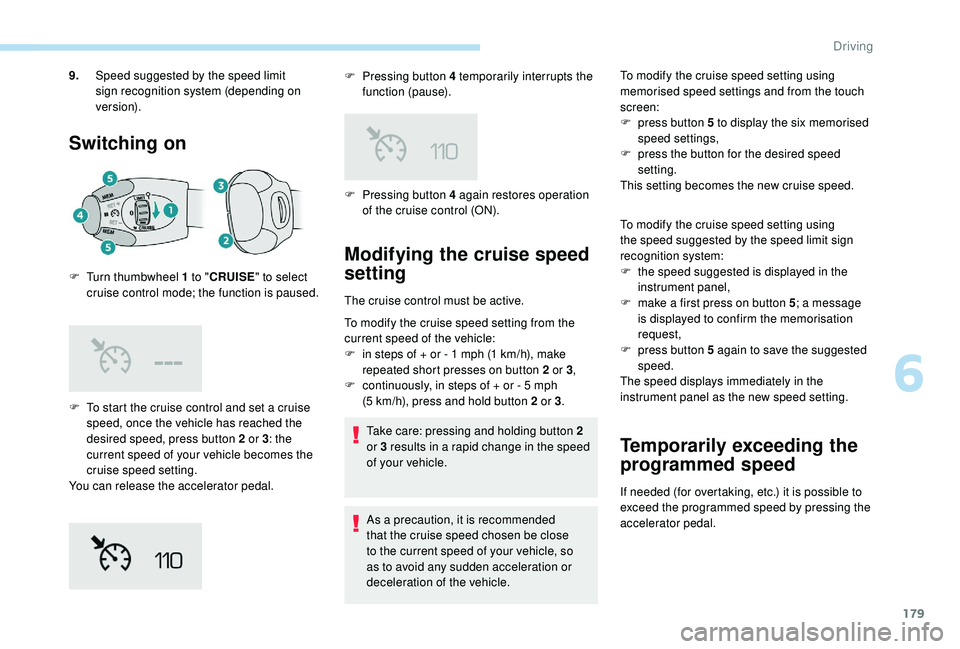
F To start the cruise control and set a cruise speed, once the vehicle has reached the
desired speed, press button 2 or 3 : the
current speed of your vehicle becomes the
cruise speed setting.
You can release the accelerator pedal. F
P
ressing button 4 temporarily interrupts the
function (pause).
9.
Speed suggested by the speed limit
sign recognition system (depending on
ve r s i o n).
F
T
urn thumbwheel 1 to "
CRUISE" to select
cruise control mode; the function is paused. F
P
ressing button 4 again restores operation
of the cruise control (ON).
Modifying the cruise speed
setting
The cruise control must be active.
To modify the cruise speed setting from the
current speed of the vehicle:
F
i
n steps of + or - 1 mph (1 km/h), make
repeated short presses on button 2 or 3 ,
F
c
ontinuously, in steps of + or - 5 mph
(5
km/h), press and hold button 2 or 3 .
Take care: pressing and holding button 2
or 3
results in a rapid change in the speed
of your vehicle.
As a precaution, it is recommended
that the cruise speed chosen be close
to the current speed of your vehicle, so
as to avoid any sudden acceleration or
deceleration of the vehicle. To modify the cruise speed setting using
memorised speed settings and from the touch
screen:
F
p
ress button 5 to display the six memorised
speed settings,
F
p
ress the button for the desired speed
setting.
This setting becomes the new cruise speed.
To modify the cruise speed setting using
the speed suggested by the speed limit sign
recognition system:
F
t
he speed suggested is displayed in the
instrument panel,
F m ake a first press on button 5; a message
is displayed to confirm the memorisation
request,
F
p
ress button 5 again to save the suggested
speed.
The speed displays immediately in the
instrument panel as the new speed setting.
Temporarily exceeding the
programmed speed
If needed (for overtaking, etc.) it is possible to
exceed the programmed speed by pressing the
accelerator pedal.
6
Driving
Page 197 of 360
195
The detection may be impeded:
- i f the markings on the road are worn,
-
i
f there is little contrast between the
markings on the road and the road
sur face,
-
i
f the windscreen is dirty,
-
i
n certain weather conditions: fog,
heavy rain, snow, shade, bright
sunlight or direct exposure to the sun
(low sun, leaving a tunnel, etc.).
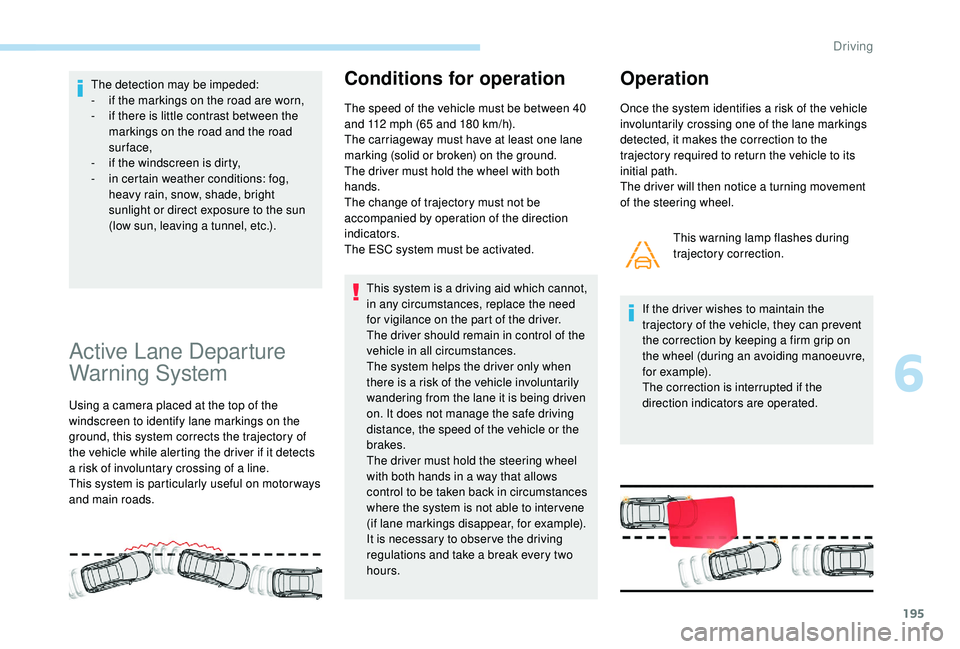
Active Lane Departure
Warning System
Using a camera placed at the top of the
windscreen to identify lane markings on the
ground, this system corrects the trajectory of
the vehicle while alerting the driver if it detects
a risk of involuntary crossing of a line.
This system is particularly useful on motor ways
and main roads.
Conditions for operation
The speed of the vehicle must be between 40
and 112 mph (65 and 180 km/h).
The carriageway must have at least one lane
marking (solid or broken) on the ground.
The driver must hold the wheel with both
hands.
The change of trajectory must not be
accompanied by operation of the direction
indicators.
The ESC system must be activated.
This system is a driving aid which cannot,
in any circumstances, replace the need
for vigilance on the part of the driver.
The driver should remain in control of the
vehicle in all circumstances.
The system helps the driver only when
there is a risk of the vehicle involuntarily
wandering from the lane it is being driven
on. It does not manage the safe driving
distance, the speed of the vehicle or the
brakes.
The driver must hold the steering wheel
with both hands in a way that allows
control to be taken back in circumstances
where the system is not able to inter vene
(if lane markings disappear, for example).
It is necessary to obser ve the driving
regulations and take a break every two
hours. This warning lamp flashes during
trajectory correction.
If the driver wishes to maintain the
trajectory of the vehicle, they can prevent
the correction by keeping a firm grip on
the wheel (during an avoiding manoeuvre,
for example).
The correction is interrupted if the
direction indicators are operated.
Operation
Once the system identifies a risk of the vehicle
involuntarily crossing one of the lane markings
detected, it makes the correction to the
trajectory required to return the vehicle to its
initial path.
The driver will then notice a turning movement
of the steering wheel.
6
Driving