check PEUGEOT 308 2022 User Guide
[x] Cancel search | Manufacturer: PEUGEOT, Model Year: 2022, Model line: 308, Model: PEUGEOT 308 2022Pages: 260, PDF Size: 7.92 MB
Page 39 of 260
37
Access
2selective unlocking is activated, prior to the
opening of the tailgate.
Closing the tailgate with the “Hands-Free
Tailgate Access” function enables you to lock
the vehicle.
Recommendations on the hands-free
function (Hands-Free Tailgate Access)
If it does not work, check that the electronic key
is not exposed to a source of electromagnetic
interference (e.g. smartphone).
The function may be deactivated or affected if
there is rain or snow.
The function may not work correctly with a
prosthetic leg.
In some circumstances, the tailgate may open or
close by itself, particularly when:
–
hitching up or removing a trailer;
–
fitting or removing a bicycle carrier;
–
loading
or unloading bicycles on/from a bicycle
carrier;
–
depositing or lifting something behind the
vehicle;
–
an animal approaches the rear bumper;
–
washing the vehicle;
–
maintenance is performed on the vehicle;
–
accessing the spare wheel.
T
o avoid such operating problems, keep the
electronic key away from the recognition zone or
deactivate the hands-free function.
Towing device
The installation of a towing device may
disturb the detection system.
To avoid unintentionally opening the tailgate
while operating the towing device:
►
remove the electronic key from the
recognition zone, with the tailgate closed.
For more information on the T
owing device
with quickly detachable towball , refer to the
corresponding section.
Memorising an opening
position
To limit the opening angle of the motorised
tailgate:
►
move the tailgate to the desired position
manually or by pressing the button.
►
press button
C or the exterior control B for
more than 3 seconds (memorisation is confirmed
by a brief audible signal).
A new memorisation operation cancels the
previous one.
Memorising is not available until the
height of opening is more than or equal
to 1 metre between the low position and the
high position of the tailgate.
Manual operation
The tailgate can be manoeuvred by hand, even
with motorised operation activated.
The tailgate must be stationary.
With resumption of the motorised function
The motorised tailgate function can be activated
manually.
►
With the boot open: vigorously move the
tailgate a little in the closing direction to activate
motorised closing.
►
With the boot partly open: vigorously move
the tailgate a little in the opening direction to
activate motorised opening.
Without resumption of the motorised
function
► Move the tailgate as slowly and smoothly as
possible.
Assistance from the gas struts is no longer
available when opening and closing the
motorised tailgate manually
. Resistance to
opening and closing is therefore quite normal.
In case of the motor overheating
Repeatedly opening and closing the
tailgate can cause overheating of its electric
motor, after which opening and closing will not
be possible.
Allow the electric motor to cool down for at
least 10 minutes before carrying out any
manoeuvre.
If you are unable to wait, operate it manually.
Page 40 of 260
38
Access
Manual closing of the
motorised tailgate in case of
failure
This operation is only necessary in the case of
failure of the tailgate motor .
If the failure originates from the battery, it is
recommended to recharge it or change it with the
tailgate closed.
In this situation, a significant force may be
needed to close the tailgate.
►
Close it gently without slamming, as slowly as
possible, by pushing at the centre of the tailgate.
Do not lower the tailgate by pushing at
one of its sides - risk of damage!
Precautions in use
In wintry conditions
To avoid any operating problems, remove
the snow or wait until the ice melts before
requesting motorised opening of the tailgate.
When washing
When washing the vehicle in an
automatic car wash, do not forget to lock and
move away from the vehicle
to prevent any
risk of unwanted opening.
Alarm
(Depending on version)
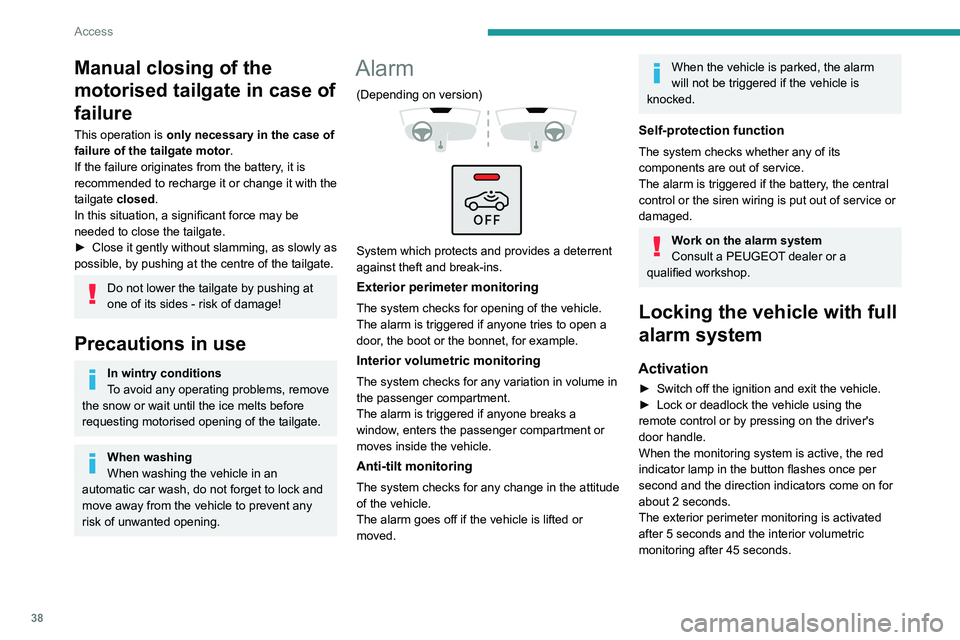
System which protects and provides a deterrent
against theft and break-ins.
Exterior perimeter monitoring
The system checks for opening of the vehicle.
The alarm is triggered if anyone tries to open a
door, the boot or the bonnet, for example.
Interior volumetric monitoring
The system checks for any variation in volume in
the passenger compartment.
The alarm is triggered if anyone breaks a
window, enters the passenger compartment or
moves inside the vehicle.
Anti-tilt monitoring
The system checks for any change in the attitude
of the vehicle.
The alarm goes off if the vehicle is lifted or
moved.
When the vehicle is parked, the alarm
will not be triggered if the vehicle is
knocked.
Self-protection function
The system checks whether any of its
components are out of service.
The alarm is triggered if the battery, the central
control or the siren wiring is put out of service or
damaged.
Work on the alarm system
Consult a PEUGEOT dealer or a
qualified workshop.
Locking the vehicle with full
alarm system
Activation
► Switch off the ignition and exit the vehicle.
► Lock or deadlock the vehicle using the
remote control or by pressing on the driver's
door handle.
When the monitoring system is active, the red
indicator lamp in the button flashes once per
second and the direction indicators come on for
about 2 seconds.
The exterior perimeter monitoring is activated
after 5 seconds and the interior volumetric
monitoring after 45 seconds.
Page 42 of 260
40
Access
► Switch on the ignition; this stops the alarm.
The indicator lamp in the button goes off.
Locking the vehicle without
activating the alarm
► Lock the vehicle using the key (built-in the
remote control) in the front left-hand door lock.
Automatic activation
(Depending on version)
The system is activated automatically 2 minutes
after the last door or the boot is closed.
►
T
o avoid triggering the alarm on entering the
vehicle, first press the unlocking button on the
remote control or unlock the vehicle using the
"Keyless Entry and Start" system.
Malfunction
When the ignition is switched on, the fixed
lighting of the red indicator lamp in the button
indicates a system malfunction.
Have it checked by a PEUGEOT dealer or a
qualified workshop.
Electric windows
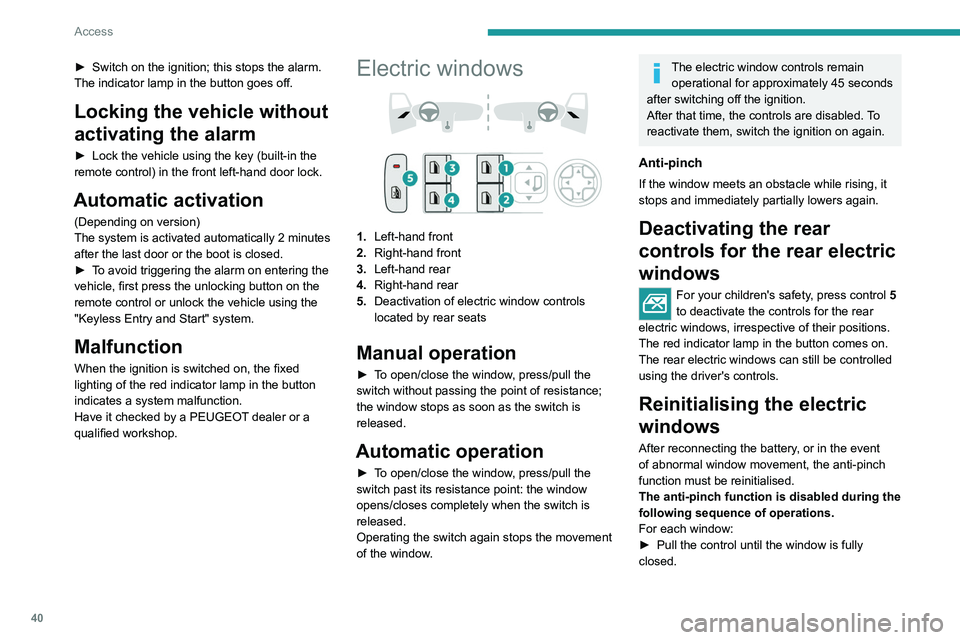
1. Left-hand front
2. Right-hand front
3. Left-hand rear
4. Right-hand rear
5. Deactivation of electric window controls
located by rear seats
Manual operation
► To open/close the window, press/pull the
switch without passing the point of resistance;
the window stops as soon as the switch is
released.
Automatic operation
► To open/close the window, press/pull the
switch past its resistance point: the window
opens/closes completely when the switch is
released.
Operating the switch again stops the movement
of the window.
The electric window controls remain
operational for approximately 45 seconds
after switching off the ignition.
After that time, the controls are disabled. To
reactivate them, switch the ignition on again.
Anti-pinch
If the window meets an obstacle while rising, it
stops and immediately partially lowers again.
Deactivating the rear
controls for the rear electric
windows
For your children's safety, press control 5
to deactivate the controls for the rear
electric windows, irrespective of their positions.
The red indicator lamp in the button comes on.
The rear electric windows can still be controlled
using the driver's controls.
Reinitialising the electric
windows
After reconnecting the battery, or in the event
of abnormal window movement, the anti-pinch
function must be reinitialised.
The anti-pinch function is disabled during the
following sequence of operations.
For each window:
►
Pull the control until the window is fully
closed.
Page 43 of 260
41
Access
2► Release the control, then pull it again for at
least one second.
If an electric window meets an obstacle
during operation, the movement of the
window must be reversed. To do this, press
the relevant control.
When the driver operates the passengers’
electric window controls, it is important to
ensure that nothing can prevent the window
from closing properly.
It is important to ensure that passengers use
the electric windows correctly.
Pay particular attention to children when
operating the windows.
Be aware of passengers and/or other persons
present when closing windows remotely using
the electronic key.
Do not put your head or arms through the
open windows when the vehicle is moving -
risk of serious injury!
Sunroof
The sunroof consists of a movable glass panel
that slides over the roof and a blind that can
be opened independently. Opening the sunroof
automatically opens the blind.
►
T
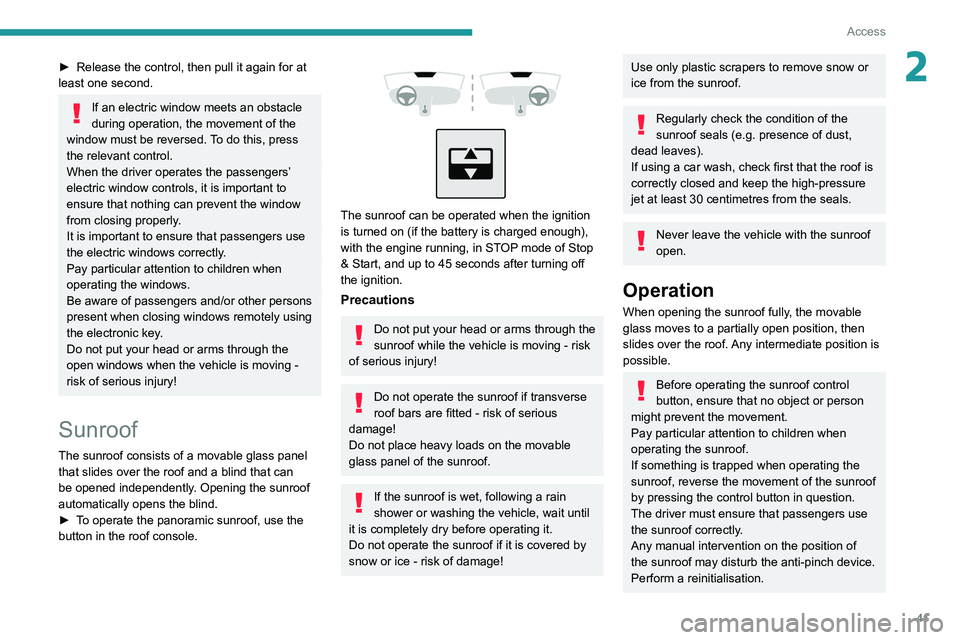
o operate the panoramic sunroof, use the
button in the roof console.
The sunroof can be operated when the ignition
is turned on (if the battery is charged enough),
with the engine running, in STOP mode of Stop
& Start, and up to 45 seconds after turning off
the ignition.
Precautions
Do not put your head or arms through the
sunroof while the vehicle is moving - risk
of serious injury!
Do not operate the sunroof if transverse
roof bars are fitted - risk of serious
damage!
Do not place heavy loads on the movable
glass panel of the sunroof.
If the sunroof is wet, following a rain
shower or washing the vehicle, wait until
it is completely dry before operating it.
Do not operate the sunroof if it is covered by
snow or ice - risk of damage!
Use only plastic scrapers to remove snow or
ice from the sunroof.
Regularly check the condition of the
sunroof seals (e.g. presence of dust,
dead leaves).
If using a car wash, check first that the roof is
correctly closed and keep the high-pressure
jet at least 30 centimetres from the seals.
Never leave the vehicle with the sunroof
open.
Operation
When opening the sunroof fully, the movable
glass moves to a partially open position, then
slides over the roof. Any intermediate position is
possible.
Before operating the sunroof control
button, ensure that no object or person
might prevent the movement.
Pay particular attention to children when
operating the sunroof.
If something is trapped when operating the
sunroof, reverse the movement of the sunroof
by pressing the control button in question.
The driver must ensure that passengers use
the sunroof correctly.
Any manual intervention on the position of
the sunroof may disturb the anti-pinch device.
Perform a reinitialisation.
Page 44 of 260
42
Access
Anti-pinch system
If the sunroof encounters an obstacle when
closing, the movement is automatically reversed.
Opening/closing the sunroof
► To open the sunroof, use the part of the
button located towards the rear.
►
T
o close the sunroof, use the part of the
button located towards the front.
Operating the button
► Pressing the button beyond its point of
resistance opens or closes the sunroof fully .
►
Pressing the button again stops the
movement in progress.
►
By keeping the button pressed (without going
beyond the point of resistance), the movement of
the glass stops when this button is released.
►
When the sunroof is closed: pressing once
without passing the point of resistance moves it
to the partially open position.
►
When the sunroof is partially open: pressing
once on the front part of the button, without
going beyond the point of resistance, closes it
completely
.
The sunroof and windows can be closed by holding down the remote control
locking button.
Press again to stop the manoeuvre.
Opening/closing the blind
► To open the blind, pull its handle backwards
until the desired position is reached. ►
T
o close the blind, push its handle forwards
until the desired position is reached.
Reinitialisation
Reinitialisation is required after reconnecting the
battery, or if the sunroof malfunctions or moves
in a jerky manner.
►
Check that nothing is affecting the movement
of the sunroof and that the seals are clean.
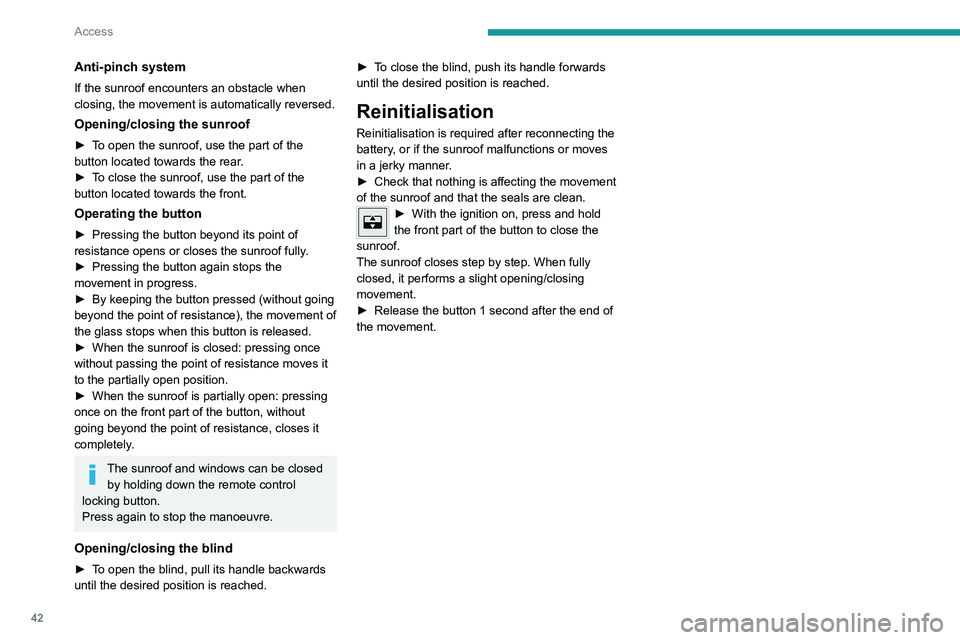
► With the ignition on, press and hold
the front part of the button to close the
sunroof.
The sunroof closes step by step. When fully
closed, it performs a slight opening/closing
movement.
►
Release the button 1 second after the end of
the movement.
Page 53 of 260
51
Ease of use and comfort
3The backrests should only be manoeuvred when the vehicle is
stationary.
First steps:
►
Lower the head restraints, or remove them
when carrying heavy loads.
►
Lift up the rear armrest.
►
If necessary
, move the front seats forward.
►
Check
that no person or object might interfere
with the folding of the backrests (e.g.
clothing,
luggage).
►
Check that the outer seat belts are lying flat
on the backrests.
The folding of the backrest is accompanied by a slight lowering of the
corresponding cushion.
To obtain a flat surface, it is necessary to
place the adjustable boot floor in the high
position.
When the backrest is released, the red
indicator in the release grip is visible.
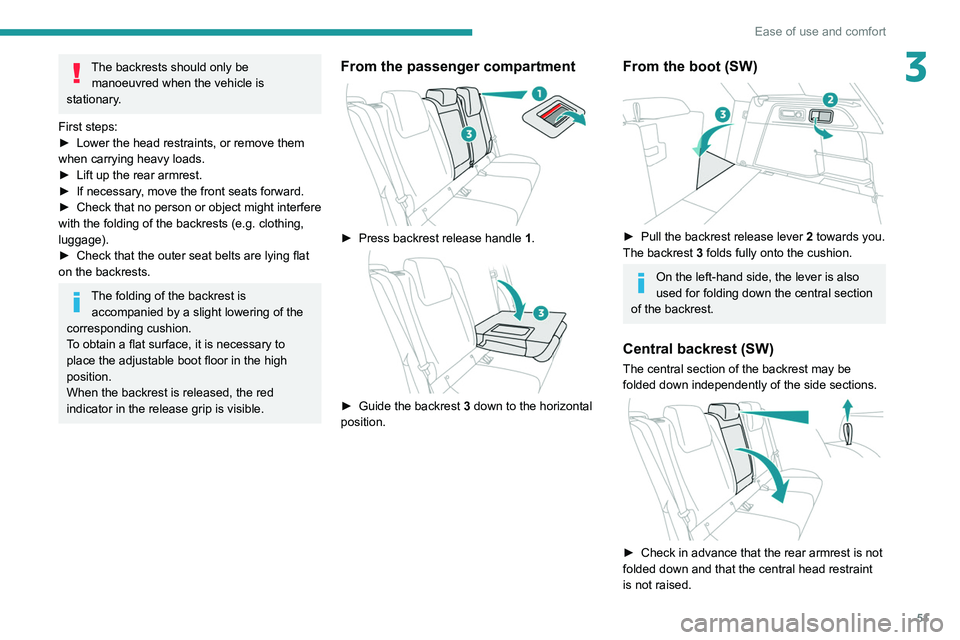
From the passenger compartment
► Press backrest release handle 1 .
► Guide the backrest 3 down to the horizontal
position.
From the boot (SW)
► Pull the backrest release lever 2 towards you.
The backrest 3 folds fully onto the cushion.
On the left-hand side, the lever is also
used for folding down the central section
of the backrest.
Central backrest (SW)
The central section of the backrest may be
folded down independently of the side sections.
► Check in advance that the rear armrest is not
folded down and that the central head restraint
is not raised.
Page 54 of 260
52
Ease of use and comfort
► From inside the passenger compartment or
from the boot, pull on the strap to release.
►
Fold the backrest onto the seat cushion.
►
When repositioning, lift up the backrest fully
until it locks.
Repositioning the backrests
First check that the outer seat belts are
lying vertically flat alongside the backrest
latching rings.
► Put the backrest 3 in the upright position and
push it firmly to latch it home.
►
Check that the red indicator is no longer
visible in the release grip 1
.
►
Ensure that the outer seat belts were not
trapped during the operation.
Please note: an incorrectly latched
backrest compromises the safety of
passengers in the event of sudden braking or
an accident.
The contents of the boot may be thrown
forwards - risk of serious injury!
Heating and Ventilation
Air intake
The air circulating in the passenger compartment
is filtered and originates either from the
exterior, via the grille located at the base of the
windscreen, or from the inside in air recirculation
mode.
Controls
Depending on version, certain controls
are accessible in the Climate touch
screen application and/via the control panel on
the centre console.
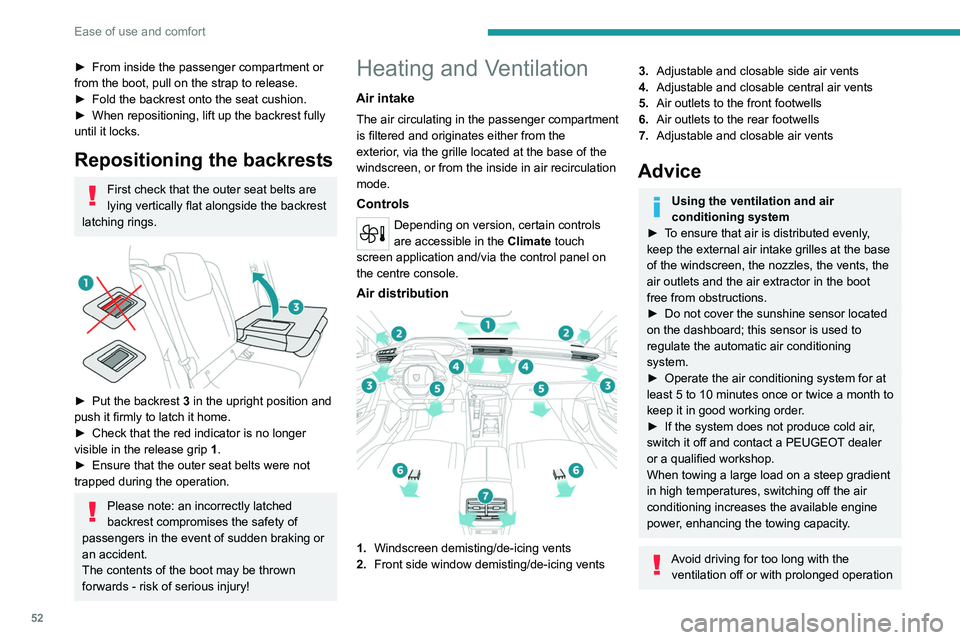
Air distribution
1. Windscreen demisting/de-icing vents
2. Front side window demisting/de-icing vents
3.Adjustable and closable side air vents
4. Adjustable and closable central air vents
5. Air outlets to the front footwells
6. Air outlets to the rear footwells
7. Adjustable and closable air vents
Advice
Using the ventilation and air
conditioning system
►
T
o ensure that air is distributed evenly,
keep the external air intake grilles at the base
of the windscreen, the nozzles, the vents, the
air outlets and the air extractor in the boot
free from obstructions.
►
Do not cover the sunshine sensor located
on the dashboard; this sensor is used to
regulate the automatic air conditioning
system.
►
Operate the air conditioning system for at
least 5 to 10 minutes once or twice a month to
keep it in good working order
.
►
If the system does not produce cold air
,
switch it off and contact a PEUGEOT dealer
or a qualified workshop.
When towing a large load on a steep gradient
in high temperatures, switching off the air
conditioning increases the available engine
power, enhancing the towing capacity.
Avoid driving for too long with the ventilation off or with prolonged operation
Page 55 of 260
53
Ease of use and comfort
3of interior air recirculation. Risk of misting and
deterioration of the air quality!
If the interior temperature is very high
after the vehicle has stood for a long
time in the sunshine, air the passenger
compartment for a few moments.
Put the air flow control at a setting high
enough to quickly change the air in the
passenger compartment.
Condensation created by the air
conditioning results in a discharge of
water underneath the vehicle. This is perfectly
normal.
Servicing the ventilation and air
conditioning system
►
Ensure that the passenger compartment
filter is in good condition and have the filter
elements replaced regularly
.
We recommend using a composite passenger
compartment filter. Its specific active additive
helps protect against polluting gases and bad
smells.
►
T
o ensure correct operation of the
air conditioning system, have it checked
according to the recommendations in the
Manufacturer’s service schedule.
Stop & Start
The heating and air conditioning systems
only operate when the engine is running.
Temporarily deactivate the Stop & Start
system to maintain a comfortable temperature
in the passenger compartment.
For more information on the Stop &
Start
system, refer to the corresponding
section.
Rechargeable hybrid vehicles
Intensive use of the air conditioning
reduces the vehicle range in Electric mode.
Ventilation with the ignition on
When the ignition is switched on, the ventilation
system and the air flow 2 and air distribution
3 settings in the passenger compartment are
activated, for a period which depends on the
battery charge.
This function does not include the air
conditioning system.
Dual-zone automatic air
conditioning
This system automatically controls the activation
of the air conditioning system, regulating the
temperature, air flow and air distribution inside
the passenger compartment. This system works with the engine running, but
access to the ventilation and its controls remains
possible with the ignition on.
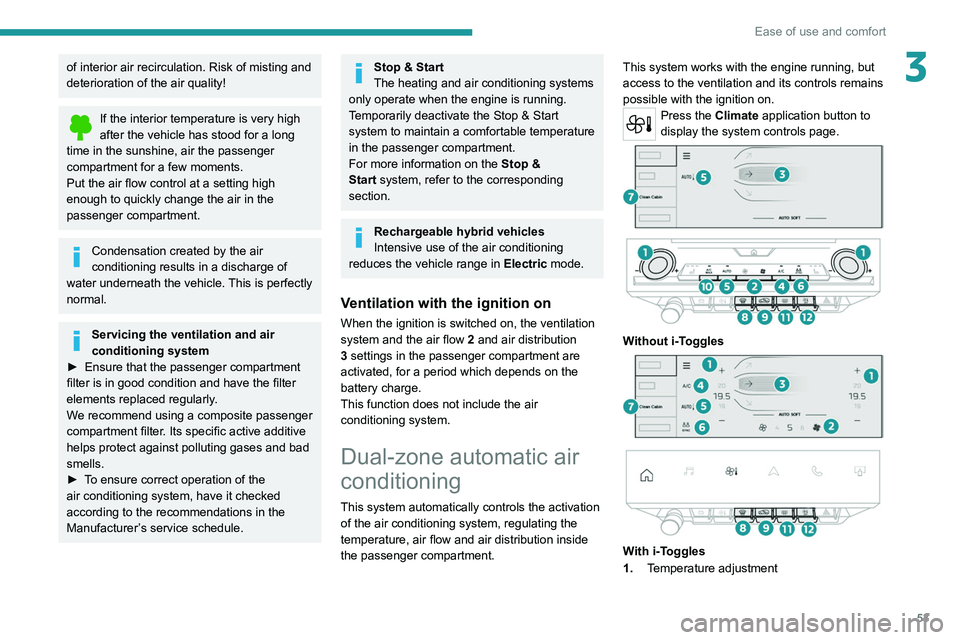
Press the Climate application button to
display the system controls page.
Without i-Toggles
With i-Toggles
1. Temperature adjustment
Page 61 of 260
59
Ease of use and comfort
3allows a smartphone to be connected by Android
Auto® or CarPlay®, enabling certain smartphone
applications to be used on the touch screen.
For best results, use a cable made or approved
by the device manufacturer.
These applications can be managed using the
steering-mounted controls or the audio system
controls.
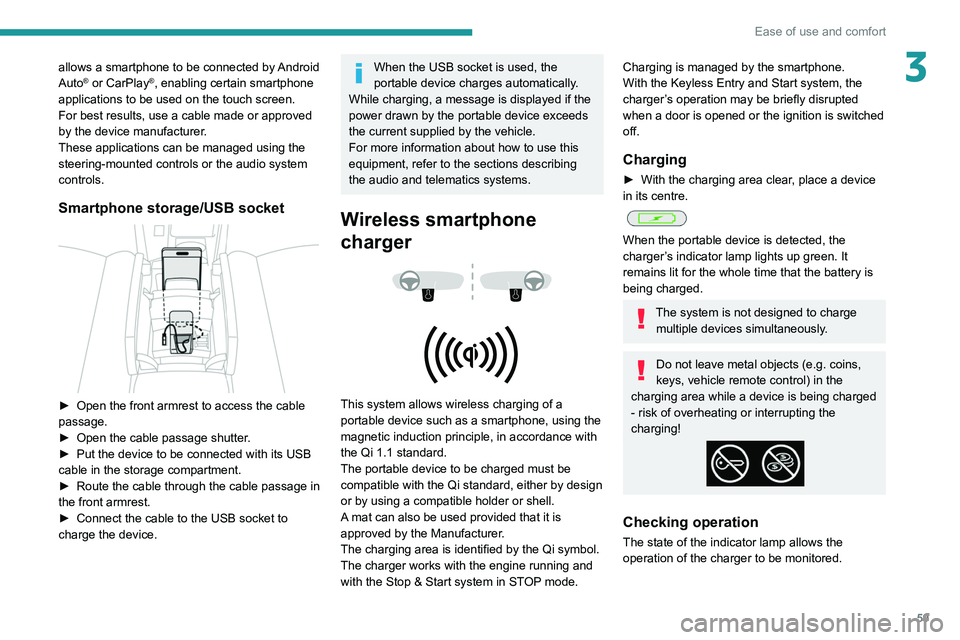
Smartphone storage/USB socket
► Open the front armrest to access the cable
passage.
►
Open the cable passage shutter
.
►
Put the device to be connected with its USB
cable in the storage compartment.
►
Route the cable through the cable passage in
the front armrest.
►
Connect the cable to the USB socket to
charge the device.
When the USB socket is used, the
portable device charges automatically.
While charging, a message is displayed if the
power drawn by the portable device exceeds
the current supplied by the vehicle.
For more information about how to use this
equipment, refer to the sections describing
the audio and telematics systems.
Wireless smartphone
charger
This system allows wireless charging of a
portable device such as a smartphone, using the
magnetic induction principle, in accordance with
the Qi 1.1 standard.
The portable device to be charged must be
compatible with the Qi standard, either by design
or by using a compatible holder or shell.
A mat can also be used provided that it is
approved by the Manufacturer.
The charging area is identified by the Qi symbol.
The charger works with the engine running and
with the Stop & Start system in STOP mode.
Charging is managed by the smartphone.
With the Keyless Entry and Start system, the
charger’s operation may be briefly disrupted
when a door is opened or the ignition is switched
off.
Charging
► With the charging area clear , place a device
in its centre.
When the portable device is detected, the
charger’s indicator lamp lights up green. It
remains lit for the whole time that the battery is
being charged.
The system is not designed to charge multiple devices simultaneously.
Do not leave metal objects (e.g. coins,
keys, vehicle remote control) in the
charging area while a device is being charged
- risk of overheating or interrupting the
charging!
Checking operation
The state of the indicator lamp allows the
operation of the charger to be monitored.
Page 62 of 260
60
Ease of use and comfort
State of the
indicator lampMeaning
Off Engine switched off.
No compatible devices
detected.
Charging complete.
Fixed green Compatible portable device detected.
Charging.
Flashing orange Foreign object detected in the charging zone.
Portable device not well
centred in the charging
zone.
Fixed orange Malfunction of the portable device's battery
meter.
Device battery
temperature too high.
Charger malfunction.
If the indicator lamp is fixed orange:
– remove the device, then place it back in the
centre of the charging zone.
or
–
remove the device and try again in a quarter
of an hour
.
If the problem persists, have the system checked
by a PEUGEOT dealer or a qualified workshop.
Front armrest
It includes a storage space and is illuminated
when the cover is opened (depending on
version).
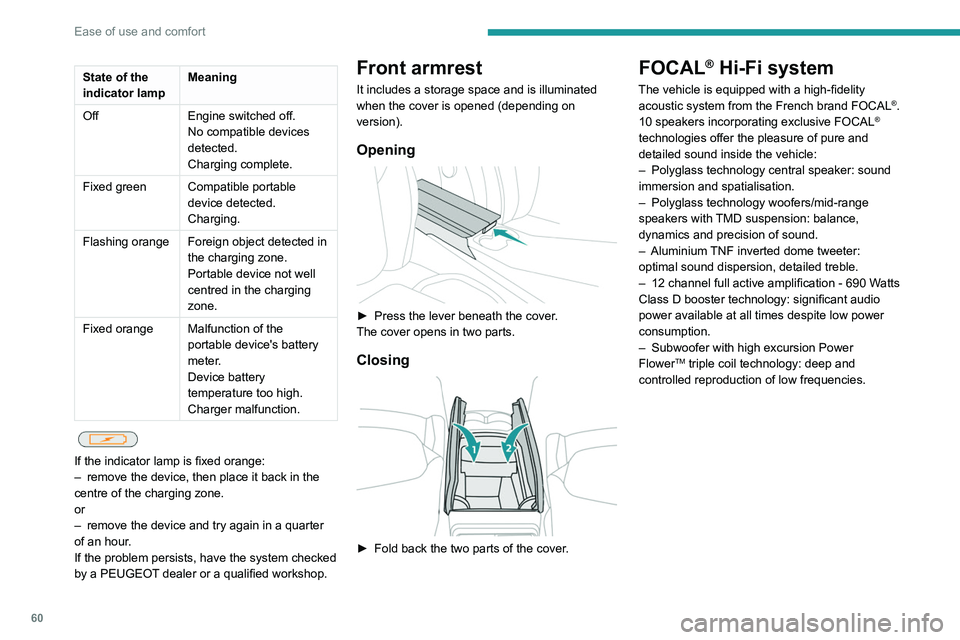
Opening
► Press the lever beneath the cover.
The cover opens in two parts.
Closing
► Fold back the two parts of the cover .
FOCAL® Hi-Fi system
The vehicle is equipped with a high-fidelity
acoustic system from the French brand FOCAL®.
10 speakers incorporating exclusive FOCAL®
technologies offer the pleasure of pure and
detailed sound inside the vehicle:
–
Polyglass technology central speaker: sound
immersion and spatialisation.
–
Polyglass technology woofers/mid-range
speakers with
TMD suspension: balance,
dynamics and precision of sound.
–
Aluminium
TNF inverted dome tweeter:
optimal sound dispersion, detailed treble.
–
12 channel full active amplification - 690 W
atts
Class D booster technology: significant audio
power available at all times despite low power
consumption.
–
Subwoofer with high excursion Power
FlowerTM triple coil technology: deep and
controlled reproduction of low frequencies.