mirror PEUGEOT 308 2023 Owners Manual
[x] Cancel search | Manufacturer: PEUGEOT, Model Year: 2023, Model line: 308, Model: PEUGEOT 308 2023Pages: 260, PDF Size: 7.97 MB
Page 4 of 260
2
Contents
■
Overview
■
Eco-driving
1Dashboard instrumentsDriver information 10
Digital instrument panels 10
Warning and indicator lamps 11
Indicators 17
Manual test 20
Total distance recorder 21
Trip computer 21
10-inch touch screen 22
i-Toggles 24
Remotely operable additional functions
(Rechargeable hybrid)
24
2AccessElectronic key with remote control function
and built-in key 26
Proximity Keyless Entry and Start 28
Central locking 30
Back-up procedures 31
Doors 33
Boot 33
Motorised tailgate (SW) 33
Alarm 37
Electric windows 39
Sunroof 40
3Ease of use and comfortDriving position 42
Front seats 43
Steering wheel adjustment 47
Heated steering wheel 47
Mirrors 47
Rear bench seat 49
Heating and Ventilation 51
Dual-zone automatic air conditioning 52
Front demisting/defrosting 55
Rear screen demisting/defrosting 55
Heated windscreen 55
Temperature pre-conditioning
(Rechargeable hybrid)
55
Front fittings 56
Courtesy lamps 59
Interior ambient lighting 60
Rear fittings 60
Boot fittings 61
4Lighting and visibilityExterior lighting control stalk 65
Direction indicators 66
Headlamp beam height adjustment 66
Automatic illumination of headlamps 67
Guide-me-home and welcome lighting 67
Automatic lighting systems - General
recommendations
68
Automatic headlamp dipping 68
Peugeot Matrix LED Technology 2.0 69
Wiper control stalk 71
Intermittent wipers 73
Automatic wipers 73
Changing a wiper blade 74
5SafetyGeneral safety recommendations 76
Hazard warning lamps 76
Horn 77
Pedestrian horn (Rechargeable hybrid) 77
Emergency or assistance 77
Electronic stability control (ESC) 79
Seat belts 82
Airbags 84
Child seats 86
Deactivating the front passenger airbag 88
ISOFIX child seats 89
i-Size child seats 90
Installing child seats 91
Child lock 93
6DrivingDriving recommendations 94
Starting/switching off the engine 95
Starting rechargeable hybrid vehicles 96
Electric parking brake 98
Manual gearbox 100
Automatic gearbox 100
Driving modes 103
Hill start assist 104
Gear shift indicator 105
Stop & Start 105
Tyre under-inflation detection 107
Driving and manoeuvring aids -
General recommendations
108
Steering wheel with hands-on detection 11 0
Shortcuts for driving aids 11 0
Road signs recognition 111
Speed limiter 11 4
Cruise control - Specific recommendations 11 6 CarM an uals 2 .c o m
Page 5 of 260
3
Contents
Cruise control 11 6
Drive Assist Plus 11 8
Drive Assist 2.0 11 8
Adaptive cruise control 11 9
Lane positioning assist 123
Semi-automatic lane changing 126
Active Safety Brake with Collision Risk Alert
and Intelligent emergency braking assistance
130
Distraction detection 134
Lane keeping assist 135
Long-distance blind spot monitoring 138
Parking sensors 139
Visiopark 1 140
Visiopark 3 142
Rear cross traffic alert 144
7Practical informationCompatibility of fuels 147
Refuelling 147
Misfuel prevention (Diesel) 148
Rechargeable hybrid system 149
Charging the traction battery
(Rechargeable hybrid)
155
Towing device 158
Towing device with quickly detachable towball 159
Roof bars 162
Very cold climate screens 163
Snow chains 164
Energy economy mode 165
Bonnet 165
Engine compartment 166
Checking levels 167
Checks 168
AdBlue® (BlueHDi) 170
Free-wheeling 172
Advice on care and maintenance 173
8In the event of a breakdownWarning triangle 176
Running out of fuel (Diesel) 176
Tool kit 176
Temporary puncture repair kit 178
Spare wheel 181
Changing a bulb 184
Fuses 186
12
V battery/Accessory batteries 186
Towing the vehicle 192
9Technical dataEngine technical data and towed loads 194
Petrol engines 195
Diesel engines 197
Rechargeable hybrid engines 198
Dimensions 199
Identification markings 200
10 PEUGEOT i-Connect Advanced -PEUGEOT i-Connect
First steps 201
Customisation 204
Steering mounted controls 205
Applications 206
Voice commands 206
Navigation 207
Connectivity 208
Mirror Screen 210
Media 2 11
Phone 213
Settings 214
Help 215
11Vehicle data recording and privacy
■
Alphabetical index
■
Appendix CarM an uals 2 .c o m
Page 6 of 260
4
Overview
Presentation
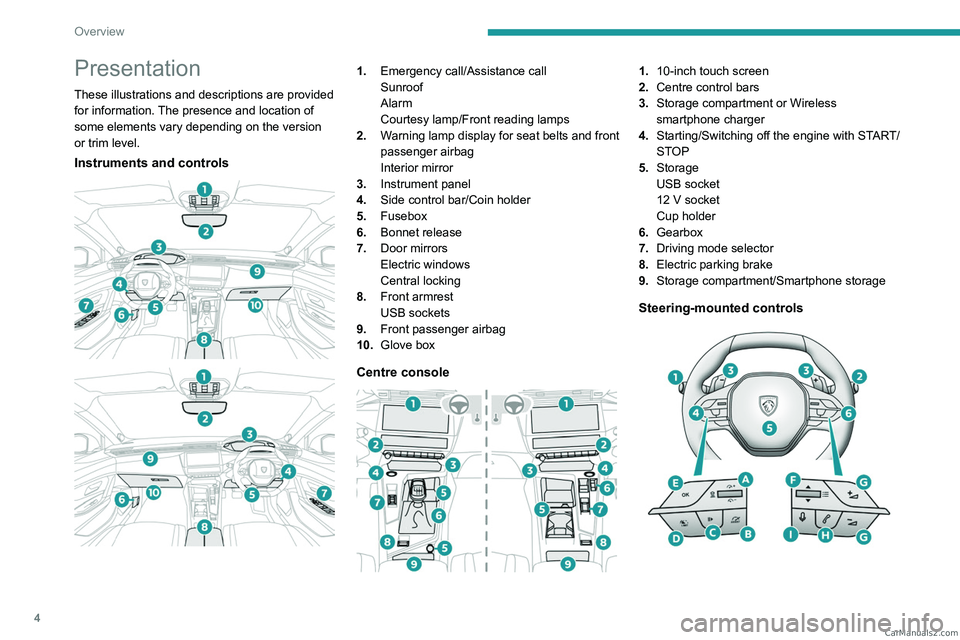
These illustrations and descriptions are provided
for information. The presence and location of
some elements vary depending on the version
or trim level.
Instruments and controls
1. Emergency call/Assistance call
Sunroof
Alarm
Courtesy lamp/Front reading lamps
2. Warning lamp display for seat belts and front
passenger airbag
Interior mirror
3. Instrument panel
4. Side control bar/Coin holder
5. Fusebox
6. Bonnet release
7. Door mirrors
Electric windows
Central locking
8. Front armrest
USB sockets
9. Front passenger airbag
10. Glove box
Centre console
1.10-inch touch screen
2. Centre control bars
3. Storage compartment or Wireless
smartphone charger
4. Starting/Switching off the engine with START/
STOP
5. Storage
USB socket
12
V socket
Cup holder
6. Gearbox
7. Driving mode selector
8. Electric parking brake
9. Storage compartment/Smartphone storage
Steering-mounted controls
CarM an uals 2 .c o m
Page 26 of 260
24
Dashboard instruments
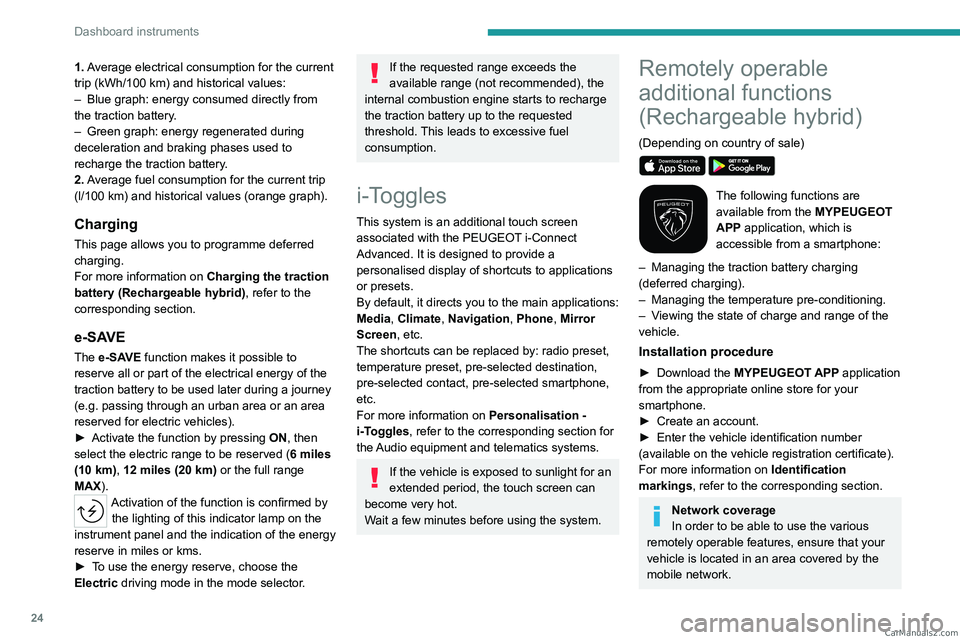
1. Average electrical consumption for the current
trip (kWh/100 km) and historical values:
–
Blue graph: energy consumed directly from
the traction battery
.
–
Green graph: energy regenerated during
deceleration and braking phases used to
recharge the
traction battery.
2. Average fuel consumption for the current trip
(l/100
km) and historical values (orange graph).
Charging
This page allows you to programme deferred
charging.
For more information on Charging the traction
battery (Rechargeable hybrid), refer to the
corresponding section.
e-SAVE
The e-SAVE function makes it possible to
reserve all or part of the electrical energy of the
traction battery to be used later during a journey
(e.g.
passing through an urban area or an area
reserved for electric vehicles).
►
Activate the function by pressing ON
, then
select the electric range to be reserved ( 6 miles
(10 km), 12 miles (20 km) or the full range
MAX).
Activation of the function is confirmed by the lighting of this indicator lamp on the
instrument panel and the indication of the energy
reserve in miles or kms.
►
T
o use the energy reserve, choose the
Electric driving mode in the mode selector.
If the requested range exceeds the
available range (not recommended), the
internal combustion engine starts to recharge
the traction battery up to the requested
threshold. This leads to excessive fuel
consumption.
i-Toggles
This system is an additional touch screen
associated with the PEUGEOT i-Connect
Advanced. It is designed to provide a
personalised display of shortcuts to applications
or presets.
By default, it directs you to the main applications:
Media, Climate, Navigation, Phone, Mirror
Screen, etc.
The shortcuts can be replaced by: radio preset,
temperature preset, pre-selected destination,
pre-selected contact, pre-selected smartphone,
etc.
For more information on
Personalisation -
i-T
oggles, refer to the corresponding section for
the Audio equipment and telematics systems.
If the vehicle is exposed to sunlight for an
extended period, the touch screen can
become very hot.
Wait a few minutes before using the system.
Remotely operable
additional functions
(Rechargeable hybrid)
(Depending on country of sale)
The following functions are
available from the MYPEUGEOT
APP application, which is
accessible from a smartphone:
–
Managing the traction battery charging
(deferred charging).
–
Managing the temperature pre-conditioning.
–
V
iewing the state of charge and range of the
vehicle.
Installation procedure
► Download the MYPEUGEOT APP application
from the appropriate online store for your
smartphone.
►
Create an account.
►
Enter the vehicle identification number
(available on the vehicle registration certificate).
For more information on Identification
markings
, refer to the corresponding section.
Network coverage
In order to be able to use the various
remotely operable features, ensure that your
vehicle is located in an area covered by the
mobile network. CarM an uals 2 .c o m
Page 28 of 260
26
Access
Electronic key with
remote control function
and built-in key
Remote control function
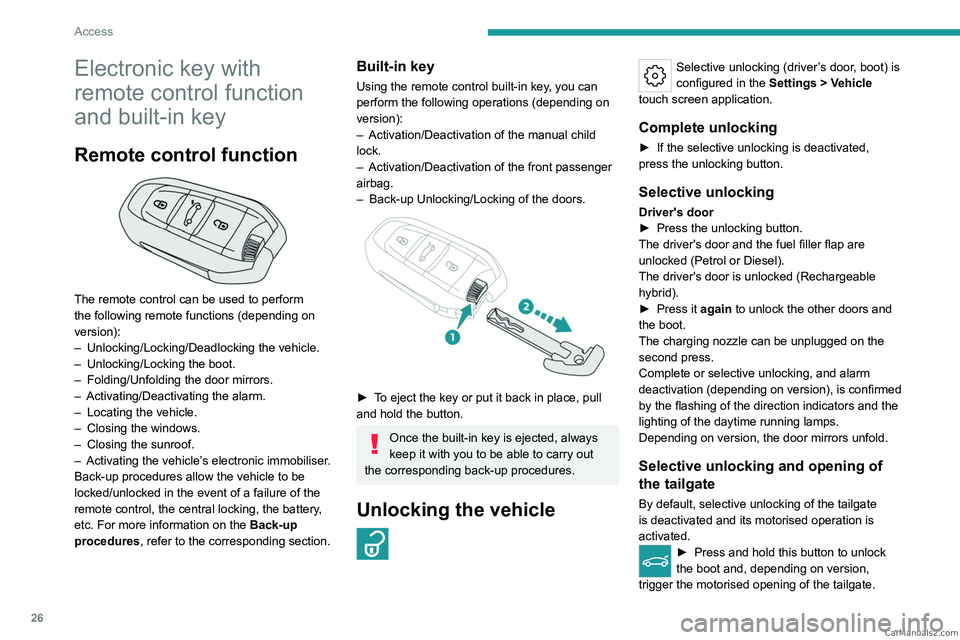
The remote control can be used to perform
the following remote functions (depending on
version):
–
Unlocking/Locking/Deadlocking the vehicle.
–
Unlocking/Locking the boot.
–
Folding/Unfolding the door mirrors.
–
Activating/Deactivating the alarm.
–
Locating the vehicle.
–
Closing the windows.
–
Closing the sunroof.
–
Activating the vehicle’
s electronic immobiliser.
Back-up procedures allow the vehicle to be
locked/unlocked in the event of a failure of the
remote control, the central locking, the battery,
etc. For more information on the Back-up
procedures, refer to the corresponding section.
Built-in key
Using the remote control built-in key, you can
perform the following operations (depending on
version):
–
Activation/Deactivation of the manual child
lock.
–
Activation/Deactivation of the front passenger
airbag.
–
Back-up Unlocking/Locking of the doors.
► To eject the key or put it back in place, pull
and hold the button.
Once the built-in key is ejected, always
keep it with you to be able to carry out
the corresponding back-up procedures.
Unlocking the vehicle
Selective unlocking (driver’s door, boot) is
configured in the Settings
> Vehicle
touch screen application.
Complete unlocking
► If the selective unlocking is deactivated,
press the unlocking button.
Selective unlocking
Driver's door
► Press the unlocking button.
The driver's door and the fuel filler flap are
unlocked (Petrol or Diesel).
The driver's door is unlocked (Rechargeable
hybrid).
►
Press it
again to unlock the other doors and
the boot.
The charging nozzle can be unplugged on the
second press.
Complete or selective unlocking, and alarm
deactivation (depending on version), is confirmed
by the flashing of the direction indicators and the
lighting of the daytime running lamps.
Depending on version, the door mirrors unfold.
Selective unlocking and opening of
the tailgate
By default, selective unlocking of the tailgate
is deactivated and its motorised operation is
activated.
► Press and hold this button to unlock
the boot and, depending on version,
trigger the motorised opening of the tailgate. CarM an uals 2 .c o m
Page 29 of 260
27
Access
2When selective unlocking of the tailgate is
activated, the doors and the fuel filler flap remain
locked.
If selective unlocking of the tailgate is
deactivated, pressing the button unlocks the
whole vehicle.
If motorised operation of the tailgate is
deactivated, pressing the button partially
opens the tailgate.
To lock the vehicle, it is necessary to close
the tailgate again.
Locking the vehicle
Depending on version, the activation/
deactivation of the lock audible signal is
configured in the Settings
> Vehicle touch
screen application.
Normal locking
► Press the locking button.
The locking, and the activation of the alarm
depending on version,
is confirmed by the
lighting of the direction indicators and the
daytime running lamps.
Depending on version, the door mirrors fold.
An access (door or boot) that is not properly closed prevents locking of the
vehicle. However, if the vehicle is fitted with
an alarm, it will be activated after 45 seconds.
If the vehicle is unlocked but the doors or boot
are not subsequently opened,
the vehicle
will automatically lock itself again after about
30
seconds. If the vehicle is fitted with an
alarm, it will be reactivated automatically.
Deadlocking
Deadlocking renders the interior door
controls inoperative. It also deactivates
the central locking buttons.
The horn remains operational.
Never leave anyone inside the vehicle
when it is deadlocked.
►
Press the locking button.
►
Press the locking button again within 3
seconds to deadlock the vehicle (confirmed by
the temporary lighting of the direction indicators).
For the vehicles equipped with the Proximity
Keyless Entry and Start system, a double
audible signal indicates that the vehicle is not
deadlocked.
Closing the windows and sunroof
An audible signal sounds before the start of
movement.
►
T
o completely close the windows and,
depending on version, the sunroof, press the
locking button for more than 2 seconds.
► Press again to stop closing.
Ensure that no person or object could
prevent the correct closing of the
windows and sunroof.
If, on versions with alarm, you want to
leave the windows and/or sunroof partially
open, you must first deactivate the interior
volumetric alarm protection.
For more information on the Alarm, refer to
the corresponding section.
Locating the vehicle
This function helps you to spot your vehicle from
a distance, with the vehicle locked:
–
The direction indicators flash for approximately
10 seconds.
–
The door mirror spotlamps come on.
–
The courtesy lamps come on.
► Press this button.
Advice
Remote control
The remote control is a sensitive, high-
frequency device; avoid handling it in your
pocket, due to the risk of unintentionally
unlocking the vehicle.
Avoid pressing the remote control buttons
while out of range of the vehicle, due to
the risk of rendering the remote control CarM an uals 2 .c o m
Page 30 of 260
28
Access
inoperative. It would then be necessary to
reset it.
The remote control does not work when the
key is in the ignition switch, even when the
ignition is switched off.
Anti-theft protection
Do not modify the electronic vehicle
immobiliser, as this might result in
malfunctions.
For vehicles with a key ignition switch,
remember to remove the key and turn the
steering wheel to engage the steering lock.
Locking the vehicle
Driving with the doors locked could make
it more difficult for the emergency services
to enter the passenger compartment in an
emergency.
As a safety precaution, remove the key from
the ignition or take the electronic key with you
when leaving the vehicle, even for a short
time.
Purchasing a second-hand vehicle
Have the key codes memorised by a
PEUGEOT dealer, to ensure that the keys
in your possession are the only ones able to
start the vehicle.
Proximity Keyless Entry
and Start
This is a Keyless Entry and Start system. It enables automatic vehicle locking/unlocking
simply by detecting the electronic key.
As long as the driver has the electronic key
on their person, the vehicle unlocks as they
approach and locks when they walk away.
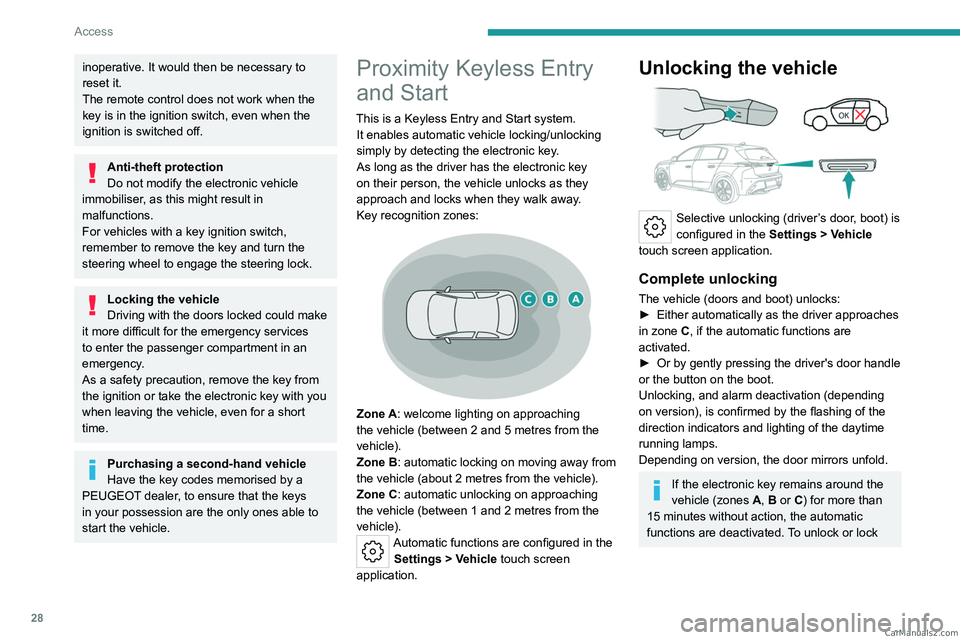
Key recognition zones:
Zone A: welcome lighting on approaching
the vehicle (between 2 and 5 metres from the
vehicle).
Zone B: automatic locking on moving away from
the vehicle (about 2
metres from the vehicle).
Zone C: automatic unlocking on approaching
the vehicle (between 1 and 2
metres from the
vehicle).
Automatic functions are configured in the Settings > Vehicle touch screen
application.
Unlocking the vehicle
Selective unlocking (driver’s door, boot) is
configured in the Settings
> Vehicle
touch screen application.
Complete unlocking
The vehicle (doors and boot) unlocks:
► Either automatically as the driver approaches
in zone
C, if the automatic functions are
activated.
►
Or by gently pressing the driver's door handle
or the button on the boot.
Unlocking, and alarm deactivation (depending
on version), is confirmed by the flashing of the
direction indicators and lighting of the daytime
running lamps.
Depending on version, the door mirrors unfold.
If the electronic key remains around the
vehicle (zones A, B or C) for more than
15 minutes without action, the automatic
functions are deactivated. To unlock or lock CarM an uals 2 .c o m
Page 32 of 260
30
Access
Automatic folding/unfolding of the door mirrors is configured in the touch screen.
For more information on Mirrors, refer to the
corresponding section.
As a safety measure, never leave the vehicle, even for a short time, without
taking the Keyless Entry and Start system’s
electronic key with you.
Be aware of the risk of theft of the vehicle if
the key is present in one of the defined areas
while the vehicle is unlocked.
In order to preserve the battery in the
electronic key and the vehicle's battery:
–
The unlocking
on approach function
(zone
C) automatically switches to hibernation
mode after several days (approximately one
week) without being used. To unlock the
vehicle, use the remote control or press on
the driver’s door handle. The next time the
vehicle is started, the automatic unlocking
and locking functions will be reactivated.
–
If the welcome lighting is triggered
several times in succession without the
vehicle subsequently being started, it will be
deactivated.
–
All "hands-free" functions switch to
hibernation mode after 21 days without being
used.
To restore these functions, unlock the
vehicle using the remote control and start the
engine.
Electrical interference
The electronic key may not work if it is
close to an electronic device (e.g.
mobile
telephone (switched on or on standby), laptop
computer, strong magnetic fields). If this
occurs, move the electronic key away from
the electronic device.
Central locking
Manual
► Press these buttons to lock/unlock the vehicle
(doors and boot) from inside the passenger
compartment.
Central locking does not take place if any
of the doors are open.
When locking/deadlocking from the
outside
When the vehicle is locked or deadlocked
from the outside, the indicator lamp in the
locking button flashes and the buttons are
inactive.
►
After normal locking, pull one of the
interior door controls to unlock the vehicle.
►
After deadlocking, you must use the
remote control, the "Keyless Entry and
Start" system or the built-in key to unlock the
vehicle.
Automatic (anti-intrusion security)
The doors and boot lock automatically while
driving (speed above 6 mph (10
km/h)).
To deactivate/reactivate this function (activated
by default):
►
Press the locking button until a confirmation
message appears.
Transporting long or voluminous
objects
Press the central locking control to drive
with the boot open and the doors locked.
Otherwise, every time the speed of the
vehicle exceeds 6 mph (10 km/h), the sound
of the locks rebounding will be heard and an
alert will be displayed. CarM an uals 2 .c o m
Page 44 of 260
42
Ease of use and comfort
Driving position
Correct seating position
Adopting a good driving position contributes to
improving driver comfort and protection.
It also optimises interior and exterior visibility as
well as access to controls.
Certain seat adjustments described in this
section depend on the trim level and the country
in which the vehicle is sold.
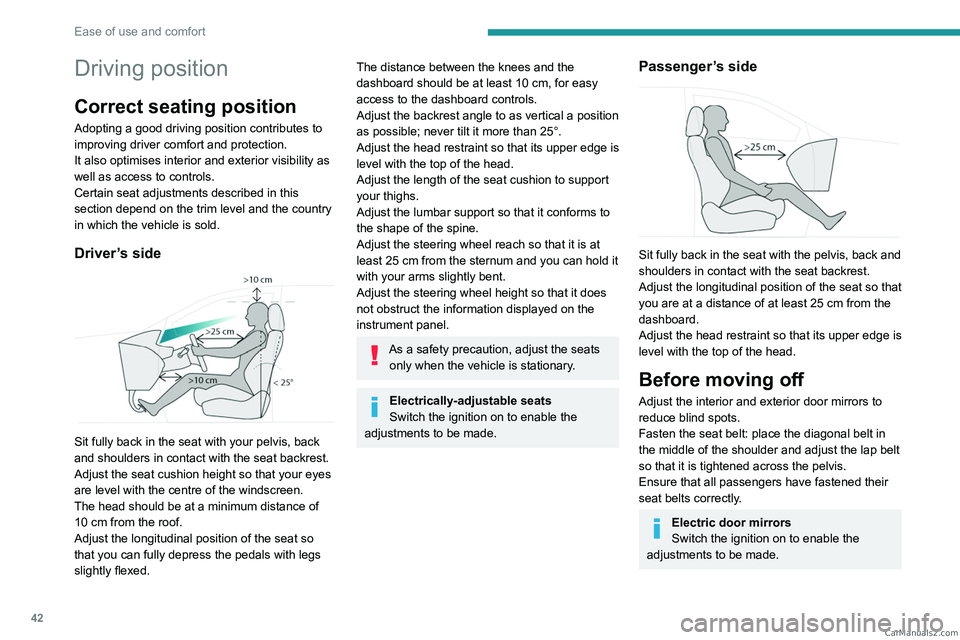
Driver’s side
Sit fully back in the seat with your pelvis, back
and shoulders in contact with the seat backrest.
Adjust the seat cushion height so that your eyes
are level with the centre of the windscreen.
The head should be at a minimum distance of
10 cm from the roof.
Adjust the longitudinal position of the seat so
that you can fully depress the pedals with legs
slightly flexed.
The distance between the knees and the
dashboard should be at least 10 cm, for easy
access to the dashboard controls.
Adjust the backrest angle to as vertical a position
as possible; never tilt it more than 25°.
Adjust the head restraint so that its upper edge is
level with the top of the head.
Adjust the length of the seat cushion to support
your thighs.
Adjust the lumbar support so that it conforms to
the shape of the spine.
Adjust the steering wheel reach so that it is at
least 25
cm from the sternum and you can hold it
with your arms slightly bent.
Adjust the steering wheel height so that it does
not obstruct the information displayed on the
instrument panel.
As a safety precaution, adjust the seats only when the vehicle is stationary.
Electrically-adjustable seats
Switch the ignition on to enable the
adjustments to be made.
Passenger’s side
Sit fully back in the seat with the pelvis, back and
shoulders in contact with the seat backrest.
Adjust the longitudinal position of the seat so that
you are at a distance of at least 25
cm from the
dashboard.
Adjust the head restraint so that its upper edge is
level with the top of the head.
Before moving off
Adjust the interior and exterior door mirrors to
reduce blind spots.
Fasten the seat belt: place the diagonal belt in
the middle of the shoulder and adjust the lap belt
so that it is tightened across the pelvis.
Ensure that all passengers have fastened their
seat belts correctly.
Electric door mirrors
Switch the ignition on to enable the
adjustments to be made. CarM an uals 2 .c o m
Page 47 of 260
45
Ease of use and comfort
3Lumbar
The control allows independent adjustment of
the depth and vertical position of the lumbar
support.
► Press and hold the front or rear of the
control to increase or reduce the lumbar
support.
►
Press and hold the top or bottom of the
control to raise or lower the lumbar support area.
Seat cushion angle
This electric adjustment control is present on
‘AGR’ certified manually-adjustable seats.
► Press and hold the front or rear of the button
to raise or lower the front of the seat cushion.
Memorising driving
positions
Associated with the electrically-adjusted driver’s
seat, this function allows two driving positions
to be memorised, to make these adjustments
easier if there are frequent driver changes.
It records the electric adjustments made to the
seat and door mirrors.
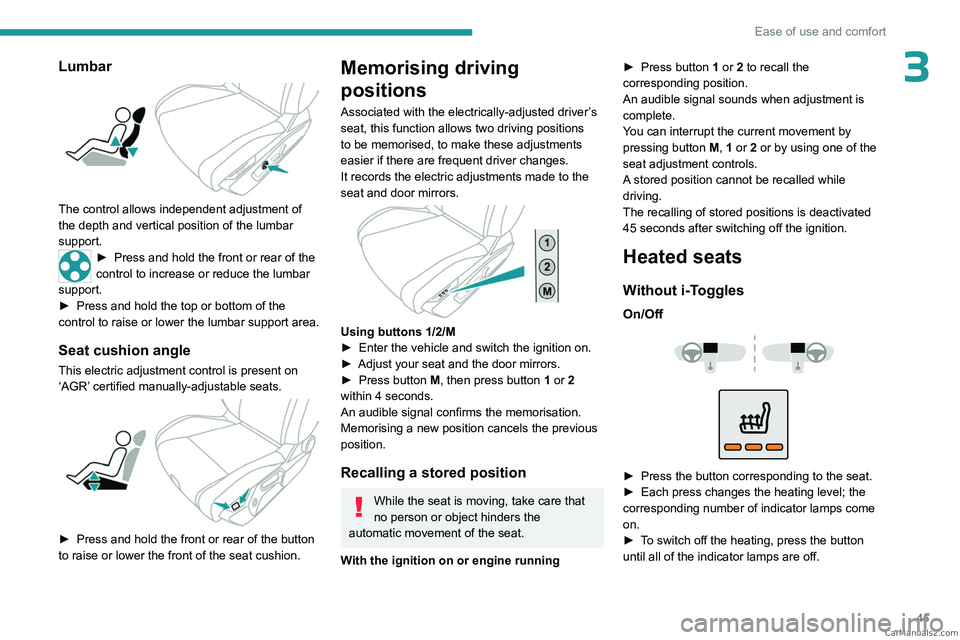
Using buttons 1/2/M
► Enter the vehicle and switch the ignition on.
►
Adjust your seat and the door mirrors.
►
Press button
M, then press button 1 or 2
within 4 seconds.
An audible signal confirms the memorisation.
Memorising a new position cancels the previous
position.
Recalling a stored position
While the seat is moving, take care that
no person or object hinders the
automatic movement of the seat.
With the ignition on or engine running ►
Press button
1 or 2 to recall the
corresponding position.
An audible signal sounds when adjustment is
complete.
You can interrupt the current movement by
pressing button M, 1 or 2 or by using one of the
seat adjustment controls.
A stored position cannot be recalled while
driving.
The recalling of stored positions is deactivated
45 seconds after switching off the ignition.
Heated seats
Without i-Toggles
On/Off
► Press the button corresponding to the seat.
► Each press changes the heating level; the
corresponding number of indicator lamps come
on.
►
T
o switch off the heating, press the button
until all of the indicator lamps are off. CarM an uals 2 .c o m