oil pressure Peugeot 308 CC 2014 Owner's Manual
[x] Cancel search | Manufacturer: PEUGEOT, Model Year: 2014, Model line: 308 CC, Model: Peugeot 308 CC 2014Pages: 268, PDF Size: 15.33 MB
Page 22 of 268
20
Limit the causes of excess consumption
Spread loads throughout the vehicle; place the heaviest
items in the bottom of the boot, as close as possible to the
rear seats.
Limit the loads carried in the vehicle and reduce wind resis-
tance (roof bars, roof rack, bicycle carrier, trailer...). Use a
roof box in preference.
Remove roof bars and roof racks after use.
At the end of winter, remove snow tyres and refi t your sum-
mer tyres.
Observe the recommendations on maintenance
Check the tyre pressures regularly, when cold, referring to
the label in the door aperture, driver's side.
Carry out this check in particular:
- before a long journey,
- at each change of season,
- after a long period out of use.
Don't forget the spare wheel and the tyres on any trailer or
caravan.
Have your vehicle serviced regularly (engine oil, oil fi lter,
air fi lter, passenger compartment fi lter...) and observe the
schedule of operations recommended in the warranty and
maintenance record.
When refuelling, do not continue after the third cut-off of the
nozzle to avoid any overfl ow.
At the wheel of your new vehicle, it is only after the fi rst
1 800 miles (3 000 kilometres) that you will see the fuel
c onsumption settle down to a consistent average.
Page 138 of 268
9
i
136
CHECKS
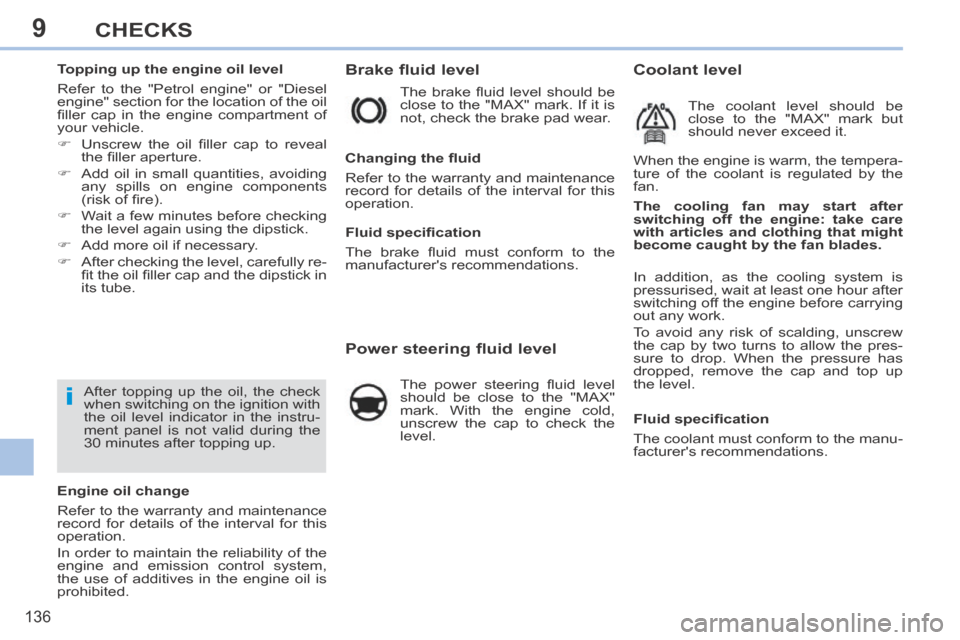
Brake fluid level
The brake fl uid level should be
close to the "MAX" mark. If it is
not, check the brake pad wear.
Power steering fluid level
The power steering fl uid level
should be close to the "MAX"
mark. With the engine cold,
unscrew the cap to check the
level.
Changing the fl uid
Refer to the warranty and maintenance
record for details of the interval for this
operation.
When the engine is warm, the tempera-
ture of the coolant is regulated by the
fan.
Coolant level
The coolant level should be
close to the "MAX" mark but
should never exceed it.
The cooling fan may start after
switching off the engine: take care
with articles and clothing that might
become caught by the fan blades.
Fluid specifi cation
The coolant must conform to the manu-
facturer's recommendations.
Fluid specifi cation
The brake fl uid must conform to the
manufacturer's recommendations.
In addition, as the cooling system is
pressurised, wait at least one hour after
switching off the engine before carrying
out any work.
To avoid any risk of scalding, unscrew
the cap by two turns to allow the pres-
sure to drop. When the pressure has
dropped, remove the cap and top up
the level.
Topping up the engine oil level
Refer to the "Petrol engine" or "Diesel
engine" section for the location of the oil
fi ller cap in the engine compartment of
your vehicle.
Unscrew the oil fi ller cap to reveal
the fi ller aperture.
Add oil in small quantities, avoiding any spills on engine components
(risk of fi re).
Wait a few minutes before checking the level again using the dipstick.
Add more oil if necessary.
After checking the level, carefully re- fi t the oil fi ller cap and the dipstick in
its tube.
After topping up the oil, the check
when switching on the ignition with
the oil level indicator in the instru-
ment panel is not valid during the
30 minutes after topping up.
Engine oil change
Refer to the warranty and maintenance
record for details of the interval for this
operation.
In order to maintain the reliability of the
engine and emission control system,
the use of additives in the engine oil is
prohibited.
Page 145 of 268
10
!
143
PRACTICAL INFORMATION
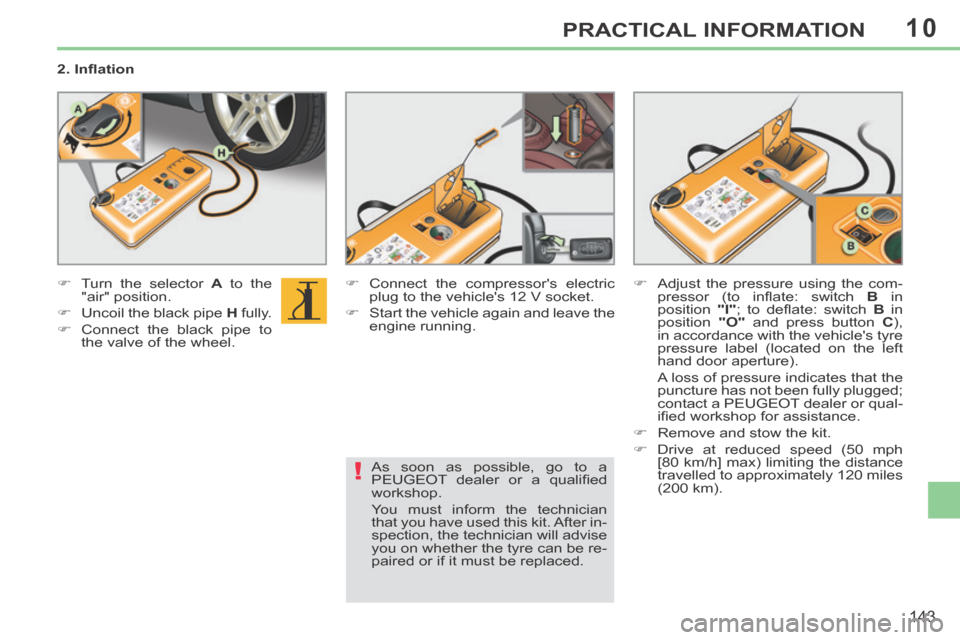
2. Infl ation
Turn the selector A to the
"air" position.
Uncoil the black pipe H fully.
Connect the black pipe to the valve of the wheel. Connect the compressor's electric
plug to the vehicle's 12 V socket.
Start the vehicle again and leave the engine running. Adjust the pressure using the com-
pressor (to infl ate: switch B in
p osition "I" ; to defl ate: switch B in
position "O" and press button C ),
in accordance with the vehicle's tyre
pressure label (located on the left
hand door aperture).
A loss of pressure indicates that the puncture has not been fully plugged;
contact a PEUGEOT dealer or qual-
ifi ed workshop for assistance.
Remove and stow the kit.
Drive at reduced speed (50 mph [80 km/h] max) limiting the distance
travelled to approximately 120 miles
(200 km).
As soon as possible, go to a
PEUGEOT dealer or a qualifi ed
workshop.
You must inform the technician
that you have used this kit. After in-
spection, the technician will advise
you on whether the tyre can be re-
paired or if it must be replaced.
Page 146 of 268
10
!
!
144
PRACTICAL INFORMATION
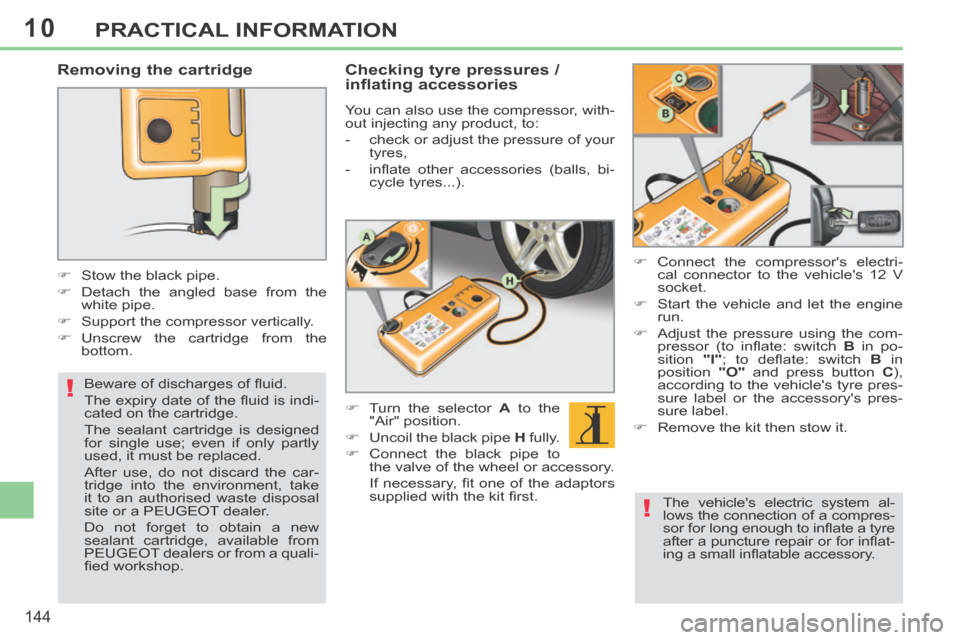
Removing the cartridge
Stow the black pipe.
Detach the angled base from the white pipe.
Support the compressor vertically.
Unscrew the cartridge from the bottom.
Beware of discharges of fl uid.
The expiry date of the fl uid is indi-
cated on the cartridge.
The sealant cartridge is designed
for single use; even if only partly
used, it must be replaced.
After use, do not discard the car-
tridge into the environment, take
it to an authorised waste disposal
site or a PEUGEOT dealer.
Do not forget to obtain a new
sealant cartridge, available from
PEUGEOT dealers or from a quali-
fi ed workshop.
Checking tyre pressures /
inflating accessories
You can also use the compressor, with-
out injecting any product, to:
- check or adjust the pressure of your tyres,
- infl ate other accessories (balls, bi- cycle tyres...).
Turn the selector A to the
"Air" position.
Uncoil the black pipe H fully.
Connect the black pipe to the valve of the wheel or accessory.
If necessary, fi t one of the adaptors supplied with the kit fi rst. Connect the compressor's electri-
cal connector to the vehicle's 12 V
socket.
Start the vehicle and let the engine run.
Adjust the pressure using the com- pressor (to infl ate: switch B in po-
sition "I" ; to defl ate: switch B in
position "O" and press button C ),
according to the vehicle's tyre pres-
sure label or the accessory's pres-
sure label.
Remove the kit then stow it.
The vehicle's electric system al-
lows the connection of a compres-
sor for long enough to infl ate a tyre
after a puncture repair or for infl at-
ing a small infl atable accessory.
Page 160 of 268
10
158
PRACTICAL INFORMATION
Engine compartment fuses
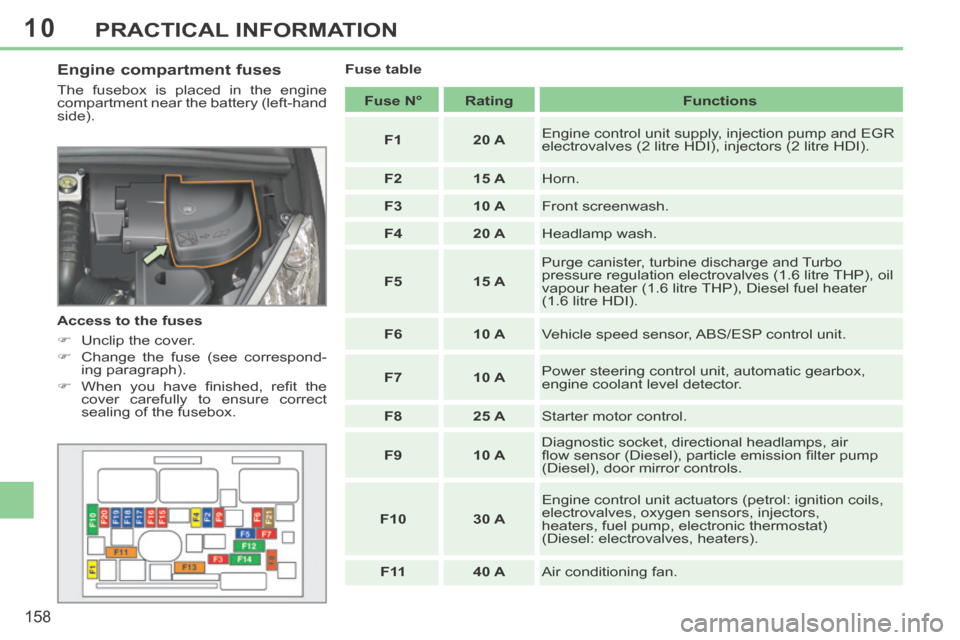
The fusebox is placed in the engine
compartment near the battery (left-hand
side).
Access to the fuses
Unclip the cover.
Change the fuse (see correspond-ing paragraph).
When you have fi nished, refi t the cover carefully to ensure correct
sealing of the fusebox. Fuse table
Fuse N° Rating Functions
F1 20 A Engine control unit supply, injection pump and EGR
electrovalves (2 litre HDI), injectors (2 litre HDI).
F2 15 A Horn.
F3 10 A Front screenwash.
F4 20 A Headlamp wash.
F5 15 A Purge canister, turbine discharge and Turbo
pressure regulation electrovalves (1.6 litre THP), oil
vapour heater (1.6 litre THP), Diesel fuel heater
(1.6 litre HDI).
F6 10 A Vehicle speed sensor, ABS/ESP control unit.
F7 10 A Power steering control unit, automatic gearbox,
engine coolant level detector.
F8 25 A Starter motor control.
F9 10 A Diagnostic socket, directional headlamps, air
fl ow sensor (Diesel), particle emission fi lter pump
(Diesel), door mirror controls.
F10 30 A Engine control unit actuators (petrol: ignition coils,
electrovalves, oxygen sensors, injectors,
heaters, fuel pump, electronic thermostat)
(Diesel: electrovalves, heaters).
F 11 40 A Air conditioning fan.
Page 161 of 268
10
159
PRACTICAL INFORMATION
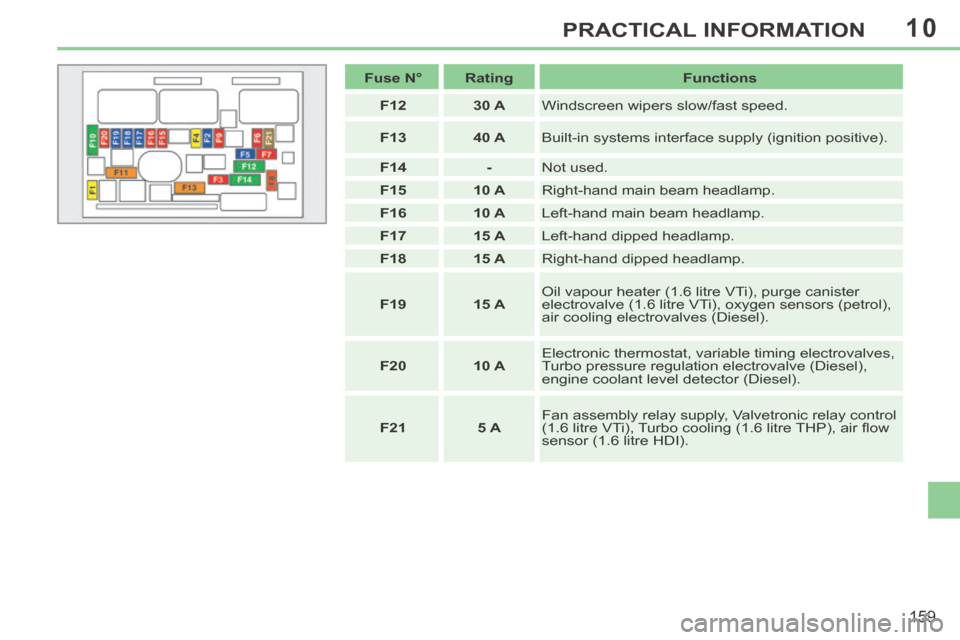
Fuse N° Rating Functions
F12 30 A Windscreen wipers slow/fast speed.
F13 40 A Built-in systems interface supply (ignition positive).
F14 - Not used.
F15 10 A Right-hand main beam headlamp.
F16 10 A Left-hand main beam headlamp.
F17 15 A Left-hand dipped headlamp.
F18 15 A Right-hand dipped headlamp.
F19 15 A Oil vapour heater (1.6 litre VTi), purge canister
electrovalve (1.6 litre VTi), oxygen sensors (petrol),
air cooling electrovalves (Diesel).
F20 10 A Electronic thermostat, variable timing electrovalves,
Turbo pressure regulation electrovalve (Diesel),
engine coolant level detector (Diesel).
F21 5 A Fan assembly relay supply, Valvetronic relay control
(1.6 litre VTi), Turbo cooling (1.6 litre THP), air fl ow
sensor (1.6 litre HDI).
Page 258 of 268
256
ALPHABETICAL INDEX
ABS and EBFD systems ..................94
Accessories ....................................168
Accessory socket, 12V .....................89
Access to rear seats .........................55
Adjusting headlamps ........................80
Adjusting the steering wheel ............................................60
Airbags ...........................................100
Airbags, front ..........................100, 103
Airbags, lateral .......................102, 103
Air conditioning .....................19, 46, 48
Air conditioning, digital .....................48
Air filter ...........................................Air filter ...........................................Air filter138
Air flow ..............................................45
Air vents ...........................................45
Alarm ................................................66
Anti-lock braking system (ABS) ........94
Anti-swirl net .....................................50
Anti-theft ...........................................63
Armrest, front ....................................88
Armrest, rear ....................................Armrest, rear ....................................Armrest, rear57
Ashtray .............................................89
Assistance call ..................94, 177, 178
Audible warning ................................93
Audio streaming (Bluetooth) ....218, 245
Audio systems ................................179
Automatic illumination of headlamps ..........................76, 79
Automatic operation of hazard warning lamps ..............................93
Battery .............................138, 161-163
Battery, charging ............................163
Battery, remote control ...............64, 65
Bluetooth (hands-free) ............202, 243
Bluetooth (telephone) .........................202, 243
Bonnet ............................................131
Bonnet stay ....................................131
Boot ..................................................73
Boot (fittings) ...............................91-92
Boot lamp .........................................85
Boot (opening) ..................................61
Boot screen ......................................92
Brake discs .....................................139
Brake lamps ...................................153
Brake pads .....................................139
Braking assistance system ..........................................94
Capacity, fuel tank ............................74
CD MP3 ..................................215, 239
Central locking ..................................71
Changing a bulb ......................150-154
Changing a fuse ......................155-160
Changing a wheel....................145-148
Changing a wiper blade ...........84, 165
Changing the date ......................41, 43
Changing the remote control battery ....Changing the remote control battery ....Changing the remote control battery64
Changing the time ......................41, 43
CHECK .............................................35
Checking levels .......................135-137
Checking the engine oil level ...32, 135
Checking tyre pressures (using the kit) .............................144
Checks.....................................133-139
Children .....................99, 101, 104-113
Child seats ...............................104-11 3
Child seats, conventional ...............108
Closing the boot ...............................73
Closing the doors .............................70
Closing the retractable roof ................Closing the retractable roof ................Closing the retractable roof6
Cold climate screen ........................168
Colour screen, retractable ...........42-44
Connectors, audio ....88, 219, 240, 241
Control for retractable roof .................Control for retractable roof .................Control for retractable roof6
Control for the four windows ............68
Coolant level .............................31, 136
Coolant temperature indicator ..........Coolant temperature indicator ..........Coolant temperature indicator31
Courtesy lamps ................................84
Courtesy mirror .................................Courtesy mirror .................................Courtesy mirror87
Cruise control .................................126
Automatic rain sensitive windscreen wipers .....................................82, 83
Auxiliary sockets .......................219, 240, 241
A
B
C
Cabriolet (configuration) ..........6, 46, 48, 50, 56, 66, 73, 87, 88, 92, 97