seat adjustment PEUGEOT 4008 2014.5 Owners Manual
[x] Cancel search | Manufacturer: PEUGEOT, Model Year: 2014.5, Model line: 4008, Model: PEUGEOT 4008 2014.5Pages: 389, PDF Size: 15.75 MB
Page 4 of 389
Instrument panel 12
Warning and indicator lamps
1
3
Instrument panel screen
1
9
tr
ip computer
3
2
Distance recorder
3
2
tr
ip distance recorder
3
2
Service indicator
3
3
Adjusting vehicle settings
3
7
Audio- CD system screen
4
4
Audio- CD system touch screen
4
6
Audio-
te
lematic system touch
screen
48
Lighting dimmer
5
1
MonitoringOver view
Remote control key 5
2
"Keyless e
n
try and Starting"
system
5
6
Doors
62
Boot
6
3
Alarm
65
el
ectric windows
6
8
Panoramic sunroof
7
0
Access
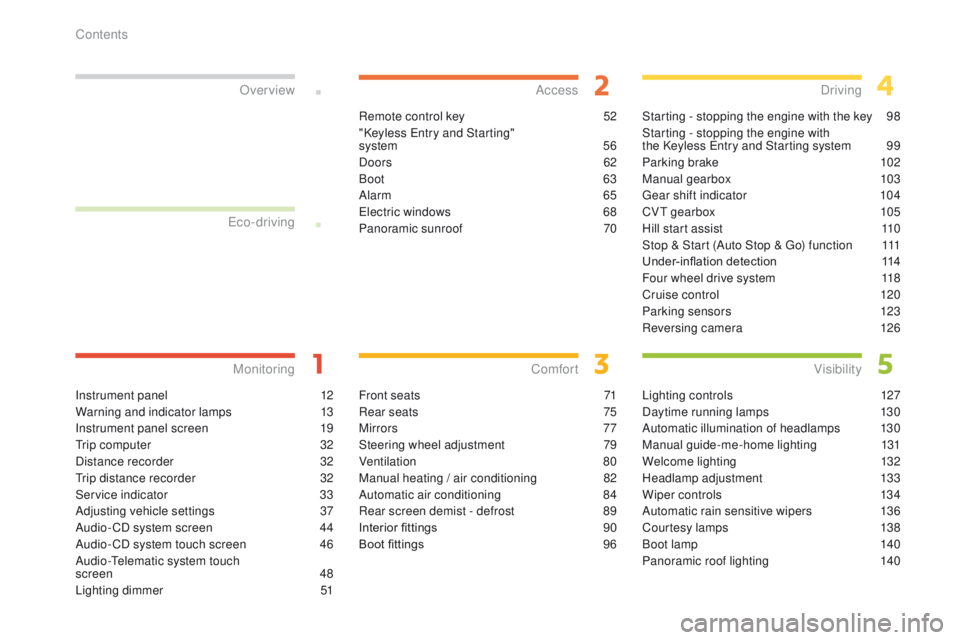
Front seats 7 1
Rear seats
7
5
Mirrors
77
Steering wheel adjustment
7
9
Ventilation
80
Manual heating / air conditioning
8
2
Automatic air conditioning
8
4
Rear screen demist - defrost
8
9
Interior fittings
9
0
Boot fittings
9
6
Comfort
Starting - stopping the engine with the key 98
Starting - stopping the engine with
the Keyless
e
n
try and Starting system
9
9
Parking brake
1
02
Manual gearbox
1
03
ge
ar shift indicator
1
04
CV
t
gearbox
1
05
Hill start assist
1
10
Stop & Start (Auto Stop &
g
o
) function
1
11
Under-inflation detection
1
14
Four wheel drive system
1
18
Cruise control
1
20
Parking sensors
1
23
Reversing camera
1
26
Driving
Lighting controls 1 27
Daytime running lamps
1
30
Automatic illumination of headlamps
1
30
Manual guide-me-home lighting
1
31
Welcome lighting
1
32
Headlamp adjustment
1
33
Wiper controls
1
34
Automatic rain sensitive wipers
1
36
Courtesy lamps
1
38
Boot lamp
1
40
Panoramic roof lighting
1
40
Visibility
e
co-driving
Contents
Page 10 of 389
8
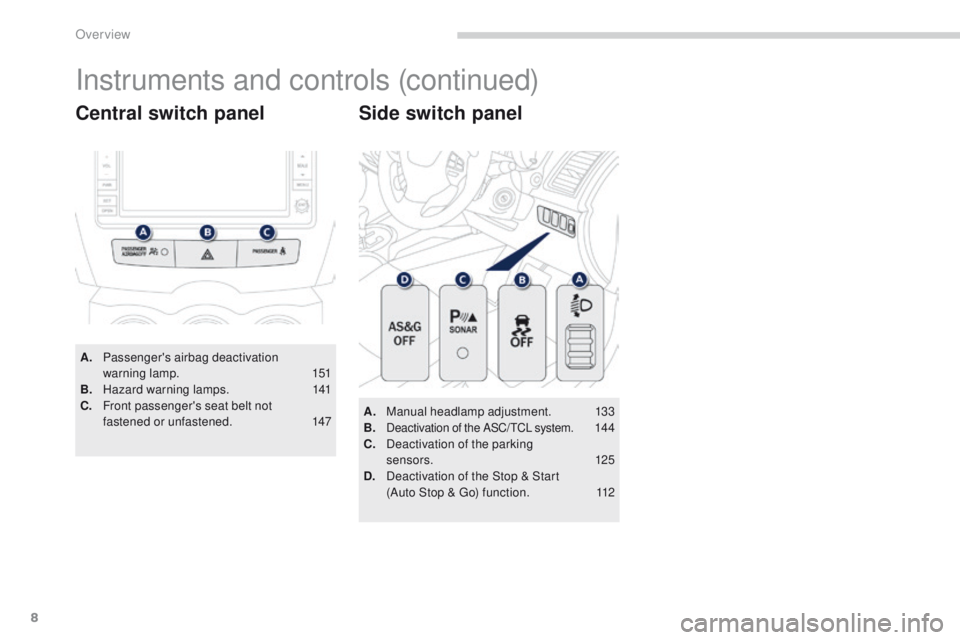
A. Passenger's airbag deactivation warning lamp. 1 51
B.
H
azard warning lamps.
1
41
C.
F
ront passenger's seat belt not
fastened or unfastened.
1
47
Central switch panel
Instruments and controls (continued)
A. Manual headlamp adjustment. 133
B. Deactivation of the ASC/tC L system. 14 4
C. D
eactivation of the parking
sensors.
125
D.
D
eactivation of the Stop & Start
(Auto Stop &
g
o
) function.
1
12
Side switch panel
Over view
Page 17 of 389
15
Warning/indicator lampis on Cause Action / Observations
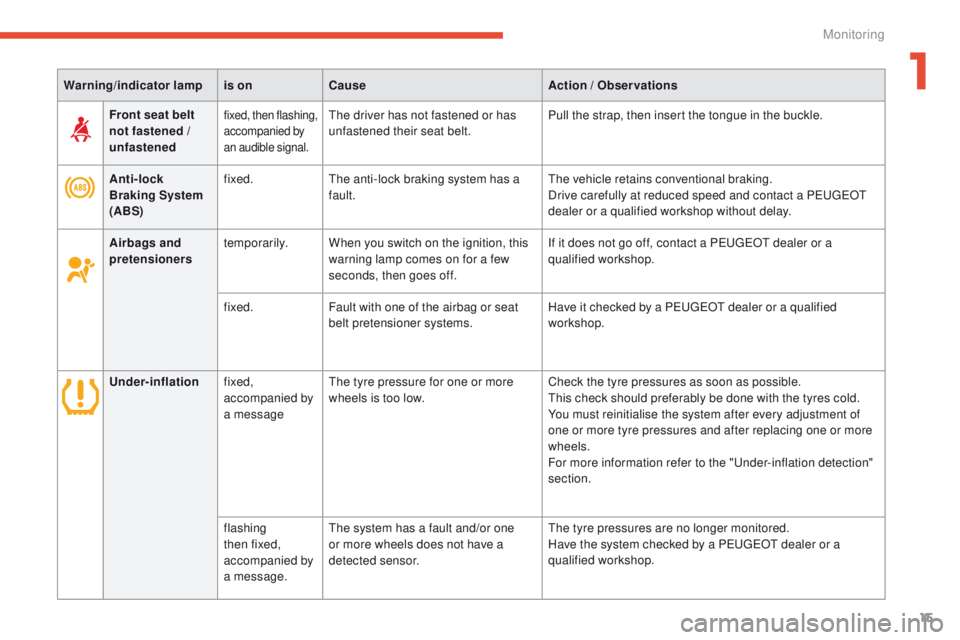
Anti-lock
Braking System
(ABS) fixed.
th
e anti-lock braking system has a
fault.
th
e vehicle retains conventional braking.
Drive carefully at reduced speed and contact a P
e
uge
Ot
dealer or a qualified workshop without delay.
Front seat belt
not fastened /
unfastened
fixed, then flashing,
accompanied by
an audible signal.the driver has not fastened or has
unfastened their seat belt.
Pull the strap, then insert the tongue in the buckle.
Airbags and
pretensioners temporarily.
When you switch on the ignition, this
warning lamp comes on for a few
seconds, then goes off. If it does not go off, contact a P
e
uge
Ot
dealer or a
qualified workshop.
fixed. Fault with one of the airbag or seat
belt pretensioner systems. Have it checked by a P
e
uge
Ot
dealer or a qualified
workshop.
Under-inflation fixed,
accompanied by
a message
th
e tyre pressure for one or more
wheels is too low. Check the tyre pressures as soon as possible.
th
is check should preferably be done with the tyres cold.
You must reinitialise the system after every adjustment of
one or more tyre pressures and after replacing one or more
wheels.
For more information refer to the "
un
der-inflation detection"
section.
flashing
then fixed,
accompanied by
a message.
th
e system has a fault and/or one
or more wheels does not have a
detected sensor.
th
e tyre pressures are no longer monitored.
Have the system checked by a Peuge
O
t dealer or a
qualified workshop.
1
Monitoring
Page 73 of 389
71
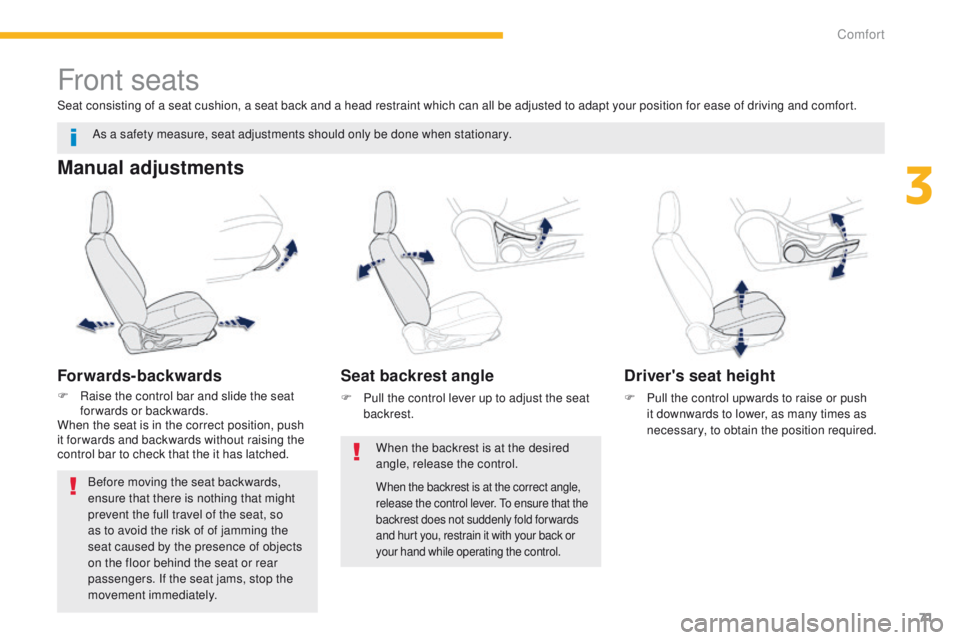
Front seats
Manual adjustments
Forwards-backwards
F Raise the control bar and slide the seat forwards or backwards.
When the seat is in the correct position, push
it for wards and backwards without raising the
control bar to check that the it has latched.
Seat backrest angle
F Pull the control lever up to adjust the seat
backrest.
When the backrest is at the desired
angle, release the control.
As a safety measure, seat adjustments should only be done when stationary.
Driver's seat height
F Pull the control upwards to raise or push
it downwards to lower, as many times as
necessary, to obtain the position required.
Seat consisting of a seat cushion, a seat back and a head restraint which can all be adjusted to adapt your position for ease of driving and comfort.
When the backrest is at the correct angle,
release the control lever.
to e nsure that the
backrest does not suddenly fold for wards
and hurt you, restrain it with your back or
your hand while operating the control.Before moving the seat backwards,
ensure that there is nothing that might
prevent the full travel of the seat, so
as to avoid the risk of of jamming the
seat caused by the presence of objects
on the floor behind the seat or rear
passengers. If the seat jams, stop the
movement immediately.
3
Comfort
Page 74 of 389
72
Front seats
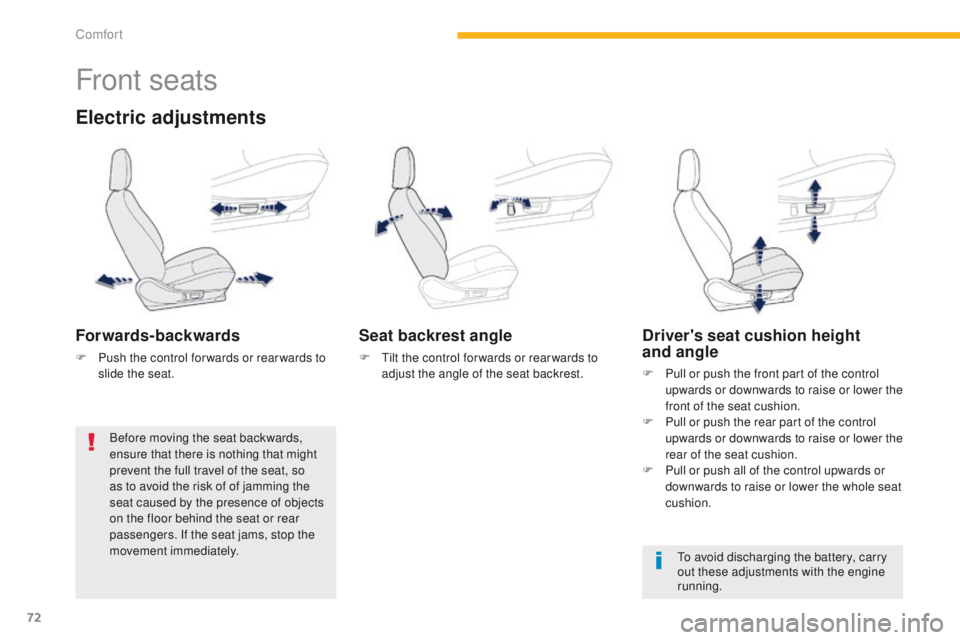
Electric adjustments
Forwards-backwards
F Push the control for wards or rear wards to slide the seat.
Seat backrest angle
F tilt the control for wards or rear wards to adjust the angle of the seat backrest.
Driver's seat cushion height
and angle
F Pull or push the front part of the control upwards or downwards to raise or lower the
front of the seat cushion.
F
P
ull or push the rear part of the control
upwards or downwards to raise or lower the
rear of the seat cushion.
F
P
ull or push all of the control upwards or
downwards to raise or lower the whole seat
cushion.
to a
void discharging the battery, carry
out these adjustments with the engine
running.
Before moving the seat backwards,
ensure that there is nothing that might
prevent the full travel of the seat, so
as to avoid the risk of of jamming the
seat caused by the presence of objects
on the floor behind the seat or rear
passengers. If the seat jams, stop the
movement immediately.
Comfort
Page 75 of 389
73
Additional adjustments
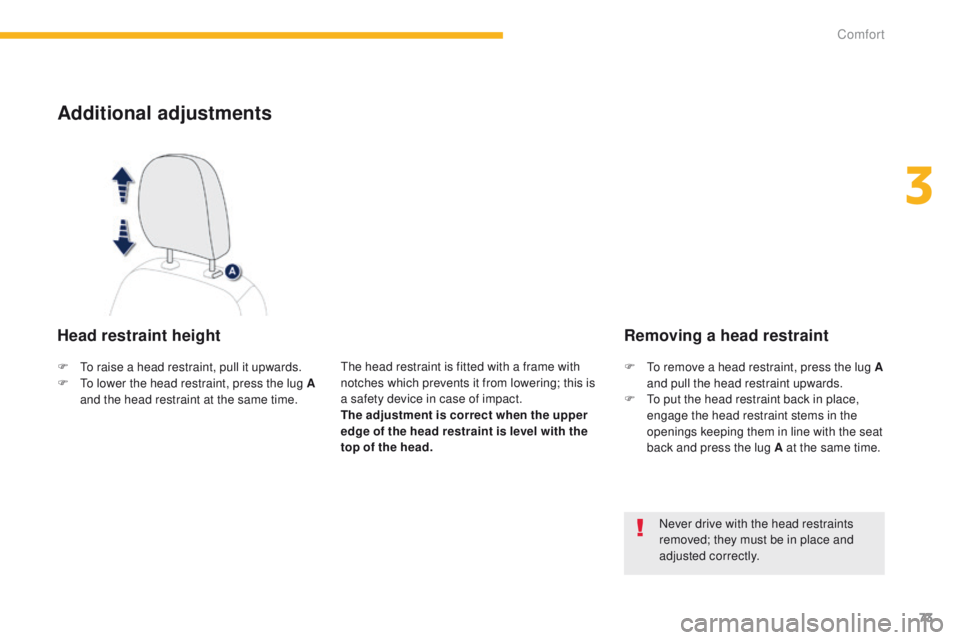
Head restraint height
the head restraint is fitted with a frame with
notches which prevents it from lowering; this is
a safety device in case of impact.
The adjustment is correct when the upper
edge of the head restraint is level with the
top of the head.Never drive with the head restraints
removed; they must be in place and
adjusted correctly.
F
to r
aise a head restraint, pull it upwards.
F
t
o l
ower the head restraint, press the lug A
and the head restraint at the same time. F
to r emove a head restraint, press the lug A
and pull the head restraint upwards.
F
t
o p
ut the head restraint back in place,
engage the head restraint stems in the
openings keeping them in line with the seat
back and press the lug A at the same time.
Removing a head restraint
3
Comfort
Page 76 of 389
74
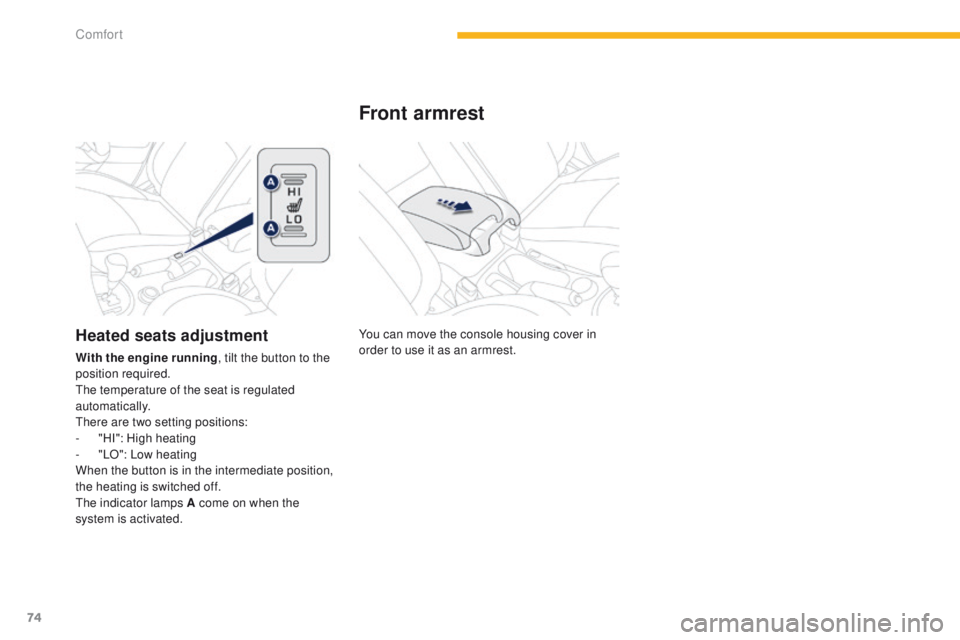
You can move the console housing cover in
order to use it as an armrest.
Front armrest
Heated seats adjustment
With the engine running, tilt the button to the
position required.
th
e temperature of the seat is regulated
automatically.
th
ere are two setting positions:
-
"
HI": High heating
-
"
LO": Low heating
When the button is in the intermediate position,
the heating is switched off.
th
e indicator lamps A come on when the
system is activated.
Comfort
Page 135 of 389
133
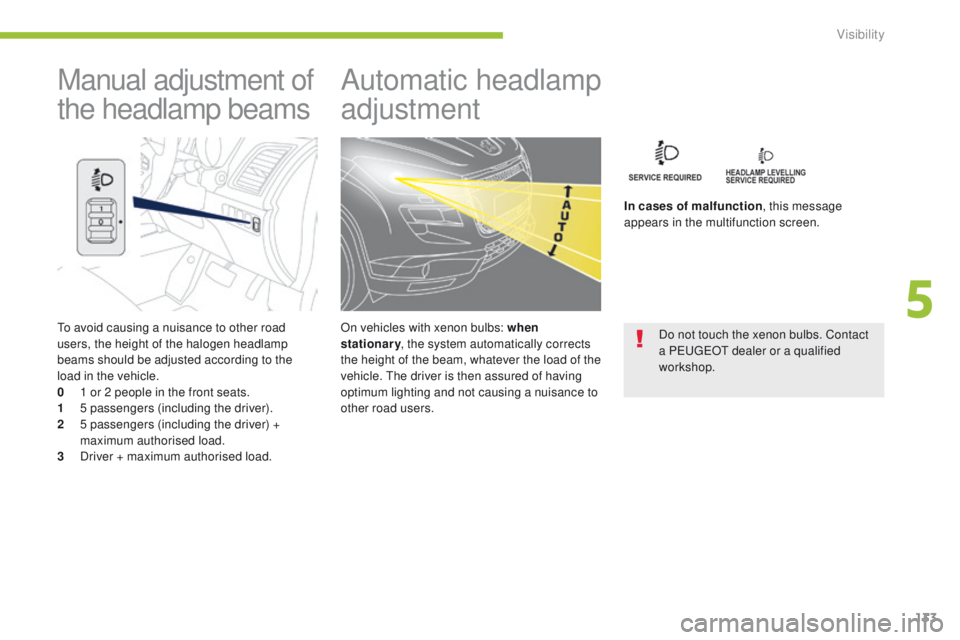
to avoid causing a nuisance to other road
users, the height of the halogen headlamp
beams should be adjusted according to the
load in the vehicle.
0
1 o
r 2 people in the front seats.
1
5
passengers (including the driver).
2
5
passengers (including the driver) +
maximum authorised load.
3
D
river + maximum authorised load.
Manual adjustment of
the headlamp beams Automatic headlamp
adjustment
In cases of malfunction
, this message
appears in the multifunction screen.
Do not touch the xenon bulbs. Contact
a P
e
uge
Ot
dealer or a qualified
workshop.
On vehicles with xenon bulbs: when
stationary
, the system automatically corrects
the height of the beam, whatever the load of the
vehicle.
t
h
e driver is then assured of having
optimum lighting and not causing a nuisance to
other road users.
5
Visibility
Page 148 of 389
146
Seat belts
Front seat belts
the front seat belts are fitted with a
pretensioning and force limiting system.
th
is system improves safety in the front
seats in the event of a front or side impact.
Depending on the severity of the impact, the
pretensioning system instantly tightens the seat
belts against the body of the occupants.
the
pretensioning seat belts are active when
the ignition is on.
th
e force limiter reduces the pressure of the
seat belt on the chest of the occupant,
so improving their protection.
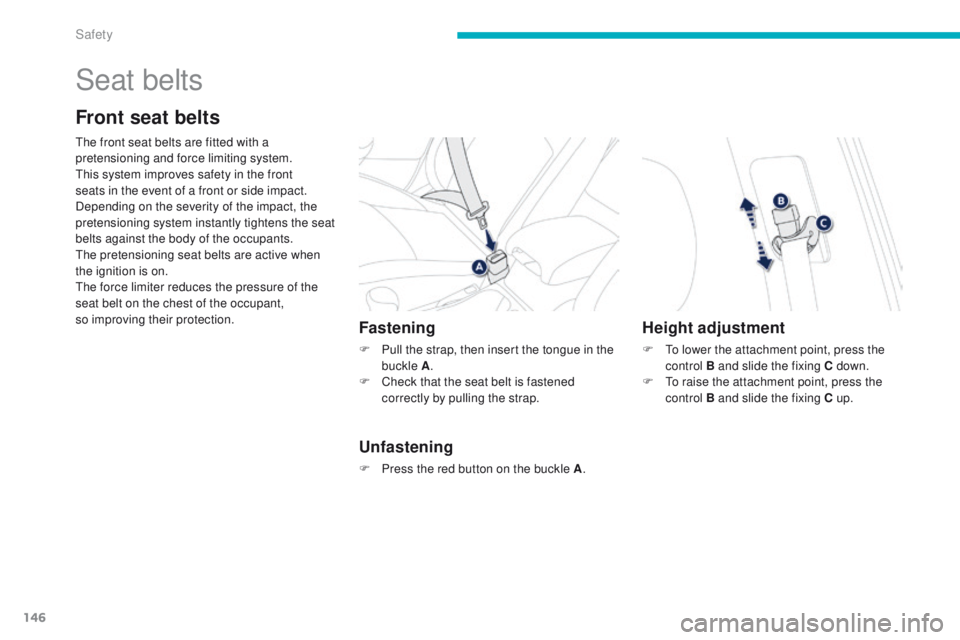
Fastening
F Pull the strap, then insert the tongue in the buckle A .
F
C
heck that the seat belt is fastened
correctly by pulling the strap.
Unfastening
F Press the red button on the buckle A .
Height adjustment
F to lower the attachment point, press the
control B and slide the fixing C down.
F
t
o r
aise the attachment point, press the
control B and slide the fixing C up.
Safety
Page 151 of 389
149
the driver must ensure that passengers use
the seat belts correctly and that they are all
restrained securely before setting off.
Wherever you are seated in the vehicle,
always fasten your seat belt, even for short
journeys.
Do not interchange the seat belt buckles as
they will not fulfil their role fully.
th
e seat belts are fitted with an inertia reel
permitting automatic adjustment of the
length of the strap to your size.
t
h
e seat belt
is stowed automatically when not in use.
Before and after use, ensure that the seat
belt is reeled in correctly.
th
e lower part of the strap must be
positioned as low as possible on the pelvis.
th
e upper part must be positioned in the
hollow of the shoulder.
th
e inertia reels are fitted with an automatic
locking device which comes into operation in
the event of a collision, emergency braking
or if the vehicle rolls over. You can release
the device by pulling the strap firmly and
then releasing it so that it reels in slightly.Recommendations for children
use a suitable child seat if the passenger is
less than 12 years old or shorter than one
and a half metres.
Never use the same seat belt to secure more
than one person.
Never allow a child to travel on your lap.
For more information, refer to the "Child
seats" section.
In order to be effective, a seat belt must:
-
b
e tightened as close to the body as
possible,
-
b
e pulled in front of you with a smooth
movement, checking that it does not
twist,
-
b
e used to restrain only one person,
-
n
ot bear any trace of cuts or fraying,
-
n
ot be converted or modified to avoid
affecting its performance.
In the event of an impact
Depending on the nature and
seriousness of the impact , the
pretensioning device may be deployed
before and independently of the airbags.
Deployment of the pretensioners is
accompanied by a slight discharge of
harmless smoke and a noise, due to the
activation of the pyrotechnic cartridge
incorporated in the system.
In all cases, the airbag warning lamp
comes
on.
Following an impact, have the seat belts
system checked, and if necessary replaced,
by a P
e
uge
Ot
dealer or a qualified
workshop.
In accordance with current safety
regulations, for all repairs on your vehicle's
seat belts, go to a qualified workshop with
the skills and equipment needed, which a
P
e
uge
Ot d
ealer is able to provide.
Have your seat belts checked regularly by a
P
e
uge
Ot
dealer or a qualified workshop,
particularly if the straps show signs of
damage.
Clean the seat belt straps with soapy
water or a textile cleaning product, sold by
P
e
uge
Ot d
ealers.
After folding or moving a seat or rear bench
seat, ensure that the seat belt is positioned
and reeled in correctly.
6
Safety