parking sensors PEUGEOT 5008 2018 Owners Manual
[x] Cancel search | Manufacturer: PEUGEOT, Model Year: 2018, Model line: 5008, Model: PEUGEOT 5008 2018Pages: 364, PDF Size: 13.03 MB
Page 5 of 364
3
.
bit.ly/helpPSA
.
Driving recommendations 155
Anti-theft protection 1 56
Starting/Switching off the engine with
the key
1
56
Starting/Switching off the engine with
K
eyless Entry and Starting
1
58
Electric parking brake
1
61
Manual gearbox
1
64
Automatic gearbox
1
65
Hill start assist
1
69
Dynamic pack
1
70
Gear shift indicator
1
70
Stop & Start
1
71
Under-inflation detection
1
74
Memorising speeds
1
75
Recognition of speed limit signs and
recommendation
1
76
Speed limiter
1
79
Cruise control
1
81
Adaptive cruise control
1
84
Distance Alert and Active Safety Brake
1
92
Fatigue detection system
1
96
Lane Departure Warning System
1
98
Active Lane Departure Warning System
1
98
Blind Spot Monitoring System
2
03
Parking sensors
2
05
Visiopark 1 - Visiopark 2
2
07
Park Assist
2
12Fuel
220
Misfuel prevention (Diesel) 2 21
Compatibility of fuels
2
22
Towing device
2
23
Towbar with quickly detachable towball
2
24
Load reduction mode
2
27
Energy economy mode
2
27
Very cold climate screen
2
28
Snow chains
2
28
Fitting roof bars
2
29
Bonnet
23
0
Engine compartment
2
31
Checking levels
23
2
Checks
235
AdBlue
® (BlueHDi engines) 2 37
Warning triangle
2
40
Running out of fuel (Diesel)
2
40
Tool kit
2
41
Temporary puncture repair kit
2
43
Spare wheel
2
46
Changing a
bulb
2
52
Changing a
wiper blade
2
57
Changing a
fuse
2
57
12
V battery
2
62
Towing the vehicle
2
65Engine technical data and towed loads
2
67
Petrol engines and towed loads
2
68
Diesel engines and towed loads
2
69
Dimensions
272
Identification markings
2
73
Driving
Practical information Technical data
Alphabetical index
In the event of a
breakdownAudio equipment and telematics
PEUGEOT Connect Nav
PEUGEOT Connect Radio
Bluetooth audio system
Access to additional videos
.
Contents
Page 41 of 364
39
Controls
From the audio system control panel, press:
F t he "MENU " button to access the main
menu ,
F
t
he "5" or " 6" buttons to scroll through the
items in the screen,
F
t
he "7" or " 8" buttons to change a
setting
value,
F
t
he "OK" button to confirm,
or
F
t
he "Back " button to abandon the operation
in progress.
Main menu
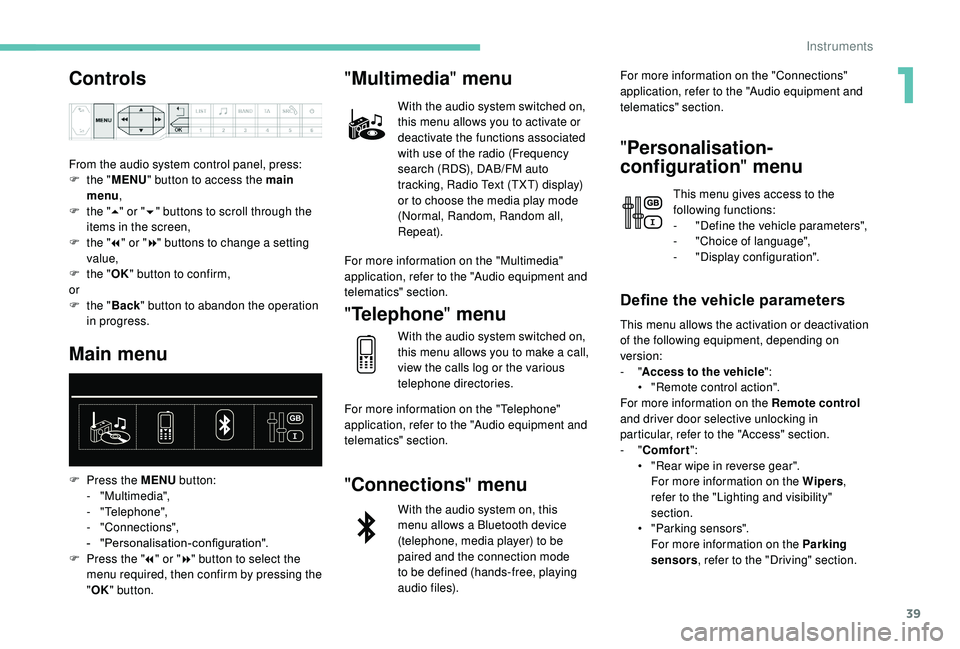
F Press the MENU button:
- "Multimedia",
-
"Telephone",
-
"Connections",
-
"
Personalisation-configuration".
F
P
ress the " 7" or " 8" button to select the
menu required, then confirm by pressing the
" OK " button.
"Multimedia " menu
With the audio system switched on,
this menu allows you to activate or
deactivate the functions associated
with use of the radio (Frequency
search (RDS), DAB/FM auto
tracking, Radio Text (TXT) display)
or to choose the media play mode
(Normal, Random, Random all,
Repeat).
For more information on the "Multimedia"
application, refer to the "Audio equipment and
telematics" section.
" Telephone " menu
With the audio system switched on,
this menu allows you to make a
call,
view the calls log or the various
telephone directories.
For more information on the "Telephone"
application, refer to the "Audio equipment and
telematics" section.
" Connections " menu
With the audio system on, this
menu allows a
Bluetooth device
(telephone, media player) to be
paired and the connection mode
to be defined (hands-free, playing
audio files). For more information on the "Connections"
application, refer to the "Audio equipment and
telematics" section.
"
Personalisation-
configuration " menu
This menu gives access to the
following functions:
-
"
Define the vehicle parameters",
-
"
Choice of language",
-
"
Display configuration".
Define the vehicle parameters
This menu allows the activation or deactivation
of the following equipment, depending on
version:
- "Access to the vehicle ":
•
"
Remote control action".
For more information on the Remote control
and driver door selective unlocking in
particular, refer to the "Access" section.
-
"Comfort ":
•
"
Rear wipe in reverse gear".
For more information on the Wipers ,
refer to the "Lighting and visibility"
section.
•
"
Parking sensors".
For more information on the Parking
sensors , refer to the "Driving" section.
1
Instruments
Page 46 of 364
44
"Driving functions " tab
Function Comment
" Adjusting Speeds " Memorisation of speed settings for the speed limiter or
programmable cruise control.
"
Under-inflation initialisation "Reinitialisation of the under-inflation detection system.
" Lane departure warning system "Activation/deactivation of the function.
" Lane assist " Activation/deactivation of the function.
" Parking sensors " Activation/deactivation of the function.
" Park Assist " Activation/deactivation of the function.
" Automatic headlamp dip "Activation/deactivation of the function.
" Stop & Star t " Activation/deactivation of the function.
" Blind spot sensors " Activation/deactivation of the function.
" Panoramic visual aid "Activation of the Visiopark 2
function.
" Traction control" Activation/deactivation of the function. For more information on one of these
functions, refer to the corresponding
section.
Settings
PEUGEOT Connect Nav
The functions available through the
upper menu bar are detailed in the
table below.
Button Comments
Selection of a
topic.
Audio settings (sound ambience,
distribution, level, voice volume,
ringer volume).
Switch off the screen.
Settings for the touch screen and
the digital instrument panel.
Instruments
Page 158 of 364
156
Side wind
F Take into account the increased sensitivity to wind.
Cooling
Towing a trailer on a slope increases the
t emperature of the coolant.
As the fan is electrically controlled, its cooling
capacity is not dependent on the engine speed.
F
T
o lower the engine speed, reduce your
speed.
The maximum towable load on an incline
depends on the gradient and the exterior
temperature.
In all cases, keep a
check on the coolant
temperature.
F
I
f this warning lamp and the
STOP warning lamp come on,
stop the vehicle and switch off
the engine as soon as possible.
New vehicle
Do not pull a trailer before having driven at least
approximately 620
miles (1,000
kilometres).
Braking
Towing a trailer increases the braking distance.
T o avoid overheating of the brakes, the use of
engine braking is recommended.
Ty r e s
F Check the tyre pressures of the towing vehicle and of the trailer, observing the
recommended pressures.
Lighting
F Check the electrical lighting and signalling on the trailer and the headlamp beam height
of your vehicle.
For more information on Headlamp
adjustment , refer to the corresponding
section.
The rear parking sensors will be
deactivated automatically to avoid the
audible signal if a
genuine PEUGEOT
towbar is used.
Anti-theft protection
Electronic immobiliser
The keys contain an electronic chip which has
a secret code. When the ignition is switched
on, this code must be recognised in order for
starting to be possible.
A few seconds after switching off the ignition,
this system locks the engine control system,
therefore preventing the engine from being
started in the event of a
break-in.
Starting/Switching off the
engine with the key
Key ignition switch
Ignition on position
If the system fails, as reported by a message,
t he engine will not start.
Contact a
PEUGEOT dealer.
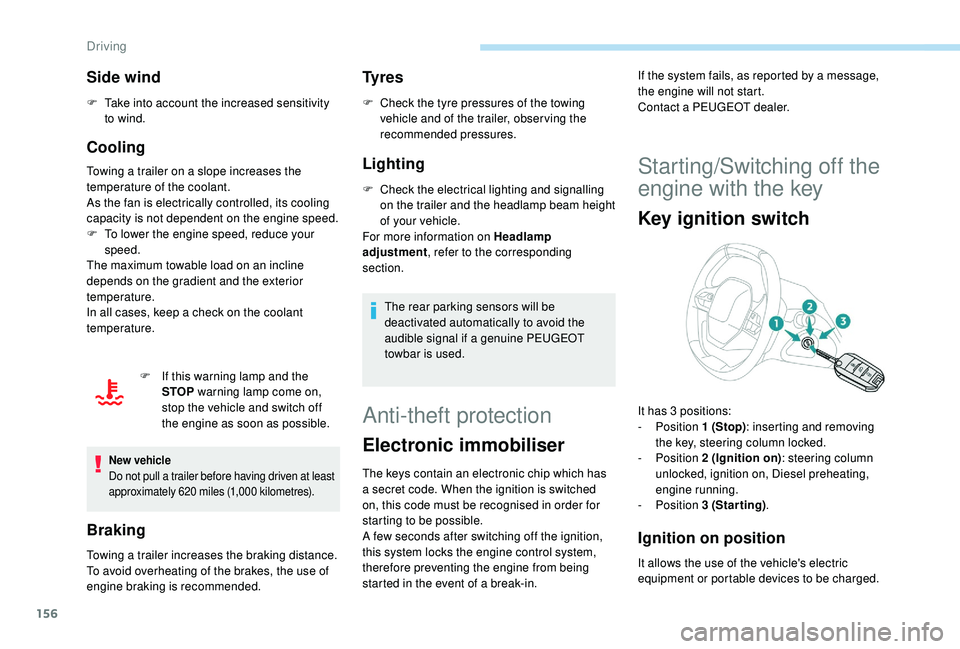
It has 3
positions:
-
Position 1 (Stop): inserting and removing
the key, steering column locked.
-
Position 2 (Ignition on) : steering column
unlocked, ignition on, Diesel preheating,
engine running.
-
Position 3 (Starting) .
It allows the use of the vehicle's electric
equipment or portable devices to be charged.
Driving
Page 207 of 364
205
Active Blind Spot
Monitoring System
In addition to the fixed warning lamp in the door
mirror on the side in question, a correction of
trajectory will be felt if you cross a lane marking
with the direction indicators on, to help you
avoid a
collision.
Conditions for operation
The following systems must be activated:The system is automatically deactivated
when towing with a
towbar approved by
P E U G E O T.
High pressure jet wash
When washing your vehicle, direct the
lance at least 30 cm away from the
sensors.
-
B
lind Spot Monitoring System,
-
A
ctive Lane Departure Warning System.
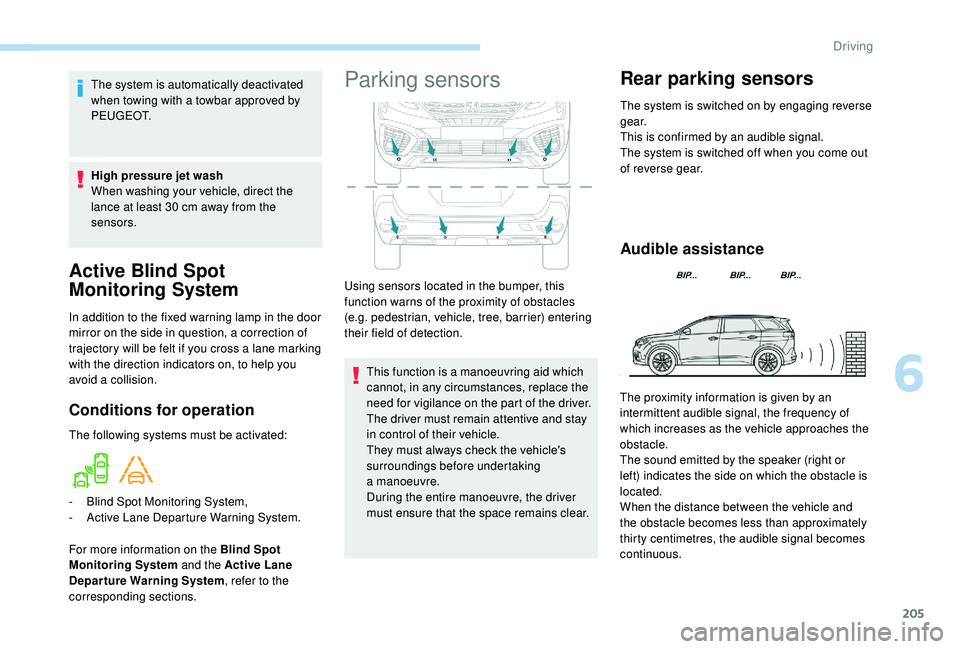
Parking sensors
This function is a manoeuvring aid which
c annot, in any circumstances, replace the
need for vigilance on the part of the driver.
The driver must remain attentive and stay
in control of their vehicle.
They must always check the vehicle's
surroundings before undertaking
a
manoeuvre.
During the entire manoeuvre, the driver
must ensure that the space remains clear.
Rear parking sensors
The system is switched on by engaging reverse
g e a r.
This is confirmed by an audible signal.
The system is switched off when you come out
of reverse gear.
Audible assistance
Using sensors located in the bumper, this
function warns of the proximity of obstacles
(e.g. pedestrian, vehicle, tree, barrier) entering
their field of detection.
For more information on the Blind Spot
Monitoring System and the Active Lane
Departure Warning System , refer to the
corresponding sections. The proximity information is given by an
intermittent audible signal, the frequency of
which increases as the vehicle approaches the
obstacle.
The sound emitted by the speaker (right or
left) indicates the side on which the obstacle is
located.
When the distance between the vehicle and
the obstacle becomes less than approximately
thirty centimetres, the audible signal becomes
continuous.
6
Driving
Page 208 of 364
206
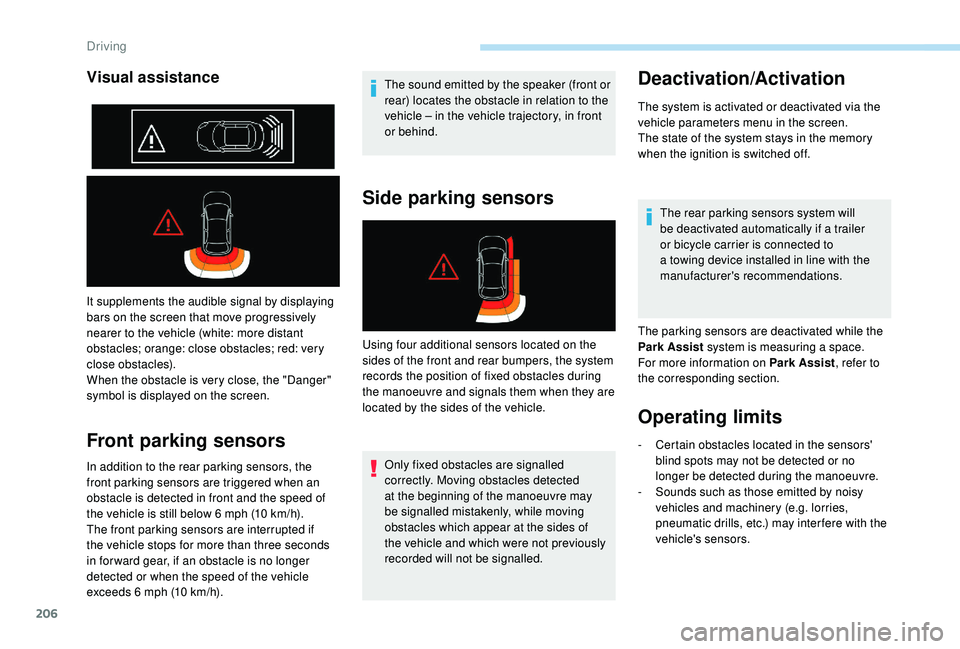
It supplements the audible signal by displaying
bars on the screen that move progressively
nearer to the vehicle (white: more distant
obstacles; orange: close obstacles; red: very
close obstacles).
When the obstacle is very close, the "Danger"
symbol is displayed on the screen.
Front parking sensors
In addition to the rear parking sensors, the
front parking sensors are triggered when an
obstacle is detected in front and the speed of
the vehicle is still below 6 mph (10 km/h).
The front parking sensors are interrupted if
the vehicle stops for more than three seconds
in for ward gear, if an obstacle is no longer
detected or when the speed of the vehicle
exceeds 6
mph (10 km/h). The sound emitted by the speaker (front or
rear) locates the obstacle in relation to the
vehicle – in the vehicle trajectory, in front
or behind.
Side parking sensors
Only fixed obstacles are signalled
correctly. Moving obstacles detected
at the beginning of the manoeuvre may
be signalled mistakenly, while moving
obstacles which appear at the sides of
the vehicle and which were not previously
recorded will not be signalled.
Deactivation/Activation
The system is activated or deactivated via the
vehicle parameters menu in the screen.
The state of the system stays in the memory
when the ignition is switched off.
The rear parking sensors system will
be deactivated automatically if a
trailer
or bicycle carrier is connected to
a
towing device installed in line with the
manufacturer's recommendations.
The parking sensors are deactivated while the
Park Assist system is measuring a
space.
For more information on Park Assist , refer to
the corresponding section.
Operating limits
Visual assistance
Using four additional sensors located on the
sides of the front and rear bumpers, the system
records the position of fixed obstacles during
the manoeuvre and signals them when they are
located by the sides of the vehicle.
-
C
ertain obstacles located in the sensors'
blind spots may not be detected or no
longer be detected during the manoeuvre.
-
S
ounds such as those emitted by noisy
vehicles and machinery (e.g. lorries,
pneumatic drills, etc.) may inter fere with the
vehicle's sensors.
Driving
Page 209 of 364
207
- Certain materials (fabrics) absorb sound waves: pedestrians may not be detected.
-
A
ccumulated snow or dead leaves on the
road sur face can inter fere with the vehicle's
sensors.
-
A f
ront or rear impact to the vehicle can
distort the settings of the sensors, which is
not always detected by the system: distance
measurements may be incorrect.
-
T
he tilting of the vehicle if the boot is
very loaded can affect the distance
measurements.
-
T
he sensors may be affected by poor
weather conditions (heavy rain, thick fog,
snowfall, etc.).
Recommendations on care
In bad or wintry weather, ensure that the
sensors are not covered with mud, ice or
snow. When reverse gear is engaged, an
audible signal (long beep) indicates that
the sensors may be dirty. High pressure washing
When washing your vehicle, direct the
lance at least 30
cm away from the
sensors.
Operating fault
If a fault occurs when shifting
t o reverse, this warning lamp
comes on in the instrument panel,
accompanied by a
message and an
audible signal (short beep).
Contact a
PEUGEOT dealer or a qualified
workshop to have the system checked.
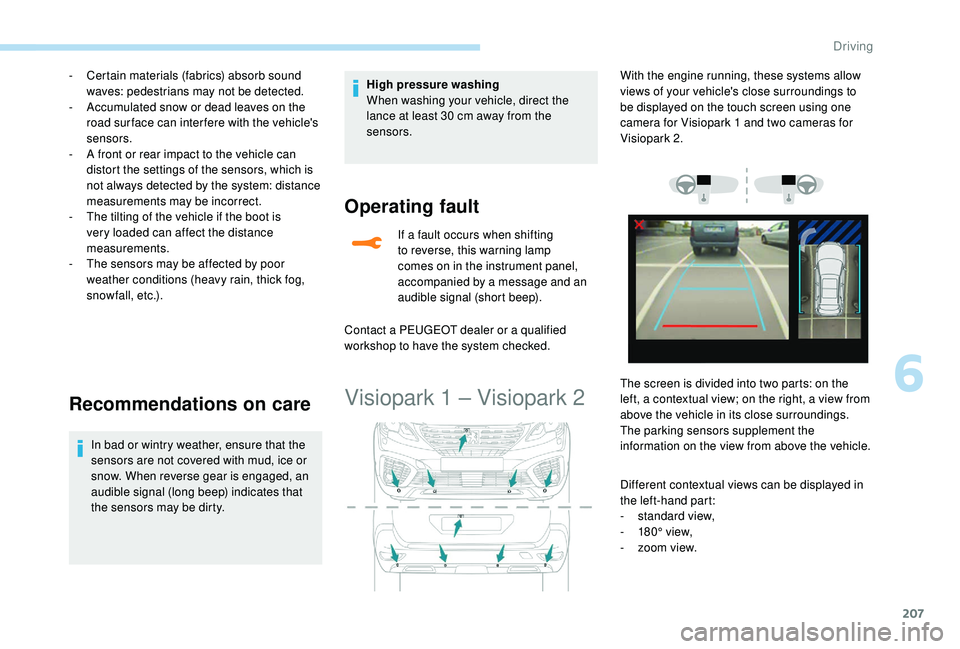
Visiopark 1 – Visiopark 2
Different contextual views can be displayed in
the left-hand part:
-
s
tandard view,
-
1
80° view,
-
z
oom view.
With the engine running, these systems allow
views of your vehicle's close surroundings to
be displayed on the touch screen using one
camera for Visiopark 1
and two cameras for
Visiopark 2.
The screen is divided into two parts: on the
left, a contextual view; on the right, a view from
above the vehicle in its close surroundings.
The parking sensors supplement the
information on the view from above the vehicle.
6
Driving
Page 210 of 364
208
The display is immediately updated with the
type of view selected.
The state of the system is not kept in memory
when the ignition is switched off.
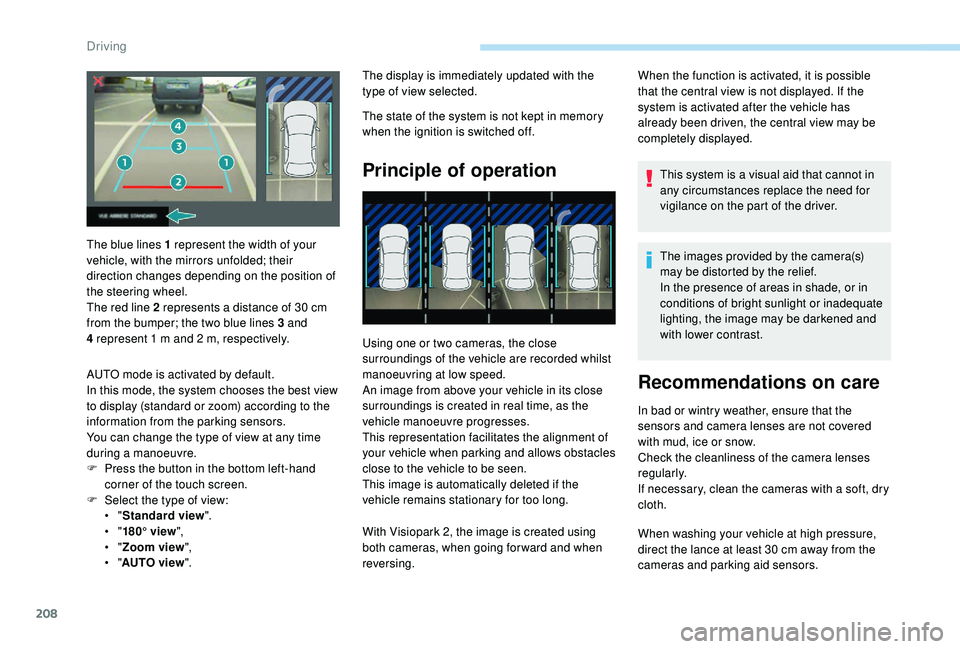
Principle of operation
Using one or two cameras, the close
surroundings of the vehicle are recorded whilst
manoeuvring at low speed.
An image from above your vehicle in its close
surroundings is created in real time, as the
vehicle manoeuvre progresses.
This representation facilitates the alignment of
your vehicle when parking and allows obstacles
close to the vehicle to be seen.
This image is automatically deleted if the
vehicle remains stationary for too long.When the function is activated, it is possible
that the central view is not displayed. If the
system is activated after the vehicle has
already been driven, the central view may be
completely displayed.
This system is a visual aid that cannot in
any circumstances replace the need for
vigilance on the part of the driver.
The images provided by the camera(s)
may be distorted by the relief.
In the presence of areas in shade, or in
conditions of bright sunlight or inadequate
lighting, the image may be darkened and
with lower contrast.
Recommendations on care
In bad or wintry weather, ensure that the
sensors and camera lenses are not covered
with mud, ice or snow.
Check the cleanliness of the camera lenses
regularly.
If necessary, clean the cameras with a
soft, dry
cloth.
When washing your vehicle at high pressure,
direct the lance at least 30
cm away from the
cameras and parking aid sensors.
The blue lines 1
represent the width of your
vehicle, with the mirrors unfolded; their
direction changes depending on the position of
the steering wheel.
The red line 2
represents a
distance of 30
cm
from the bumper; the two blue lines 3
and
4
represent 1
m and 2
m, respectively.
AUTO mode is activated by default.
In this mode, the system chooses the best view
to display (standard or zoom) according to the
information from the parking sensors.
You can change the type of view at any time
during a
manoeuvre.
F
P
ress the button in the bottom left-hand
corner of the touch screen.
F
Sel
ect the type of view:
•
" Standard view ".
•
" 180° view ",
•
" Zoom view ",
•
" AUTO view ". With Visiopark 2, the image is created using
both cameras, when going for ward and when
reversing.
Driving
Page 212 of 364
210
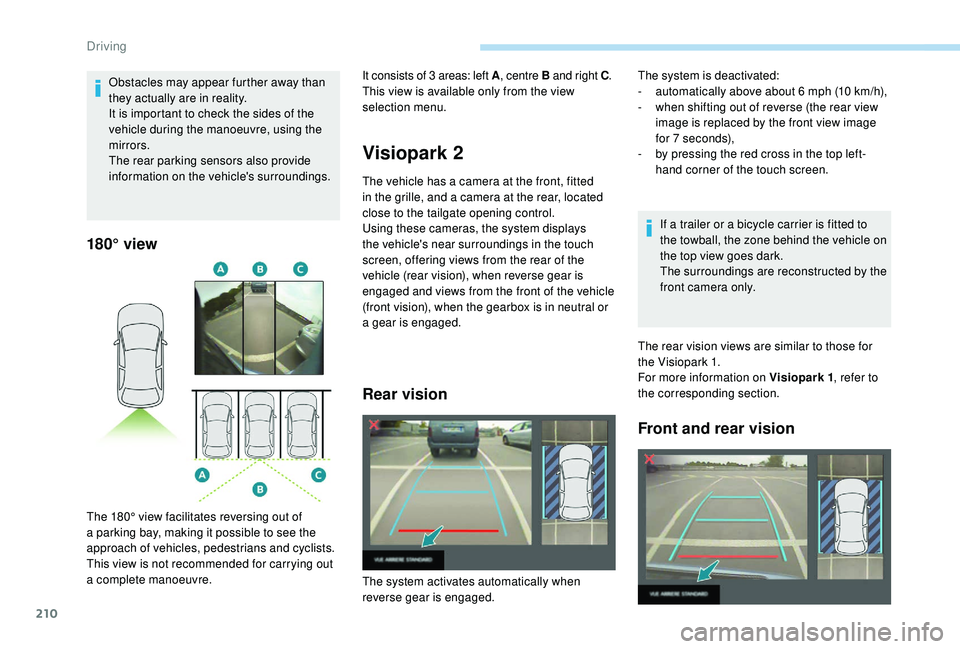
180° view
Visiopark 2
The vehicle has a camera at the front, fitted
i n the grille, and a camera at the rear, located
close to the tailgate opening control.
Using these cameras, the system displays
the vehicle's near surroundings in the touch
screen, offering views from the rear of the
vehicle (rear vision), when reverse gear is
engaged and views from the front of the vehicle
(front vision), when the gearbox is in neutral or
a
gear is engaged.
Rear vision
If a trailer or a bicycle carrier is fitted to
t he towball, the zone behind the vehicle on
the top view goes dark.
The surroundings are reconstructed by the
front camera only.
The rear vision views are similar to those for
the Visiopark 1.
For more information on Visiopark 1 , refer to
the corresponding section.
Front and rear vision
Obstacles may appear further away than
they actually are in reality.
It is important to check the sides of the
vehicle during the manoeuvre, using the
mirrors.
The rear parking sensors also provide
information on the vehicle's surroundings.
The 180° view facilitates reversing out of
a
parking bay, making it possible to see the
approach of vehicles, pedestrians and cyclists.
This view is not recommended for carrying out
a
complete manoeuvre. It consists of 3
areas: left A
, centre B and right C .
This view is available only from the view
selection menu. The system is deactivated:
-
a utomatically above about 6 mph (10 km/h),
-
w
hen shifting out of reverse (the rear view
image is replaced by the front view image
for 7
seconds),
-
b
y pressing the red cross in the top left-
hand corner of the touch screen.
The system activates automatically when
reverse gear is engaged.
Driving
Page 213 of 364
211
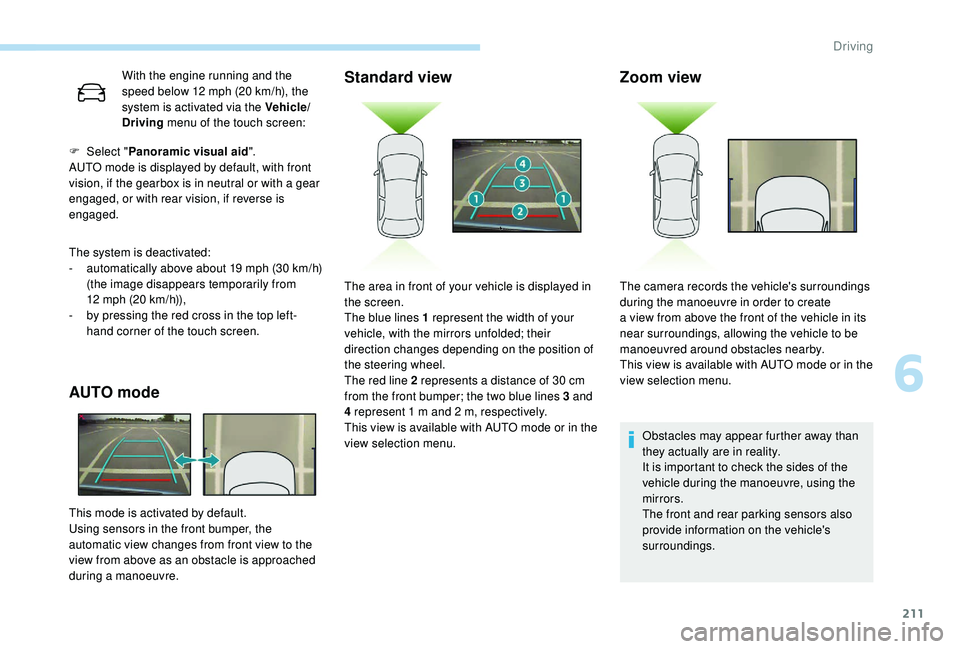
With the engine running and the
speed below 12 mph (20 km/h), the
system is activated via the Vehicle/
Driving menu of the touch screen:
The system is deactivated:
-
a
utomatically above about 19 mph (30 km/h)
(the image disappears temporarily from
12
mph (20 km/h)),
-
b
y pressing the red cross in the top left-
hand corner of the touch screen.
AUTO mode Standard view
F Select "
Panoramic visual aid ".
AUTO mode is displayed by default, with front
vision, if the gearbox is in neutral or with a
gear
engaged, or with rear vision, if reverse is
engaged.
This mode is activated by default.
Using sensors in the front bumper, the
automatic view changes from front view to the
view from above as an obstacle is approached
during a
manoeuvre.
Zoom view
Obstacles may appear further away than
they actually are in reality.
It is important to check the sides of the
vehicle during the manoeuvre, using the
mirrors.
The front and rear parking sensors also
provide information on the vehicle's
surroundings.
The area in front of your vehicle is displayed in
the screen.
The blue lines 1
represent the width of your
vehicle, with the mirrors unfolded; their
direction changes depending on the position of
the steering wheel.
The red line 2
represents a
distance of 30
cm
from the front bumper; the two blue lines 3
and
4
represent 1
m and 2
m, respectively.
This view is available with AUTO mode or in the
view selection menu. The camera records the vehicle's surroundings
during the manoeuvre in order to create
a
view from above the front of the vehicle in its
near surroundings, allowing the vehicle to be
manoeuvred around obstacles nearby.
This view is available with AUTO mode or in the
view selection menu.
6
Driving