ECU PEUGEOT 5008 2020 Owners Manual
[x] Cancel search | Manufacturer: PEUGEOT, Model Year: 2020, Model line: 5008, Model: PEUGEOT 5008 2020Pages: 308, PDF Size: 10.1 MB
Page 16 of 308
14
Instruments
message indicating that starting is prevented.
The engine immobiliser prevents the engine
from restarting (over the authorised driving limit
after confirmation of an emissions control system
malfunction).
To start the engine, carry out (2).
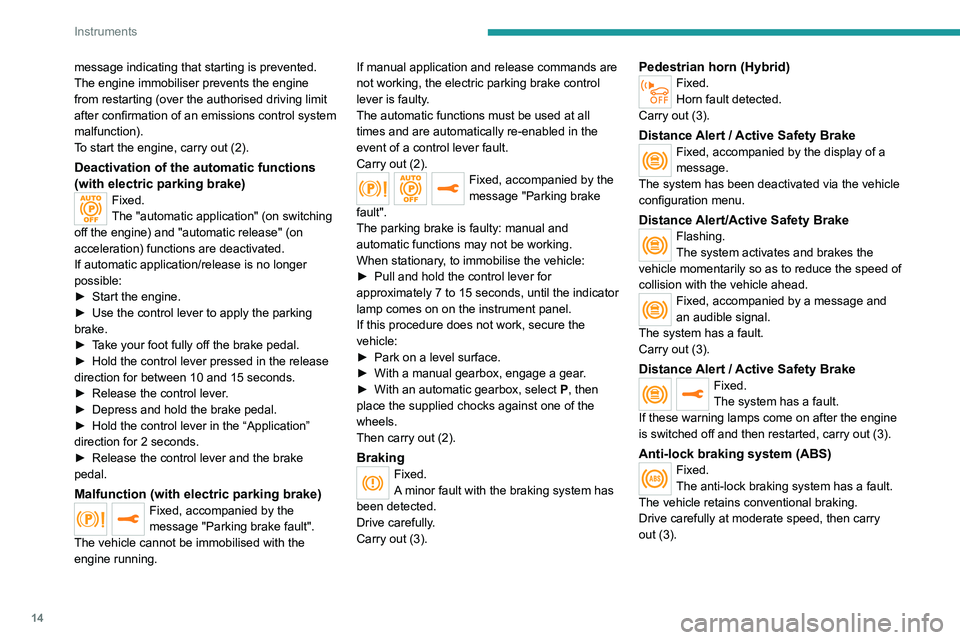
Deactivation of the automatic functions
(with electric parking brake)
Fixed.
The "automatic application" (on switching
off the engine) and "automatic release" (on
acceleration) functions are deactivated.
If automatic application/release is no longer
possible:
►
Start the engine.
►
Use the control lever to apply the parking
brake.
►
T
ake your foot fully off the brake pedal.
►
Hold the control lever pressed in the release
direction for between 10 and 15 seconds.
►
Release the control lever
.
►
Depress and hold the brake pedal.
►
Hold the control lever in the “Application”
direction for 2
seconds.
►
Release the control lever and the brake
pedal.
Malfunction (with electric parking brake)Fixed, accompanied by the
message "Parking brake fault".
The vehicle cannot be immobilised with the
engine running. If manual application and release commands are
not working, the electric parking brake control
lever is faulty.
The automatic functions must be used at all
times and are automatically re-enabled in the
event of a control lever fault.
Carry out (2).
Fixed, accompanied by the
message "Parking brake
fault".
The parking brake is faulty: manual and
automatic functions may not be working.
When stationary, to immobilise the vehicle:
►
Pull and hold the control lever for
approximately 7 to 15 seconds, until the indicator
lamp comes on on the instrument panel.
If this procedure does not work, secure the
vehicle:
►
Park on a level surface.
►
With a manual gearbox, engage a gear
.
►
With an automatic gearbox, select
P
, then
place the supplied chocks against one of the
wheels.
Then carry out (2).
BrakingFixed.
A minor fault with the braking system has
been detected.
Drive carefully.
Carry out (3).
Pedestrian horn (Hybrid)Fixed.
Horn fault detected.
Carry out (3).
Distance Alert / Active Safety BrakeFixed, accompanied by the display of a
message.
The system has been deactivated via the vehicle
configuration menu.
Distance Alert/Active Safety BrakeFlashing.
The system activates and brakes the
vehicle momentarily so as to reduce the speed of
collision with the vehicle ahead.
Fixed, accompanied by a message and
an audible signal.
The system has a fault.
Carry out (3).
Distance Alert / Active Safety BrakeFixed.
The system has a fault.
If these warning lamps come on after the engine
is switched off and then restarted, carry out (3).
Anti-lock braking system (ABS)Fixed.
The anti-lock braking system has a fault.
The vehicle retains conventional braking.
Drive carefully at moderate speed, then carry
out (3).
Page 34 of 308
32
Access
To restore these functions, press one of the
remote control buttons or start the engine with
the electronic key in the reader.
For more information on starting with the
Keyless Entry and Starting system, refer to
the corresponding section.
Electrical interference
The electronic key may not operate if
close to certain electronic devices: telephone
(switched on or on standby), laptop computer,
strong magnetic fields, etc.
Central locking
Manual
► Press this button to lock/unlock the vehicle
(doors and boot) from inside the vehicle.
The indicator lamp comes on to confirm the
central locking of the vehicle.
The central locking does not take place if one of the doors is open.
When locking/deadlocking from the
outside
When the vehicle is locked or deadlocked
from the outside, the indicator lamp flashes
and the button is inoperative.
►
After normal locking, pull one of the
interior door controls to unlock the vehicle.
►
After deadlocking, it is necessary to use
the remote control, Keyless Entry and Starting
or the integral key to unlock the vehicle.
Automatic (anti-intrusion security)
The doors and boot lock automatically while
driving (speed above 6 mph (10
km/h)).
To deactivate/reactivate this function (activated
by default):
►
Press the button until an audible warning is
triggered and a confirmation message appears.
Transporting long or voluminous
objects
Press the central locking control to drive
with the boot open and the doors locked.
Otherwise, every time the speed of the
vehicle exceeds 6 mph (10 km/h), the locks
will rebound and an alert will appear.
Back-up procedures
Lost keys, remote control,
electronic key
Visit a PEUGEOT dealer with the vehicle's
registration certificate, a personal identification
document and, if possible, the label bearing the
key code.
The PEUGEOT dealer will be able to retrieve the
key code and the transponder code required to
order a new key.
Complete unlocking/locking
of the vehicle with the key
Use this procedure in the following situations:
– Remote control battery discharged.
–
Remote control malfunction.
–
V
ehicle battery discharged.
–
V
ehicle in an area subject to strong
electromagnetic interference.
In the first case, change the remote control
battery.
In the second case, reinitialise
the remote
control.
Refer to the corresponding sections.
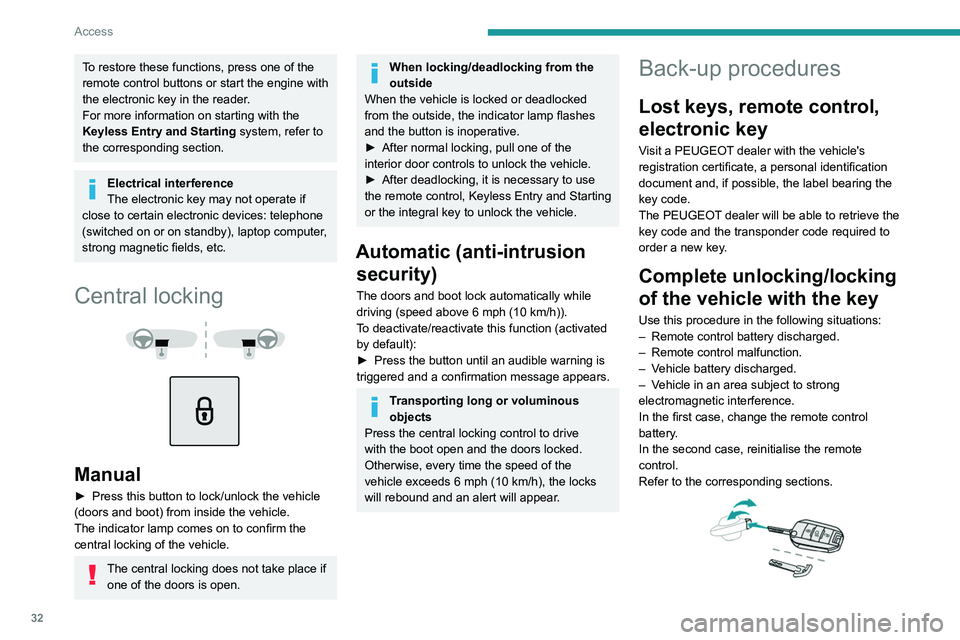
► Insert the key in the door lock.
► Turn the key towards the front/rear to unlock/
lock the vehicle.
► Turn the key rearwards again within
5 seconds to deadlock the vehicle.
If the vehicle is fitted with an alarm, it will
not be activated when locking with the
key.
If the alarm is activated, the siren sounds
when the door is opened; switch on the
ignition to stop it.
Central locking not
functioning
Use these procedures in the following cases:
– Central locking malfunction.
– Battery disconnected or discharged.
In the event of a malfunction of the
central locking system, the battery must
be disconnected to ensure that the vehicle is
locked fully.
Driver's door
► Turn the key towards the rear of the vehicle
to lock it, or towards the front to unlock it.
Passenger doors
Unlocking
► Pull the interior door opening control.
Locking
Page 38 of 308
36
Access
Reactivating the interior volumetric
and anti-tilt monitoring
► Deactivate the exterior perimeter monitoring
by unlocking the vehicle using the remote control
or the Keyless Entry and Starting system.
The indicator lamp in the button goes off.
►
Reactivate all monitoring by locking the
vehicle using the remote control or the Keyless
Entry and Starting system.
The red indicator lamp in the button once again
flashes every second.
Triggering of the alarm
This is indicated by sounding of the siren
and flashing of the direction indicators for 30
seconds.
Depending on the country of sale, certain
monitoring functions remain active until the alarm
has been triggered eleven times consecutively.
When the vehicle is unlocked using the remote
control or the Keyless Entry and Starting system,
rapid flashing of the red indicator lamp in the
button informs you that the alarm was triggered
during your absence. When the ignition is
switched on, this flashing stops.
Failure of the remote control
To deactivate the monitoring functions:
► Unlock the vehicle using the key in the
driver's door lock.
►
Open the door; the alarm is triggered.
► Switch on the ignition; this stops the alarm.
The indicator lamp in the button goes off.
Locking the vehicle without
activating the alarm
► Lock or deadlock the vehicle using the key
(integral to the remote control) in the driver's
door lock.
Malfunction
When the ignition is switched on, fixed
illumination of the red indicator lamp in the
button indicates a malfunction of the system.
Have it checked by a PEUGEOT dealer or a
qualified workshop.
Doors
Opening
From outside
► After unlocking the vehicle or with the
Keyless Entry and Starting electronic key in the
recognition zone, pull the door handle.
When selective unlocking is activated,
the first press of the remote control
unlocking button permits unlocking of the
driver's door only.
From inside
► Pull the interior opening control of a door; this
unlocks the vehicle completely .
With selective unlocking activated:
– Opening the driver's door unlocks
the driver's door only (if the vehicle has not
already been completely unlocked).
–
Opening one of the passenger doors
unlocks the rest of the vehicle.
Closing
If a door is not properly closed, this
warning lamp comes on accompanied by
a message if the engine is running, and an
audible signal when the vehicle is travelling at
more than 6
mph (10 km/h).
Boot
Opening the tailgate
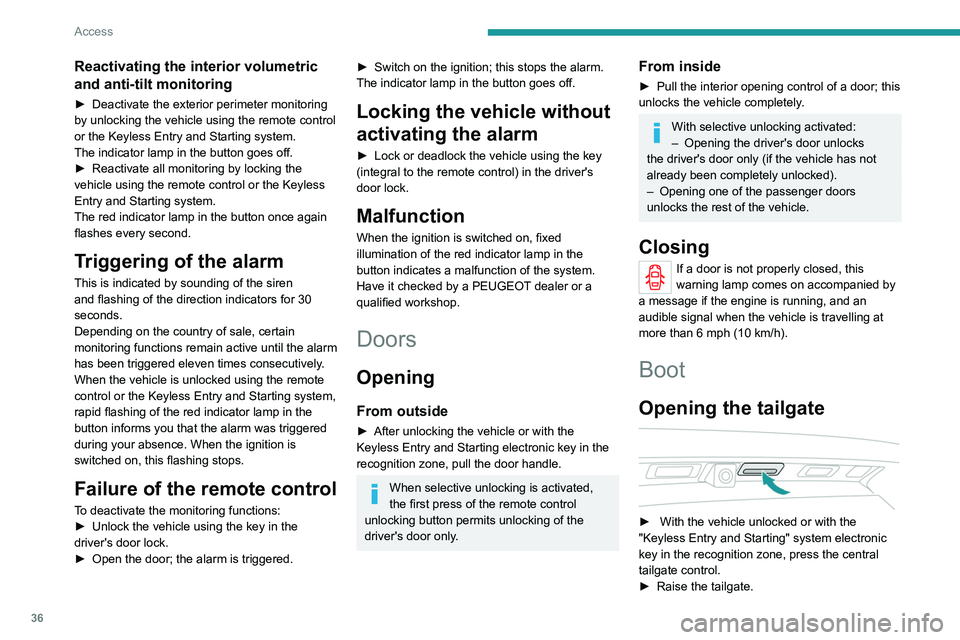
► With the vehicle unlocked or with the
"Keyless Entry and Starting" system electronic
key in the recognition zone, press the central
tailgate control.
►
Raise the tailgate.
When selective unlocking is activated,
the electronic key must be close to the
rear of the vehicle.
The tailgate is not designed to hold a bicycle carrier.
Closing the tailgate
► Lower the tailgate using the interior grips.
► Release the grips and press down on the
outside of the tailgate to close it.
In the event of a malfunction or if you
experience difficulty opening or closing
the tailgate, have it checked by a PEUGEOT
dealer or a qualified workshop without delay,
to avoid the issue deteriorating and prevent
any risk of the tailgate dropping, potentially
causing serious injury.
Back-up release
To manually unlock the boot in the event of a
battery or central locking failure.
Unlocking
► Fold the rear seats to gain access to the lock
from inside the boot.
Page 48 of 308
46
Ease of use and comfort
3.Lumbar support electric adjustment
The control allows independent adjustment of
the depth and vertical position of the lumbar
support.
►
Press and hold the front or rear of the
control to increase or reduce the lumbar
support.
►
Press and hold the top or bottom of the
control to raise or lower the lumbar support
area.
Placing the passenger seat
in the table position
The backrest of the passenger seat can be fully
folded forwards and secured in this position.
This function, when associated with folding
of the backrest of the rear seats, helps with
transporting long and bulky objects.
First steps:
►
Lower the head restraint.
►
Fold up the “aircraft” type table (depending
on version).
►
Move the seat backwards to allow space for
the head restraint.
►
Adjust the seat to the lowest position.
►
Check that there is nothing that might
interfere with folding of the backrest (seat belt,
child seat, items of clothing, bags, etc.).
Deactivation of the front passenger
airbag is recommended.
Folding the backrest
► Pull the control fully up to release the
backrest.
►
T
ip the backrest fully forward.
In this position, the backrest can support
a maximum load of 30 kg.
When sharp deceleration occurs, objects
placed on the folded backrest can turn into
projectiles.
Returning the backrest to the normal
position
► Pull the control fully up to release the
backrest.
►
Raise the backrest and guide it back until it
latches into place.
►
Check that the backrest has engaged
correctly
.
Front head restraints
Adjusting the height
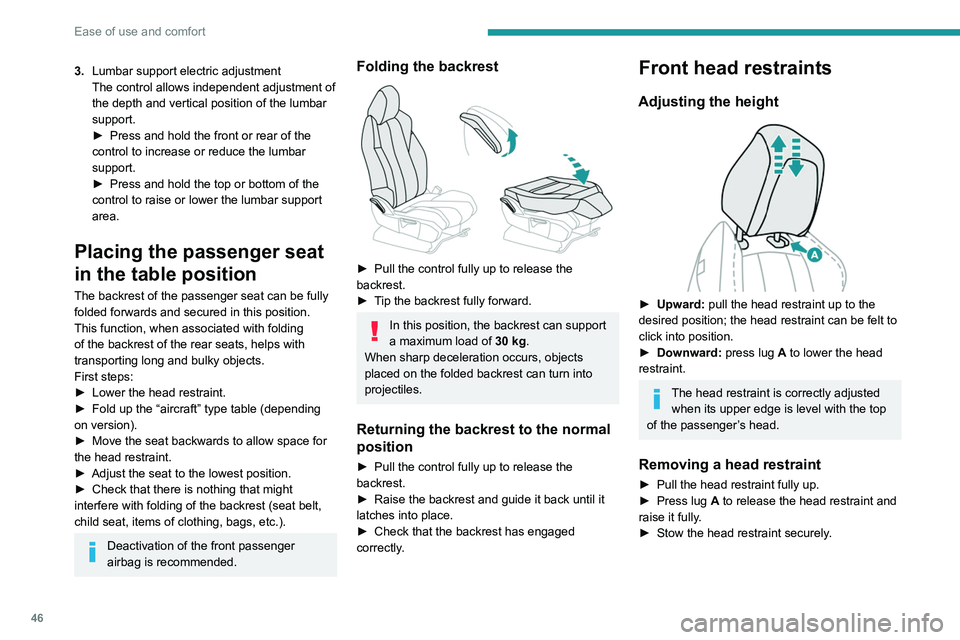
► Upward: pull the head restraint up to the
desired position; the head restraint can be felt to
click into position.
►
Downward:
press lug A to lower the head
restraint.
The head restraint is correctly adjusted when its upper edge is level with the top
of the passenger’s head.
Removing a head restraint
► Pull the head restraint fully up.
► Press lug A to release the head restraint and
raise it fully.
►
Stow the head restraint securely
.
Refitting a head restraint
► Insert the head restraint rods into the guides
in the corresponding seat backrest.
► Push the head restraint down as far as it will
go.
► Press the lug A to release the head restraint
and push it down.
► Adjust the height of the head restraint.
Never drive with the head restraints
removed; they should be in place and
adjusted for the occupant of the seat.
Electrically-adjusted driver's
seat
To carry out these electric adjustments, switch on the ignition or start the engine
if the vehicle has gone into energy economy
mode.
These electric adjustments are accessible
about 1 minute after opening the driver's door.
They are deactivated about 1 minute after
switching the ignition off.
Page 56 of 308
54
Ease of use and comfort
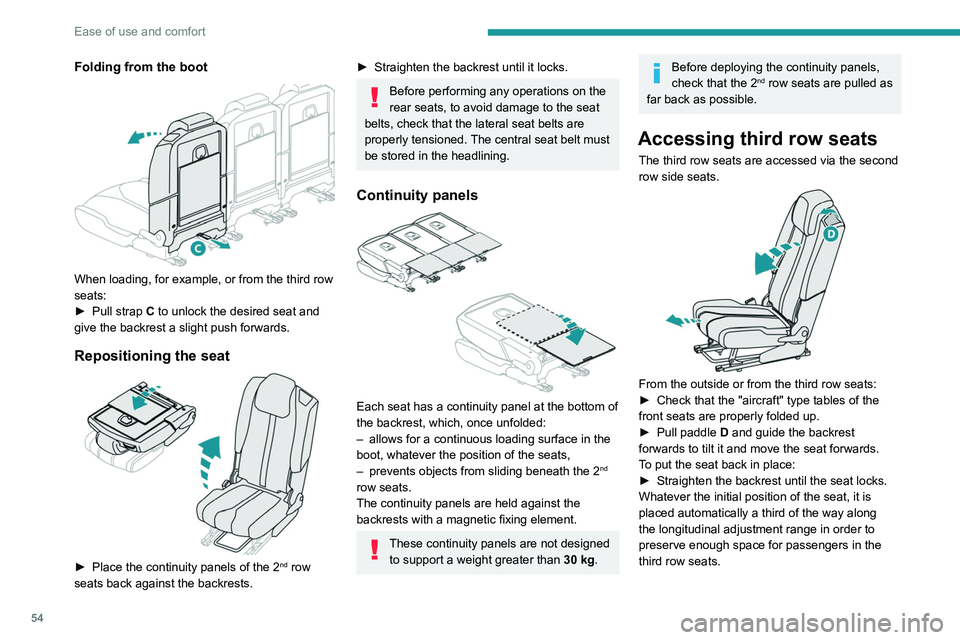
Folding from the boot
When loading, for example, or from the third row
seats:
►
Pull strap
C to unlock the desired seat and
give the backrest a slight push forwards.
Repositioning the seat
► Place the continuity panels of the 2nd row
seats back against the backrests.
► Straighten the backrest until it locks.
Before performing any operations on the
rear seats, to avoid damage to the seat
belts, check that the lateral seat belts are
properly tensioned. The central seat belt must
be stored in the headlining.
Continuity panels
Each seat has a continuity panel at the bottom of
the backrest, which, once unfolded:
–
allows for a continuous loading surface in the
boot, whatever the position of the seats,
–
prevents objects from sliding beneath the 2nd
row seats.
The continuity panels are held against the
backrests with a magnetic fixing element.
These continuity panels are not designed to support a weight greater than 30 kg.
Before deploying the continuity panels,
check that the 2nd row seats are pulled as
far back as possible.
Accessing third row seats
The third row seats are accessed via the second
row side seats.
From the outside or from the third row seats:
► Check that the "aircraft" type tables of the
front seats are properly folded up.
►
Pull paddle D
and guide the backrest
forwards to tilt it and move the seat forwards.
To put the seat back in place:
►
Straighten the backrest until the seat locks.
Whatever the initial position of the seat, it is
placed automatically a third of the way along
the longitudinal adjustment range in order to
preserve enough space for passengers in the
third row seats.
If this system fails (paddle D), the third
row passengers can also get out after
having folded the backrest of the second row
seats using strap C.
Do not let children operate the seats
unsupervised.
Third row seats
The two third row seats are stored in a retracted
position in the bottom of the boot. Each one is
covered with rigid concertina panels, secured to
the vehicle.
Do not let children operate the seats
unsupervised.
Each concertina panel can support a
maximum load of 100 kg with the third
row seats folded away.
With the third row seats removed and the
removable concertina panels supports
installed, the maximum load is limited to
50 kg.
Page 57 of 308
55
Ease of use and comfort
3If this system fails (paddle D), the third
row passengers can also get out after
having folded the backrest of the second row
seats using strap C.
Do not let children operate the seats
unsupervised.
Third row seats
The two third row seats are stored in a retracted
position in the bottom of the boot. Each one is
covered with rigid concertina panels, secured to
the vehicle.
Do not let children operate the seats
unsupervised.
Each concertina panel can support a
maximum load of 100
kg with the third
row seats folded away.
With the third row seats removed and the
removable concertina panels supports
installed, the maximum load is limited to
50
kg.
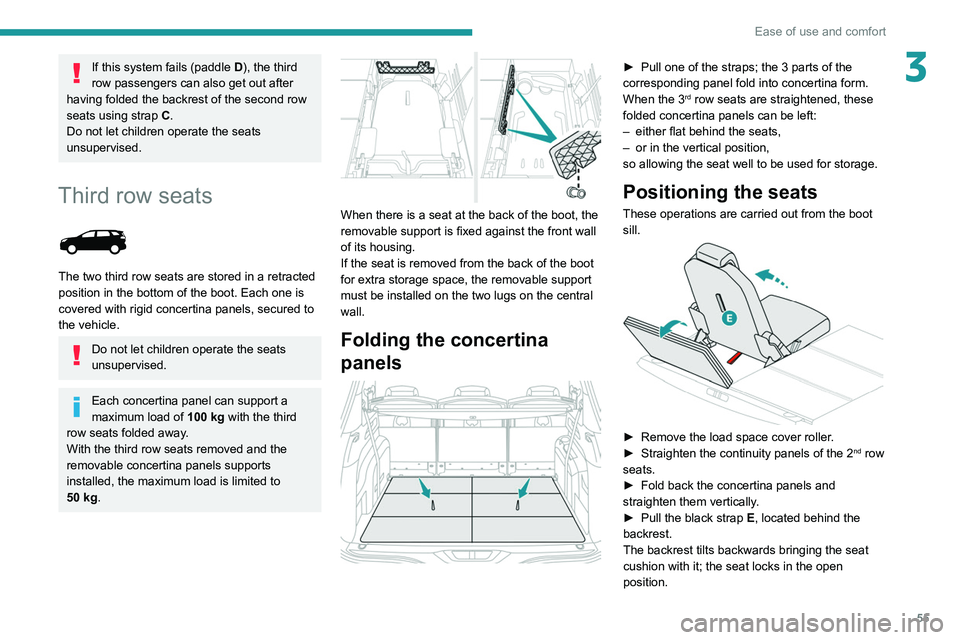
When there is a seat at the back of the boot, the
removable support is fixed against the front wall
of its housing.
If the seat is removed from the back of the boot
for extra storage space, the removable support
must be installed on the two lugs on the central
wall.
Folding the concertina
panels
► Pull one of the straps; the 3 parts of the
corresponding panel fold into concertina form.
When the 3
rd row seats are straightened, these
folded concertina panels can be left:
–
either flat behind the seats,
–
or in the vertical position,
so allowing the seat well to be used for storage.
Positioning the seats
These operations are carried out from the boot
sill.
► Remove the load space cover roller .
► Straighten the continuity panels of the 2nd row
seats.
►
Fold back the concertina panels and
straighten them vertically
.
►
Pull the black strap E
, located behind the
backrest.
The backrest tilts backwards bringing the seat
cushion with it; the seat locks in the open
position.
Page 58 of 308
56
Ease of use and comfort
The load space cover roller can be stored behind
the backrests of the 3rd row seats.
For more information on the Interior fittings,
and in particular the load space cover roller, refer
to the corresponding section.
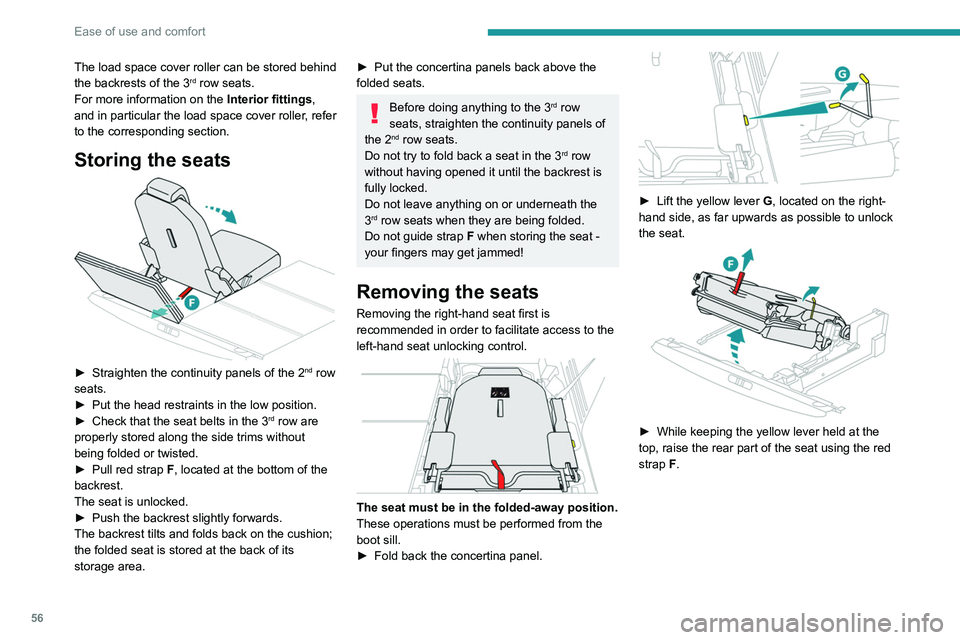
Storing the seats
► Straighten the continuity panels of the 2nd row
seats.
►
Put the head restraints in the low position.
►
Check that the seat belts in the 3rd row are
properly stored along the side trims without
being folded or twisted.
►
Pull red strap
F, located at the bottom of the
backrest.
The seat is unlocked.
►
Push the backrest slightly forwards.
The backrest tilts and folds back on the cushion;
the folded seat is stored at the back of its
storage area.
► Put the concertina panels back above the
folded seats.
Before doing anything to the 3rd row
seats, straighten the continuity panels of
the 2
nd row seats.
Do not try to fold back a seat in the 3rd row
without having opened it until the backrest is
fully locked.
Do not leave anything on or underneath the
3
rd row seats when they are being folded.
Do not guide strap F when storing the seat -
your fingers may get jammed!
Removing the seats
Removing the right-hand seat first is
recommended in order to facilitate access to the
left-hand seat unlocking control.
The seat must be in the folded-away position.
These operations must be performed from the
boot sill.
►
Fold back the concertina panel.
► Lift the yellow lever G , located on the right-
hand side, as far upwards as possible to unlock
the seat.
► While keeping the yellow lever held at the
top, raise the rear part of the seat using the red
strap
F.
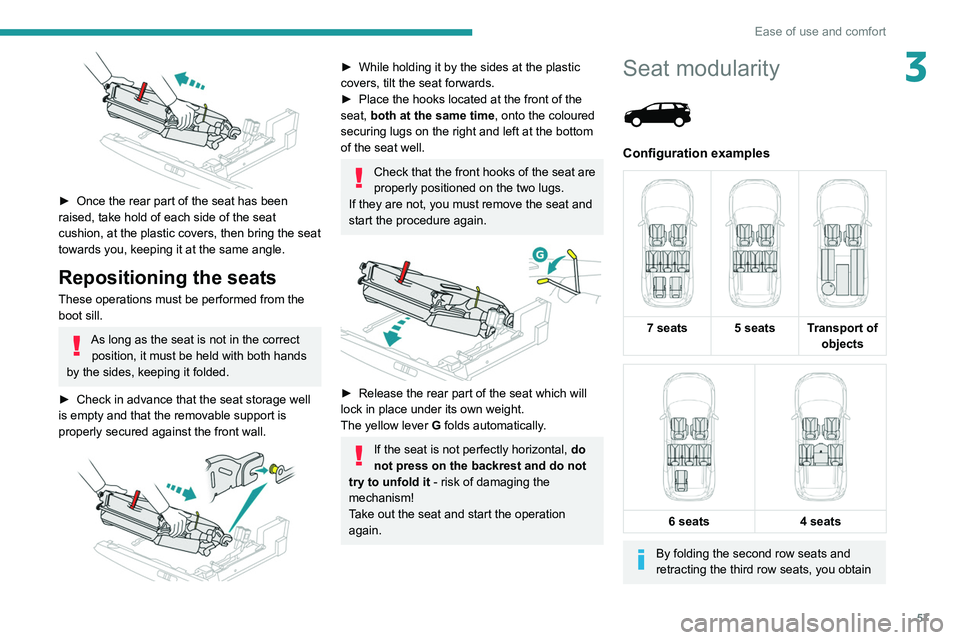
► Once the rear part of the seat has been
raised, take hold of each side of the seat
cushion, at the plastic covers, then bring the seat
towards you, keeping it at the same angle.
Repositioning the seats
These operations must be performed from the
boot sill.
As long as the seat is not in the correct position, it must be held with both hands
by the sides, keeping it folded.
► Check in advance that the seat storage well
is empty and that the removable support is
properly secured against the front wall.
Page 59 of 308
57
Ease of use and comfort
3
► Once the rear part of the seat has been
raised, take hold of each side of the seat
cushion, at the plastic covers, then bring the seat
towards you, keeping it at the same angle.
Repositioning the seats
These operations must be performed from the
boot sill.
As long as the seat is not in the correct position, it must be held with both hands
by the sides, keeping it folded.
►
Check in advance that the seat storage well
is empty and that the removable support is
properly secured against the front wall.
► While holding it by the sides at the plastic
covers, tilt the seat forwards.
►
Place the hooks located at the front of the
seat,
both at the same time, onto the coloured
securing lugs on the right and left at the bottom
of the seat well.
Check that the front hooks of the seat are
properly positioned on the two lugs.
If they are not, you must remove the seat and
start the procedure again.
► Release the rear part of the seat which will
lock in place under its own weight.
The yellow lever G
folds automatically.
If the seat is not perfectly horizontal, do
not press on the backrest and do not
try to unfold it - risk of damaging the
mechanism!
Take out the seat and start the operation
again.
Seat modularity
Configuration examples
7 seats 5 seats Transport of
objects
6 seats
4 seats
By folding the second row seats and
retracting the third row seats, you obtain
Page 67 of 308
65
Ease of use and comfort
3the accumulation of snow resulting from the
operation of the windscreen wipers.
On/Off
► With the engine running, press this button to
activate/deactivate the function (confirmed by an
indicator lamp).
The function is activated when the exterior
temperature drops below 0°C. It is deactivated
automatically when the engine is switched off.
Rear screen demisting/
defrosting
Demisting/defrosting only operates with the
engine running.
Depending on version, this also applies to the
door mirrors.
► Press this button to activate/deactivate
the function (confirmed by the
illumination/extinction of the indicator lamp).
Demisting/defrosting switches off automatically
to prevent an excessive consumption of
electrical current.
Switch off demisting/defrosting as soon
as you no longer consider it necessary,
as reducing the consumption of electrical
current reduces fuel consumption.
Thermal pre-conditioning (Hybrid)
This function allows you to programme the
vehicle to adjust the passenger compartment
temperature to a pre-defined, non-modifiable
temperature (approx. 21°C) before you enter the
vehicle, on the days and times of your choice.
Programming
(With PEUGEOT Connect Nav)
In the Climate > OPTIONS menu:
Select Temperature conditioning .
►
Press
+ to programme.
►
Select the time of entry into the vehicle and
the desired days. Press
OK.
►
Press
ON to activate this programming.
Pre-conditioning begins approximately 45
minutes before the programmed time, and is
maintained for 10 minutes afterwards.
This indicator lamp remains lit throughout the
pre-conditioning phase.
You can define multiple programmings. Each one is saved in the system.
To optimise battery life, we recommend
programming with the vehicle plugged in.
This feature can be programmed using a smartphone, via the
MyPeugeot
application.
With PEUGEOT Connect Radio, the
programming can only be carried out using a
smartphone, via the application.
For more information on Remotely operable
features , refer to the corresponding section.
Operating conditions
– The function is only activated when the
ignition is off and the vehicle locked .
–
The function is not activated if the battery
charge level is below 50%.
–
If recurrent programming is activated (e.g.
from Monday to Friday) and two pre-conditioning
Page 71 of 308
69
Ease of use and comfort
3A ventilation nozzle circulates fresh air.
Closing
► Replace the two parts of the cover.
Mats
Fitting
When fitting the mat for the first time, on the
driver's side use only the fasteners supplied in
the enclosed sachet.
The other mats are simply laid over the carpet.
Removing/Refitting
► To remove it on the driver's side, move the
seat backwards and unclip the fixings.
►
T
o refit it, position the mat and secure it by
pressing.
To avoid any risk of jamming the pedals: – only use mats that are suited to the
fixings already present in the vehicle; these
fixings must be used,
–
never fit one mat on top of another
.
The use of mats not approved by PEUGEOT
may interfere with access to the pedals and
hinder the operation of the cruise control/
speed limiter.
The approved mats have two fasteners
located underneath the seat.
Courtesy lamps
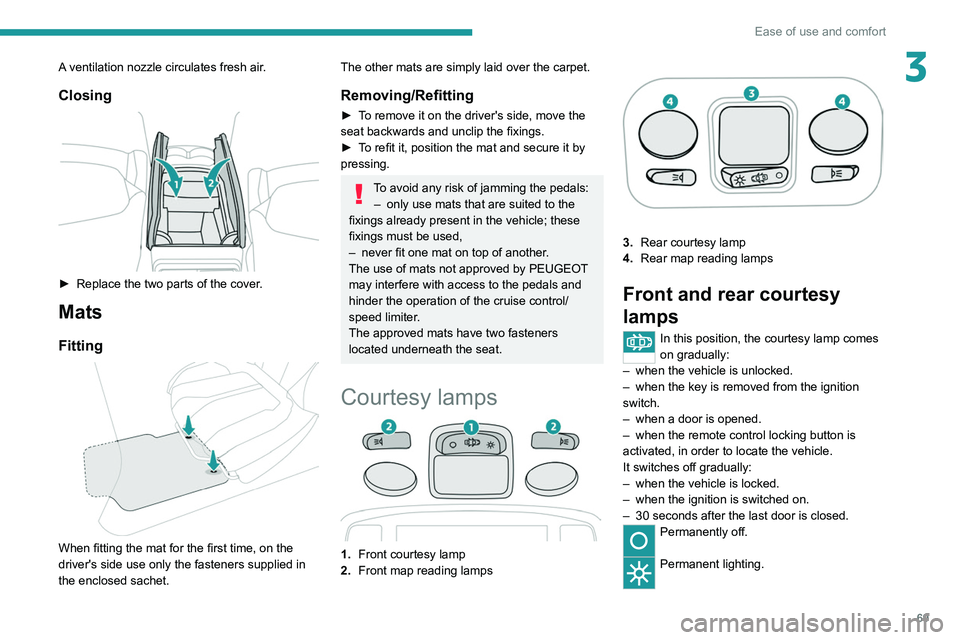
1. Front courtesy lamp
2. Front map reading lamps
3.Rear courtesy lamp
4. Rear map reading lamps
Front and rear courtesy
lamps
In this position, the courtesy lamp comes
on gradually:
–
when the vehicle is unlocked.
–
when the key is removed from the ignition
switch.
–
when a door is opened.
–
when the remote control locking button is
activated, in order to locate the vehicle.
It switches off gradually:
–
when the vehicle is locked.
–
when the ignition is switched on.
–
30 seconds after the last door is closed.
Permanently off.
Permanent lighting.