Windows PEUGEOT 5008 2021 User Guide
[x] Cancel search | Manufacturer: PEUGEOT, Model Year: 2021, Model line: 5008, Model: PEUGEOT 5008 2021Pages: 292, PDF Size: 9.65 MB
Page 62 of 292
60
Ease of use and comfort
The function is available on the secondary
page, which can be accessed by pressing the
“OPTIONS” button.
►
Press button
14 to activate the "REAR"
function; its status is displayed as " ON".
►
Press the “
large fan” or “small fan” button to
increase or decrease the air flow.
The corresponding indicator lamps come on.
If all of the indicator lamps are off, a slight air
flow can still be felt as a result of the vehicle's
movement.
Ventilation with the ignition
on
When the ignition is switched on, the ventilation
system and the air flow 2 and air distribution
3 settings in the passenger compartment are
activated, for a period which depends on the
battery charge.
This function does not include the air
conditioning system.
Switching the system off
► Press button 7; all the indicator lamps of the
system go out.
This action deactivates all of the functions of the
air conditioning system.
The temperature is no longer regulated. A slight
flow of air can still be felt, due to the forward
movement of the vehicle.
Interior air recirculation
The intake of exterior air prevents the formation
of mist on the windscreen and side windows.
Recirculating the interior air isolates the
passenger compartment from outside odours
and fumes and allows the desired passenger
compartment temperature to be achieved more
rapidly.
► Press this button to activate/deactivate
the function (confirmed by the
illumination/extinction of the indicator lamp).
This function is activated automatically when reverse gear is engaged.
Front demisting
- defrosting
Automatic Visibility programme
This mode allows the windscreen and side
windows to be demisted or defrosted as quickly
as possible.
► Press this button to activate/deactivate
the mode (confirmed by the illumination/
extinction of the
indicator lamp).
The programme automatically manages the air
conditioning (depending on version), air flow
and air intake, and provides optimum distribution
towards the windscreen and side windows.
It is possible to manually change the air flow
without deactivating the automatic Visibility
programme.
With Stop & Start, when demisting has
been activated, STOP mode is not
available.
In wintry conditions, before moving off,
remove all snow or ice on the windscreen
near the camera.
Otherwise, the operation of the equipment
using the camera may be affected.
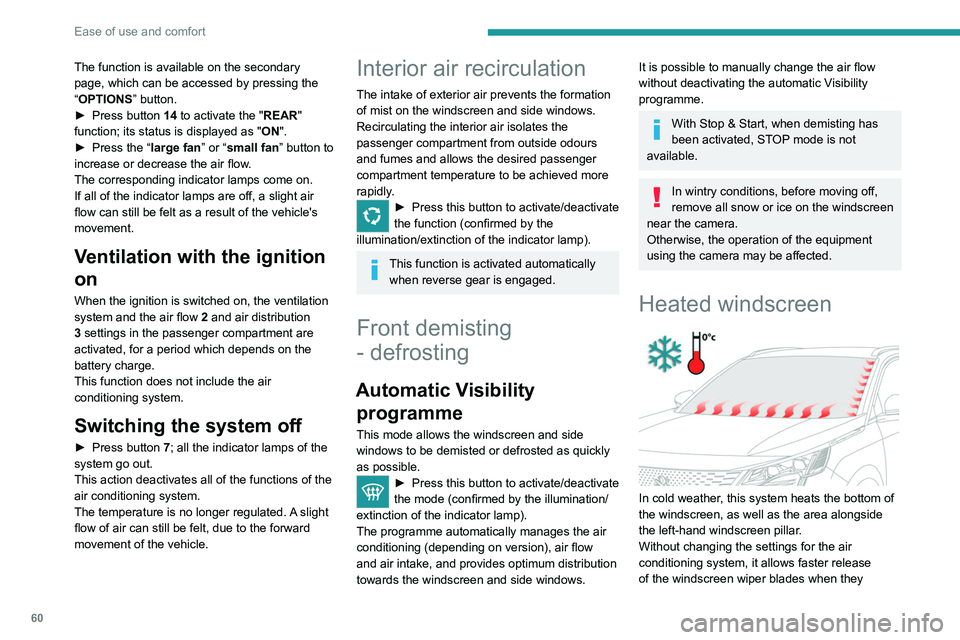
Heated windscreen
In cold weather, this system heats the bottom of
the windscreen, as well as the area alongside
the left-hand windscreen pillar.
Without changing the settings for the air
conditioning system, it allows faster release
of the windscreen wiper blades when they
are frozen to the windscreen and helps avoid
the accumulation of snow resulting from the
operation of the windscreen wipers.
Switching on/off
► With the engine running, press this button to
activate/deactivate the function (confirmed by an
indicator lamp).
The function is activated when the outside
temperature drops below 0°C. It is deactivated
automatically when the engine is switched off.
Rear screen
demisting/defrosting
This demisting/defrosting only works with the engine running.
Depending on version, it also demists/defrosts
the doors mirrors.
► Press this button to activate/deactivate
the function (confirmed by the
illumination/extinction of the indicator lamp).
Page 70 of 292

68
Ease of use and comfort
Side blinds
Fitted to the second row windows, they protect
the passenger compartment from the sun's rays.
►
Pull the central tab to unroll the blind.
►
Position the blind's clip on the hook.
Always guide the blind slowly, using the tab, while raising or lowering it.
Storage boxes
Depending on version, the storage boxes are
fitted in the floor, at the foot of the side seats on
the second row.
On the left-hand side, it may also contain the
temporary puncture repair kit.
►
T
o open them, lift the cover by the notch.
Boot fittings
1. Load space cover shelf 2.
12V accessory socket (max. 120W)
3. Boot lamp
4. Rear seat folding controls
5. Hooks
6. Stowing rings
7. Boot floor
8. Storage well/Tool box under the floor
9. Open storage compartments
1. Load space cover roller
2. 12 V accessory socket (max. 120 W)
3. Boot lamp
4. Luggage retaining strap
5. Storage brackets of the load space cover
roller
6. Armrest with cup holder and storage
compartment
7. Open storage compartment
8.Concertina panels
9. Stowing rings
The stowing rings are designed to secure
luggage using different types of retaining
nets.
These retaining nets are available as an
option or as an accessory.
For more information, contact a PEUGEOT
dealer or a qualified workshop.
For information on installing the High load
retaining net , refer to the corresponding
section.
Load space cover shelf
It consists of two sections:
– a fixed section with an open storage space.
Page 98 of 292

96
Safety
presence of a smaller occupant, with the seat
set in a forward longitudinal position.
Deployment
They deploy, except the front passenger airbag
if it is deactivated*, in the event of a serious front
impact to all or part of the front impact zone A.
The front airbag inflates between the thorax and
head of the front occupant of the vehicle and the
steering wheel, driver's side, and the dashboard,
passenger's side, to cushion their forward
movement.
Lateral airbags
In the event of a serious side impact, this system
protects the driver and front passenger to
mitigate the risk of injury to the chest, between
the hip and the shoulder.
* For more information on Deactivating the front passenger airbag, refer t\
o the corresponding section.Each lateral airbag is fitted in the seat backrest
frame, on the door side.
Deployment
The lateral airbags are deployed on one side in
the event of a serious side impact applied to all
or part of the side impact zone B.
The lateral airbag inflates between the chest of
the vehicle's occupant and the corresponding
door panel.
Curtain airbags
System contributing towards greater protection
for the driver and passengers (with the exception
of the rear centre passenger) in the event of a
serious side impact in order to limit the risk of
injury to the side of the head.
Each curtain airbag is built into the pillars and
the upper passenger compartment area.
Deployment
It deploys simultaneously with the corresponding
lateral airbag in the event of a serious side
impact applied to all or part of the side impact
zone B.
The curtain airbag inflates between the front
and rear occupants of the vehicle and the
corresponding windows.
Malfunction
In the event of a malfunction, this warning
lamp lights up on the instrument panel.
Contact a PEUGEOT dealer or a qualified
workshop to have the system checked.
The airbags may not be deployed in the event of
a serious impact.
In the event of a minor impact or bump at
the side of the vehicle or if the vehicle
rolls over, the airbags may not be deployed.
In the event of a rear or front collision, none of
the lateral airbags are deployed.
Advice
For the airbags to be fully effective,
observe the safety recommendations
below.
Adopt a normal and upright sitting position.
Fasten your seat belt and position it correctly.
Do not place anything between the occupants
and the airbags (e.g.
child, animal, object), do
not fix or attach anything near or in the path of
the airbags, as this could cause injuries when
they are deployed.
Never modify the original definition of the
vehicle, particularly in the area directly around
the airbags.
Even if all of the precautions mentioned are
observed, a risk of injury or of minor burns to
the head, chest or arms cannot be ruled out
when an airbag is deployed. The bag inflates
almost instantly (within a few milliseconds)
then deflates within the same time,
discharging the hot gas via openings provided
for this purpose.
After an accident or if the vehicle has been
stolen, have the airbag systems checked.
All work must be carried out only by a
PEUGEOT dealer or a qualified workshop.
Front airbags
Do not drive holding the steering wheel
by its spokes or resting your hands on the
centre part of the wheel.
Passengers must not place their feet on the
dashboard.
Do not smoke as deployment of the airbags
can cause burns or the risk of injury from a
cigarette or pipe.
Never remove or pierce the steering wheel or
hit it violently.
Do not fix or attach anything to the steering
wheel or dashboard, as this could cause
injuries when the airbags are deployed.
Lateral airbags
Use only approved seat covers
compatible with the deployment of these
airbags. For information on the range of seat
covers suitable for your vehicle, contact a
PEUGEOT dealer.
Page 100 of 292

98
Safety
Remember to fasten the seat belts or the
harness of child seats, keeping the slack
relative to the child's body to a minimum,
even for short journeys.
When installing a child seat using the seat
belt, ensure that the seat belt is tightened
correctly on the child seat and that it secures
the child seat firmly on the seat of the vehicle.
If the passenger seat is adjustable, move it
forwards if necessary.
Remove the head restraint before
installing a child seat with a backrest on a
passenger seat.
Ensure that the head restraint is stored or
attached securely to prevent it from being
thrown around the vehicle in the event of
sharp braking. Refit the head restraint once
the child seat has been removed.
Installing a booster seat
The chest part of the seat belt must be
positioned on the child's shoulder without
touching the neck.
Ensure that the lap part of the seat belt
passes correctly over the child's thighs.
Use a booster seat with backrest, equipped
with a belt guide at shoulder level.
Additional protections
To prevent accidental opening of the
doors and rear windows, use the "Child lock".
Take care not to open the rear windows by
more than one third.
To protect young children from the rays of the
sun, fit side blinds on the rear windows.
As a safety precaution, do not leave:
–
a child alone and unattended in a vehicle,
–
a child or an animal in a vehicle which is
exposed to the sun, with the windows closed,
–
the keys within reach of children inside the
vehicle.
Child seat at the rear
Forward-facing or rearward-facing
► Move the vehicle's front seat forward and
straighten the backrest so that the legs of the
child in the forward-facing or rearward-facing
child seat itself do not touch the vehicle's front
seat.
►
Check that the backrest of the forward-facing
child seat is as close as possible to the backrest
of the vehicle's rear seat, and ideally in contact
with it.
In the presence of a dog guard, it
is essential that booster seat type
child seats with backrest be installed in the
second row.
Centre rear seat
A child seat with a support leg must never be
installed on the centre rear passenger seat .
Child seat at the front
► Adjust the front passenger seat to the
highest and fully back longitudinal position ,
with the backrest straightened.
"Forward facing"
You must leave the front passenger airbag active.
"Rearward facing"
The front passenger airbag must be deactivated before installing a rearward
facing child seat. Otherwise, the child risks
being seriously injured or killed if the
airbag is deployed .
Page 110 of 292

108
Safety
Seat
Front passenger airbag i-Size restraint system i-Size restraint system
Row 2 Rear side seats
i-U i-U
Rear central seat
Not i-Size i-U
Row 3 Rear side seats -Not i-Size
i-U: Suitable for i-Size restraint systems in the
"Universal" category, "forward facing" and
"rearward facing".
i-UF: Only suitable for i-Size restraint systems
in the "Universal" category which are
"forward facing". X:
Seat position not suitable for i-Size restraint
systems in the "Universal" category.
(a) Refer to the current legislation in your
country before installing a child at this seat
position.
Manual child lock
The system prevents a rear door from being
opened using its interior handle.
The red control is located on the edge of each
rear door (marked by a label).
Locking/Unlocking
► To lock, turn the red control as far as it will go
using the integral key:
•
T
o the right on the left-hand rear door.
•
T
o the left on the right-hand rear door.
►
T
o unlock, turn it in the opposite direction.
Do not confuse the child lock control,
which is red, with the back-up locking
control, which is black.
Electric child lock
This control prevents the opening of the rear
doors using their interior handles and the use of
the rear electric windows.
Activation/Deactivation
► With the ignition on, press this button to
activate/deactivate the child lock.
When the indicator lamp is on, the child lock is
activated.
Page 111 of 292

109
Safety
5
Electric child lock
This control prevents the opening of the rear
doors using their interior handles and the use of
the rear electric windows.
Activation/Deactivation
► With the ignition on, press this button to
activate/deactivate the child lock.
When the indicator lamp is on, the child lock is
activated.
This system is independent and in no circumstances does it take the place of
the central locking control.
Check the status of the child lock each time
you switch on the ignition.
Always keep the electronic key with you when
leaving the vehicle, even for a short time.
In the event of a serious impact, the electric
child lock is switched off automatically to
permit the exit of the rear passengers.
Page 210 of 292
208
In the event of a breakdown
approximately 15 minutes before starting the
engine.
If minor problems nevertheless persist following
this operation, contact a PEUGEOT dealer or a
qualified workshop.
Referring to the relevant section, reinitialise
certain equipment:
– Remote control key or electronic key
(depending on version).
– Sunroof and electric blind.
– Electric windows.
– Date and time.
– Preset radio stations.
After reconnecting the battery, the
message "Collision risk detection
system fault" is displayed on the instrument
panel when the ignition is switched on. This
operation is perfectly normal. The message
will disappear while driving.
The Stop & Start system may not be operational during the trip following the
first engine start.
In this case, the system will only be available
again after a continuous period with the
vehicle immobilised, the duration of which
depends on the exterior temperature and the
state of charge of the battery (up to about 8
hours).
► At the end of the charging operation, switch
off charger B
before disconnecting the cables
from battery A.
If this label is present, use only a 12 V
charger to avoid causing irreversible
damage to the electrical components.
24V
12V
Never try to charge a frozen battery - risk
of explosion!
If the battery has frozen, have it checked by a
PEUGEOT dealer or by a qualified workshop
who will verify that the internal components
have not been damaged and that the case
has not cracked, which would mean a risk of
toxic and corrosive acid leaking.
Some functions, including Stop & Start,
are not available if the battery is not
sufficiently charged.
Disconnecting the battery
In order to maintain an adequate state of
charge for starting the engine, we recommend
disconnecting the battery if the vehicle is to be
unused for an extended period. Before disconnecting the battery:
►
Close all openings (doors, boot, windows,
roof).
►
Switch off all electricity-consuming devices
(audio system, wipers, lamps, etc.).
►
Switch off the ignition and wait for 4
minutes.
After accessing the battery, it is only necessary
to disconnect the (+) terminal.
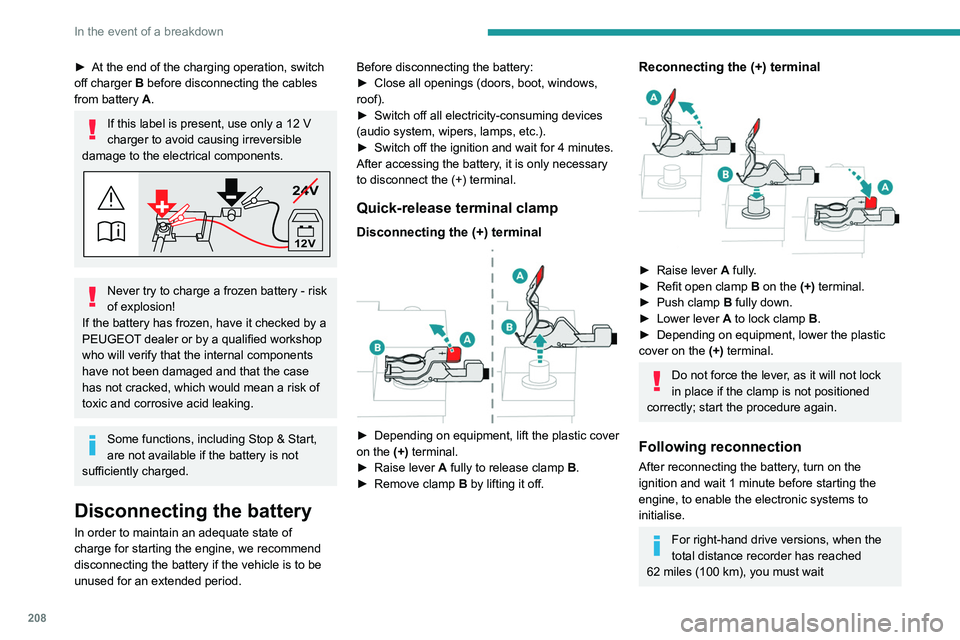
Quick-release terminal clamp
Disconnecting the (+) terminal
► Depending on equipment, lift the plastic cover
on the (+) terminal.
►
Raise lever
A
fully to release clamp
B
.
►
Remove clamp
B
by lifting it off.
Reconnecting the (+) terminal
► Raise lever A fully.
► Refit open clamp B on the (+) terminal.
►
Push clamp
B fully down.
►
Lower lever
A
to lock clamp B.
►
Depending on equipment, lower the plastic
cover on the
(+) terminal.
Do not force the lever, as it will not lock
in place if the clamp is not positioned
correctly; start the procedure again.
Following reconnection
After reconnecting the battery, turn on the
ignition and wait 1 minute before starting the
engine, to enable the electronic systems to
initialise.
For right-hand drive versions, when the
total distance recorder has reached
62
miles (100 km), you must wait
Page 211 of 292
209
In the event of a breakdown
8approximately 15 minutes before starting the
engine.
If minor problems nevertheless persist following
this operation, contact a PEUGEOT
dealer or a
qualified workshop.
Referring to the relevant section, reinitialise
certain equipment:
–
Remote control key or electronic key
(depending on version).
–
Sunroof and electric blind.
–
Electric windows.
–
Date and time.
–
Preset radio stations.
After reconnecting the battery, the message "Collision risk detection
system fault" is displayed on the instrument
panel when the ignition is switched on. This
operation is perfectly normal. The message
will disappear while driving.
The Stop & Start system may not be operational during the trip following the
first engine start.
In this case, the system will only be available
again after a continuous period with the
vehicle immobilised, the duration of which
depends on the exterior temperature and the
state of charge of the battery (up to about 8
hours).
Accessory battery (Rechargeable hybrid)
The rechargeable hybrid system has two
accessory batteries: one at the front and one at
the rear of the vehicle.
The batteries contain harmful substances (sulphuric acid and lead).
They must be disposed of in accordance
with regulations and must never under any
circumstances be discarded with household
waste.
Take used remote control batteries and
vehicle batteries to a special collection point.
Protect your eyes and face before
handling batteries.
All operations on the batteries must be carried
out in a well ventilated area and away from
naked flames and sources of sparks, so as to
avoid the risk of explosion or fire.
Wash your hands afterwards.
For the replacement of batteries,
contact a
PEUGEOT dealer or a qualified workshop.
Do not start or jump start another vehicle
from the vehicle’s batteries.
Accessing the batteries
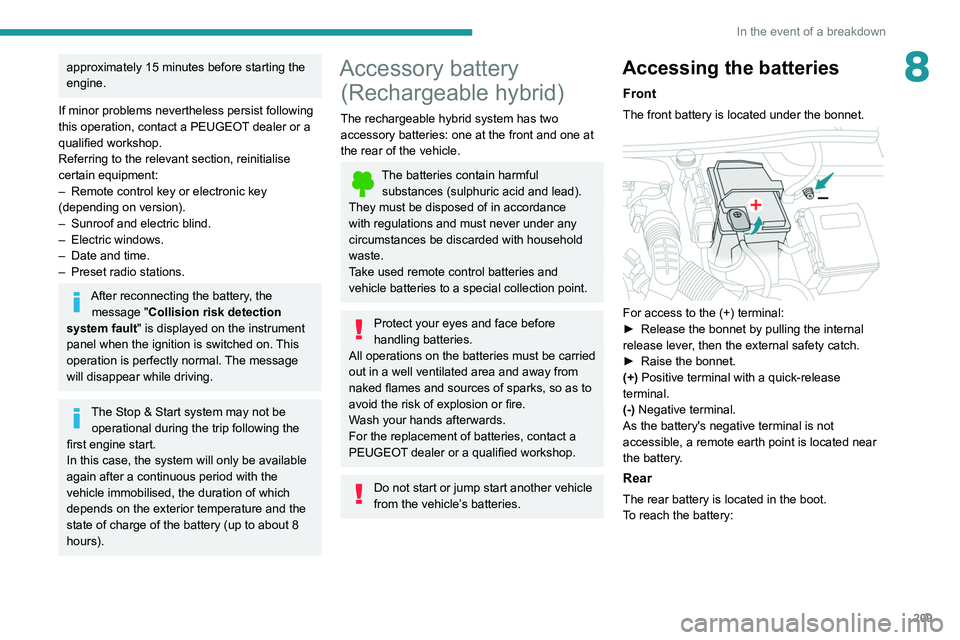
Front
The front battery is located under the bonnet.
For access to the (+) terminal:
► Release the bonnet by pulling the internal
release lever
, then the external safety catch.
►
Raise the bonnet.
(+)
Positive terminal with a quick-release
terminal.
(-) Negative terminal.
As the battery's negative terminal is not
accessible, a remote earth point is located near
the battery.
Rear
The rear battery is located in the boot.
To reach the battery:
Page 213 of 292
2 11
In the event of a breakdown
8► Close all other doors.
► Switch off all electrical consumers (audio
system, wipers, lamps, etc.).
►
Switch
off the ignition and wait for the READY
indicator lamp to go out.
►
Observe a waiting time of 4 minutes.
Never reverse the order of the battery
disconnection and reconnection steps
- risk of irreversible damage!
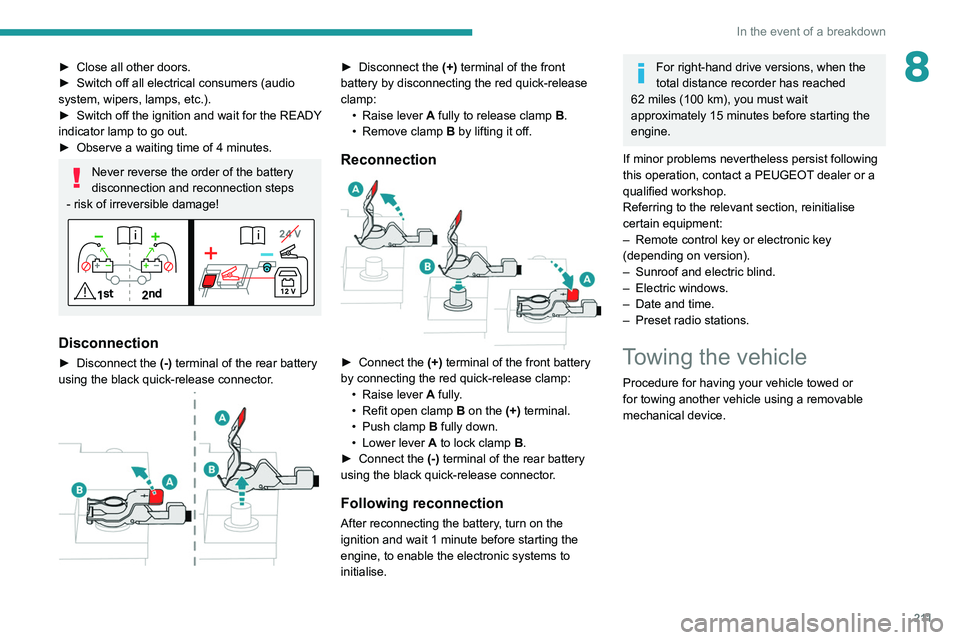
Disconnection
► Disconnect the (-) terminal of the rear battery
using the black quick-release connector.
► Disconnect the (+) terminal of the front
battery by disconnecting the red quick-release
clamp: •
Raise lever
A
fully to release clamp
B
.
•
Remove clamp
B
by lifting it off.
Reconnection
► Connect the (+) terminal of the front battery
by connecting the red quick-release clamp: •
Raise lever
A
fully.
•
Refit open clamp
B
on the (+) terminal.
•
Push clamp
B fully down.
•
Lower lever
A
to lock clamp B.
►
Connect the
(-) terminal of the rear battery
using the black quick-release connector.
Following reconnection
After reconnecting the battery, turn on the
ignition and wait 1 minute before starting the
engine, to enable the electronic systems to
initialise.
For right-hand drive versions, when the
total distance recorder has reached
62
miles (100 km), you must wait
approximately 15
minutes before starting the
engine.
If minor problems nevertheless persist following
this operation, contact a PEUGEOT dealer or a
qualified workshop.
Referring to the relevant section, reinitialise
certain equipment:
–
Remote control key or electronic key
(depending on version).
–
Sunroof and electric blind.
–
Electric windows.
–
Date and time.
–
Preset radio stations.
Towing the vehicle
Procedure for having your vehicle towed or
for towing another vehicle using a removable
mechanical device.
Page 237 of 292
235
PEUGEOT Connect Radio
10► Delete the files supplied with the memory
stick and limit the number of sub-folders in the
file structure on the memory stick.
Some characters in information about the
currently playing media are not displayed
correctly
.
The audio system is unable to process certain
types of character.
►
Use standard characters to name tracks and
folders.
Playback of streaming files does not start.
The connected device does not automatically
launch playback.
►
Start playback from the device.
T
rack names and playing times are not
displayed on the audio streaming screen.
The Bluetooth profile does not allow the transfer
of this information.
Telephone
I cannot connect my Bluetooth telephone.
The telephone's Bluetooth function may be
switched off or the device may not be visible.
►
Check that the telephone has Bluetooth
switched on.
►
Check in the telephone settings that it is
"visible to all".
The Bluetooth telephone is not compatible with
the system.
►
Check the compatibility of the telephone on
the Brand's website (services).
Android
Auto and/or CarPlay do not work. Android Auto and CarPlay may not activate if the
USB cables are of poor quality.
►
Use genuine USB cables to ensure
compatibility
.
Android Auto and/or CarPlay do not work.
Android Auto and CarPlay are not available in all
countries.
►
Check the Google
Android Auto or Apple
website to see which countries are supported.
The volume of the telephone connected in
Bluetooth mode is inaudible.
The volume depends on both the system and the
telephone.
►
Increase the volume of the audio system, to
maximum if required, and increase the volume of
the telephone if necessary
.
Ambient noise affects the quality of the
telephone call.
►
Reduce ambient noise (close windows, turn
down ventilation, slow down, etc.).
The contacts are not listed in alphabetical
order
.
Some telephones offer display options.
Depending on the settings chosen, contacts can
be transferred in a specific order.
►
Modify the telephone directory display
settings.
Settings
When the treble and bass settings are
changed, the ambience is deselected.
When the ambience is changed, the treble
and bass settings are reset. Selecting an ambience imposes the treble and
bass settings, and vice versa.
►
Modify the treble and bass or ambience
settings to obtain the desired musical ambience.
When the balance settings are changed, the
distribution is deselected.
When the distribution setting is changed, the
balance settings are deselected.
Selecting a distribution setting imposes the
balance settings, and vice versa.
►
Modify the balance setting or the distribution
setting to obtain the desired sound quality
.
There is a difference in sound quality
between audio sources.
To allow for optimal listening quality, the sound
settings can be tailored to different audio
sources, which can generate audible differences
when changing source.
►
Check that the sound settings are appropriate
to the sources listened to.
Adjust the sound
functions to the middle position.
When the engine is off, the system switches
off after several minutes of use.
When the engine is switched off, the system's
operating time depends on the state of charge of
the battery.
The switch-off is normal: the system
automatically goes into energy economy mode
and switches off to maintain an adequate charge
in the battery.
► Start the vehicle’ s engine to increase the
charge of the battery.