turn signal Peugeot 508 2018 Owner's Manual
[x] Cancel search | Manufacturer: PEUGEOT, Model Year: 2018, Model line: 508, Model: Peugeot 508 2018Pages: 320, PDF Size: 10.09 MB
Page 18 of 320
16
+
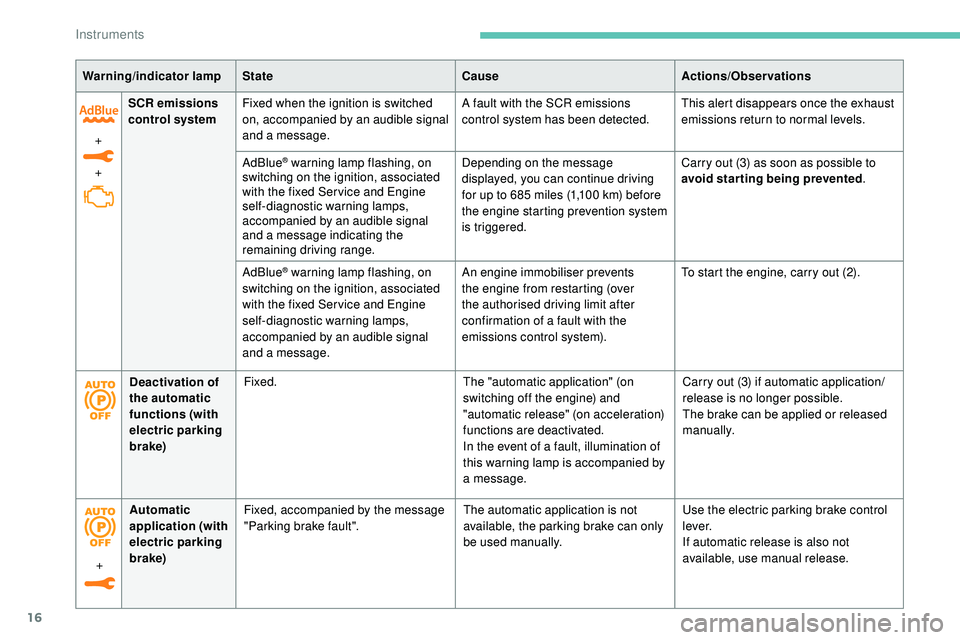
+SCR emissions
control system
Fixed when the ignition is switched
on, accompanied by an audible signal
and a message. A fault with the SCR emissions
control system has been detected.
This alert disappears once the exhaust
emissions return to normal levels.
AdBlue
® warning lamp flashing, on
switching on the ignition, associated
with the fixed Ser vice and Engine
self-diagnostic warning lamps,
accompanied by an audible signal
and a message indicating the
remaining driving range. Depending on the message
displayed, you can continue driving
for up to 685 miles (1,100
km) before
the engine starting prevention system
is triggered. Carry out (3) as soon as possible to
avoid starting being prevented
.
AdBlue
® warning lamp flashing, on
switching on the ignition, associated
with the fixed Ser vice and Engine
self-diagnostic warning lamps,
accompanied by an audible signal
and a message. An engine immobiliser prevents
the engine from restarting (over
the authorised driving limit after
confirmation of a fault with the
emissions control system).
To start the engine, carry out (2).
Warning/indicator lamp
State CauseActions/Observations
Deactivation of
the automatic
functions (with
electric parking
brake) Fixed.
The "automatic application" (on
switching off the engine) and
"automatic release" (on acceleration)
functions are deactivated.
In the event of a fault, illumination of
this warning lamp is accompanied by
a message.Carry out (3) if automatic application/
release is no longer possible.
The brake can be applied or released
manually.
+ Automatic
application (with
electric parking
brake)
Fixed, accompanied by the message
"Parking brake fault".
The automatic application is not
available, the parking brake can only
be used manually.Use the electric parking brake control
l eve r.
If automatic release is also not
available, use manual release.
Instruments
Page 37 of 320
35
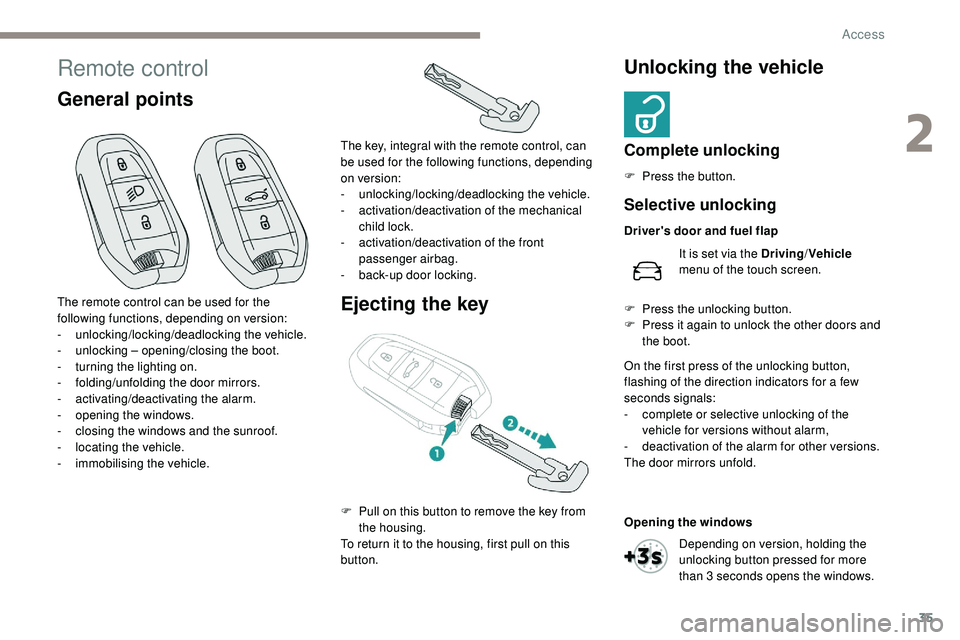
Remote control
General pointsEjecting the keyUnlocking the vehicle
Complete unlocking
F Press the button.
The remote control can be used for the
following functions, depending on version:
-
u
nlocking/locking/deadlocking the vehicle.
-
u
nlocking – opening/closing the boot.
-
t
urning the lighting on.
-
fo
lding/unfolding the door mirrors.
-
a
ctivating/deactivating the alarm.
-
o
pening the windows.
-
c
losing the windows and the sunroof.
-
l
ocating the vehicle.
-
i
mmobilising the vehicle. The key, integral with the remote control, can
be used for the following functions, depending
on version:
-
u
nlocking/locking/deadlocking the vehicle.
-
a
ctivation/deactivation of the mechanical
child lock.
-
a
ctivation/deactivation of the front
passenger airbag.
-
b
ack-up door locking.
F
P
ull on this button to remove the key from
the housing.
To return it to the housing, first pull on this
button.
Selective unlocking
Driver's door and fuel flap
It is set via the Driving /Vehicle
menu of the touch screen.
F
P
ress the unlocking button.
F
P
ress it again to unlock the other doors and
the boot.
On the first press of the unlocking button,
flashing of the direction indicators for a few
seconds signals:
-
c
omplete or selective unlocking of the
vehicle for versions without alarm,
-
d
eactivation of the alarm for other versions.
The door mirrors unfold.
Opening the windows
Depending on version, holding the
unlocking button pressed for more
than 3 seconds opens the windows.
2
Access
Page 88 of 320
86
Exterior lighting control
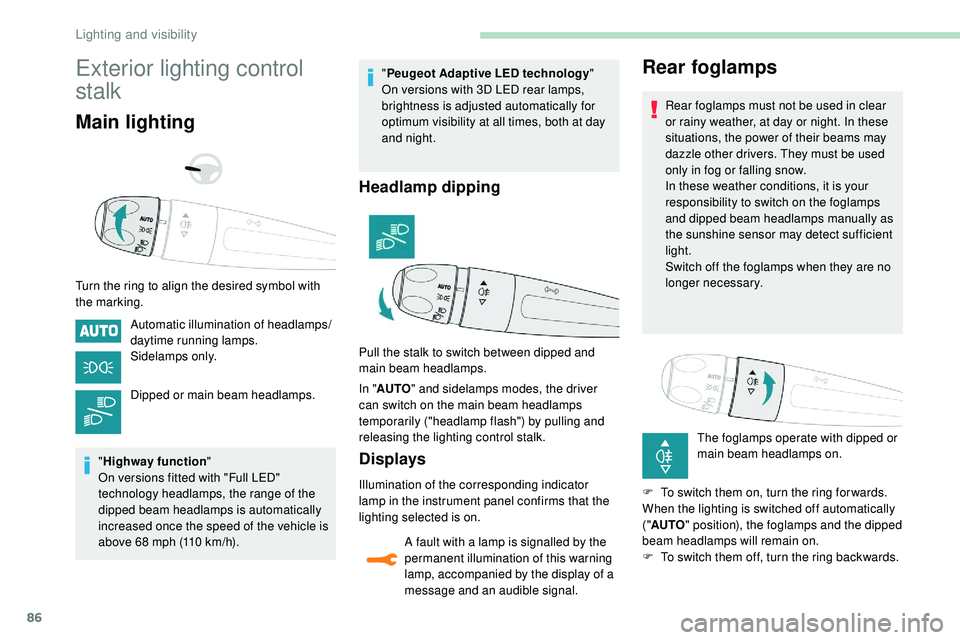
stalk
Main lighting
Turn the ring to align the desired symbol with
the marking.Automatic illumination of headlamps/
daytime running lamps.
Sidelamps only.
Dipped or main beam headlamps.
" Highway function "
On versions fitted with "Full LED"
technology headlamps, the range of the
dipped beam headlamps is automatically
increased once the speed of the vehicle is
above 68 mph (110 km/h). "
Peugeot Adaptive LED technology "
On versions with 3D LED rear lamps,
brightness is adjusted automatically for
optimum visibility at all times, both at day
and night.
Headlamp dipping
In " AUTO " and sidelamps modes, the driver
can switch on the main beam headlamps
temporarily ("headlamp flash") by pulling and
releasing the lighting control stalk.
Displays
Illumination of the corresponding indicator
lamp in the instrument panel confirms that the
lighting selected is on.
A fault with a lamp is signalled by the
permanent illumination of this warning
lamp, accompanied by the display of a
message and an audible signal.
Rear foglamps
Rear foglamps must not be used in clear
or rainy weather, at day or night. In these
situations, the power of their beams may
dazzle other drivers. They must be used
only in fog or falling snow.
In these weather conditions, it is your
responsibility to switch on the foglamps
and dipped beam headlamps manually as
the sunshine sensor may detect sufficient
light.
Switch off the foglamps when they are no
longer necessary.
The foglamps operate with dipped or
main beam headlamps on.
F
T
o switch them on, turn the ring for wards.
When the lighting is switched off automatically
(" AUTO " position), the foglamps and the dipped
beam headlamps will remain on.
F
T
o switch them off, turn the ring backwards.
Pull the stalk to switch between dipped and
main beam headlamps.
Lighting and visibility
Page 89 of 320
87
Switching off of the lamps when the
ignition is switched off
On switching off the ignition, all of the
lamps turn off instantly, except when
automatic guide-me-home lighting is
activated.
Switching on the lighting after the
ignition is switched off
To reactivate the lighting control, set
the ring to "AUTO", then to the desired
position.
On opening the driver's door, a temporary
audible signal warns the driver that the
lighting is on.
It switches off automatically after a period
of time that depends on the state of charge
in battery (entering energy economy mode).
In some weather conditions (e.g. low
temperature or humidity), the presence
of misting on the internal sur face of the
glass of the headlamps and rear lamps is
normal; it disappears after the lamps have
been on for a few minutes.
Never look too closely at the luminous
beam of "Full LED" headlamps: risk of
serious eye injury. Travelling abroad
If using your vehicle in a country that
drives on the other side of the road, the
headlamps must be adjusted to avoid
dazzling oncoming drivers.
Contact a PEUGEOT dealer or a qualified
workshop.
Daytime running lamps/
Sidelamps
The front and rear lamps light up automatically
when the engine starts.
They provide the following functions:
-
D
aytime running lamps (lighting control
stalk at position " AUTO" with adequate light
level).
-
S
idelamps (lighting control stalk at " AUTO"
position with low light levels or "Sidelamps
only” or "Dipped/main beam headlamps").
The LEDs are brighter when operating as
daytime running lamps.
Direction indicators
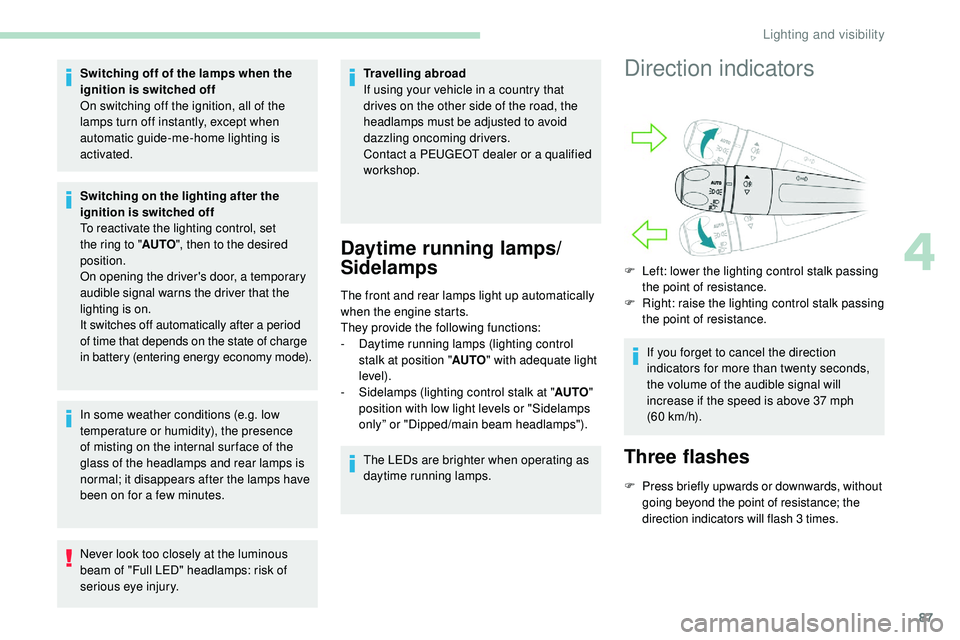
F Left: lower the lighting control stalk passing the point of resistance.
F
R
ight: raise the lighting control stalk passing
the point of resistance.
If you forget to cancel the direction
indicators for more than twenty seconds,
the volume of the audible signal will
increase if the speed is above 37 mph
(60
km/h).
Three flashes
F Press briefly upwards or downwards, without going beyond the point of resistance; the
direction indicators will flash 3 times.
4
Lighting and visibility
Page 90 of 320
88
Parking lamps
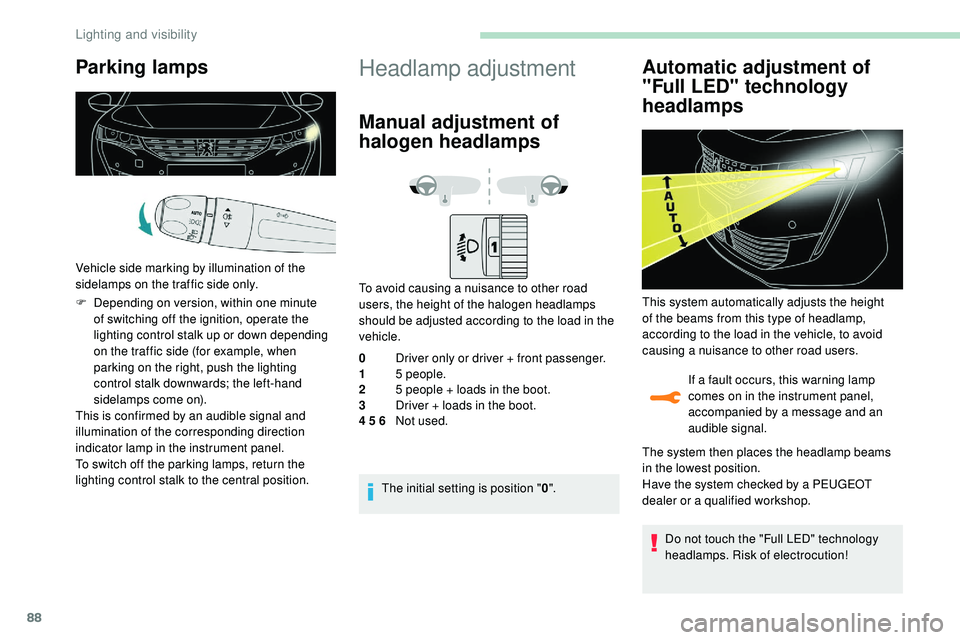
Vehicle side marking by illumination of the
sidelamps on the traffic side only.
F
D
epending on version, within one minute
of switching off the ignition, operate the
lighting control stalk up or down depending
on the traffic side (for example, when
parking on the right, push the lighting
control stalk downwards; the left-hand
sidelamps come on).
This is confirmed by an audible signal and
illumination of the corresponding direction
indicator lamp in the instrument panel.
To switch off the parking lamps, return the
lighting control stalk to the central position.
Headlamp adjustment
Manual adjustment of
halogen headlamps
To avoid causing a nuisance to other road
users, the height of the halogen headlamps
should be adjusted according to the load in the
vehicle.
0 Driver only or driver + front passenger.
1 5 people.
2 5 people + loads in the boot.
3 Driver + loads in the boot.
4 5 6 Not used.
The initial setting is position " 0".
Automatic adjustment of
"Full LED" technology
headlamps
If a fault occurs, this warning lamp
comes on in the instrument panel,
accompanied by a message and an
audible signal.
This system automatically adjusts the height
of the beams from this type of headlamp,
according to the load in the vehicle, to avoid
causing a nuisance to other road users.
The system then places the headlamp beams
in the lowest position.
Have the system checked by a PEUGEOT
dealer or a qualified workshop.
Do not touch the "Full LED" technology
headlamps. Risk of electrocution!
Lighting and visibility
Page 91 of 320
89
Automatic illumination of
headlamps
When the ring is at the "AUTO" position and
a low level of ambient light is detected by a
sunshine sensor, the number plate lamps,
side
lamps and dipped beam headlamps are
switched on automatically, without any action
on the part of the driver. They can also come
on if rain is detected, at the same time as
automatic operation of the windscreen wipers.
As soon as the brightness returns to a
sufficient level or after the windscreen wipers
are switched off, the lamps are switched off
automatically.
Operating fault
In the event of a malfunction of the
sunshine sensor, the lighting comes
on, this warning lamp is displayed in
the instrument panel accompanied by
an audible signal and/or a message.
Contact a PEUGEOT dealer or a
qualified workshop.
Do not cover the sunshine sensor,
combined with the rain sensor and located
at the top centre of the windscreen behind
the rear view mirror; the associated
functions would no longer be controlled. In fog or snow, the sunshine sensor may
detect sufficient light. In this case, the
lighting will not come on automatically.
Guide-me-home lighting
Automatic
With the ring in the "
AUTO" position, if the
brightness is low, the dipped beam headlamps
come on automatically when the ignition is
switched off.
Manual
Switching on/off
F W ith the ignition off, "flash" the headlamps
using the lighting control stalk to switch the
function on/off.
Manual guide-me-home lighting goes off
automatically at the end of a given period of time.
Automatic exterior welcome
lighting
With the "Automatic illumination of headlamps"
function activated, under low ambient light, the
sidelamps, dipped beam headlamps and door
mirror spotlamps come on automatically when
the vehicle is unlocked.
Activation, deactivation and
the duration of the exterior
welcome lighting are set in the
Driving/Vehicle menu of the touch
screen.
The activation, deactivation
and the duration of the guide-
me-home lighting are set in the
Driving
/Vehicle menu of the touch
screen.
4
Lighting and visibility
Page 94 of 320
92
Clean the windscreen regularly,
particularly the area in front of the camera.
The internal sur face of the windscreen can
also become misted around the camera.
In humid and cold weather, demist the
windscreen regularly.
Do not allow snow to accumulate on the
bonnet or roof of the vehicle as this could
conceal the detection camera.
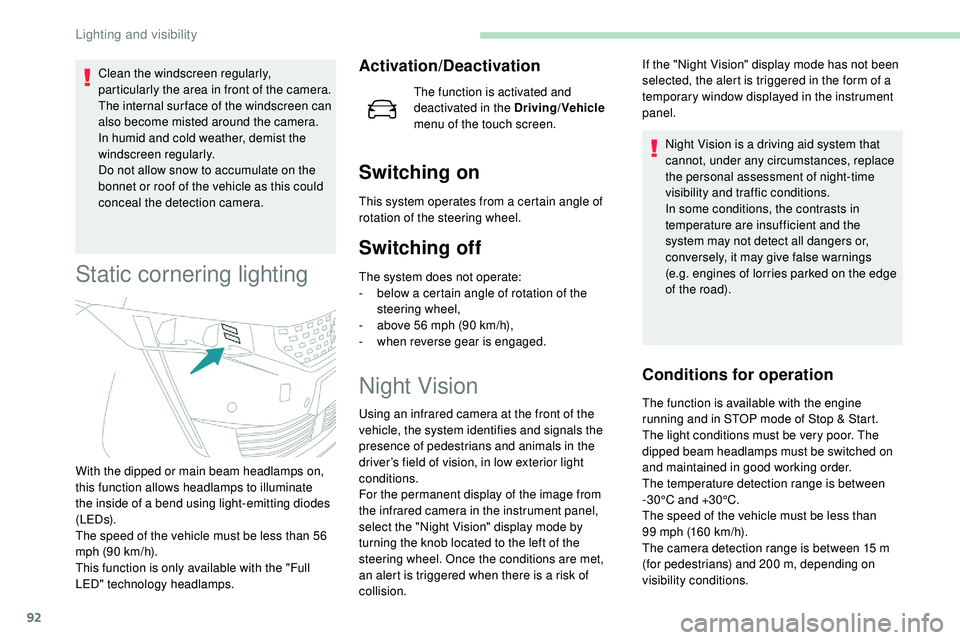
Static cornering lighting
Activation/Deactivation
The function is activated and
deactivated in the Driving/Vehicle
menu of the touch screen.
Switching on
This system operates from a certain angle of
rotation of the steering wheel.
Switching off
The system does not operate:
- b elow a certain angle of rotation of the
steering wheel,
-
a
bove 56 mph (90 km/h),
-
w
hen reverse gear is engaged.
Night Vision
Using an infrared camera at the front of the
vehicle, the system identifies and signals the
presence of pedestrians and animals in the
driver’s field of vision, in low exterior light
conditions.
For the permanent display of the image from
the infrared camera in the instrument panel,
select the "Night Vision" display mode by
turning the knob located to the left of the
steering wheel. Once the conditions are met,
an alert is triggered when there is a risk of
collision. Night Vision is a driving aid system that
cannot, under any circumstances, replace
the personal assessment of night-time
visibility and traffic conditions.
In some conditions, the contrasts in
temperature are insufficient and the
system may not detect all dangers or,
conversely, it may give false warnings
(e.g. engines of lorries parked on the edge
of the road).
Conditions for operation
With the dipped or main beam headlamps on,
this function allows headlamps to illuminate
the inside of a bend using light-emitting diodes
(LEDs).
The speed of the vehicle must be less than 56
mph (90 km/h).
This function is only available with the "Full
LED" technology headlamps. If the "Night Vision" display mode has not been
selected, the alert is triggered in the form of a
temporary window displayed in the instrument
panel.
The function is available with the engine
running and in STOP mode of Stop & Start.
The light conditions must be very poor. The
dipped beam headlamps must be switched on
and maintained in good working order.
The temperature detection range is between
-30°C and +30°C.
The speed of the vehicle must be less than
99
mph (160 km/h).
The camera detection range is between 15
m
(for pedestrians) and 200
m, depending on
visibility conditions.
Lighting and visibility
Page 103 of 320
101
Anti-lock braking system
(ABS) and electronic brake
force distribution (EBFD)
The fixed illumination of this warning
lamp signals that there is a fault with
the ABS.
Emergency braking assistance
(EBA)
In an emergency, this system enables you to
reach the optimum braking pressure more
quickly and therefore reduce the stopping
distance.
It is triggered in relation to the speed at which
the brake pedal is pressed. This is felt by a
reduction in the resistance of the pedal and an
increase in braking efficiency.
Anti-slip regulation (ASR)
This system optimises traction in order to
avoid wheel slip by acting on the brakes of
the driving wheels and on the engine. It also
improves the directional stability of the vehicle
on acceleration.
Dynamic stability control (DSC)
If there is a difference between the path
followed by the vehicle and that required by the
driver, this system monitors each wheel and
automatically acts on the brake of one or more
wheels and on the engine to return the vehicle
to the required path, within the limits of the laws
of physics.
Trailer stability assist (TSA)
This system allows control of the vehicle to be
retained when towing a trailer, so as to avoid
the risk of snaking.The vehicle retains conventional braking. Drive
carefully at moderate speed.
Contact a PEUGEOT dealer or a qualified
workshop as soon as possible.
Illumination of this warning lamp,
linked with the STOP and ABS
warning lamps, accompanied by
the display of a message and an
audible signal, signals that there is a
fault with the electronic brake force
distribution (EBFD).
You must stop as soon as it is safe to do so.
Call on a PEUGEOT dealer or a qualified
workshop.
Normal operation of the ABS may make
itself felt by slight vibrations of the brake
pedal.
When braking in an emergency, press
very firmly and maintain this pressure. When changing wheels (tyres and rims),
ensure that these are approved for your
vehicle.
After an impact, have these systems
checked by a PEUGEOT dealer or a
qualified workshop.
Anti-slip regulation (ASR)/
Dynamic stability control
(DSC)
Operation
These systems are activated automatically
every time the vehicle is started.
They come into operation in the event of a
problem with grip or trajectory.
This is indicated by flashing of this
warning lamp in the instrument panel.
Deactivation
In exceptional conditions (starting a vehicle
which is bogged down, stuck in snow, on soft
ground, etc.), it may be advisable to deactivate
the ASR system, so that the wheels can turn
freely and regain grip.
Reactivate the system when grip conditions
allow.
5
Safety
Page 106 of 320
104
Fastening
F Pull the strap, then insert the tongue in the buckle.
F
C
heck that the seat belt is fastened
correctly by pulling the strap.
Unfastening
F Press the red button on the buckle.
F G uide the seat belt as it is reeled in.
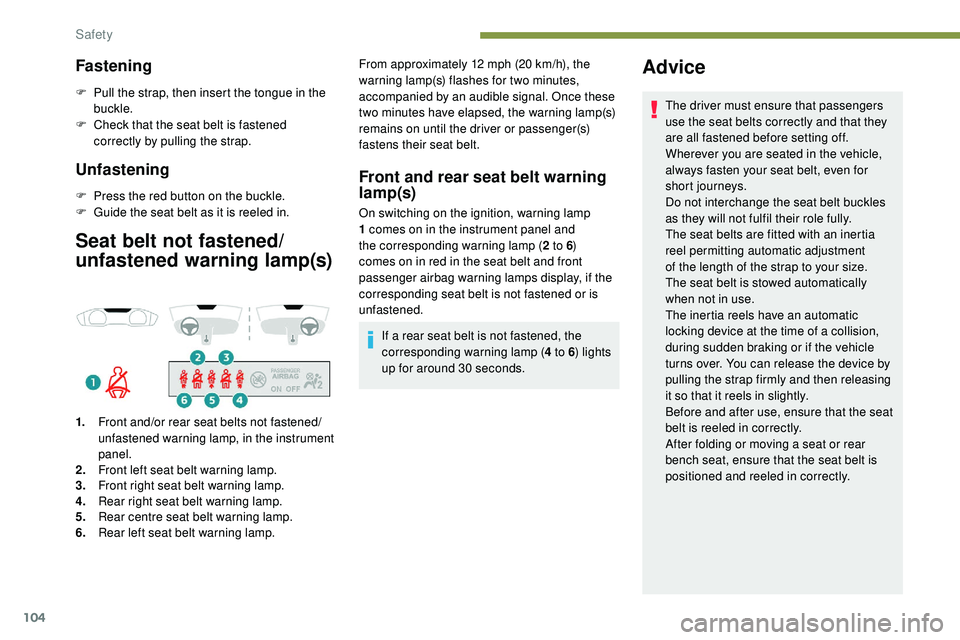
Seat belt not fastened/
unfastened warning lamp(s)
1.Front and/or rear seat belts not fastened/
unfastened warning lamp, in the instrument
panel.
2. Front left seat belt warning lamp.
3. Front right seat belt warning lamp.
4. Rear right seat belt warning lamp.
5. Rear centre seat belt warning lamp.
6. Rear left seat belt warning lamp. From approximately 12 mph (20
km/h), the
warning lamp(s) flashes for two minutes,
accompanied by an audible signal. Once these
two minutes have elapsed, the warning lamp(s)
remains on until the driver or passenger(s)
fastens their seat belt.
Front and rear seat belt warning
lamp(s)
On switching on the ignition, warning lamp
1 comes on in the instrument panel and
the corresponding warning lamp ( 2 to 6)
comes on in red in the seat belt and front
passenger airbag warning lamps display, if the
corresponding seat belt is not fastened or is
unfastened.
If a rear seat belt is not fastened, the
corresponding warning lamp ( 4 to 6) lights
up for around 30 seconds.
Advice
The driver must ensure that passengers
use the seat belts correctly and that they
are all fastened before setting off.
Wherever you are seated in the vehicle,
always fasten your seat belt, even for
short journeys.
Do not interchange the seat belt buckles
as they will not fulfil their role fully.
The seat belts are fitted with an inertia
reel permitting automatic adjustment
of the length of the strap to your size.
The
seat belt is stowed automatically
when not in use.
The inertia reels have an automatic
locking device at the time of a collision,
during sudden braking or if the vehicle
turns over. You can release the device by
pulling the strap firmly and then releasing
it so that it reels in slightly.
Before and after use, ensure that the seat
belt is reeled in correctly.
After folding or moving a seat or rear
bench seat, ensure that the seat belt is
positioned and reeled in correctly.
Safety
Page 109 of 320
107
To assure the safety of your child, the front
passenger airbag must be deactivated
when you install a "rear ward facing" child
seat on the front passenger seat.
Otherwise, the child risks being seriously
injured or killed if the airbag is deployed.
Reactivating the front passenger
airbag
When you remove the child seat, with the
ignition off, turn the switch to the ON position
to reactivate the front airbag and so assure the
safety of your front passenger in the event of
an impact.
When the ignition is switched on,
this warning lamp comes on in the
seat belt warning lamps display
screen for approximately one minute
to signal that the front airbag is
activated.
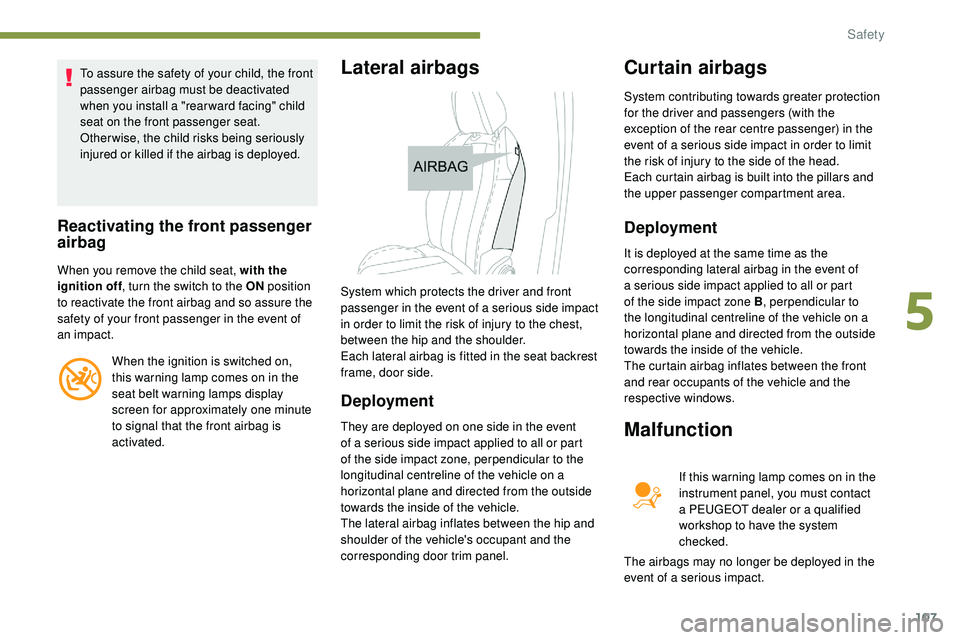
Lateral airbags
Deployment
They are deployed on one side in the event
of a serious side impact applied to all or part
of the side impact zone, perpendicular to the
longitudinal centreline of the vehicle on a
horizontal plane and directed from the outside
towards the inside of the vehicle.
The lateral airbag inflates between the hip and
shoulder of the vehicle's occupant and the
corresponding door trim panel.
Curtain airbags
System contributing towards greater protection
for the driver and passengers (with the
exception of the rear centre passenger) in the
event of a serious side impact in order to limit
the risk of injury to the side of the head.
Each curtain airbag is built into the pillars and
the upper passenger compartment area.
Deployment
It is deployed at the same time as the
corresponding lateral airbag in the event of
a serious side impact applied to all or part
of the side impact zone B , perpendicular to
the longitudinal centreline of the vehicle on a
horizontal plane and directed from the outside
towards the inside of the vehicle.
The curtain airbag inflates between the front
and rear occupants of the vehicle and the
respective windows.
Malfunction
System which protects the driver and front
passenger in the event of a serious side impact
in order to limit the risk of injury to the chest,
between the hip and the shoulder.
Each lateral airbag is fitted in the seat backrest
frame, door side.
If this warning lamp comes on in the
instrument panel, you must contact
a PEUGEOT dealer or a qualified
workshop to have the system
checked.
The airbags may no longer be deployed in the
event of a serious impact.
5
Safety