low beam Peugeot 508 2019 Owner's Manual
[x] Cancel search | Manufacturer: PEUGEOT, Model Year: 2019, Model line: 508, Model: Peugeot 508 2019Pages: 320, PDF Size: 10.09 MB
Page 63 of 320
61
F next, proceed with the passenger's seat in the same way.
The changes are taken into account immediately.Once activated, the system starts a one hour
massage cycle, made up of sequences of 6 minutes
of massage followed by 3 minutes at rest.
The system stops automatically at the end of the
cycle; the indicator lamp in the button goes off.
Steering wheel adjustment
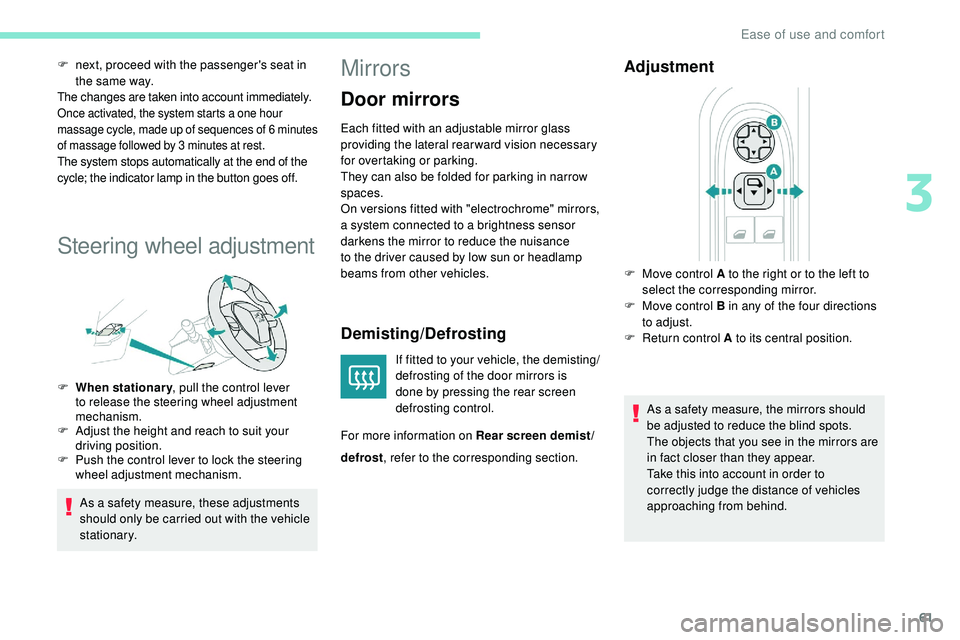
F When stationary , pull the control lever
to release the steering wheel adjustment
mechanism.
F
A
djust the height and reach to suit your
driving position.
F
P
ush the control lever to lock the steering
wheel adjustment mechanism.
As a safety measure, these adjustments
should only be carried out with the vehicle
stationary.
Mirrors
Door mirrors
Each fitted with an adjustable mirror glass
providing the lateral rear ward vision necessary
for overtaking or parking.
They can also be folded for parking in narrow
spaces.
On versions fitted with "electrochrome" mirrors,
a system connected to a brightness sensor
darkens the mirror to reduce the nuisance
to the driver caused by low sun or headlamp
beams from other vehicles.
Demisting/Defrosting
If fitted to your vehicle, the demisting/
defrosting of the door mirrors is
done by pressing the rear screen
defrosting control.
For more information on Rear screen demist/
Adjustment
As a safety measure, the mirrors should
be adjusted to reduce the blind spots.
The objects that you see in the mirrors are
in fact closer than they appear.
Take this into account in order to
correctly judge the distance of vehicles
approaching from behind.
F
M
ove control A to the right or to the left to
select the corresponding mirror.
F
M
ove control B in any of the four directions
to adjust.
F
R
eturn control A to its central position.
defrost , refer to the corresponding section.
3
Ease of use and comfort
Page 89 of 320
87
Switching off of the lamps when the
ignition is switched off
On switching off the ignition, all of the
lamps turn off instantly, except when
automatic guide-me-home lighting is
activated.
Switching on the lighting after the
ignition is switched off
To reactivate the lighting control, set
the ring to "AUTO", then to the desired
position.
On opening the driver's door, a temporary
audible signal warns the driver that the
lighting is on.
It switches off automatically after a period
of time that depends on the state of charge
in battery (entering energy economy mode).
In some weather conditions (e.g. low
temperature or humidity), the presence
of misting on the internal sur face of the
glass of the headlamps and rear lamps is
normal; it disappears after the lamps have
been on for a few minutes.
Never look too closely at the luminous
beam of "Full LED" headlamps: risk of
serious eye injury. Travelling abroad
If using your vehicle in a country that
drives on the other side of the road, the
headlamps must be adjusted to avoid
dazzling oncoming drivers.
Contact a PEUGEOT dealer or a qualified
workshop.
Daytime running lamps/
Sidelamps
The front and rear lamps light up automatically
when the engine starts.
They provide the following functions:
-
D
aytime running lamps (lighting control
stalk at position " AUTO" with adequate light
level).
-
S
idelamps (lighting control stalk at " AUTO"
position with low light levels or "Sidelamps
only” or "Dipped/main beam headlamps").
The LEDs are brighter when operating as
daytime running lamps.
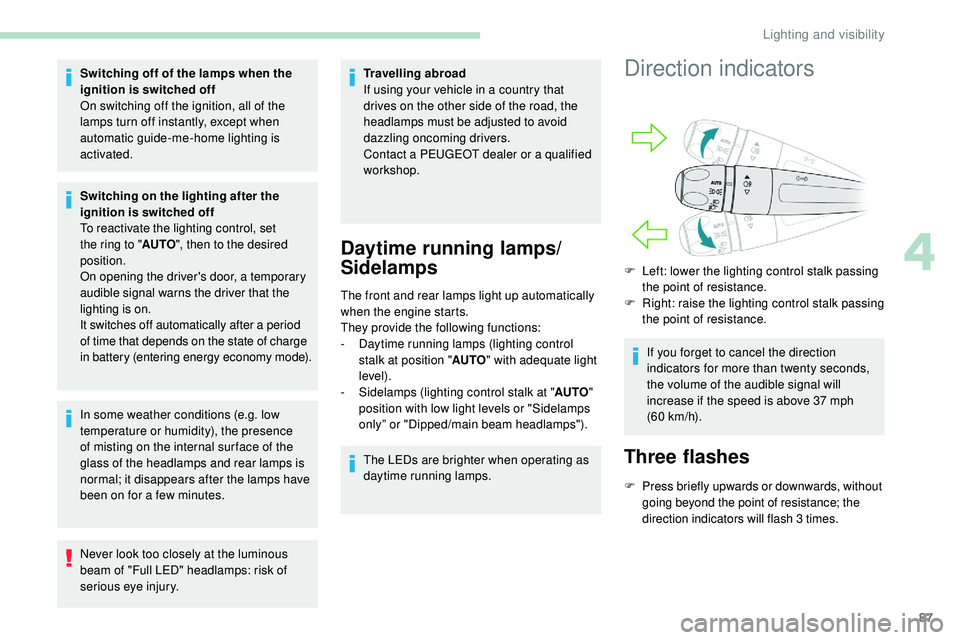
Direction indicators
F Left: lower the lighting control stalk passing the point of resistance.
F
R
ight: raise the lighting control stalk passing
the point of resistance.
If you forget to cancel the direction
indicators for more than twenty seconds,
the volume of the audible signal will
increase if the speed is above 37 mph
(60
km/h).
Three flashes
F Press briefly upwards or downwards, without going beyond the point of resistance; the
direction indicators will flash 3 times.
4
Lighting and visibility
Page 90 of 320
88
Parking lamps
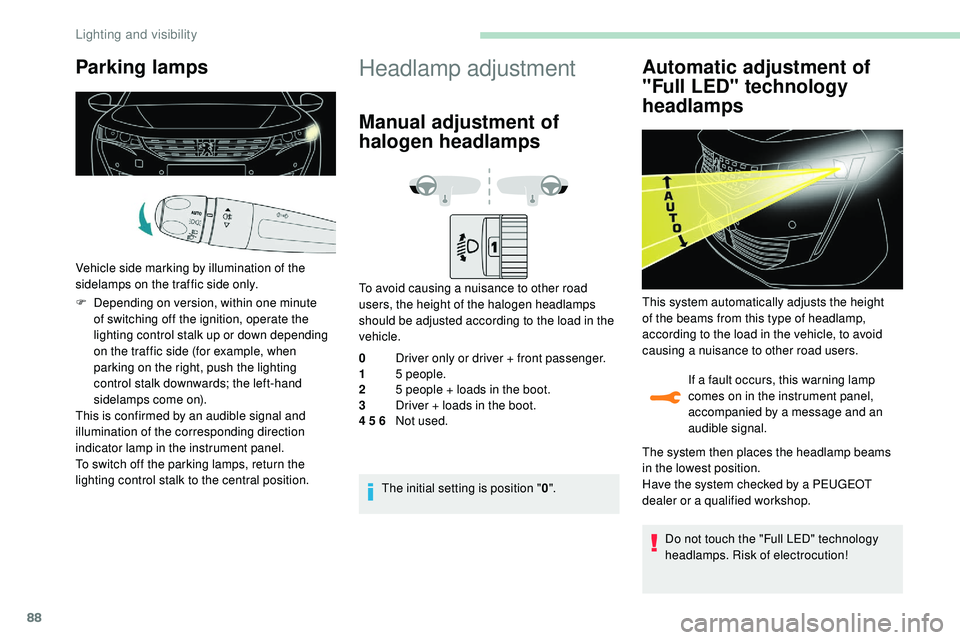
Vehicle side marking by illumination of the
sidelamps on the traffic side only.
F
D
epending on version, within one minute
of switching off the ignition, operate the
lighting control stalk up or down depending
on the traffic side (for example, when
parking on the right, push the lighting
control stalk downwards; the left-hand
sidelamps come on).
This is confirmed by an audible signal and
illumination of the corresponding direction
indicator lamp in the instrument panel.
To switch off the parking lamps, return the
lighting control stalk to the central position.
Headlamp adjustment
Manual adjustment of
halogen headlamps
To avoid causing a nuisance to other road
users, the height of the halogen headlamps
should be adjusted according to the load in the
vehicle.
0 Driver only or driver + front passenger.
1 5 people.
2 5 people + loads in the boot.
3 Driver + loads in the boot.
4 5 6 Not used.
The initial setting is position " 0".
Automatic adjustment of
"Full LED" technology
headlamps
If a fault occurs, this warning lamp
comes on in the instrument panel,
accompanied by a message and an
audible signal.
This system automatically adjusts the height
of the beams from this type of headlamp,
according to the load in the vehicle, to avoid
causing a nuisance to other road users.
The system then places the headlamp beams
in the lowest position.
Have the system checked by a PEUGEOT
dealer or a qualified workshop.
Do not touch the "Full LED" technology
headlamps. Risk of electrocution!
Lighting and visibility
Page 91 of 320
89
Automatic illumination of
headlamps
When the ring is at the "AUTO" position and
a low level of ambient light is detected by a
sunshine sensor, the number plate lamps,
side
lamps and dipped beam headlamps are
switched on automatically, without any action
on the part of the driver. They can also come
on if rain is detected, at the same time as
automatic operation of the windscreen wipers.
As soon as the brightness returns to a
sufficient level or after the windscreen wipers
are switched off, the lamps are switched off
automatically.
Operating fault
In the event of a malfunction of the
sunshine sensor, the lighting comes
on, this warning lamp is displayed in
the instrument panel accompanied by
an audible signal and/or a message.
Contact a PEUGEOT dealer or a
qualified workshop.
Do not cover the sunshine sensor,
combined with the rain sensor and located
at the top centre of the windscreen behind
the rear view mirror; the associated
functions would no longer be controlled. In fog or snow, the sunshine sensor may
detect sufficient light. In this case, the
lighting will not come on automatically.
Guide-me-home lighting
Automatic
With the ring in the "
AUTO" position, if the
brightness is low, the dipped beam headlamps
come on automatically when the ignition is
switched off.
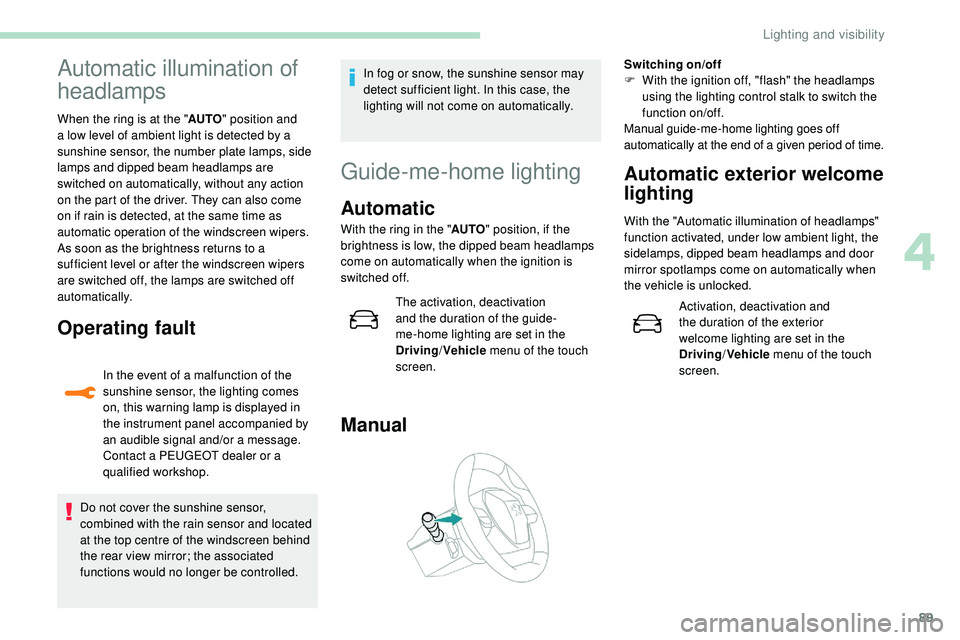
Manual
Switching on/off
F W ith the ignition off, "flash" the headlamps
using the lighting control stalk to switch the
function on/off.
Manual guide-me-home lighting goes off
automatically at the end of a given period of time.
Automatic exterior welcome
lighting
With the "Automatic illumination of headlamps"
function activated, under low ambient light, the
sidelamps, dipped beam headlamps and door
mirror spotlamps come on automatically when
the vehicle is unlocked.
Activation, deactivation and
the duration of the exterior
welcome lighting are set in the
Driving/Vehicle menu of the touch
screen.
The activation, deactivation
and the duration of the guide-
me-home lighting are set in the
Driving
/Vehicle menu of the touch
screen.
4
Lighting and visibility
Page 92 of 320
90
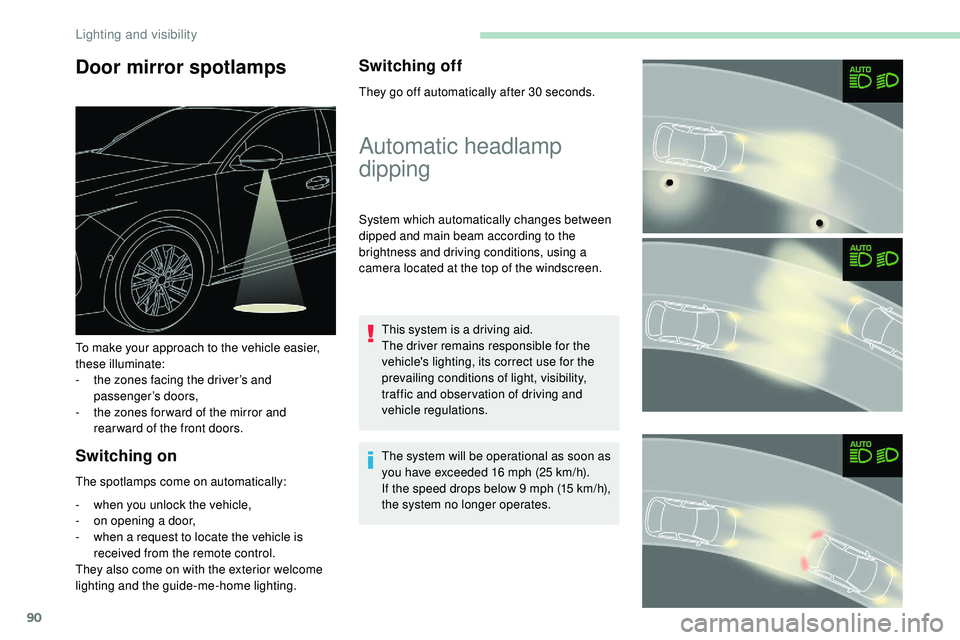
Door mirror spotlamps
Switching on
The spotlamps come on automatically:
-
w
hen you unlock the vehicle,
-
o
n opening a door,
-
w
hen a request to locate the vehicle is
received from the remote control.
They also come on with the exterior welcome
lighting and the guide-me-home lighting.
Switching off
They go off automatically after 30 seconds.
To make your approach to the vehicle easier,
these illuminate:
-
t
he zones facing the driver’s and
passenger’s doors,
-
t
he zones for ward of the mirror and
rear ward of the front doors.
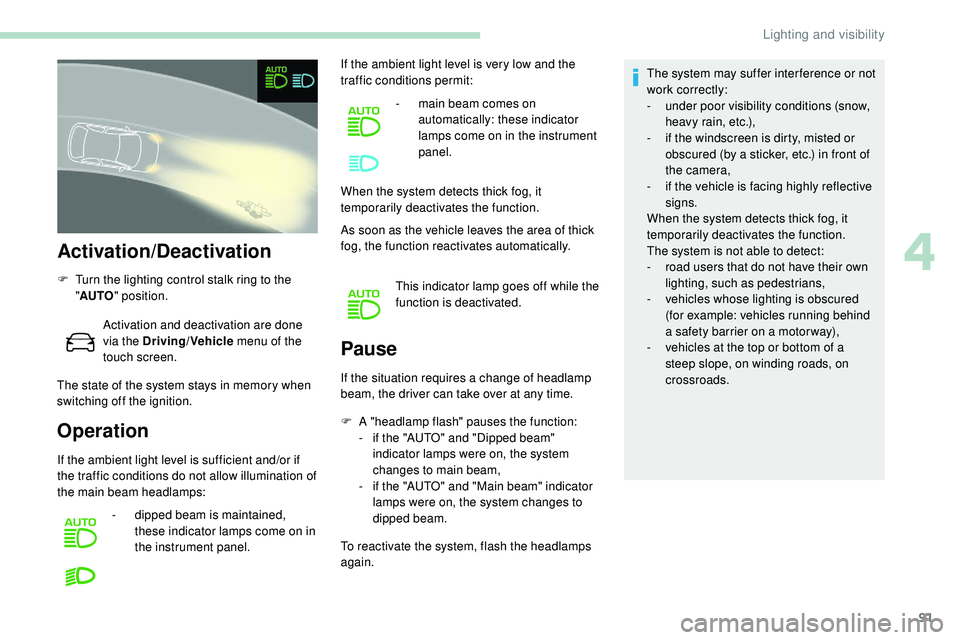
Automatic headlamp
dipping
System which automatically changes between
dipped and main beam according to the
brightness and driving conditions, using a
camera located at the top of the windscreen.
This system is a driving aid.
The driver remains responsible for the
vehicle's lighting, its correct use for the
prevailing conditions of light, visibility,
traffic and obser vation of driving and
vehicle regulations.
The system will be operational as soon as
you have exceeded 16 mph (25
km/h).
If the speed drops below 9 mph (15
km/h),
the system no longer operates.
Lighting and visibility
Page 93 of 320
91
Activation/Deactivation
F Turn the lighting control stalk ring to the "AUTO " position.
Activation and deactivation are done
via the Driving/Vehicle menu of the
touch screen.
The state of the system stays in memory when
switching off the ignition.
Operation Pause
If the situation requires a change of headlamp
beam, the driver can take over at any time.
F
A
"headlamp flash" pauses the function:
-
i
f the "AUTO" and "Dipped beam"
indicator lamps were on, the system
changes to main beam,
-
i
f the "AUTO" and "Main beam" indicator
lamps were on, the system changes to
dipped beam.
To reactivate the system, flash the headlamps
again. The system may suffer inter ference or not
work correctly:
-
u
nder poor visibility conditions (snow,
heavy rain, etc.),
-
i
f the windscreen is dirty, misted or
obscured (by a sticker, etc.) in front of
the camera,
-
i
f the vehicle is facing highly reflective
signs.
When the system detects thick fog, it
temporarily deactivates the function.
The system is not able to detect:
-
r
oad users that do not have their own
lighting, such as pedestrians,
-
v
ehicles whose lighting is obscured
(for example: vehicles running behind
a safety barrier on a motor way),
-
v
ehicles at the top or bottom of a
steep slope, on winding roads, on
crossroads.
If the ambient light level is sufficient and/or if
the traffic conditions do not allow illumination of
the main beam headlamps: -
d
ipped beam is maintained,
these indicator lamps come on in
the instrument panel. If the ambient light level is very low and the
traffic conditions permit:
-
m
ain beam comes on
automatically: these indicator
lamps come on in the instrument
panel.
When the system detects thick fog, it
temporarily deactivates the function.
As soon as the vehicle leaves the area of thick
fog, the function reactivates automatically.
This indicator lamp goes off while the
function is deactivated.
4
Lighting and visibility
Page 94 of 320
92
Clean the windscreen regularly,
particularly the area in front of the camera.
The internal sur face of the windscreen can
also become misted around the camera.
In humid and cold weather, demist the
windscreen regularly.
Do not allow snow to accumulate on the
bonnet or roof of the vehicle as this could
conceal the detection camera.
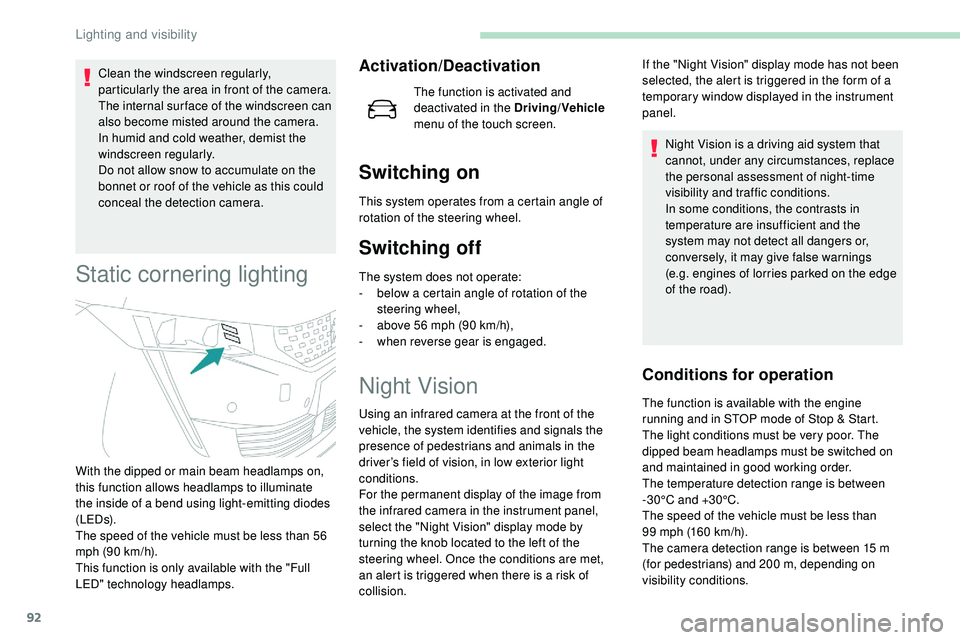
Static cornering lighting
Activation/Deactivation
The function is activated and
deactivated in the Driving/Vehicle
menu of the touch screen.
Switching on
This system operates from a certain angle of
rotation of the steering wheel.
Switching off
The system does not operate:
- b elow a certain angle of rotation of the
steering wheel,
-
a
bove 56 mph (90 km/h),
-
w
hen reverse gear is engaged.
Night Vision
Using an infrared camera at the front of the
vehicle, the system identifies and signals the
presence of pedestrians and animals in the
driver’s field of vision, in low exterior light
conditions.
For the permanent display of the image from
the infrared camera in the instrument panel,
select the "Night Vision" display mode by
turning the knob located to the left of the
steering wheel. Once the conditions are met,
an alert is triggered when there is a risk of
collision. Night Vision is a driving aid system that
cannot, under any circumstances, replace
the personal assessment of night-time
visibility and traffic conditions.
In some conditions, the contrasts in
temperature are insufficient and the
system may not detect all dangers or,
conversely, it may give false warnings
(e.g. engines of lorries parked on the edge
of the road).
Conditions for operation
With the dipped or main beam headlamps on,
this function allows headlamps to illuminate
the inside of a bend using light-emitting diodes
(LEDs).
The speed of the vehicle must be less than 56
mph (90 km/h).
This function is only available with the "Full
LED" technology headlamps. If the "Night Vision" display mode has not been
selected, the alert is triggered in the form of a
temporary window displayed in the instrument
panel.
The function is available with the engine
running and in STOP mode of Stop & Start.
The light conditions must be very poor. The
dipped beam headlamps must be switched on
and maintained in good working order.
The temperature detection range is between
-30°C and +30°C.
The speed of the vehicle must be less than
99
mph (160 km/h).
The camera detection range is between 15
m
(for pedestrians) and 200
m, depending on
visibility conditions.
Lighting and visibility
Page 95 of 320
93
Animals less than 0.50 m tall are not detected.
T he instrument panel must be in "Night Vision"
display mode for the infrared camera image to
be displayed constantly.
The constant display disappears upon
switching off the ignition or if the conditions are
not met.
Operation
Activation/deactivation of the function
is done in the Driving/Vehicle menu
of the touch screen.
If all the operating conditions are
met, this indicator lamp comes on in
green: the display in the instrument
panel (with "Night Vision" mode
selected) and triggering of alerts are
available.
If certain operating conditions (speed
or temperature) are not met, the
indicator lamp comes on in orange:
only the display in the instrument
panel is available (in "Night Vision"
m o d e).
Whilst the exterior light is too bright
or the dipped beam headlamps have
not been switched on, the alerts are
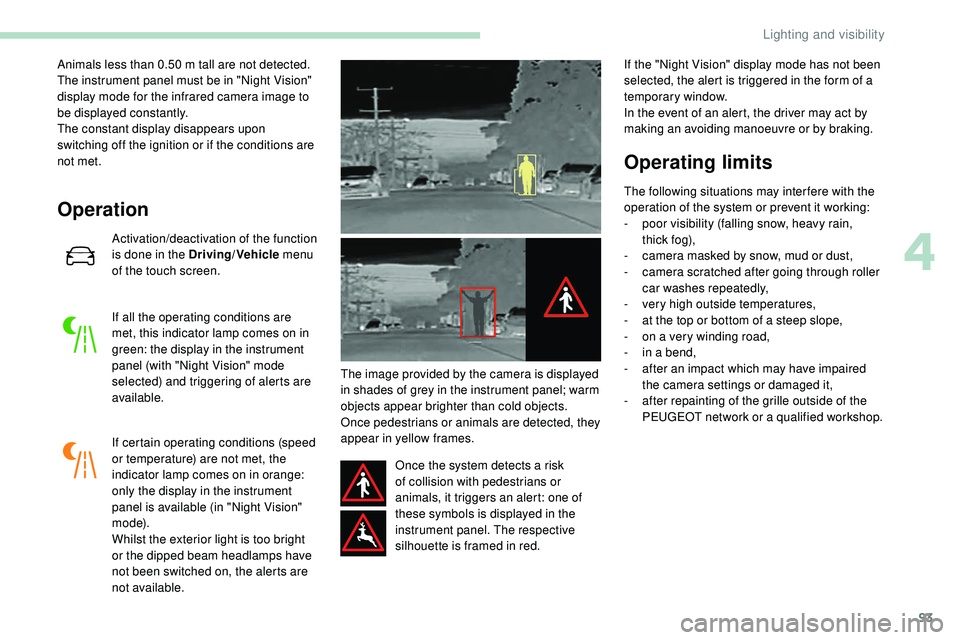
not available. The image provided by the camera is displayed
in shades of grey in the instrument panel; warm
objects appear brighter than cold objects.
Once pedestrians or animals are detected, they
appear in yellow frames.
Once the system detects a risk
of collision with pedestrians or
animals, it triggers an alert: one of
these symbols is displayed in the
instrument panel. The respective
silhouette is framed in red. If the "Night Vision" display mode has not been
selected, the alert is triggered in the form of a
temporary window.
In the event of an alert, the driver may act by
making an avoiding manoeuvre or by braking.
Operating limits
The following situations may inter fere with the
operation of the system or prevent it working:
-
p
oor visibility (falling snow, heavy rain,
t hi c k
fo g),
-
c
amera masked by snow, mud or dust,
-
c
amera scratched after going through roller
car washes repeatedly,
-
v
ery high outside temperatures,
-
a
t the top or bottom of a steep slope,
-
o
n a very winding road,
-
i
n a bend,
-
a
fter an impact which may have impaired
the camera settings or damaged it,
-
a
fter repainting of the grille outside of the
PEUGEOT network or a qualified workshop.
4
Lighting and visibility
Page 127 of 320
125
In case of towing
Driving with a trailer places greater
demands on the towing vehicle and
requires extra care from the driver.
Side wind
F Take into account the increased sensitivity to wind.
Cooling
Towing a trailer on a slope increases the
temperature of the coolant.
As the fan is electrically controlled, its cooling
capacity is not dependent on the engine speed.
F
T
o lower the engine speed, reduce your
speed.
The maximum towable load on an incline
depends on the gradient and the exterior
temperature.
In all cases, keep a check on the coolant
temperature.
F
I
f this warning lamp and the STOP
warning lamp come on, stop the
vehicle and switch off the engine
as soon as possible.
New vehicle
Do not pull a trailer before having driven at least
approximately 620 miles (1,000 kilometres).
Braking
Towing a trailer increases the braking distance.
To avoid overheating of the brakes, the use of
engine braking is recommended.
Ty r e s
F Check the tyre pressures of the towing vehicle and of the trailer, observing the
recommended pressures.
Lighting
F Check the electrical lighting and signalling on the trailer and the headlamp beam height
of your vehicle.
For more information on Headlamp
adjustment , refer to the corresponding
section.
Certain driving or manoeuvring aid
functions are automatically disabled
if
an approved towbar is used.
Anti-theft protection
Electronic immobiliser
The keys contain an electronic chip which has
a secret code. When the ignition is switched
on, this code must be recognised in order for
starting to be possible.
A few seconds after switching off the ignition,
this system locks the engine control system,
therefore preventing the engine from being
started in the event of a break-in.
If the system fails, as reported by a message,
the engine will not start.
Contact the PEUGEOT dealer.
Starting/Switching off the
engine
Starting the engine
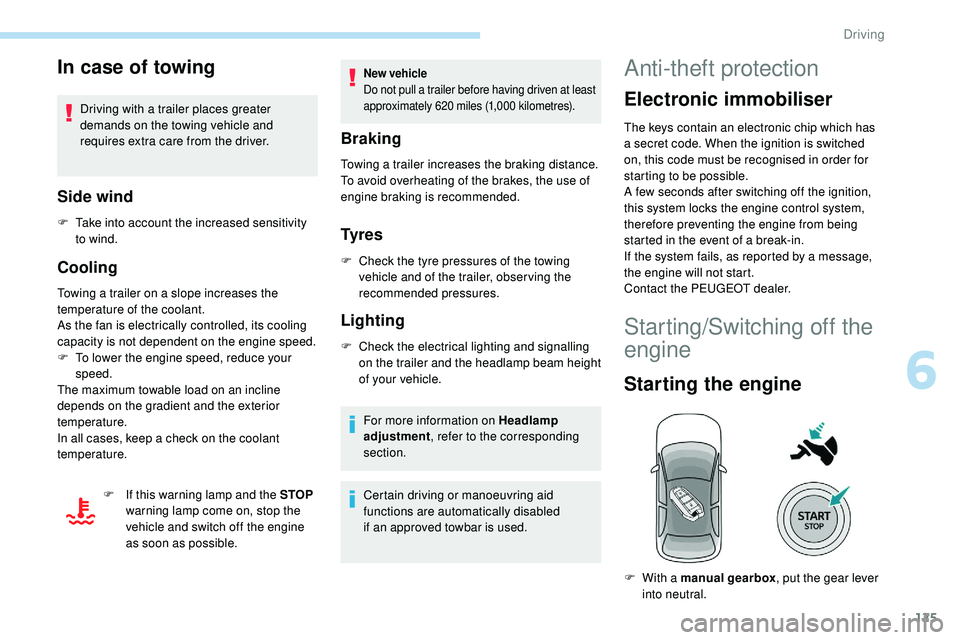
F With a manual gearbox , put the gear lever
into neutral.
6
Driving
Page 204 of 320
202
Energy economy mode
System which manages the duration of use of
certain functions to conser ve a sufficient level of
charge in the battery.
After the engine has stopped, you can still use
functions such as the audio and telematics
system, windscreen wipers, dipped beam
headlamps,
courtesy lamps, etc. for a maximum
combined duration of about forty minutes.
Switching to this mode
A message appears in the instrument panel
screen indicating that the vehicle has switched
to economy mode and the active functions are
put on standby.
If a telephone call is being made at this
time, it will be maintained for around 10
minutes with the Bluetooth hands-free
system of your audio system.
Exiting the mode
Let the engine run for the duration specified to
ensure that the battery charge is sufficient.
Do not repeatedly and continuously restart the
engine in order to charge the battery.
A flat battery prevents the engine from
starting.
For more information on the 12 V batter y ,
refer to the corresponding section.
These functions will be automatically restored
the next time the vehicle is used.
In order to restore the use of these functions
immediately, start the engine and let it run:
-
f
or less than ten minutes, to use the
equipment for approximately five minutes,
-
f
or more than ten minutes, to use the
equipment for up to approximately thirty
minutes.
Snow chains
In wintry conditions, snow chains
improve traction as well as the
behaviour of the vehicle when
braking.
Snow chains must be fitted only to the
front wheels. They must never be fitted
to
"space-saver" type spare wheels.
Take account of the legislation in force in
your country on the use of snow chains
and the maximum authorised speed.
Use only the chains designed to be fitted to the
type of wheel fitted to your vehicle:
Installation tips
F If you have to fit the chains during a journey, stop the vehicle on a flat sur face on the side
of the road.
F
A
pply the parking brake and position any
wheel chocks under the wheels to prevent
movement of your vehicle.
F
F
it the chains following the instructions
provided by the manufacturer.
F
M
ove off gently and drive for a few
moments, without exceeding 31 mph
(50
km/h).
F
S
top your vehicle and check that the snow
chains are correctly tightened.
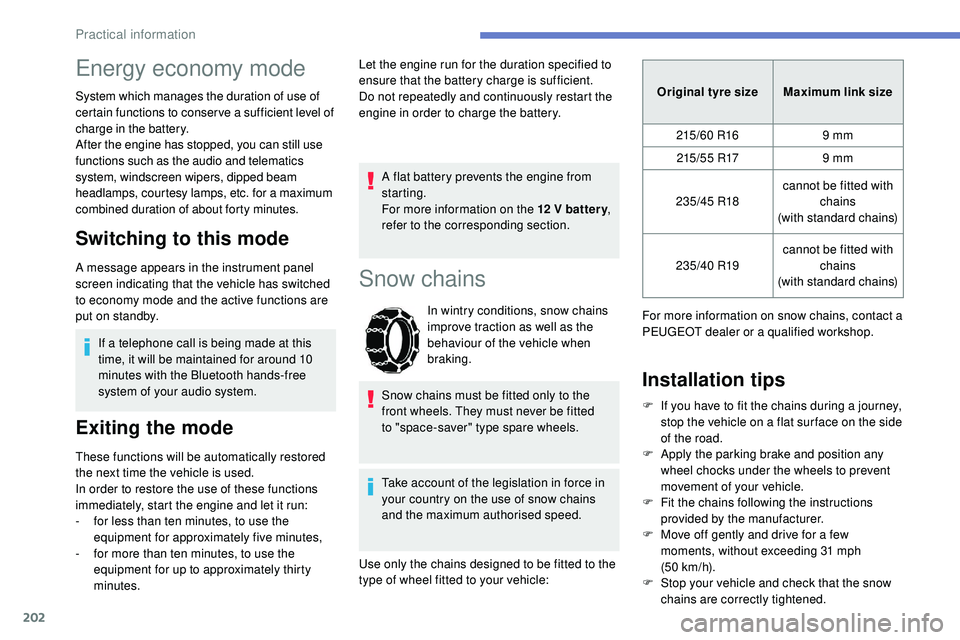
Original tyre size
Maximum link size
215/60 R16 9 mm
215 / 5 5 R17 9 mm
235/45 R18 cannot be fitted with
chains
(with standard chains)
235/40 R19 cannot be fitted with
chains
(with standard chains)
For more information on snow chains, contact a
PEUGEOT dealer or a qualified workshop.
Practical information